mNo edit summary |
No edit summary |
||
| (48 intermediate revisions by 21 users not shown) | |||
| Line 6: | Line 6: | ||
'''Crystal:''' {{Wind|Wind}}<br> |
'''Crystal:''' {{Wind|Wind}}<br> |
||
'''Weak to:''' {{Ice|Ice}} |
'''Weak to:''' {{Ice|Ice}} |
||
| − | |||
|width="50%" align="center"| |
|width="50%" align="center"| |
||
| − | [[ |
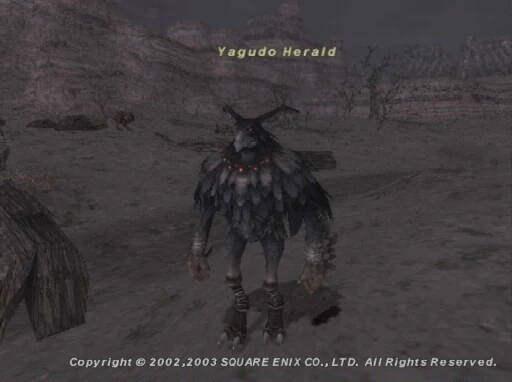
+ | [[File:Yagudo Herald Sauromugue.jpg|thumb]] |
|} |
|} |
||
| − | |||
{| border="0" width="100%" cellpadding="4" cellspacing="2" |
{| border="0" width="100%" cellpadding="4" cellspacing="2" |
||
|- BGCOLOR="#ffdead" |
|- BGCOLOR="#ffdead" |
||
| − | ! Zone || Level || Drops || Steal || Spawns || |
+ | ! Zone || Level || Drops || Steal || Spawns || Notes |
| ⚫ | |||
|- BGCOLOR="#e3e6ff" |
|- BGCOLOR="#e3e6ff" |
||
| − | |style="padding-left:1ex"| |
+ | |style="padding-left:1ex"|[[Sauromugue Champaign]] |
| ⚫ | |||
| − | [[Sauromugue Champaign]] |
||
| ⚫ | |||
| − | 30 - 36 |
||
|<!--Add Items Dropped Here--> |
|<!--Add Items Dropped Here--> |
||
| − | *[[Eastern Paper]] {{Drop Rate| |
+ | *[[Eastern Paper]] {{Drop Rate| 5|77}} <!-- Update drop rates on ALL items, please --> |
| − | *[[Juji Shuriken]] {{Drop Rate| |
+ | *[[Juji Shuriken]] {{Drop Rate| 4|77}} |
| − | *[[Shuriken]] {{Drop Rate| |
+ | *[[Shuriken]] {{Drop Rate|12|77}} |
| − | *[[Soil Hachimaki]] {{Drop Rate|0| |
+ | *[[Soil Hachimaki]] {{Drop Rate| 0|77}} |
| − | *[[Soil Kyahan]] {{Drop Rate|0| |
+ | *[[Soil Kyahan]] {{Drop Rate| 0|77}} |
| − | *[[Soil Sitabaki]] {{Drop Rate|0| |
+ | *[[Soil Sitabaki]] {{Drop Rate| 0|77}} |
| − | *[[Soil Tekko]] {{Drop Rate|0| |
+ | *[[Soil Tekko]] {{Drop Rate| 0|77}} |
| − | *[[Yagudo Feather]] {{Drop Rate| |
+ | *[[Yagudo Feather]] {{Drop Rate| 12|77}} |
| − | *[[Yagudo Necklace]] {{Drop Rate| |
+ | *[[Yagudo Necklace]] {{Drop Rate| 3|77}} |
| + | *{{Gil Dropped|41|77}} |
||
|<!--Add Items Stolen Here--> |
|<!--Add Items Stolen Here--> |
||
| − | *[[Silver Beastcoin]] |
+ | *[[Silver Beastcoin]] {{Steal Rate|1|1}} |
| + | *{{Gil Mugged|48}} {{Steal Rate|1|1}} |
||
| ⚫ | |||
| − | [[: |
+ | |align="center"|[[:File:Saurchamp yagudo.jpg|5]]<br>''Respawn: 5 minutes'' |
| − | |align="center"| |
+ | |align="center"|A, L, S<br>{{HPMP|low hp=|high hp=|low mp=none|high mp=}} |
| − | A, L, S |
||
| − | |- BGCOLOR="# |
+ | |- BGCOLOR="#e3e6ff" |
| − | |style="padding-left:1ex"| |
+ | |style="padding-left:1ex"|[[Castle Oztroja]] |
| + | |align="center"|32 - 36 |
||
| − | [[Castle Oztroja]] |
||
| ⚫ | |||
| − | 32 - 36 |
||
|<!--Add Items Dropped Here--> |
|<!--Add Items Dropped Here--> |
||
| − | *[[Juji Shuriken]] {{Drop Rate| |
+ | *[[Juji Shuriken]] {{Drop Rate|4|128}} <!-- Update drop rates on ALL items, please --> |
| − | *[[Shuriken]] {{Drop Rate|0| |
+ | *[[Shuriken]] {{Drop Rate|0|128}} |
| − | *[[Soil Hachimaki]] {{Drop Rate|0| |
+ | *[[Soil Hachimaki]] {{Drop Rate|0|128}} |
| − | *[[Soil Kyahan]] {{Drop Rate|0| |
+ | *[[Soil Kyahan]] {{Drop Rate|0|128}} |
| − | *[[Soil Sitabaki]] {{Drop Rate|0| |
+ | *[[Soil Sitabaki]] {{Drop Rate|0|128}} |
| − | *[[Soil Tekko]] {{Drop Rate|0| |
+ | *[[Soil Tekko]] {{Drop Rate|0|128}} |
| − | *[[Thirteen-Knot Quipus]] {{Drop Rate| |
+ | *[[Thirteen-Knot Quipus]] {{Drop Rate|9|128}} |
| − | *[[Yagudo Feather]] {{Drop Rate|0| |
+ | *[[Yagudo Feather]] {{Drop Rate|0|128}} |
| − | *[[Yagudo Necklace]] {{Drop Rate|0| |
+ | *[[Yagudo Necklace]] {{Drop Rate|0|128}} |
| + | *{{Gil Dropped|54|93}} |
||
|<!--Add Items Stolen Here--> |
|<!--Add Items Stolen Here--> |
||
*[[Silver Beastcoin]] |
*[[Silver Beastcoin]] |
||
| + | *{{Gil Mugged|14|27}} |
||
| ⚫ | |||
| − | 29<br>''Respawn: 12 minutes'' |
+ | |align="center"|29<br>''Respawn: 12 minutes'' |
| − | |align="center"| |
+ | |align="center"|A, L, S<br>{{HPMP|low hp=|high hp=|low mp=none|high mp=}} |
| − | A, L, S |
||
|- BGCOLOR="#e3e6ff" |
|- BGCOLOR="#e3e6ff" |
||
| − | |style="padding-left:1ex"| |
+ | |style="padding-left:1ex"|[[Fort Karugo-Narugo (S)]] |
| ⚫ | |||
| − | [[Fort Karugo-Narugo (S)]] |
||
| + | | |
||
| − | |align="center"| |
||
| + | *[[Bottled Pixie]] {{Drop Rate|0|16}} |
||
| − | 64 - 68 |
||
| − | + | *{{Gil Dropped}} |
|
| ⚫ | |||
| ⚫ | |||
| + | *{{Gil Mugged}} |
||
| ⚫ | |||
| + | |align="center"|A, L, S<br>{{HPMP|low hp=|high hp=|low mp=none|high mp=}} |
||
| + | |- BGCOLOR="#ffd9d9" |
||
| ⚫ | |||
| + | |style="padding-left:1ex"|[[Ghoyu's Reverie]] |
||
| ⚫ | |||
| + | :''[[A Manifest Problem]]'' |
||
| − | |align="center"| |
||
| ⚫ | |||
|align="center"| |
|align="center"| |
||
| + | | |
||
| − | A, L, S |
||
| + | | |
||
| ⚫ | |||
| + | |align="center"|A, L, S<br>{{HPMP|low hp=|high hp=|low mp=none|high mp=}} |
||
|- |
|- |
||
|align="center" colspan="6" BGCOLOR="#ffdead"| |
|align="center" colspan="6" BGCOLOR="#ffdead"| |
||
{{Monster Notes}} |
{{Monster Notes}} |
||
|} |
|} |
||
| ⚫ | |||
| + | :*Ghoyu's Reverie version are encountered in large waves during the quest [[A Manifest Problem]], and have very low HP, defense, and magic defense there. |
||
| + | :*I would not recommend farming Gold Beastcoins off Yagudo Heralds in Fort Karugo-Narugo (S). With 8+ steal gear I was getting normally 2/15+. That's averaging about 2 an hour or more. |
||
Latest revision as of 19:38, 22 July 2011
 |
| Zone | Level | Drops | Steal | Spawns | Notes |
|---|---|---|---|---|---|
| Sauromugue Champaign | 30 - 36 |
|
|
5 Respawn: 5 minutes |
A, L, S ??? HP |
| Castle Oztroja | 32 - 36 |
|
|
29 Respawn: 12 minutes |
A, L, S ??? HP |
| Fort Karugo-Narugo (S) | 64 - 68 |
|
|
5 Respawn: 5 minutes |
A, L, S ??? HP |
| Ghoyu's Reverie | 3+ | A, L, S ??? HP | |||
|
HP = Detects Low HP; M = Detects Magic; Sc = Follows by Scent; T(S) = True-sight; T(H) = True-hearing JA = Detects job abilities; WS = Detects weaponskills; Z(D) = Asleep in Daytime; Z(N) = Asleep at Nighttime; A(R) = Aggressive to Reive participants | |||||
Notes:
- Ghoyu's Reverie version are encountered in large waves during the quest A Manifest Problem, and have very low HP, defense, and magic defense there.
- I would not recommend farming Gold Beastcoins off Yagudo Heralds in Fort Karugo-Narugo (S). With 8+ steal gear I was getting normally 2/15+. That's averaging about 2 an hour or more.