m (Removed Broo comment (again), as it does not aggro level 56+ players.) Tag: Visual edit |
mNo edit summary Tag: Source edit |
||
| (17 intermediate revisions by 12 users not shown) | |||
| Line 1: | Line 1: | ||
| − | [[Category:quests]][[Category:Jeuno Quests]][[de:Daher weht der Wind]] |
+ | [[Category:quests]][[Category:Jeuno Quests]][[de:Daher weht der Wind]][[Category:Limit Break quests]] |
{{Quest |
{{Quest |
||
| − | |startnpc=[[Maat]] - |
+ | |startnpc=[[Maat]] - {{Location|Ru'Lude Gardens|H-5}} |
| − | |requirements= |
+ | |requirements=Level 56-60<br>Must have started [[Magicite]] mission (4-1) (not needed to accept) |
| − | |items=[[Orcish |
+ | |items={{KeyItem}} [[#orc|Orcish Crest]]<br>{{KeyItem}} [[#quad|Quadav crest]]<br>{{KeyItem}} [[#yagu|Yagudo crest]] |
|title=Sky Breaker |
|title=Sky Breaker |
||
|repeatable=No |
|repeatable=No |
||
| − | |reward=Raises level cap to 65 |
+ | |reward=Raises the player's level cap to 65 |
|previous=[[Atop the Highest Mountains]] |
|previous=[[Atop the Highest Mountains]] |
||
|next=[[Riding on the Clouds]] |
|next=[[Riding on the Clouds]] |
||
| Line 13: | Line 13: | ||
== Walkthrough == |
== Walkthrough == |
||
| − | [[Maat]] will ask you to |
+ | [[Maat]] will ask you to bring him three crests (key items): |
| + | #[[Orcish crest]] |
||
| + | #[[Quadav crest]] |
||
| + | #[[Yagudo crest]] |
||
| + | |||
| + | '''Note''': Although you only need to be level 56-60 to receive this quest, to finish it you still need to have started the [[Magicite|Magicite mission]], so you may wish to start that first and do it concurrently with this quest, as it involves the same areas. |
||
| + | <span id="orc"></span> |
||
| + | |||
===Orcish Crest === |
===Orcish Crest === |
||
[[Image:Davoi.png|thumb|100px|Map of Davoi]] |
[[Image:Davoi.png|thumb|100px|Map of Davoi]] |
||
[[Image:Monastic-cavern.png|thumb|100px|Map of Monastic Cavern]] |
[[Image:Monastic-cavern.png|thumb|100px|Map of Monastic Cavern]] |
||
| − | :''NOTE: You will need [[Invisible|Invisibility]] for this entire section. |
+ | :''NOTE: You will need [[Invisible|Invisibility]] for this entire section. |
| − | :1. Travel to [[Davoi]] and enter [[Monastic Cavern]] at (H-11). |
+ | :1. Travel to [[Davoi]] and enter [[Monastic Cavern]] at ({{Location Tooltip|area=Davoi|pos=H-11}}). |
| − | :2. Go to the SW corner of I-8 and zone back to |
+ | :2. Go to the SW corner of ({{Location Tooltip|area=Monastic Cavern|pos=I-8}}) and zone back to Davoi. This will put you in the house area at the center of the Davoi map. |
| − | :3. Head east across the bridge towards (J-9). If you |
+ | :3. Head east across the bridge towards ({{Location Tooltip|area=Davoi|pos=J-9}}). If you (or one of your party members) possess the {{KeyItem}} [[Crimson Orb]], everyone proceed south to the ''Wall of Banishing'' (SW corner of {{Location Tooltip|area=Davoi|pos=J-9}}). Have the person with the Crimson Orb open the wall by clicking on it. This will open a hole in the wall which anyone can walk through. |
| + | ::'''WARNING:''' Make sure any orcs by the ''Wall of Banishing'' are looking away when you drop invisibility to check the wall. The zoneline is only a few feet past the wall, so if you do get aggro you can run for it. |
||
| − | :'''''One party member MUST hold a [[Crimson Orb]] to open the Wall of Banishing. If no one holds the orb, you will now need to do a mini-quest to obtain it.''''' |
||
| + | :4. '''Mini-Quest:''' If no one holds the orb, you will need to do the following mini-quest to obtain it. Otherwise, skip to #5. |
||
| − | ====Mini Quest==== |
||
| − | ::Anyone trying to obtain the [[Crimson Orb]] must first touch the Wall of Banishing (J-9) to the south and receive the message that it is blocking the cave. Take care as there are multiple high level orcs wandering in the area and they will most likely |
+ | ::Anyone trying to obtain the {{KeyItem}} [[Crimson Orb]] must first touch the ''Wall of Banishing'' ({{Location Tooltip|area=Davoi|pos=J-9}}) to the south and receive the message that it is blocking the cave. Take care as there are multiple high level orcs wandering in the area and they will most likely aggro you if you're not careful. |
| − | ::After touching the wall, head due north to the top of the fort at (J-8), and speak to a Tarutaru by the name of [[Sedal-Godjal]] to receive the quest. He will give the quester a [[White Orb]] |
+ | ::After touching the wall, head due north to the top of the fort at ({{Location Tooltip|area=Davoi|pos=J-8}}), and speak to a Tarutaru by the name of [[Sedal-Godjal]] to receive the quest. He will give the quester a {{KeyItem}} [[White Orb]] which must be dipped in the 4 red pools across [[Davoi]]. The White Orb will change to a [[Pink Orb]] when you have gone to 1 pool, a [[Red Orb]] when you have gone to 2 pools, and a [[Blood Orb]] when you have gone to 3 pools, before it finally becomes a [[Cursed Orb]] at the 4th pool. ''WARNING: When you dip the orb into the 4th pool it [[curse]]s you, so plan accordingly. However, this curse can be lifted with the spell [[Cursna]], [[Healing Waltz]], or a WHM Trust like [[Trust: Kupipi]]. Otherwise the curse will last 10 minutes.'' The four pools are located as follows: |
| − | + | ::*The Howling Pond is located at the NW corner of {{Location Tooltip|area=Davoi|pos=H-10}}. ([[Orcish Footsoldier]] & [[Orcish Gladiator]] check EP but do not aggro a lvl 59.) |
|
| − | + | ::*The Wailing Pond is at the NE corner of ({{Location Tooltip|area=Davoi|pos=L-9}}). |
|
| − | + | ::*The Screaming Pond is at the NW corner of ({{Location Tooltip|area=Davoi|pos=E-8}}). |
|
| − | + | ::*The Groaning Pond, which is not displayed on the map, is found by following the river at ({{Location Tooltip|area=Davoi|pos=H-6}}) north and to the east. Gain access to the river at ({{Location Tooltip|area=Davoi|pos=D-8}}), ({{Location Tooltip|area=Davoi|pos=J-10}}), or ({{Location Tooltip|area=Davoi|pos=H-8}}). It's possible to get aggro from the cliffs above the river around ({{Location Tooltip|area=Davoi|pos=I-8}}), so you may want to use invisible. |
|
::Return to [[Sedal-Godjal]] with the [[Cursed Orb]], and he will turn it into a [[Crimson Orb]]. |
::Return to [[Sedal-Godjal]] with the [[Cursed Orb]], and he will turn it into a [[Crimson Orb]]. |
||
| ⚫ | |||
| ⚫ | |||
| ⚫ | |||
| ⚫ | :5. Zone into [[Monastic Cavern]] on the other side of the wall. Hug the left wall and proceed to the SW corner of ({{Location Tooltip|area=Monastic Cavern|pos=J-6}}). Careful of the true sight Orc NMs that lurk in this room (mainly along the eastern walls). Click on the [[???]] to receive your [[Orcish crest]]. ''WARNING: Do not drop down the ledge to get to the [[???]]; it's along the western wall.'' |
||
| ⚫ | |||
| + | <span id="quad"></span> |
||
| − | |||
| ⚫ | : |
||
===Quadav Crest === |
===Quadav Crest === |
||
[[Image:Beadeaux1.png|thumb|100px|Map of Beadeaux]] |
[[Image:Beadeaux1.png|thumb|100px|Map of Beadeaux]] |
||
[[Image:QulunDome.png|thumb|100px|Qulun Dome]] |
[[Image:QulunDome.png|thumb|100px|Qulun Dome]] |
||
| + | :NOTE: One person must have the {{keyItem}} [[Silver bell]], {{keyItem}} [[Coruscant rosary]], and {{keyItem}} [[Black Matinee Necklace]] before you can enter the area with the Quadav crest. You must start the mission [[Magicite]] before you can receive those key items. |
||
| − | :''NOTE: You will want [[Sneak]] for this section, but [[Invisible]] is not needed. A party member must have completed Mysteries of Beadeaux I and II (can only be flagged if you were on Magicite mission), or be rank 5+, to be able to complete this part.'' |
+ | : ''NOTE: You will want [[Sneak]] for this section, but [[Invisible]] is not needed. A party member must have completed Mysteries of Beadeaux I and II (can only be flagged if you were on Magicite mission), or be rank 5+, to be able to complete this part.'' |
| − | :''NOTE: If you are affected by The Mute's silence effect but do not remove it by normal means, it will last approximately 10-15 real life minutes. |
||
| − | :''NOTE: The |
+ | :''NOTE: If you are affected by The Mute's silence effect but do not remove it by normal means, it will last approximately 10-15 real life minutes.'' |
| + | :''NOTE: 'The Afflictor's' curse will bring your HP and MP down to approximately 10% of max HP and 50% of max MP.'' |
||
| − | :''TIP: Casters should bring Echo Drops to remove silence. The Afflictor machines you must pass will curse you, however you can avoid this by muting yourself with one of the Mute machines, and then using an echo drop to cure yourself once past |
+ | :''TIP: Casters should bring Echo Drops to remove silence. 'The Afflictor' machines you must pass will curse you, however you can avoid this by muting yourself with one of the Mute machines, and then using an echo drop to cure yourself once past 'The Afflictor.''' |
| − | #Enter [[Beadeaux]] and follow the tunnel down at H-7 (1st map). |
+ | #Enter [[Beadeaux]] and follow the tunnel down at {{Location Tooltip|area=Beadeaux|map=Surface|pos=H-7}} (1st map). |
| − | #Then proceed through the underground to F-8 to exit the tunnel (2nd map). |
+ | #Then proceed through the underground to {{Location Tooltip|area=Beadeaux|map=Tunnels|pos=F-8}} to exit the tunnel (2nd map). |
| − | #*If you don't want to get cursed by The Afflictor in the tunnel, touch The Mute at G-7. Touching The Mute will [[Silence]] the adventurer. |
+ | #*If you don't want to get cursed for 5 minutes by The Afflictor in the tunnel, touch The Mute at {{Location Tooltip|area=Beadeaux|map=Tunnels|pos=G-7}}. Touching The Mute will [[Silence]] the adventurer. |
| − | #Once above ground again, hug the right wall to the ramp at E-10 (1st map). |
+ | #Once above ground again, hug the right wall to the ramp at {{Location Tooltip|area=Beadeaux|map=Surface|pos=E-10}} (1st map). |
| − | #*If you don't wish to be cursed by The Afflictor at F-10 & G-10 touch The Mute at F-9. If [[Silence]] is still active from the first The Mute then this step can be skipped. |
+ | #*If you don't wish to be cursed by The Afflictor at {{Location Tooltip|area=Beadeaux|map=Surface|pos=F-10}} & {{Location Tooltip|area=Beadeaux|map=Surface|pos=G-10}} touch The Mute at {{Location Tooltip|area=Beadeaux|map=Surface|pos=F-9}}. If [[Silence]] is still active from the first The Mute then this step can be skipped. |
| − | #Head East to the right section of the map, then north east to K-6. Be careful not to fall off. ''Recommended to have [[Sneak]] on even if nothing has aggroed so far!'' Then jump down and take the tunnel at section K-6 (1st map). |
+ | #Head East to the right section of the map, then north east to {{Location Tooltip|area=Beadeaux|map=Surface|pos=K-6}}. Be careful not to fall off. ''Recommended to have [[Sneak]] on even if nothing has aggroed so far!'' Then jump down and take the tunnel at section {{Location Tooltip|area=Beadeaux|map=Surface|pos=K-6}} (1st map). |
| − | #Once underground again, follow the path to M-8 (2nd map) and then zone into [[Qulun Dome]]. (There are three Afflictors in a row here) |
+ | #Once underground again, follow the path to {{Location Tooltip|area=Beadeaux|map=Tunnels|pos=M-8}} (2nd map) and then zone into [[Qulun Dome]]. (There are three Afflictors in a row here) |
| − | #The crest is located on the borderline of I-6/7, this is on the far Northwest wall of the second room. |
+ | #The crest is located on the borderline of {{Location Tooltip|area=Qulun Dome|pos=I-6}}/{{Location Tooltip|text=7|area=Qulun Dome|pos=I-7}}, this is on the far Northwest wall of the second room. |
| − | #*In the first room is most likely an NM, the [[Ruby Quadav]]. This NM has [[True Hearing]] so it can hear through Sneak. However, you will want to have sneak up to |
+ | #*In the first room is most likely an NM, the [[Ruby Quadav]]. This NM has [[True Hearing]] so it can hear through Sneak. However, you will want to have sneak up to get past the other two that like to hang out there. |
| − | #*A party member that has all three key items, or who is rank 5 |
+ | #*A party member that has all three key items, or who is rank 5 minimum, must open the door. This door opens for the entire party/alliance. It CANNOT be opened from the inside. Attempting to do so will give you the message "It cannot be opened from this side!" |
| − | #*When you go through the door into the second room, there will be 2-3 different NMs with True Hearing, |
+ | #*When you go through the door into the second room, there will be 2-3 different NMs with True Hearing, Ruby Quadav and [[Adaman Quadav]], along the northeast corner of the room. Avoid them and find the [[???]] as quickly as possible (located in northwest corner of the room). As soon as you hit it and receive the [[Quadav crest]], warp away. |
| + | <span id="yagu"></span> |
||
===Yagudo Crest === |
===Yagudo Crest === |
||
| Line 63: | Line 72: | ||
:''NOTE: the passwords change every day .'' |
:''NOTE: the passwords change every day .'' |
||
:''TIP: In the event that a game day has passed or your time is limited, it might be faster to hack the password to the trap door, rather than wasting time hunting down every set of words. Try guessing it! This can also be applied to the 4 lever door.'' |
:''TIP: In the event that a game day has passed or your time is limited, it might be faster to hack the password to the trap door, rather than wasting time hunting down every set of words. Try guessing it! This can also be applied to the 4 lever door.'' |
||
| − | > Here is a list of all possible passwords |
+ | > Here is a list of all possible passwords below '''''(passwords are case sensitive)'''''. |
# Domi |
# Domi |
||
# Puqu |
# Puqu |
||
| Line 85: | Line 94: | ||
:''NOTE: To light the torches you must have started the magicite mission and have the [[Yagudo Torch]].'' |
:''NOTE: To light the torches you must have started the magicite mission and have the [[Yagudo Torch]].'' |
||
:''NOTE: The recent speed increase to all players has made soloing easier.'' |
:''NOTE: The recent speed increase to all players has made soloing easier.'' |
||
| − | :''NOTE: if you have done or are on [[Magicite (All Nations-Mission 4)]], it is faster to start on password two then head through the two brass doors to the [[Altar Room]] at G-10 and shortcut back to map 1 that way, the other passwords are then all on route'' |
+ | :''NOTE: if you have done or are on [[Magicite (All Nations-Mission 4)]], it is faster to start on password two, then head through the two brass doors to the [[Altar Room]] at {{Location Tooltip|area=Castle Oztroja|map=Map 2|pos=G-10}} and shortcut back to map 1 that way, the other passwords are then all on route'' |
#Enter [[Castle Oztroja]] |
#Enter [[Castle Oztroja]] |
||
#*For the first part you will need to find out the password of the day, which requires collecting the information from 3 brass statues. It also is possible to head straight to the trap door where you have to enter the passwords and find the right combination through trial and error. The possible passwords are: Domi, Puqu, Gadu, Deggi, Mjuu, Xalmo, Haqa, Mong, Ouzi, Duzu, Buxu, Quu, Misu, Xicu, Ovzi, Duxo and Zhuu. Note that they are case-sensitive, but can be entered in any order. |
#*For the first part you will need to find out the password of the day, which requires collecting the information from 3 brass statues. It also is possible to head straight to the trap door where you have to enter the passwords and find the right combination through trial and error. The possible passwords are: Domi, Puqu, Gadu, Deggi, Mjuu, Xalmo, Haqa, Mong, Ouzi, Duzu, Buxu, Quu, Misu, Xicu, Ovzi, Duxo and Zhuu. Note that they are case-sensitive, but can be entered in any order. |
||
| ⚫ | |||
| ⚫ | #:*Now head to the door at I-8 and then go up the stairs to the 2nd map. On this map, head to the exit at G-7 and zone over onto the next map. On the next map head north to I-7 and zone over to yet another map. Now head to the SE corner of H-9 and open the brass door and receive the 2nd password from the statue. |
||
| ⚫ | |||
#:*Only the second statue is really out of your way to the crest. If you don't have much time before the day changes, grab the first and third passwords, so that you only have to guess the second. |
#:*Only the second statue is really out of your way to the crest. If you don't have much time before the day changes, grab the first and third passwords, so that you only have to guess the second. |
||
| ⚫ | |||
| ⚫ | |||
| ⚫ | #:*Second password (if you wish to skip this, head directly to the 3rd map via exit A ({{Location Tooltip|area=Castle Oztroja|map=Map 1|pos=J-8}})and follow directions for the third password): Now head to the door at {{Location Tooltip|area=Castle Oztroja|map=Map 1|pos=I-8}} and then go up the stairs to the 2nd map. On this map, head to the exit at {{Location Tooltip|area=Castle Oztroja|map=Map 3|pos=G-7}} and zone over onto the next map. On the next map head north to {{Location Tooltip|area=Castle Oztroja|map=Map 7|pos=I-7}} and zone over to yet another map. Now head to the SE corner of {{Location Tooltip|area=Castle Oztroja|map=Map 2|pos=H-9}} and open the brass door and receive the 2nd password from the statue. |
||
| ⚫ | |||
| ⚫ | #:*Third password: Proceed back along the same path to the 3rd map. The 3rd statue is located on the NW corner of {{Location Tooltip|id=3rd password|area=Castle Oztroja|map=Map 3|pos=I-8}}. If you've never experienced this section of the map before there are blocker points preventing most of the "obvious" paths and forcing you to walk around the outside. |
||
| ⚫ | |||
| ⚫ | #From the 3rd statue point head to the 4 lever door at the SW corner of {{Location Tooltip|area=Castle Oztroja|map=Map 3|pos=G-8}}. You can find the current combination of the levers at the dead-end at ({{Location Tooltip|area=Castle Oztroja|map=Map 3|pos=I-10}}). ''If you were not aggroed before you will be once going through this door, plan accordingly!'' |
||
| ⚫ | #You want to proceed through the Brass door at H-7 from here. In order to open it, someone must light one of the 4 torches at G-7, G-8, H-7, or H-8. If you brought help that has NOT done Magicite Mission 4 you can light the torch while they pass through the Brass door. Then they can let you in with the lever behind the Brass door. There are no mobs behind the Brass door but you do not want to bring aggro mobs with you as you need time to work the mechanism. It is recommended that a Thief with Hide to attempt to light the torches, as Hide works against Yagudo. Be forewarned; there are high level Yagudo at all 4 torches. It is recommended to light a torch that does not have a Yagudo Prelate near it, and if using the Reraise strategy without Invisible, stay as far away from Prelates as possible so as not to have Blind status. |
||
| ⚫ | |||
| ⚫ | |||
| ⚫ | #You want to proceed through the Brass door at {{Location Tooltip|area=Castle Oztroja|map=Map 5|pos=H-7}} from here. In order to open it, someone must light one of the 4 torches at {{Location Tooltip|id=torch1|area=Castle Oztroja|map=Map 5|pos=G-7}}, {{Location Tooltip|id=torch2|area=Castle Oztroja|map=Map 5|pos=G-8}}, {{Location Tooltip|id=torch3|area=Castle Oztroja|map=Map 5|pos=H-7}}, or {{Location Tooltip|id=torch4|area=Castle Oztroja|map=Map 5|pos=H-8}}. If you brought help that has NOT done Magicite (Mission 4) you can light the torch while they pass through the Brass door. Then they can let you in with the lever behind the Brass door. There are no mobs behind the Brass door but you do not want to bring aggro mobs with you as you need time to work the mechanism. It is recommended that a Thief with [[Hide]] to attempt to light the torches, as Hide works against Yagudo. Be forewarned; there are high level Yagudo at all 4 torches. It is recommended to light a torch that does not have a Yagudo Prelate near it, or only 2 Yagudo instead of 3, and if using the Reraise strategy without Invisible, stay as far away from Prelates as possible so as not to have Blind status. |
||
#Once through the brass door, there will be a wooden plank with a red circle (trap door) in front of a [[Brass Statue]]. Have everyone stand on the plank. Click on the statue and input the passwords in the order shown on the Vana'diel Atlas maps. The trap door will open and everyone will fall through to the bottom. Don't worry about invisibility, as the bottom of the trap door is safe. |
#Once through the brass door, there will be a wooden plank with a red circle (trap door) in front of a [[Brass Statue]]. Have everyone stand on the plank. Click on the statue and input the passwords in the order shown on the Vana'diel Atlas maps. The trap door will open and everyone will fall through to the bottom. Don't worry about invisibility, as the bottom of the trap door is safe. |
||
| − | #Once everyone has dropped down through the trap door, recast invisibility, and run down the long corridor leading to a large room with a series of ramps up to a center platform. The [[???]] to get the [[Yagudo crest]] is located on the central platform. At this point you'll need to keep a lookout for the Yagudo NM |
+ | #Once everyone has dropped down through the trap door, recast invisibility, and run down the long corridor leading to a large room with a series of ramps up to a center platform and a higher rear platform. The [[???]] to get the [[Yagudo crest]] is located on the lower central platform. At this point you'll need to keep a lookout for the Yagudo NM High Priest. |
| − | #* [[Invisible]] will work on all the Yagudo in this area except the Notorious Monsters. [[Tzee Xicu the Manifest]], [[Yagudo Avatar]], [[Yagudo High Priest]] & [[Yagudo Templar]] all have [[True Sight]] so make sure you're well away from their sight line as they will attack when they see you. |
+ | #* [[Invisible]] will work on all the Yagudo in this area except the Notorious Monsters. [[Tzee Xicu the Manifest]], [[Yagudo Avatar]], [[Yagudo High Priest]] & [[Yagudo Templar]] all have [[True Sight]], so make sure you're well away from their sight line as they will attack when they see you. |
| − | #*Wait for the Yagudo NM to be sufficiently far away from the center platform, then travel up the ramps to the center platform, standing |
+ | #*Wait for the Yagudo NM to be sufficiently far away from the center platform, then travel up the ramps to the center platform, standing behind any regular Yagudo which may be on that platform, drop invis, click the [[???]] and re-invis. |
#*If going in a large group, it is recommended to send people up one at a time. This way, if they get aggro, they can run to the base of the ramp and get KO'd within tractor range. |
#*If going in a large group, it is recommended to send people up one at a time. This way, if they get aggro, they can run to the base of the ramp and get KO'd within tractor range. |
||
*Once you have the three crests, return to Maat. |
*Once you have the three crests, return to Maat. |
||
| Line 109: | Line 118: | ||
|summary=Your innate limits can be pushed further by collecting the crests of the Orcs, the Quadav, and the Yagudo. |
|summary=Your innate limits can be pushed further by collecting the crests of the Orcs, the Quadav, and the Yagudo. |
||
}} |
}} |
||
| + | |||
| + | {{Spoiler2}} |
||
Latest revision as of 01:04, 9 September 2023
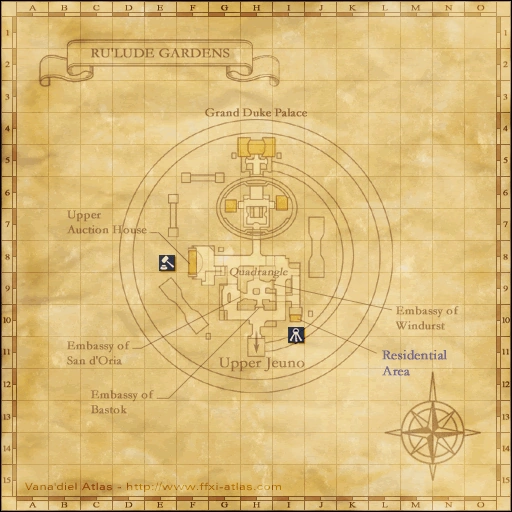
| Start NPC | Maat - Ru'Lude Gardens (H-5) |
|---|---|
| Requirements | Level 56-60 Must have started Magicite mission (4-1) (not needed to accept) |
| Items Needed | |
| Title Granted | Sky Breaker |
| Repeatable | No |
| Reward | Raises the player's level cap to 65 |
| ← Previous Quest | Next Quest → |
|---|---|
| Atop the Highest Mountains | Riding on the Clouds |
Walkthrough
Maat will ask you to bring him three crests (key items):
Note: Although you only need to be level 56-60 to receive this quest, to finish it you still need to have started the Magicite mission, so you may wish to start that first and do it concurrently with this quest, as it involves the same areas.
Orcish Crest
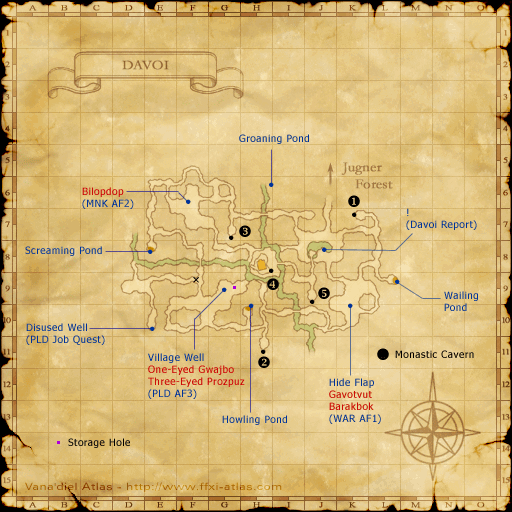
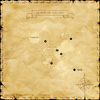
Map of Davoi
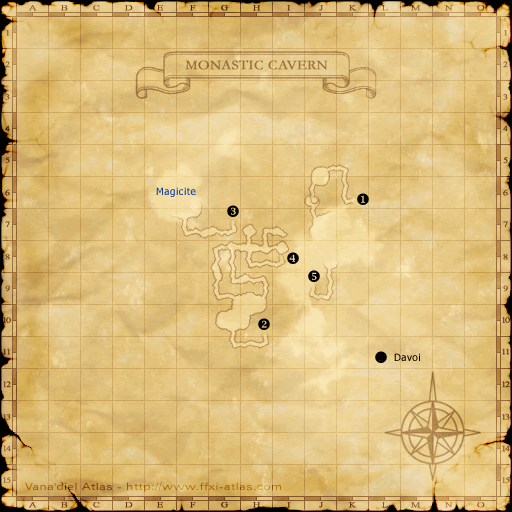
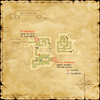
Map of Monastic Cavern
- NOTE: You will need Invisibility for this entire section.
- 1. Travel to Davoi and enter Monastic Cavern at (H-11).
- 2. Go to the SW corner of (I-8) and zone back to Davoi. This will put you in the house area at the center of the Davoi map.
- 3. Head east across the bridge towards (J-9). If you (or one of your party members) possess the
 Crimson Orb, everyone proceed south to the Wall of Banishing (SW corner of J-9). Have the person with the Crimson Orb open the wall by clicking on it. This will open a hole in the wall which anyone can walk through.
- WARNING: Make sure any orcs by the Wall of Banishing are looking away when you drop invisibility to check the wall. The zoneline is only a few feet past the wall, so if you do get aggro you can run for it.
- 4. Mini-Quest: If no one holds the orb, you will need to do the following mini-quest to obtain it. Otherwise, skip to #5.
- Anyone trying to obtain the
 Crimson Orb must first touch the Wall of Banishing (J-9) to the south and receive the message that it is blocking the cave. Take care as there are multiple high level orcs wandering in the area and they will most likely aggro you if you're not careful.
 - After touching the wall, head due north to the top of the fort at (J-8), and speak to a Tarutaru by the name of Sedal-Godjal to receive the quest. He will give the quester a
 White Orb which must be dipped in the 4 red pools across Davoi. The White Orb will change to a Pink Orb when you have gone to 1 pool, a Red Orb when you have gone to 2 pools, and a Blood Orb when you have gone to 3 pools, before it finally becomes a Cursed Orb at the 4th pool. WARNING: When you dip the orb into the 4th pool it curses you, so plan accordingly. However, this curse can be lifted with the spell Cursna, Healing Waltz, or a WHM Trust like Trust: Kupipi. Otherwise the curse will last 10 minutes. The four pools are located as follows:
- The Howling Pond is located at the NW corner of H-10. (Orcish Footsoldier & Orcish Gladiator check EP but do not aggro a lvl 59.)
- The Wailing Pond is at the NE corner of (L-9).
- The Screaming Pond is at the NW corner of (E-8).
- The Groaning Pond, which is not displayed on the map, is found by following the river at (H-6) north and to the east. Gain access to the river at (D-8), (J-10), or (H-8). It's possible to get aggro from the cliffs above the river around (I-8), so you may want to use invisible.
- Return to Sedal-Godjal with the Cursed Orb, and he will turn it into a Crimson Orb.
- FYI, when the quest is done and the curse is lifted, don't rest where visible, or you'll attract aggro from below and have the whole zone of VT mobs on you in minutes.
- Anyone trying to obtain the
- Can be done if you have already completed Whence Blows the Wind. Proved. Cannot activate the quest if Windurst mission 8-1 is open, and on the Curse Wand section of the mission.
- 5. Zone into Monastic Cavern on the other side of the wall. Hug the left wall and proceed to the SW corner of (J-6). Careful of the true sight Orc NMs that lurk in this room (mainly along the eastern walls). Click on the ??? to receive your Orcish crest. WARNING: Do not drop down the ledge to get to the ???; it's along the western wall.
Quadav Crest
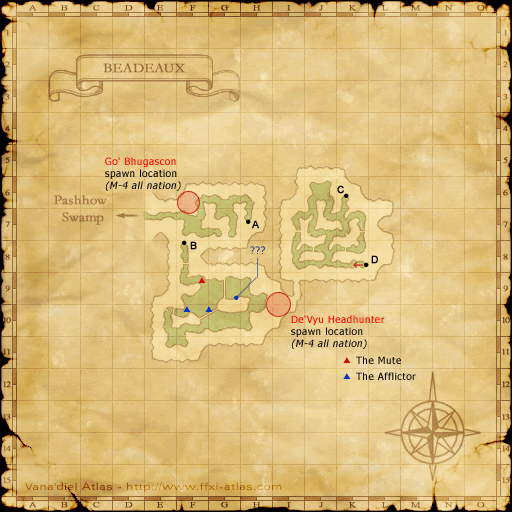
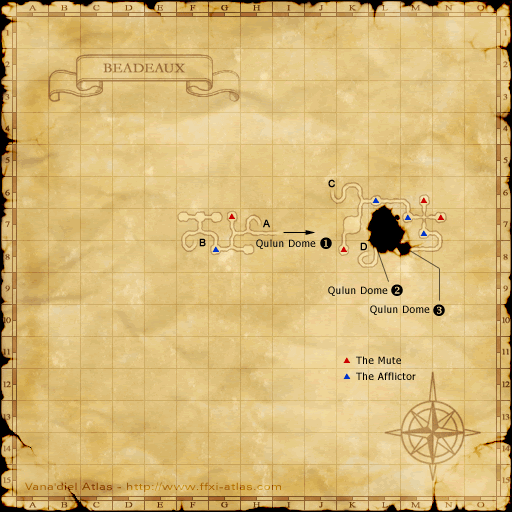
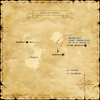
Map of Beadeaux
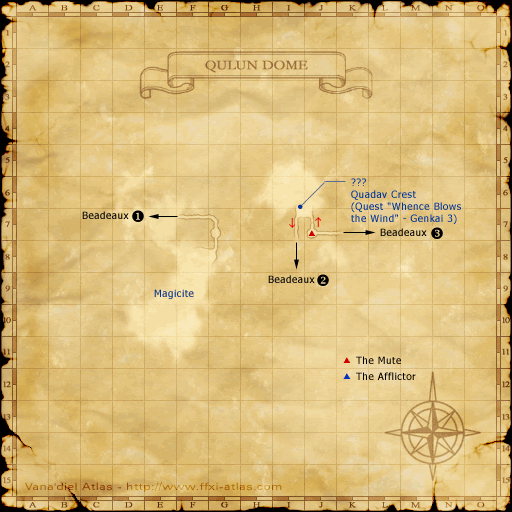
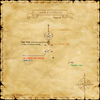
Qulun Dome
- NOTE: One person must have the
 Silver bell,
  Coruscant rosary, and
  Black Matinee Necklace before you can enter the area with the Quadav crest. You must start the mission Magicite before you can receive those key items.
 - NOTE: You will want Sneak for this section, but Invisible is not needed. A party member must have completed Mysteries of Beadeaux I and II (can only be flagged if you were on Magicite mission), or be rank 5+, to be able to complete this part.
- NOTE: If you are affected by The Mute's silence effect but do not remove it by normal means, it will last approximately 10-15 real life minutes.
- NOTE: 'The Afflictor's' curse will bring your HP and MP down to approximately 10% of max HP and 50% of max MP.
- TIP: Casters should bring Echo Drops to remove silence. 'The Afflictor' machines you must pass will curse you, however you can avoid this by muting yourself with one of the Mute machines, and then using an echo drop to cure yourself once past 'The Afflictor.'
- Enter Beadeaux and follow the tunnel down at H-7 (1st map).
- Then proceed through the underground to F-8 to exit the tunnel (2nd map).
- Once above ground again, hug the right wall to the ramp at E-10 (1st map).
- Head East to the right section of the map, then north east to K-6. Be careful not to fall off. Recommended to have Sneak on even if nothing has aggroed so far! Then jump down and take the tunnel at section K-6 (1st map).
- Once underground again, follow the path to M-8 (2nd map) and then zone into Qulun Dome. (There are three Afflictors in a row here)
- The crest is located on the borderline of I-6/7, this is on the far Northwest wall of the second room.
- In the first room is most likely an NM, the Ruby Quadav. This NM has True Hearing so it can hear through Sneak. However, you will want to have sneak up to get past the other two that like to hang out there.
- A party member that has all three key items, or who is rank 5 minimum, must open the door. This door opens for the entire party/alliance. It CANNOT be opened from the inside. Attempting to do so will give you the message "It cannot be opened from this side!"
- When you go through the door into the second room, there will be 2-3 different NMs with True Hearing, Ruby Quadav and Adaman Quadav, along the northeast corner of the room. Avoid them and find the ??? as quickly as possible (located in northwest corner of the room). As soon as you hit it and receive the Quadav crest, warp away.
Yagudo Crest
Castle Oztroja
- NOTE: You will only need Invisibility for this entire part. Sneak is necessary for bats if you are lower level.
- NOTE: Avoid the leeches if you are not using Sneak.
- NOTE: the passwords change every day .
- TIP: In the event that a game day has passed or your time is limited, it might be faster to hack the password to the trap door, rather than wasting time hunting down every set of words. Try guessing it! This can also be applied to the 4 lever door.
> Here is a list of all possible passwords below (passwords are case sensitive).
- Domi
- Puqu
- Gadu
- Deggi
- Mjuu
- Xalmo
- Haqa
- Mong
- Ouzi
- Duzu
- Buxu
- Quu
- Misu
- Xicu
- Ovzi
- Duxo
- Zhuu
- NOTE: You may want a Thief with Hide in your party.
- NOTE: To light the torches you must have started the magicite mission and have the Yagudo Torch.
- NOTE: The recent speed increase to all players has made soloing easier.
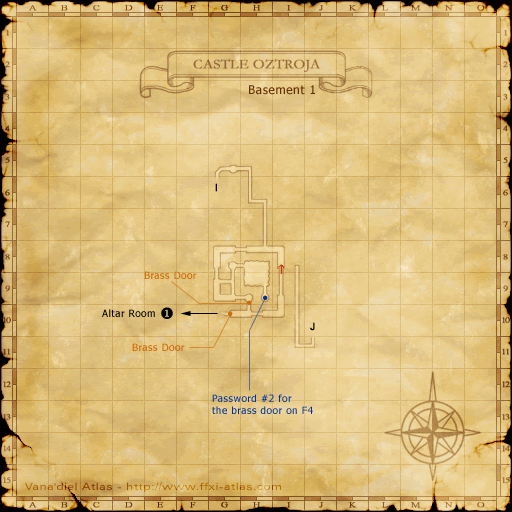
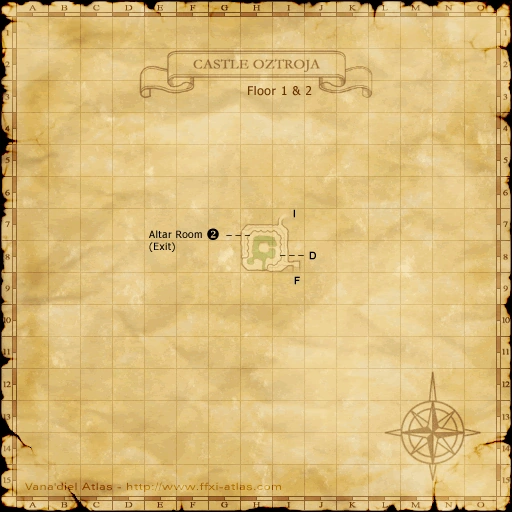
- NOTE: if you have done or are on Magicite (All Nations-Mission 4), it is faster to start on password two, then head through the two brass doors to the Altar Room at G-10 and shortcut back to map 1 that way, the other passwords are then all on route
- Enter Castle Oztroja
- For the first part you will need to find out the password of the day, which requires collecting the information from 3 brass statues. It also is possible to head straight to the trap door where you have to enter the passwords and find the right combination through trial and error. The possible passwords are: Domi, Puqu, Gadu, Deggi, Mjuu, Xalmo, Haqa, Mong, Ouzi, Duzu, Buxu, Quu, Misu, Xicu, Ovzi, Duxo and Zhuu. Note that they are case-sensitive, but can be entered in any order.
- Only the second statue is really out of your way to the crest. If you don't have much time before the day changes, grab the first and third passwords, so that you only have to guess the second.
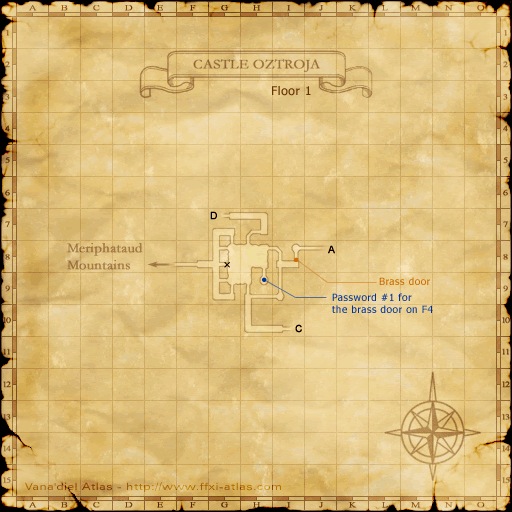
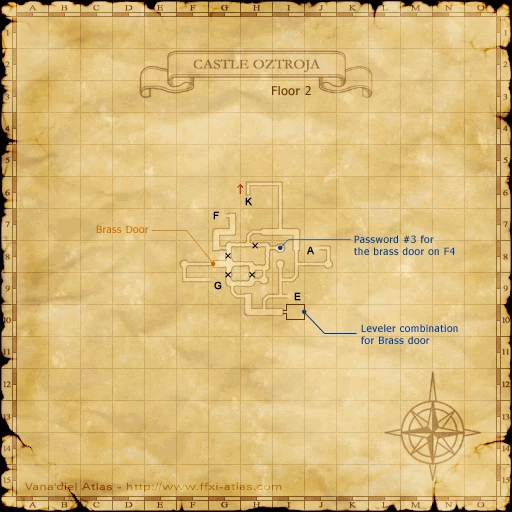
- First password: Head to the SE corner of H-8 and open the brass door. Click on the statue inside to receive the 1st password.
- Second password (if you wish to skip this, head directly to the 3rd map via exit A (J-8)and follow directions for the third password): Now head to the door at I-8 and then go up the stairs to the 2nd map. On this map, head to the exit at G-7 and zone over onto the next map. On the next map head north to I-7 and zone over to yet another map. Now head to the SE corner of H-9 and open the brass door and receive the 2nd password from the statue.
- Third password: Proceed back along the same path to the 3rd map. The 3rd statue is located on the NW corner of I-8. If you've never experienced this section of the map before there are blocker points preventing most of the "obvious" paths and forcing you to walk around the outside.
- From the 3rd statue point head to the 4 lever door at the SW corner of G-8. You can find the current combination of the levers at the dead-end at (I-10). If you were not aggroed before you will be once going through this door, plan accordingly!
- Once through the door, head up the stairs and zone over (G-9) onto a new map.
- This part is pretty straightforward: just remain invisible, don't step on the Yagudo Parasites (leeches), and proceed to the next map at H-11.
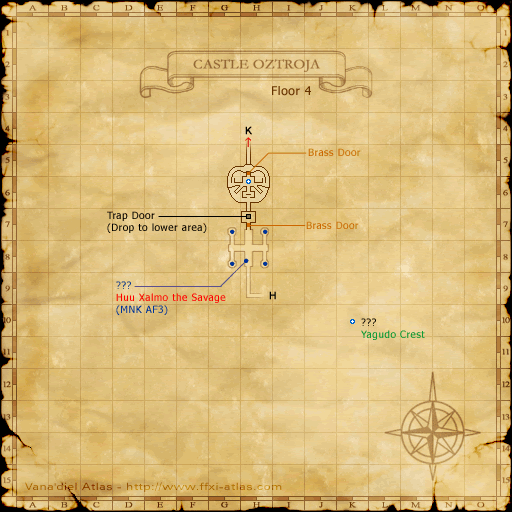
- You want to proceed through the Brass door at H-7 from here. In order to open it, someone must light one of the 4 torches at G-7, G-8, H-7, or H-8. If you brought help that has NOT done Magicite (Mission 4) you can light the torch while they pass through the Brass door. Then they can let you in with the lever behind the Brass door. There are no mobs behind the Brass door but you do not want to bring aggro mobs with you as you need time to work the mechanism. It is recommended that a Thief with Hide to attempt to light the torches, as Hide works against Yagudo. Be forewarned; there are high level Yagudo at all 4 torches. It is recommended to light a torch that does not have a Yagudo Prelate near it, or only 2 Yagudo instead of 3, and if using the Reraise strategy without Invisible, stay as far away from Prelates as possible so as not to have Blind status.
- Once through the brass door, there will be a wooden plank with a red circle (trap door) in front of a Brass Statue. Have everyone stand on the plank. Click on the statue and input the passwords in the order shown on the Vana'diel Atlas maps. The trap door will open and everyone will fall through to the bottom. Don't worry about invisibility, as the bottom of the trap door is safe.
- Once everyone has dropped down through the trap door, recast invisibility, and run down the long corridor leading to a large room with a series of ramps up to a center platform and a higher rear platform. The ??? to get the Yagudo crest is located on the lower central platform. At this point you'll need to keep a lookout for the Yagudo NM High Priest.
- Invisible will work on all the Yagudo in this area except the Notorious Monsters. Tzee Xicu the Manifest, Yagudo Avatar, Yagudo High Priest & Yagudo Templar all have True Sight, so make sure you're well away from their sight line as they will attack when they see you.
- Wait for the Yagudo NM to be sufficiently far away from the center platform, then travel up the ramps to the center platform, standing behind any regular Yagudo which may be on that platform, drop invis, click the ??? and re-invis.
- If going in a large group, it is recommended to send people up one at a time. This way, if they get aggro, they can run to the base of the ramp and get KO'd within tractor range.
- Once you have the three crests, return to Maat.
(see videos)
Game Description
- Client
- Maat (Grand Duke Palace, Ru'Lude Gardens)
- Summary
- Your innate limits can be pushed further by collecting the crests of the Orcs, the Quadav, and the Yagudo.

