No edit summary |
mNo edit summary |
||
| (34 intermediate revisions by 26 users not shown) | |||
| Line 1: | Line 1: | ||
| + | [[category:guides]][[Category:NPCs]] |
||
| ⚫ | |||
| + | The chart below shows the Weather Type term the [[Weather Reporter]] NPC would use, and the corresponding in-game Icon. |
||
| + | |||
| + | {|border="0" cellpadding="1" width="40%" |
||
| + | ! style="background:#ffdead;" align="center" width="30%" |Icon |
||
| + | ! style="background:#ffdead;" align="center" width="70%" |Weather Type |
||
| ⚫ | |||
| + | |BGCOLOR="#e0e0e0" align="center"|no Icon |
||
| + | |BGCOLOR="#e0e0e0" align="center"|Sunny/Sunshine/Fair/Fog/Clouds |
||
| + | |- |
||
| + | |BGCOLOR="#ffd9d9" align="center"|{{Resist Fire}}-{{Resist Fire}}{{Resist Fire}} [[Fire (Element)|Fire]] |
||
| + | |BGCOLOR="#ffd9d9" align="center"|Hot Spells/Heat Waves |
||
| + | |- |
||
| + | |BGCOLOR="#fff9bb" align="center"|{{Resist Earth}}-{{Resist Earth}}{{Resist Earth}} [[Earth]] |
||
| + | |BGCOLOR="#fff9bb" align="center"|Dust Storms/Sand Storms |
||
| + | |- |
||
| + | |BGCOLOR="#e3e6ff" align="center"|{{Resist Water}}-{{Resist Water}}{{Resist Water}} [[Water (Element)|Water]] |
||
| + | |BGCOLOR="#e3e6ff" align="center"|Rain/Squalls |
||
| + | |- |
||
| + | |BGCOLOR="#daffcb" align="center"|{{Resist Wind}}-{{Resist Wind}}{{Resist Wind}} [[Wind]] |
||
| + | |BGCOLOR="#daffcb" align="center"|Winds/Gales |
||
| + | |- |
||
| + | |BGCOLOR="#e3e6ff" align="center"|{{Resist Ice}}-{{Resist Ice}}{{Resist Ice}} [[Ice]] |
||
| + | |BGCOLOR="#e3e6ff" align="center"|Snow/Blizzards |
||
| + | |- |
||
| + | |BGCOLOR="#fdcbff" align="center"|{{Resist Lightning}}-{{Resist Lightning}}{{Resist Lightning}} [[Lightning]] |
||
| + | |BGCOLOR="#fdcbff" align="center"|Thunder/Thunderstorms |
||
| + | |- |
||
| + | |BGCOLOR="#fff1e7" align="center"|{{Resist Light}}-{{Resist Light}}{{Resist Light}} [[Light]] |
||
| + | |BGCOLOR="#fff1e7" align="center"|Auroras/Stellar Glare |
||
| + | |- |
||
| + | |BGCOLOR="#e0e0e0" align="center"|{{Resist Dark}}-{{Resist Dark}}{{Resist Dark}} [[Dark]] |
||
| + | |BGCOLOR="#e0e0e0" align="center"|Gloom/Miasma |
||
| + | |} |
||
| + | |||
| + | |||
| ⚫ | |||
{| border="1" cellpadding="2" width="100%" |
{| border="1" cellpadding="2" width="100%" |
||
| Line 7: | Line 43: | ||
|- |
|- |
||
|[[Amaja-Kumaja]] |
|[[Amaja-Kumaja]] |
||
| − | | |
+ | |{{Location|Rabao|F-8}} |
| − | | |
+ | | |
| + | *[[Valkurm Dunes]] |
||
| + | *[[Cape Teriggan]] |
||
| + | *[[Eastern Altepa Desert|Eastern]] and [[Western Altepa Desert]] |
||
|- |
|- |
||
|[[Appollonia]] |
|[[Appollonia]] |
||
| − | | |
+ | |{{Location|Upper Jeuno|G-6}} |
| − | | |
+ | | |
*[[Pashhow Marshlands]] |
*[[Pashhow Marshlands]] |
||
| − | *[[Valkurm Dunes |
+ | *[[Valkurm Dunes]] |
| − | *[[Jugner Forest |
+ | *[[Jugner Forest]] |
| − | *[[Batallia Downs |
+ | *[[Batallia Downs]] |
| − | *[[Rolanberry Fields |
+ | *[[Rolanberry Fields]] |
| − | *[[Meriphataud Mountains |
+ | *[[Meriphataud Mountains]] |
| − | *[[Sauromugue Champaign |
+ | *[[Sauromugue Champaign]] |
| − | *[[The Sanctuary of Zi'Tah |
+ | *[[The Sanctuary of Zi'Tah]] |
| − | *[[Qufim Island |
+ | *[[Qufim Island]] |
*[[Jeuno]] |
*[[Jeuno]] |
||
|- |
|- |
||
|[[Eya Bhithroh]] |
|[[Eya Bhithroh]] |
||
| − | | |
+ | |{{Location|Port Windurst|M-7}} |
| − | | |
+ | | |
| − | *[[East Sarutabaruta |
+ | *[[East Sarutabaruta]] |
| − | *[[West Sarutabaruta |
+ | *[[West Sarutabaruta]] |
| − | *[[Tahrongi Canyon |
+ | *[[Tahrongi Canyon]] |
| − | *[[Buburimu Peninsula |
+ | *[[Buburimu Peninsula]] |
| − | *[[Meriphataud Mountains |
+ | *[[Meriphataud Mountains]] |
|- |
|- |
||
|[[Fo Mocorho]] |
|[[Fo Mocorho]] |
||
| − | | |
+ | |{{Location|Port Bastok|J-11}} |
| |
| |
||
| + | *[[Valkurm Dunes]] |
||
| + | *[[Gustaberg]] |
||
| + | *[[Konschtat Highlands]] |
||
*[[Pashhow Marshlands]] |
*[[Pashhow Marshlands]] |
||
| + | *[[Rabao]] |
||
| + | *[[Eastern Altepa Desert|Eastern]] and [[Western Altepa Desert]] |
||
|- |
|- |
||
|[[Furan-Furin]] |
|[[Furan-Furin]] |
||
| − | | |
+ | |{{Location|Windurst Waters|map = North|F-8}} |
| |
| |
||
| − | *[[East Sarutabaruta |
+ | *[[East Sarutabaruta]] |
| − | *[[West Sarutabaruta |
+ | *[[West Sarutabaruta]] |
| − | *[[Tahrongi Canyon |
+ | *[[Tahrongi Canyon]] |
| − | *[[Buburimu Peninsula |
+ | *[[Buburimu Peninsula]] |
*[[Meriphataud Mountains]] |
*[[Meriphataud Mountains]] |
||
|- |
|- |
||
|[[Gennoue]] |
|[[Gennoue]] |
||
| − | | |
+ | |{{Location|Tavnazian Safehold|H-8}} |
| − | | |
+ | | |
| + | *[[Tavnazian Archipelago]] |
||
| + | *[[Riverne - Site A01]] and [[Riverne - Site B01]] |
||
| + | |- |
||
| + | |[[Inthius]] |
||
| + | |{{Location|Eastern Adoulin|F-9}} |
||
| + | | |
||
| + | * [[Ceizak Battlegrounds]] |
||
| + | * [[Yahse Hunting Grounds]] |
||
| + | * [[Foret de Hennetiel]] |
||
| + | * [[Morimar Basalt Fields]] |
||
| + | * [[Yorcia Weald]] |
||
| + | * [[Marjami Ravine]] |
||
| + | * [[Kamihr Drifts]] |
||
|- |
|- |
||
|[[Leffquen]] |
|[[Leffquen]] |
||
| − | | |
+ | |{{Location|Port Jeuno|K-8}} |
| − | | |
+ | | |
*[[Pashhow Marshlands]] |
*[[Pashhow Marshlands]] |
||
| − | *[[Valkurm Dunes |
+ | *[[Valkurm Dunes]] |
*[[Jugner Forest]] |
*[[Jugner Forest]] |
||
*[[Batallia Downs]] |
*[[Batallia Downs]] |
||
*[[Rolanberry Fields]] |
*[[Rolanberry Fields]] |
||
| − | *[[Meriphataud Mountains |
+ | *[[Meriphataud Mountains]] |
| − | *[[Sauromugue Champaign |
+ | *[[Sauromugue Champaign]] |
| − | *[[The Sanctuary of Zi'Tah |
+ | *[[The Sanctuary of Zi'Tah]] |
*[[Qufim]] |
*[[Qufim]] |
||
*[[Jeuno]] |
*[[Jeuno]] |
||
|- |
|- |
||
|[[Maleme]] |
|[[Maleme]] |
||
| − | | |
+ | |{{Location|Southern San d'Oria|J-8}} |
| |
| |
||
*[[Ronfaure]] |
*[[Ronfaure]] |
||
| Line 77: | Line 134: | ||
|- |
|- |
||
|[[Mariadok]] |
|[[Mariadok]] |
||
| − | | |
+ | |{{Location|Bastok Mines|I-9}} |
| |
| |
||
*[[Pashhow Marshlands]] |
*[[Pashhow Marshlands]] |
||
| − | *[[Valkurm Dunes |
+ | *[[Valkurm Dunes]] |
| − | *[[Gustaberg |
+ | *[[Gustaberg]] |
| − | *[[Konschtat Highlands |
+ | *[[Konschtat Highlands]] |
*[[Eastern Altepa Desert]] |
*[[Eastern Altepa Desert]] |
||
*[[Western Altepa Desert]] |
*[[Western Altepa Desert]] |
||
|- |
|- |
||
|[[Mushuhi-Metahi]] |
|[[Mushuhi-Metahi]] |
||
| − | | |
+ | |{{Location|Windurst Woods|K-12}} |
| − | | |
+ | | |
| − | *[[Sarutabaruta |
+ | *[[Sarutabaruta]] |
| − | *[[Tahrongi Canyon |
+ | *[[Tahrongi Canyon]] |
| − | *[[Buburimu Peninsula |
+ | *[[Buburimu Peninsula]] |
*[[Meriphataud Mountains]] |
*[[Meriphataud Mountains]] |
||
|- |
|- |
||
|[[Pekuku]] |
|[[Pekuku]] |
||
| − | | |
+ | |{{Location|Mhaura|H-9}} |
| − | | |
+ | | |
| + | *[[Sarutabaruta]] |
||
| + | *[[Tahrongi Canyon]] |
||
| + | *[[Buburimu Peninsula]] |
||
| + | *[[Meriphataud Mountains]] |
||
| + | *[[The Sanctuary of Zi'Tah]] |
||
| + | *[[Ferry]] |
||
| + | *[[Jeuno]] |
||
| + | |- |
||
| + | |[[Sajaaya]] |
||
| + | |{{Location|Aht Urhgan Whitegate|H-9}} |
||
| + | | |
||
| + | *[[Wajaom Woodlands]] |
||
| + | *[[Bhaflau Thickets]] |
||
| + | *[[Mount Zhayolm]] |
||
| + | *[[Caedarva Mire]] |
||
|- |
|- |
||
|[[Shashan-Mishan]] |
|[[Shashan-Mishan]] |
||
| − | | |
+ | |{{Location|Lower Jeuno|F-11}} |
| − | | |
+ | | |
*[[Pashhow Marshlands]] |
*[[Pashhow Marshlands]] |
||
| − | *[[Valkurm Dunes |
+ | *[[Valkurm Dunes]] |
| − | *[[Jugner Forest |
+ | *[[Jugner Forest]] |
| − | *[[ |
+ | *[[Batallia Downs]] |
| − | *[[Rolanberry |
+ | *[[Rolanberry Fields]] |
| − | *[[Meriphataud Mountains |
+ | *[[Meriphataud Mountains]] |
| − | *[[Sauromugue Champaign |
+ | *[[Sauromugue Champaign]] |
| − | *[[Sanctuary of Zi' |
+ | *[[The Sanctuary of Zi'Tah]] |
| − | *[[Qufim Island |
+ | *[[Qufim Island]] |
*[[Jeuno]] |
*[[Jeuno]] |
||
|- |
|- |
||
|[[Shidzue]] |
|[[Shidzue]] |
||
| − | | |
+ | |{{Location|Norg|H-9}} |
| − | | |
+ | | |
| + | *[[Yuhtunga Jungle]] and [[Yhoator Jungle]] |
||
| + | *[[Ferry]] |
||
| + | *[[Jeuno]] |
||
|- |
|- |
||
|[[Svana]] |
|[[Svana]] |
||
| − | | |
+ | |{{Location|Bastok Markets|H-10}} |
| |
| |
||
| + | *[[Valkurm Dunes]] |
||
| + | *[[Gustaberg]] |
||
| + | *[[Konschtat Highlands]] |
||
*[[Pashhow Marshlands]] |
*[[Pashhow Marshlands]] |
||
| + | *[[Rabao]] |
||
| + | *[[Eastern Altepa Desert|Eastern]] and [[Western Altepa Desert]] |
||
|- |
|- |
||
|[[Tcinono]] |
|[[Tcinono]] |
||
| − | | |
+ | |{{Location|Kazham|G-7}} |
| − | | |
+ | | |
*[[Yuhtunga Jungle]] |
*[[Yuhtunga Jungle]] |
||
*[[Yhoator Jungle]] |
*[[Yhoator Jungle]] |
||
| Line 129: | Line 209: | ||
|- |
|- |
||
|[[Wachiwi]] |
|[[Wachiwi]] |
||
| − | | |
+ | |{{Location|Selbina|H-9}} |
| |
| |
||
*[[Pashhow Marshlands]] |
*[[Pashhow Marshlands]] |
||
*[[Ronfaure]] (East and West) |
*[[Ronfaure]] (East and West) |
||
| − | *[[La Theine Plateau |
+ | *[[La Theine Plateau]] |
| − | *[[Valkurm Dunes |
+ | *[[Valkurm Dunes]] |
| − | *[[Jugner Forest |
+ | *[[Jugner Forest]] |
| − | *[[Batallia Downs |
+ | *[[Batallia Downs]] |
*[[Gustaberg]] (North and South) |
*[[Gustaberg]] (North and South) |
||
| − | *[[Konschtat Highlands |
+ | *[[Konschtat Highlands]] |
| − | *[[Rolanberry Fields |
+ | *[[Rolanberry Fields]] |
| − | *[[Cape Teriggan |
+ | *[[Cape Teriggan]] |
| − | *[[Ferry |
+ | *[[Ferry]] |
| − | *[[Jeuno |
+ | *[[Jeuno]] |
| ⚫ | |||
|} |
|} |
||
Latest revision as of 21:22, 13 April 2018
The chart below shows the Weather Type term the Weather Reporter NPC would use, and the corresponding in-game Icon.
| Icon | Weather Type |
|---|---|
| no Icon | Sunny/Sunshine/Fair/Fog/Clouds |
| Hot Spells/Heat Waves | |
| Dust Storms/Sand Storms | |
| Rain/Squalls | |
| Winds/Gales | |
| Snow/Blizzards | |
| Thunder/Thunderstorms | |
| Auroras/Stellar Glare | |
| Gloom/Miasma |
The following NPCs will forecast the weather around Vana'diel. This can help to locate where Elementals will spawn and also help complete the quests Get the Picture, I Can Hear a Rainbow, Recollections and Trial of the Magians.
| Name | Location | Forecast Zones |
|---|---|---|
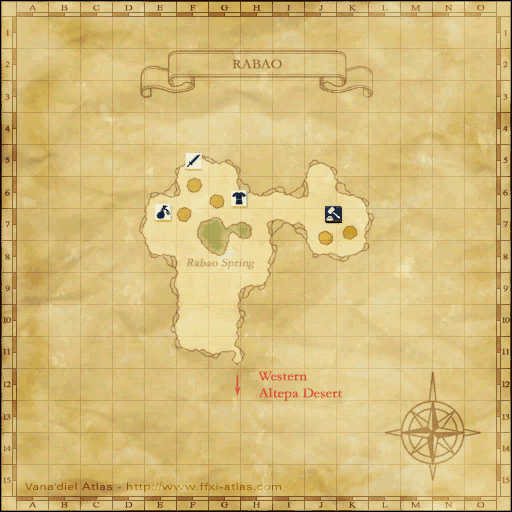
| Amaja-Kumaja | Rabao (F-8) | |
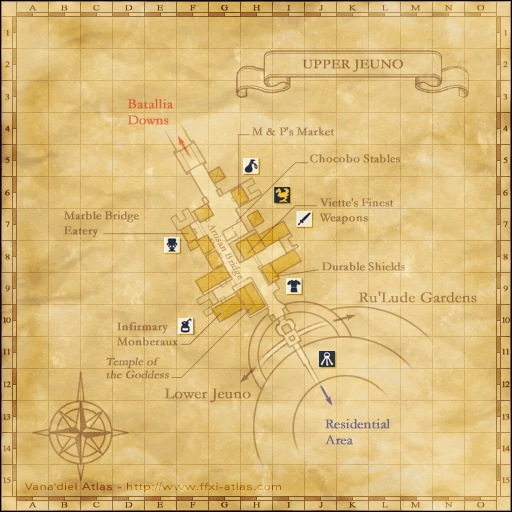
| Appollonia | Upper Jeuno (G-6) | |
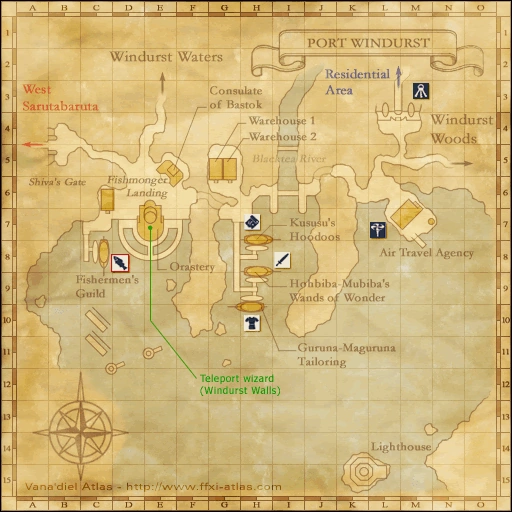
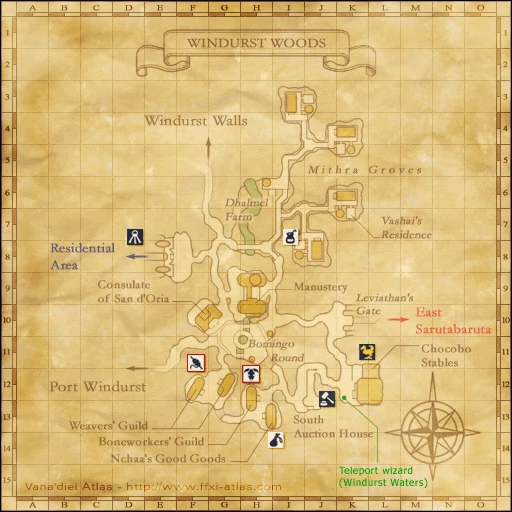
| Eya Bhithroh | Port Windurst (M-7) | |
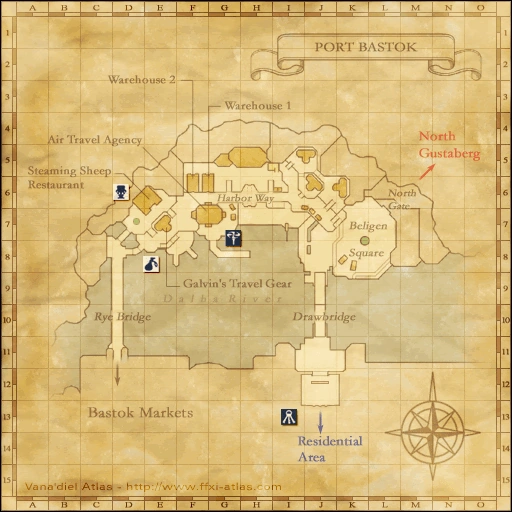
| Fo Mocorho | Port Bastok (J-11) | |
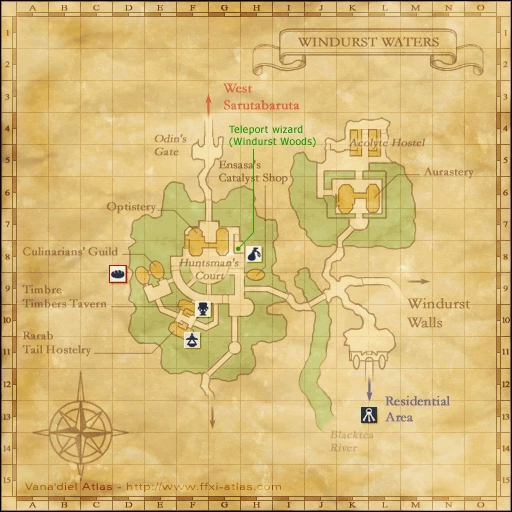
| Furan-Furin | Windurst Waters, North (F-8) | |
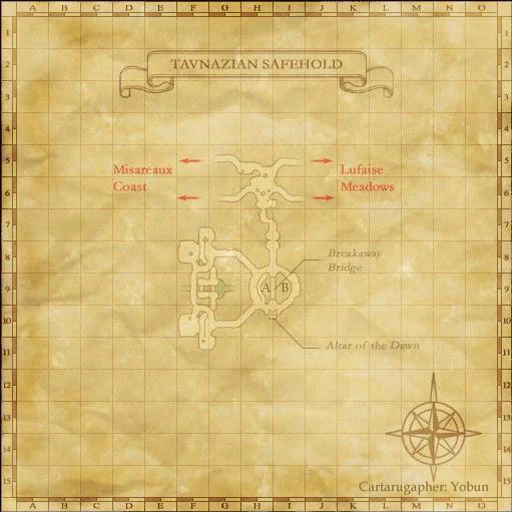
| Gennoue | Tavnazian Safehold (H-8) | |
| Inthius | Eastern Adoulin (F-9) | |
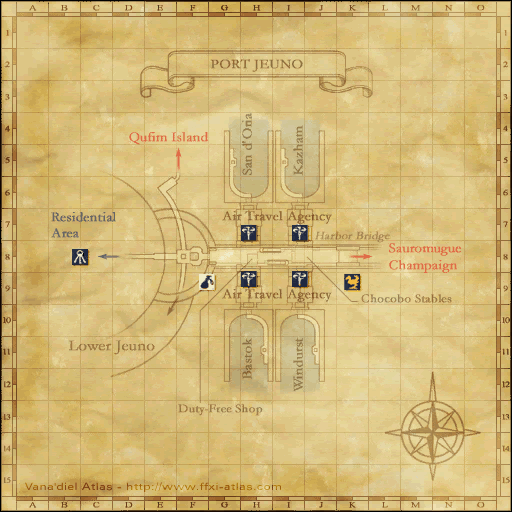
| Leffquen | Port Jeuno (K-8) | |
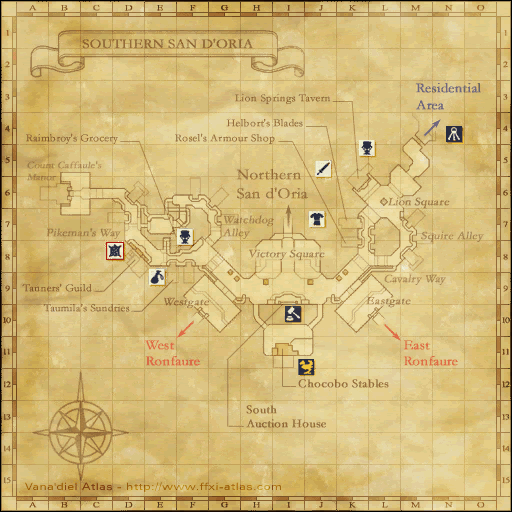
| Maleme | Southern San d'Oria (J-8) | |
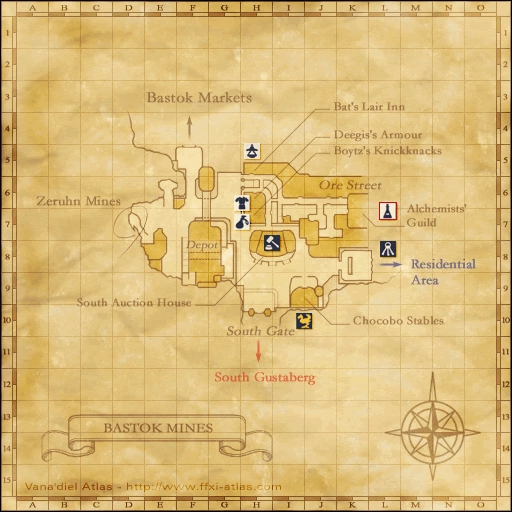
| Mariadok | Bastok Mines (I-9) | |
| Mushuhi-Metahi | Windurst Woods (K-12) | |
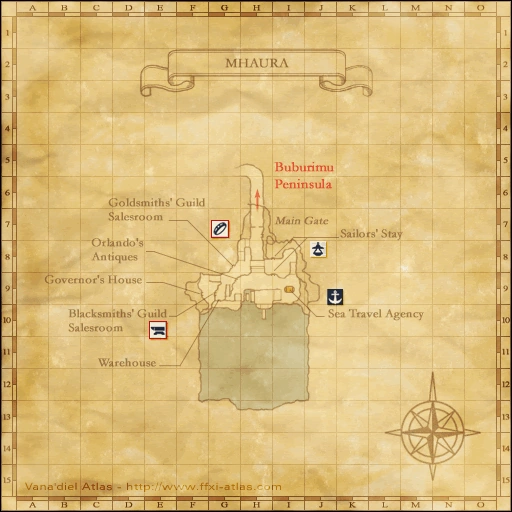
| Pekuku | Mhaura (H-9) | |
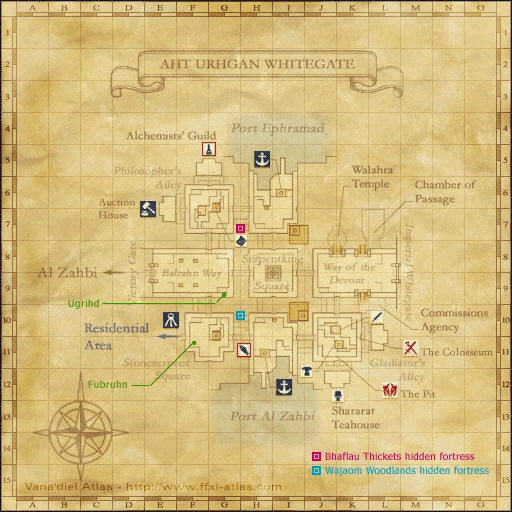
| Sajaaya | Aht Urhgan Whitegate (H-9) | |
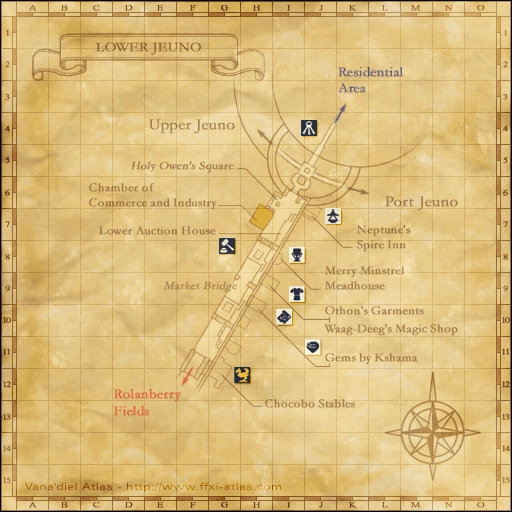
| Shashan-Mishan | Lower Jeuno (F-11) | |
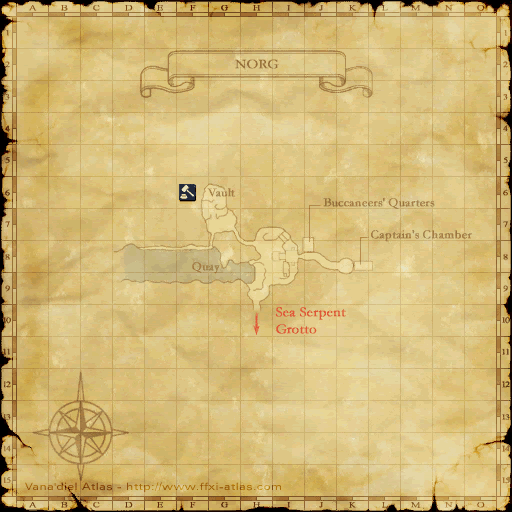
| Shidzue | Norg (H-9) | |
| Svana | Bastok Markets (H-10) | |
| Tcinono | Kazham (G-7) | |
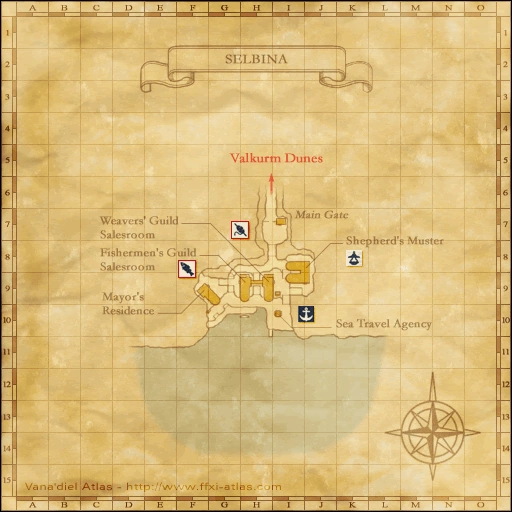
| Wachiwi | Selbina (H-9) |
|