(→Treasure: Added all coin types to mob drop and armoury crate treasure) |
(Added +1 drop items.) |
||
| (14 intermediate revisions by 11 users not shown) | |||
| Line 1: | Line 1: | ||
{|cellpadding="5" width="80%" cellspacing="4" cellpadding="0" |
{|cellpadding="5" width="80%" cellspacing="4" cellpadding="0" |
||
|valign="top" BGCOLOR="#e3e6ff"| '''Requirements:''' |
|valign="top" BGCOLOR="#e3e6ff"| '''Requirements:''' |
||
| − | |valign="top" BGCOLOR="#E0E0E0"| Level 70 |
+ | |valign="top" BGCOLOR="#E0E0E0"| Level 70 minimum. |
|- |
|- |
||
|valign="top" BGCOLOR="#e3e6ff"| '''Monsters:''' |
|valign="top" BGCOLOR="#e3e6ff"| '''Monsters:''' |
||
| Line 15: | Line 15: | ||
==Treasure== |
==Treasure== |
||
{|cellpadding="5" width="80%" cellspacing="3" cellpadding="0" |
{|cellpadding="5" width="80%" cellspacing="3" cellpadding="0" |
||
| − | |valign="top" rowspan="8" BGCOLOR="#e3e6ff"| |
+ | |valign="top" rowspan="8" BGCOLOR="#e3e6ff"|'''Drops:''' |
| − | |valign="top" BGCOLOR="#E0E0E0"| |
+ | |valign="top" BGCOLOR="#E0E0E0"|[[Coin of Advancement]] |
|- |
|- |
||
| − | |valign="top" BGCOLOR="#E0E0E0"| |
+ | |valign="top" BGCOLOR="#E0E0E0"|[[Clot Plasma]] |
|- |
|- |
||
| − | |valign="top" BGCOLOR="#E0E0E0"| |
+ | |valign="top" BGCOLOR="#E0E0E0"|[[Coin of Birth]] |
|- |
|- |
||
| − | |valign="top" BGCOLOR="#E0E0E0"| |
+ | |valign="top" BGCOLOR="#E0E0E0"|[[Coin of Decay]] |
|- |
|- |
||
| − | |valign="top" BGCOLOR="#E0E0E0"| |
+ | |valign="top" BGCOLOR="#E0E0E0"|[[Coin of Glory]] |
|- |
|- |
||
| − | |valign="top" BGCOLOR="#E0E0E0"| |
+ | |valign="top" BGCOLOR="#E0E0E0"|[[Coin of Ruin]] |
|- |
|- |
||
| − | |valign="top" BGCOLOR="#E0E0E0"| |
+ | |valign="top" BGCOLOR="#E0E0E0"|[[Slime Juice]] |
|- |
|- |
||
| − | |valign="top" BGCOLOR="#E0E0E0"| |
+ | |valign="top" BGCOLOR="#E0E0E0"|[[Slime Oil]] |
|- |
|- |
||
| − | |valign="top" rowspan=" |
+ | |valign="top" rowspan="13" BGCOLOR="#e3e6ff"|'''Armoury Crate (Top 5):''' |
| − | |valign="top" BGCOLOR="#E0E0E0"| |
+ | |valign="top" BGCOLOR="#E0E0E0"|[[Beech Log]] |
|- |
|- |
||
| − | |valign="top" BGCOLOR="#E0E0E0"| |
+ | |valign="top" BGCOLOR="#E0E0E0"|[[Clarite]] |
|- |
|- |
||
| − | |valign="top" BGCOLOR="#E0E0E0"| |
+ | |valign="top" BGCOLOR="#E0E0E0"|[[Felicitas Cape]] |
|- |
|- |
||
| − | |valign="top" BGCOLOR="#E0E0E0"| |
+ | |valign="top" BGCOLOR="#E0E0E0"|[[Frayed Pouch of Advancement]] |
|- |
|- |
||
| − | |valign="top" BGCOLOR="#E0E0E0"| |
+ | |valign="top" BGCOLOR="#E0E0E0"|[[Frayed Pouch of Birth]] |
|- |
|- |
||
| − | |valign="top" BGCOLOR="#E0E0E0"| |
+ | |valign="top" BGCOLOR="#E0E0E0"|[[Frayed Pouch of Glory]] (up to 2) |
|- |
|- |
||
| − | |valign="top" BGCOLOR="#E0E0E0"| |
+ | |valign="top" BGCOLOR="#E0E0E0"|[[Frayed Pouch of Decay]] |
|- |
|- |
||
| − | |valign="top" BGCOLOR="#E0E0E0"| |
+ | |valign="top" BGCOLOR="#E0E0E0"|[[Frayed Pouch of Ruin]] |
|- |
|- |
||
| − | |valign="top" BGCOLOR="#E0E0E0"| |
+ | |valign="top" BGCOLOR="#E0E0E0"|[[Fulmenite]] |
|- |
|- |
||
| − | |valign="top" BGCOLOR="#E0E0E0"| |
+ | |valign="top" BGCOLOR="#E0E0E0"|[[Aventurine]] |
|- |
|- |
||
| − | |valign="top" BGCOLOR="#E0E0E0"| |
+ | |valign="top" BGCOLOR="#E0E0E0"|[[Durium Ore]] |
|- |
|- |
||
| − | |valign="top" BGCOLOR="#E0E0E0"| |
+ | |valign="top" BGCOLOR="#E0E0E0"|[[Orichalcum Ore]] |
|- |
|- |
||
| − | |valign="top |
+ | |valign="top" BGCOLOR="#E0E0E0"|[[Rainbow Cloth]] |
| ⚫ | |||
|- |
|- |
||
| − | |valign="top" BGCOLOR="# |
+ | |valign="top" rowspan="31" BGCOLOR="#e3e6ff"|'''Armoury Crate (Boss):''' |
| ⚫ | |||
|- |
|- |
||
| − | |valign="top" BGCOLOR="#E0E0E0"| |
+ | |valign="top" BGCOLOR="#E0E0E0"|[[Adaman Ore]] |
|- |
|- |
||
| − | |valign="top" BGCOLOR="#E0E0E0"| |
+ | |valign="top" BGCOLOR="#E0E0E0"|[[Ancient Beast Horn]] |
|- |
|- |
||
| − | |valign="top" BGCOLOR="#E0E0E0"| |
+ | |valign="top" BGCOLOR="#E0E0E0"|[[Army's Paeon VI]] |
|- |
|- |
||
| − | |valign="top" BGCOLOR="#E0E0E0"| |
+ | |valign="top" BGCOLOR="#E0E0E0"|[[Austerity Belt]] (up to 4) /[[Austerity Belt +1]] |
|- |
|- |
||
| − | |valign="top" BGCOLOR="#E0E0E0"| |
+ | |valign="top" BGCOLOR="#E0E0E0"|[[Baramnesra]] |
|- |
|- |
||
| − | |valign="top" BGCOLOR="#E0E0E0"| |
+ | |valign="top" BGCOLOR="#E0E0E0"|[[Beech Log]] |
|- |
|- |
||
| − | |valign="top" BGCOLOR="#E0E0E0"| |
+ | |valign="top" BGCOLOR="#E0E0E0"|[[Beech Lumber]] |
|- |
|- |
||
| − | |valign="top" BGCOLOR="#E0E0E0"| |
+ | |valign="top" BGCOLOR="#E0E0E0"|[[Carnelian]] |
|- |
|- |
||
| − | |valign="top" BGCOLOR="#E0E0E0"| |
+ | |valign="top" BGCOLOR="#E0E0E0"|[[Clarite]] |
|- |
|- |
||
| − | |valign="top" BGCOLOR="#E0E0E0"| |
+ | |valign="top" BGCOLOR="#E0E0E0"|[[Durium Ore]] (up to 2) |
|- |
|- |
||
| − | |valign="top" BGCOLOR="#E0E0E0"| |
+ | |valign="top" BGCOLOR="#E0E0E0"|[[Eidolon Pendant]] (up to 2) /[[Eidolon Pendant +1]] |
|- |
|- |
||
| − | |valign="top" BGCOLOR="#E0E0E0"| |
+ | |valign="top" BGCOLOR="#E0E0E0"|[[Felicitas Cape]] (up to 3) /[[Felicitas Cape +1]] |
|- |
|- |
||
| − | |valign="top" BGCOLOR="#E0E0E0"| |
+ | |valign="top" BGCOLOR="#E0E0E0"|[[Fiendish Skin]] |
|- |
|- |
||
| − | |valign="top" BGCOLOR="#E0E0E0"| |
+ | |valign="top" BGCOLOR="#E0E0E0"|[[Flocon-de-mer]] |
|- |
|- |
||
| − | |valign="top" BGCOLOR="#E0E0E0"| |
+ | |valign="top" BGCOLOR="#E0E0E0"|[[Foe Requiem VII]] |
|- |
|- |
||
| − | |valign="top" BGCOLOR="#E0E0E0"| |
+ | |valign="top" BGCOLOR="#E0E0E0"|[[Frayed Pouch of Advancement]] |
|- |
|- |
||
| − | |valign="top" BGCOLOR="#E0E0E0"| |
+ | |valign="top" BGCOLOR="#E0E0E0"|[[Frayed Pouch of Birth]] (Up to 2) |
|- |
|- |
||
| − | |valign="top" BGCOLOR="#E0E0E0"| |
+ | |valign="top" BGCOLOR="#E0E0E0"|[[Frayed Pouch of Decay]] (up to 3) |
|- |
|- |
||
| − | |valign="top" BGCOLOR="#E0E0E0"| |
+ | |valign="top" BGCOLOR="#E0E0E0"|[[Frayed Pouch of Glory]] |
|- |
|- |
||
| − | |valign="top" BGCOLOR="#E0E0E0"| |
+ | |valign="top" BGCOLOR="#E0E0E0"|[[Frayed Pouch of Ruin]] |
|- |
|- |
||
| − | |valign="top" BGCOLOR="#E0E0E0"| |
+ | |valign="top" BGCOLOR="#E0E0E0"|[[Fulmenite]] |
|- |
|- |
||
| − | |valign="top" BGCOLOR="#E0E0E0"| |
+ | |valign="top" BGCOLOR="#E0E0E0"|[[Heliodor]] |
|- |
|- |
||
| − | |valign="top" BGCOLOR="#E0E0E0"| |
+ | |valign="top" BGCOLOR="#E0E0E0"|[[Orichalcum Ore]] |
|- |
|- |
||
| − | |valign="top" BGCOLOR="#E0E0E0"| |
+ | |valign="top" BGCOLOR="#E0E0E0"|[[Phrygian Ore]] (up to 3) |
|- |
|- |
||
| − | |valign="top" BGCOLOR="#E0E0E0"| |
+ | |valign="top" BGCOLOR="#E0E0E0"|[[Rainbow Cloth]] (up to 2){{Verification2}} |
|- |
|- |
||
| − | |valign="top" BGCOLOR="#E0E0E0"| |
+ | |valign="top" BGCOLOR="#E0E0E0"|[[Sasuke Tekko]] |
|- |
|- |
||
| − | |valign="top" BGCOLOR="#E0E0E0"| |
+ | |valign="top" BGCOLOR="#E0E0E0"|[[Selenite]] |
|- |
|- |
||
| − | |valign="top" BGCOLOR="#E0E0E0"| |
+ | |valign="top" BGCOLOR="#E0E0E0"|[[Stone V]] |
|- |
|- |
||
| − | |valign="top" BGCOLOR="#E0E0E0"| |
+ | |valign="top" BGCOLOR="#E0E0E0"|[[Water Spider's Web]] |
| + | |- |
||
| + | |valign="top" BGCOLOR="#E0E0E0"|[[Wyvern Tailskin]] |
||
|- |
|- |
||
|} |
|} |
||
== Information == |
== Information == |
||
| − | * As of the September 2010 update, monster AI behavior has been altered. Single monsters are pullable without a sac-pull, however monsters do link |
+ | * As of the September 2010 update, monster AI behavior has been altered. Single monsters are pullable without a sac-pull, however monsters do link. |
* Only the boss needs to be defeated four times in order to win. Doing so will instantly kill all other monsters. |
* Only the boss needs to be defeated four times in order to win. Doing so will instantly kill all other monsters. |
||
* Nearby slimes will be attracted to death spot of any slime that is killed. It is recommended to kill slimes in isolated areas and away from pathway so that noone will aggro incoming slimes (aggro range ~16'). |
* Nearby slimes will be attracted to death spot of any slime that is killed. It is recommended to kill slimes in isolated areas and away from pathway so that noone will aggro incoming slimes (aggro range ~16'). |
||
* [[Morbid Mollasses]] can be isolated from the group of slimes by having a puller (outside of alliance) face aggro and kite the slimes away from the alliance while the alliance grabs the [[Morbid Mollasses]] to a safe position to fight. |
* [[Morbid Mollasses]] can be isolated from the group of slimes by having a puller (outside of alliance) face aggro and kite the slimes away from the alliance while the alliance grabs the [[Morbid Mollasses]] to a safe position to fight. |
||
| − | * Berry Syrups are resistant to physical damage. |
+ | * Berry Syrups are <strike>resistant</strike> immune to physical damage. |
* Morbid Molasses casts [[Dispelga]] [[Sleepga II]] and [[Bindga]]. |
* Morbid Molasses casts [[Dispelga]] [[Sleepga II]] and [[Bindga]]. |
||
* All monsters are immune to [[Sleep]]. |
* All monsters are immune to [[Sleep]]. |
||
| − | * Title Granted: Torchbeared of the 2nd Walk (on 2nd win) |
+ | * Title Granted: Torchbeared of the 2nd Walk (on 2nd win). |
| + | *+1 gear items are only available when a walk becomes a [[surge]] walk. |
||
| − | |||
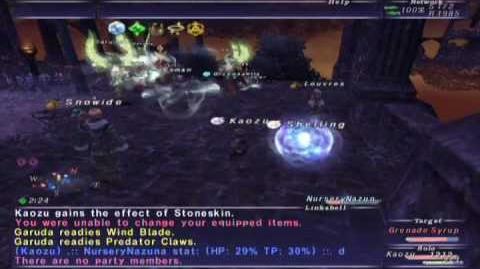
| + | == Video == |
||
| + | [[File:FFXI Walk of Echoes - Conflux 2 (Full Battle)|425px]]<BR><BR> |
||
| − | [[Category:Walk of Echoes Battlefields]][[Category:Battlefields]] |
+ | [[Category:Walk of Echoes Battlefields]][[Category:Battlefields]][[de:Veridical Conflux 2]] |
Revision as of 19:31, 12 June 2020
| Requirements: | Level 70 minimum. |
| Monsters: | Berry Syrup x4, Grenade Syrup x16 |
| Boss: | Morbid Mollasses x4 |
| Reward: | |
Treasure
| Drops: | Coin of Advancement |
| Clot Plasma | |
| Coin of Birth | |
| Coin of Decay | |
| Coin of Glory | |
| Coin of Ruin | |
| Slime Juice | |
| Slime Oil | |
| Armoury Crate (Top 5): | Beech Log |
| Clarite | |
| Felicitas Cape | |
| Frayed Pouch of Advancement | |
| Frayed Pouch of Birth | |
| Frayed Pouch of Glory (up to 2) | |
| Frayed Pouch of Decay | |
| Frayed Pouch of Ruin | |
| Fulmenite | |
| Aventurine | |
| Durium Ore | |
| Orichalcum Ore | |
| Rainbow Cloth | |
| Armoury Crate (Boss): | EXP (based on actions) |
| Adaman Ore | |
| Ancient Beast Horn | |
| Army's Paeon VI | |
| Austerity Belt (up to 4) /Austerity Belt +1 | |
| Baramnesra | |
| Beech Log | |
| Beech Lumber | |
| Carnelian | |
| Clarite | |
| Durium Ore (up to 2) | |
| Eidolon Pendant (up to 2) /Eidolon Pendant +1 | |
| Felicitas Cape (up to 3) /Felicitas Cape +1 | |
| Fiendish Skin | |
| Flocon-de-mer | |
| Foe Requiem VII | |
| Frayed Pouch of Advancement | |
| Frayed Pouch of Birth (Up to 2) | |
| Frayed Pouch of Decay (up to 3) | |
| Frayed Pouch of Glory | |
| Frayed Pouch of Ruin | |
| Fulmenite | |
| Heliodor | |
| Orichalcum Ore | |
| Phrygian Ore (up to 3) | |
| Rainbow Cloth (up to 2) | |
| Sasuke Tekko | |
| Selenite | |
| Stone V | |
| Water Spider's Web | |
| Wyvern Tailskin |
Information
- As of the September 2010 update, monster AI behavior has been altered. Single monsters are pullable without a sac-pull, however monsters do link.
- Only the boss needs to be defeated four times in order to win. Doing so will instantly kill all other monsters.
- Nearby slimes will be attracted to death spot of any slime that is killed. It is recommended to kill slimes in isolated areas and away from pathway so that noone will aggro incoming slimes (aggro range ~16').
- Morbid Mollasses can be isolated from the group of slimes by having a puller (outside of alliance) face aggro and kite the slimes away from the alliance while the alliance grabs the Morbid Mollasses to a safe position to fight.
- Berry Syrups are
resistantimmune to physical damage. - Morbid Molasses casts Dispelga Sleepga II and Bindga.
- All monsters are immune to Sleep.
- Title Granted: Torchbeared of the 2nd Walk (on 2nd win).
- +1 gear items are only available when a walk becomes a surge walk.