m (→Walk of Echoes) |
|||
| Line 6: | Line 6: | ||
See [[Category:Walk of Echoes Battlefields]] for more information. |
See [[Category:Walk of Echoes Battlefields]] for more information. |
||
| − | *Also located at (F-5) Grauberg (S) ...ask an SE spy what it's for... <Infidelity 22:35, September 24, 2010 (UTC)> |
+ | *Also located at (F-5) [[Grauberg (S)]] ...ask an SE spy what it's for... <Infidelity 22:35, September 24, 2010 (UTC)> |
==Abyssea== |
==Abyssea== |
||
Revision as of 22:36, 24 September 2010
Walk of Echoes
Used to gain access to Walk of Echoes. Located at (H-9) in Xarcabard (S).
See for more information.
- Also located at (F-5) Grauberg (S) ...ask an SE spy what it's for... <Infidelity 22:35, September 24, 2010 (UTC)>
Abyssea
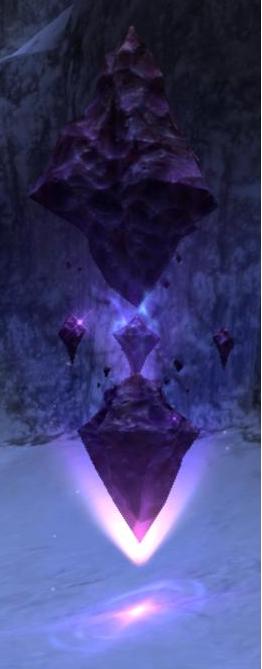
Used to warp to Veridical Conflux in Abyssea by clicking on any Veridical Conflux. In order to use them they must first be activated, which costs variable amounts of Cruor. To warp to the first one costs zero cruor. Once you activate a Conflux, it is permanently activated and you will only need the amount of Cruor required to warp to that specific Conflux.
The activation of Veridical Confluxes within Abyssean areas should be of a particularly high priority for adventurers. Due to Abyssea's vast expanses of land, and the ever-present time restriction of visitant status, high speed transportation is of paramount importance to skilled parties seeking particular goals during their stay in Abyssea. It is recommended to activate as many confluxes as possible within each area, so further excursions to Abyssea will not be hindered by unnecessary traveling time.
The cost to warp between Confluxes must be paid in Cruor, and varies by distance between the two Confluxes being utilized (the sender and receiver). A good rule of thumb to consider is, the greater the physical distance between the two confluxes, the greater the cost in Cruor. Because Cruor costs to use the confluxes vary by distance, each sending conflux will ask for a different amount of Cruor to utilize, which will be relative to the distance it is from the receiving conflux. Note that the return costs listed in the table below are most likely inaccurate, as each conflux has its own variable costs depending on its relative location to the others. There is one exception to this rule however, as Veridical Conflux No. 1 always costs 0 Cruor to return, reguardless of its distance from the sending conflux.
The Ivory Abyssite of Confluence, purchasable for 4800 Cruor, reduces the teleportation cost of all Confluxes by 20%.
- Abyssea - Tahrongi
- No. 1 H-12 (Cost 50 cruor to activate)
- No. 2 H-9 (Cost 100 cruor to activate)
- No. 3 F-9 (Cost 150 cruor to activate)
- No. 4 G-7 (Cost 200 cruor to activate)
- No. 5 H-4 (Cost 250 cruor to activate)
- No. 6 H-6 (Cost 300 cruor to activate)
- No. 7 I-7 (Cost 350 cruor to activate)
- No. 8 J-5 (Cost 400 cruor to activate)
- Abyssea - La Theine
- No. 1 E-3 (cost 50 cruor to activate)
- No. 2 D-8 (Cost 100 cruor to activate)
- No. 3 G-8 (Cost 150 cruor to activate)
- No. 4 H-7 (Cost 200 cruor to activate)
- No. 5 I-10 (Cost 250 cruor to activate)
- No. 6 L-11 (Cost 300 cruor to activate)
- No. 7 K-6 (Cost 350 cruor to activate)
- No. 8 I-9 (Cost 400 cruor to activate)
- Abyssea - Konschtat
- No. 1 J-13 (Cost 50 cruor to activate)
- No. 2 G-10 (Cost 100 cruor to activate)
- No. 3 D-7 (Cost 150 cruor to activate)
- No. 4 H-8 (Cost 200 cruor to activate)
- No. 5 G-6 (Cost 250 cruor to activate)
- No. 6 F-5 (Cost 300 cruor to activate)
- No. 7 K-8 (Cost 350 cruor to activate)
- No. 8 J-4 (Cost 400 cruor to activate)
- Abyssea - Attohwa
- No. 1 H-9
- No. 2 E-8
- No. 3 J-9
- No. 4 D-7
- No. 5 K-8
- No. 6 G-7
- No. 7 K-10 (This one is behind Dark Maisma but it will disapate allowing access to the conflux from the south)
- No. 8 H-8 (Talk to the Guard nearby the Martello)
- No. 0 F-8
(it Helps to use this
Map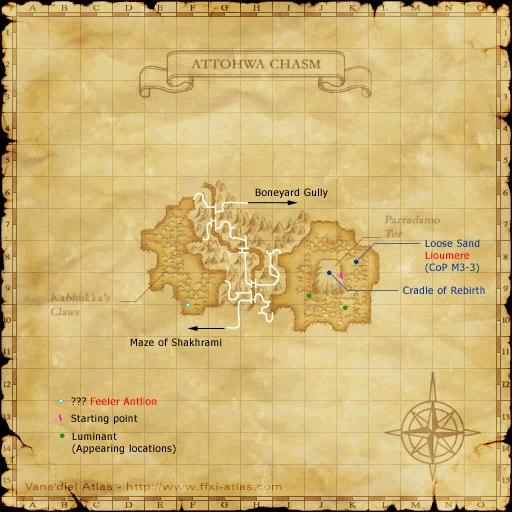
when unlocking confluxes as it has the caves mapped out)
- Abyssea - Misareaux
- No. 1 K-7 (Cost 200 cruor to activate)
- No. 2 J-8 (In the corner at the edge of the cliff)(Cost 400 cruor to activate)
- No. 3 G-7 (Qufim Island warp location) (Cost 600 cruor to activate)
- No. 4 H-10 (Cost 800 cruor to activate)
- No. 5 G-6 (Cost 1000 cruor to activate)
- No. 6 F-7 (Cost 1200 cruor to activate)
- No. 7 I-11 (Cost 1400 cruor to activate)
- No. 8 K-12 (Cost 1600 cruor to activate)
- No. 0 I-7
- Abyssea - Vunkerl
- No. 1 F-4
- No. 2 H-6
- No. 3 J-6
- No. 4 G-9 TS Tauri on the way to this one from the south EM to a lvl 82.
- No. 5 H-11
- No. 6 H-13 (off the map and in a cave, take the south eastern turnoff at g-11)
- No. 7 D-12 (same idea as 6 exept this time u gotta go through the famous blm tiger camp no gigas here though conflux is @ d-12 in the small area simular to where 0 is)
- No. 8 F-6/G-6 (It's far to the SE edge, and difficult to spot, to reach it take a right from the bridge near the djinn camp)
- No. 0 I-9