m (typo) Tag: sourceedit |
(Added Defending Ring per Sovereign Behemoth page.) |
||
| (19 intermediate revisions by 5 users not shown) | |||
| Line 1: | Line 1: | ||
Unity Concord (a.k.a. Unity) is a new type of loose in-game community--closer together than conquest, less binding than linkshells--that players can jump into and enjoy easily. Unities are named after and led by some of Vana'diel's biggest characters, and adventurers can make new friends with members of the same unity. |
Unity Concord (a.k.a. Unity) is a new type of loose in-game community--closer together than conquest, less binding than linkshells--that players can jump into and enjoy easily. Unities are named after and led by some of Vana'diel's biggest characters, and adventurers can make new friends with members of the same unity. |
||
== Unity Accolades == |
== Unity Accolades == |
||
| − | [[Unity Accolades]] can be earned by completing unity-centric [[Records of Eminence]] objectives |
+ | [[Unity Accolades]] can be earned by completing unity-centric [[Records of Eminence]] objectives; completing non-unity objectives and vanquishing particular monsters also awards a small amount. These can be used to purchase items, participate in new battle content known as "Wanted Battles" (described below), teleport to areas where these battles take place, enhance equipment earned therein, and obtain a variety of other benefits. Speak with a [[Unity Concord NPC]] to spend accolades. |
== Climb the Unity Ranking Ladder! == |
== Climb the Unity Ranking Ladder! == |
||
| − | Accolades earned by members of a particular unity are tabulated each week, culminating in a ranking of which unities collected the most glory. For the duration of the next tabulation period, |
+ | Accolades earned by members of a particular unity are tabulated each week, culminating in a ranking of which unities collected the most glory. For the duration of the next tabulation period, Wanted battle equipment effects will increase the higher a unity's ranking was in the |
previous period. |
previous period. |
||
* You can see it using: Menu => Status => Unity => Unity Info |
* You can see it using: Menu => Status => Unity => Unity Info |
||
| Line 16: | Line 16: | ||
== Unity Chat == |
== Unity Chat == |
||
Unity chat is the perfect place to form bonds with your fellow adventurers in much the same way as linkshells. |
Unity chat is the perfect place to form bonds with your fellow adventurers in much the same way as linkshells. |
||
| − | * |
+ | *Unity chat log can be enabled or disabled at any time in the same Unity Information menu shown above, allowing you to see your Unity members chat, or enjoy a quiet moment of solitude, based on your goals at the moment. |
| + | *Join Unity chat by typing the command "/cm u". |
||
== Unity-centric Objectives == |
== Unity-centric Objectives == |
||
Unity-centric objectives exist in [[Records of Eminence]], allowing unity members to tackle special content together. |
Unity-centric objectives exist in [[Records of Eminence]], allowing unity members to tackle special content together. |
||
| − | There are two kinds of unity Records of Eminence objectives. "Shared" objectives can be undertaken by any member of any Unity, while "Unity-Specific" objectives are only open to members of a particular Unity. |
+ | There are two kinds of unity Records of Eminence objectives. "'''Shared'''" objectives can be undertaken by any member of any Unity, while "'''Unity-Specific'''" objectives are only open to members of a particular Unity. |
== How to Participate == |
== How to Participate == |
||
| + | === Joining === |
||
| − | Join a Unity by speaking to an Adventurers' Mutual Aid Network representative in charge of the system located in various cities throughout Vana'diel. |
||
| + | Join a Unity by speaking to an Adventurers' Mutual Aid Network representative in charge of the system located in various cities throughout Vana'diel. You will need at least 5 RoE quests completed. The following NPC are the A.M.A.N. representatives: |
||
| − | |||
| − | If desired, you can change to a new Unity once per tabulation period. Talk to one of the NPCs listed below so you can determine what you should do or where to be teleported to. |
||
{| cellpadding="1" width="100%" align="center" |
{| cellpadding="1" width="100%" align="center" |
||
| Line 36: | Line 36: | ||
| valign="top" | [[File:Nunaarl Bthrogg.png|left|thumb|220x220px|[[Nunaarl Bthtrogg]] in [[Western Adoulin]] (H-11)]] |
| valign="top" | [[File:Nunaarl Bthrogg.png|left|thumb|220x220px|[[Nunaarl Bthtrogg]] in [[Western Adoulin]] (H-11)]] |
||
|} |
|} |
||
| + | |||
| − | |||
| + | === Changing Unities === |
||
| + | |||
| + | You can switch to a different Unity by paying a fee (in Accolades) to one of the A.M.A.N. representatives (see above). This fee depends upon the difference between your current Unity's rank, and the one you desire. The fee is highest when moving from a lower to higher rank, such as (example) 1,800 unity points for someone moving from rank 3 to rank 1. A lower fee occurs when moving from, say, rank 3 to rank 5, which might be 300 unity points. You may only change your Unity once per conquest week. |
||
| + | |||
| + | '''NOTE''': Any specific RoE UC quests you have outstanding will continue to exist, but you'll be unable to complete them, as you won't get credit (given you are no longer a member of that UC unity). |
||
| + | |||
| + | '''NOTE''': You do not lose any unity Accolades (other than the fee) by changing to a different UC / unity. |
||
| + | |||
== Wanted Battles == |
== Wanted Battles == |
||
Wanted battles are fast-paced combat against particular notorious monsters specified in Records of Eminence "Wanted" objectives. Joining the fray costs a certain amount of accolades. The stalwarts who vanquish these heinous foes will be rewarded with valuable equipment that can only be earned from these battles. |
Wanted battles are fast-paced combat against particular notorious monsters specified in Records of Eminence "Wanted" objectives. Joining the fray costs a certain amount of accolades. The stalwarts who vanquish these heinous foes will be rewarded with valuable equipment that can only be earned from these battles. |
||
| − | *Unity Notorious Monsters are spawned by inspecting |
+ | *Unity Notorious Monsters are spawned by inspecting [[Ethereal Junction]]s. Players must be in a party with 1 or more people and have the correct Wanted quest set under Records of Eminence under the Unity\Wanted tab. Players must also have the specified Unity Accolades to receive any rewards. |
| − | *Below is |
+ | *Below is a table showing cost to set the battle, NMs, their 3 Ethereal Junction locations, and their rewards. Speak with a [[Unity Concord NPC]] to set the battle and be teleported to the battle site. |
| − | *'''Notable Rewards''' are received when opening the [[Unity_Concord#Wanted_NM_Coffers|coffer]] dropped by the |
+ | *'''Notable Rewards''' are received when opening the [[Unity_Concord#Wanted_NM_Coffers|coffer]] dropped by the monster, not directly from the monster itself. |
| − | {| |
+ | {|class="ffxi-table flush-list" width="100%" |
| + | |- style="background-color:#DAA520" |
||
| − | |- |
||
| − | ! |
+ | !width="08%"| Lvl |
| − | ! |
+ | !width="08%"| Acc |
| − | ! |
+ | !width="20%"| Unity NM |
| − | ! |
+ | !width="20%"| Zone |
| − | ! |
+ | !width="20%"| Notable Rewards |
| − | ! |
+ | !width="08%"| Sparks |
| − | ! |
+ | !width="08%"| XP |
| − | ! |
+ | !width="08%"| CP |
| + | |- align="center" style="background-color:#FFF8DC" |
||
| − | |- |
||
| + | | 75 |
||
| − | | align="center" bgcolor="FFF8DC" |75 |
||
| + | | 200 |
||
| − | | align="center" bgcolor="FFF8DC" |200 |
||
| − | | |
+ | | [[Hugemaw Harold]] |
| + | | |
||
| − | | align="center" bgcolor="FFF8DC" |[[East Ronfaure]]<br>(J-8, H-9, J-10) |
||
| + | :[[East Ronfaure]] |
||
| − | | align="center" bgcolor="FFF8DC" |[[Megasco Earring]]<br>[[Setae Ring]]<br>[[Harold's Ore]] <span style="color:#DAA520"><small>#</small></span><br> |
||
| + | :(J-8, H-9, J-10) |
||
| − | | align="center" bgcolor="FFF8DC" |500 |
||
| + | | |
||
| − | | align="center" bgcolor="FFF8DC" |2500 |
||
| + | :{{IIn|Megasco Earring}} |
||
| − | | align="center" bgcolor="FFF8DC" | |
||
| + | :{{IIn|Setae Ring}} |
||
| − | |- |
||
| + | :{{IIn|Harold's Ore}} <small style="color:#DAA520">#</small> |
||
| − | | align="center" bgcolor="FFF8DC" |75 |
||
| + | | 500 |
||
| − | | align="center" bgcolor="FFF8DC" |200 |
||
| + | | 2500 |
||
| − | | align="center" bgcolor="FFF8DC" |[[Bounding Belinda]] |
||
| + | | |
||
| − | | align="center" bgcolor="FFF8DC" |[[South Gustaberg]]<br>(G-8, E-7, G-7) |
||
| + | |- align="center" style="background-color:#FFF8DC" |
||
| − | | align="center" bgcolor="FFF8DC" |[[Adsilio Boots]]<br>[[Adsilio Boots +1]]<br>[[Emico Mantle]]<br>[[Salire Belt]]<br>[[Belinda's Hide]] <span style="color:#DAA520"><small>#</small></span> |
||
| + | | 75 |
||
| − | | align="center" bgcolor="FFF8DC" |500 |
||
| + | | 200 |
||
| − | | align="center" bgcolor="FFF8DC" |2500 |
||
| + | | [[Bounding Belinda]] |
||
| − | | align="center" bgcolor="FFF8DC" | |
||
| − | | |
+ | | |
| + | :[[South Gustaberg]] |
||
| − | | align="center" bgcolor="FFF8DC" |75 |
||
| + | :(G-8, E-7, G-7) |
||
| − | | align="center" bgcolor="FFF8DC" |200 |
||
| + | | |
||
| − | | align="center" bgcolor="FFF8DC" |[[Prickly Pitriv]] |
||
| + | :{{IIn|Adsilio Boots}} |
||
| − | | align="center" bgcolor="FFF8DC" |[[East Sarutabaruta]]<br>(I-7, J-9, G-9) |
||
| + | :{{IIn|Adsilio Boots +1}} |
||
| − | | align="center" bgcolor="FFF8DC" |[[Dew Silk Cape]]<br>[[Dew Silk Cape +1]]<br>[[Pitriv's Thread]] <span style="color:#DAA520"><small>#</small></span> |
||
| + | :{{IIn|Emico Mantle}} |
||
| − | | align="center" bgcolor="FFF8DC" |500 |
||
| + | :{{IIn|Salire Belt}} |
||
| − | | align="center" bgcolor="FFF8DC" |2500 |
||
| + | :{{IIn|Belinda's Hide}} <small style="color:#DAA520">#</small> |
||
| − | | align="center" bgcolor="FFF8DC" | |
||
| + | | 500 |
||
| − | |- |
||
| + | | 2500 |
||
| − | | align="center" bgcolor="FFF8DC" |99 |
||
| + | | |
||
| − | | align="center" bgcolor="FFF8DC" |400 |
||
| − | | align="center" |
+ | |- align="center" style="background-color:#FFF8DC" |
| + | | 75 |
||
| − | | align="center" bgcolor="FFF8DC" |[[La Theine Plateau]]<br>(G-8, G-9, I-9) |
||
| + | | 200 |
||
| − | | align="center" bgcolor="FFF8DC" |[[Thorfinn Shield]]<br>[[Thorfinn Shield +1]]<br>[[Grit Earring]]<br>[[Bleating Mantle]]<br>[[Baldurno's Horn]] <span style="color:#DAA520"><small>#</small></span> |
||
| + | | [[Prickly Pitriv]] |
||
| − | | align="center" bgcolor="FFF8DC" |750 |
||
| + | | |
||
| − | | align="center" bgcolor="FFF8DC" |4000 |
||
| + | :[[East Sarutabaruta]] |
||
| − | | align="center" bgcolor="FFF8DC" | |
||
| + | :(I-7, J-9, G-9) |
||
| − | |- |
||
| + | | |
||
| − | | align="center" bgcolor="FFF8DC" |99 |
||
| + | :{{IIn|Dew Silk Cape}} |
||
| − | | align="Center" bgcolor="FFF8DC" |400 |
||
| + | :{{IIn|Dew Silk Cape +1}} |
||
| − | | align="Center" bgcolor="FFF8DC" |[[Sleepy Mabel]] |
||
| + | :{{IIn|Pitriv's Thread}} <small style="color:#DAA520">#</small> |
||
| − | | align="Center" bgcolor="FFF8DC" |[[Konschtat Highlands]]<br>(F-5, H-8, G-9) |
||
| + | | 500 |
||
| − | | align="Center" bgcolor="FFF8DC" |[[Damani Horn]]<br>[[Damani Horn +1]]<br>[[Mouflon Ring]]<br>[[Acipayam Belt]]<br>[[Mabel's Fur]] <span style="color:#DAA520"><small>#</small></span> |
||
| + | | 2500 |
||
| − | | align="Center" bgcolor="FFF8DC" |750 |
||
| + | | |
||
| − | | align="center" bgcolor="FFF8DC" |4000 |
||
| − | | align="center" |
+ | |- align="center" style="background-color:#FFF8DC" |
| − | | |
+ | | 99 |
| + | | 400 |
||
| − | | align="center" bgcolor="FFF8DC" |99 |
||
| + | | [[Ironhorn Baldurno]] |
||
| − | | align="Center" bgcolor="FFF8DC" |400 |
||
| + | | |
||
| − | | align="Center" bgcolor="FFF8DC" |[[Serpopard Ninlil]] |
||
| + | :[[La Theine Plateau]] |
||
| − | | align="Center" bgcolor="FFF8DC" |[[Tahrongi Canyon]]<br>(I-9, E-9, H-8) |
||
| + | :(G-8, G-9, I-9) |
||
| − | | align="Center" bgcolor="FFF8DC" |[[Narmar Boomerang]]<br>[[Nekhen Ring]]<br>[[Cloud Hairpin]]<br>[[Cloud Hairpin +1]]<br>[[Ninlil's Bones]] <span style="color:#DAA520"><small>#</small></span> |
||
| + | | |
||
| − | | align="Center" bgcolor="FFF8DC" |750 |
||
| + | :{{IIn|Thorfinn Shield}} |
||
| − | | align="center" bgcolor="FFF8DC" |4000 |
||
| + | :{{IIn|Thorfinn Shield +1}} |
||
| − | | align="center" bgcolor="FFF8DC" | |
||
| + | :{{IIn|Grit Earring}} |
||
| − | |- |
||
| + | :{{IIn|Bleating Mantle}} |
||
| − | | align="center" bgcolor="FFF8DC" |119 |
||
| + | :{{IIn|Baldurno's Horn}} <small style="color:#DAA520">#</small> |
||
| − | | align="center" bgcolor="FFF8DC" |1,500 |
||
| + | | 750 |
||
| − | | align="center" bgcolor="FFF8DC" |[[Abyssdiver]] |
||
| + | | 4000 |
||
| − | | align="center" bgcolor="FFF8DC" |[[Buburimu Peninsula]]<br>(K-9, K-6, H-7) |
||
| + | | |
||
| − | | align="center" bgcolor="FFF8DC" |[[Wingcutter]]<br>[[Wingcutter +1]]<br> |
||
| + | |- align="center" style="background-color:#FFF8DC" |
||
| − | [[Macabre Gauntlets]]<br>[[Macabre Gauntlets +1]]<br>[[Abyssdiver's Feather]]<span style="color:#DAA520"><small>#</small></span><br> |
||
| + | | 99 |
||
| − | | align="center" bgcolor="FFF8DC" |1000 |
||
| + | | 400 |
||
| − | | align="center" bgcolor="FFF8DC" |5000 |
||
| + | | [[Sleepy Mabel]] |
||
| − | | align="center" bgcolor="FFF8DC" |1000 |
||
| − | | |
+ | | |
| + | :[[Konschtat Highlands]] |
||
| − | | align="center" bgcolor="FFF8DC" |119 |
||
| + | :(F-5, H-8, G-9) |
||
| − | | align="Center" bgcolor="FFF8DC" |1,500 |
||
| + | | |
||
| − | | align="Center" bgcolor="FFF8DC" |[[Immanibugard]] |
||
| + | :{{IIn|Damani Horn}} |
||
| − | | align="Center" bgcolor="FFF8DC" |[[Lufaise Meadows]]<br>(G-7, J-9, K-9) |
||
| + | :{{IIn|Damani Horn +1}} |
||
| − | | align="Center" bgcolor="FFF8DC" |[[Apeile Ring]]<br>[[Apeile Ring +1]]<br>[[Hippomenes Socks]]<br>[[Hippomenes Socks +1]]<br>[[Immanibugard's Hide]] <span style="color:#DAA520"><small>#</small></span> |
||
| + | :{{IIn|Mouflon Ring}} |
||
| − | | align="Center" bgcolor="FFF8DC" |1000 |
||
| + | :{{IIn|Acipayam Belt}} |
||
| − | | align="center" bgcolor="FFF8DC" |5000 |
||
| + | :{{IIn|Mabel's Fur}} <small style="color:#DAA520">#</small> |
||
| − | | align="center" bgcolor="FFF8DC" |1000 |
||
| + | | 750 |
||
| − | |- |
||
| + | | 4000 |
||
| − | | align="center" bgcolor="FFF8DC" |119 |
||
| + | | |
||
| − | | align="Center" bgcolor="FFF8DC" |1,500 |
||
| − | | align=" |
+ | |- align="center" style="background-color:#FFF8DC" |
| + | | 99 |
||
| − | | align="Center" bgcolor="FFF8DC" |[[Bibiki Bay]]<br>(I-6, G-8, H-10) |
||
| + | | 400 |
||
| − | | align="Center" bgcolor="FFF8DC" |[[Assiduity Pants]]<br>[[Assiduity Pants +1]]<br>[[Nourishing Earring]]<br>[[Nourishing Earring +1]]<br>[[Intuila's Hide]] <span style="color:#DAA520"><small>#</small></span> |
||
| + | | [[Serpopard Ninlil]] |
||
| − | | align="Center" bgcolor="FFF8DC" |1000 |
||
| + | | |
||
| − | | align="center" bgcolor="FFF8DC" |5000 |
||
| + | :[[Tahrongi Canyon]] |
||
| − | | align="center" bgcolor="FFF8DC" |1000 |
||
| + | :(I-9, E-9, H-8) |
||
| − | |- |
||
| + | | |
||
| − | | align="center" bgcolor="FFF8DC" |119 |
||
| + | :{{IIn|Narmar Boomerang}} |
||
| − | | align="Center" bgcolor="FFF8DC" |1,500 |
||
| + | :{{IIn|Nekhen Ring}} |
||
| − | | align="Center" bgcolor="FFF8DC" |[[Jester Malatrix]] |
||
| + | :{{IIn|Cloud Hairpin}} |
||
| − | | align="Center" bgcolor="FFF8DC" |[[Qufim Island]]<br>(I-8, G-8, G-7) |
||
| + | :{{IIn|Cloud Hairpin +1}} |
||
| − | | align="Center" bgcolor="FFF8DC" |[[Buramgh]]<br>[[Buramgh +1]]<br>[[Evalach]]<br>[[Evalach +1]]<br>[[Jester Malatrix's Shard]]<span style="color:#DAA520"><small>#</small></span><br> |
||
| + | :{{IIn|Ninlil's Bones}} <small style="color:#DAA520">#</small> |
||
| − | | align="Center" bgcolor="FFF8DC" |1000 |
||
| + | | 750 |
||
| − | | align="center" bgcolor="FFF8DC" |5000 |
||
| + | | 4000 |
||
| − | | align="center" bgcolor="FFF8DC" |1000 |
||
| − | | |
+ | | |
| − | | align="center" |
+ | |- align="center" style="background-color:#FFF8DC" |
| + | | 119 |
||
| − | | align="Center" bgcolor="FFF8DC" |1,500 |
||
| + | | 1,500 |
||
| − | | align="Center" bgcolor="FFF8DC" |[[Orcfeltrap]] |
||
| + | | [[Abyssdiver]] |
||
| − | | align="Center" bgcolor="FFF8DC" |[[Carpenters' Landing]]<br>(I-9, H-9, I-11) |
||
| + | | |
||
| − | | align="Center" bgcolor="FFF8DC" |[[Shinjutsu-no-obi]]<br>[[Shinjutsu-no-obi +1]]<br>[[Tancho]]<br>[[Tancho +1]]<br>[[Orcfeltrap's Leaf]] <span style="color:#DAA520"><small>#</small></span> |
||
| + | :[[Buburimu Peninsula]] |
||
| − | | align="Center" bgcolor="FFF8DC" |1000 |
||
| + | :(K-9, K-6, H-7) |
||
| − | | align="center" bgcolor="FFF8DC" |5000 |
||
| + | | |
||
| − | | align="center" bgcolor="FFF8DC" |1000 |
||
| + | :{{IIn|Wingcutter}} |
||
| − | |- |
||
| + | :{{IIn|Wingcutter +1}} |
||
| − | | align="center" bgcolor="FFF8DC" |119 |
||
| + | :{{IIn|Macabre Gauntlets}} |
||
| − | | align="center" bgcolor="FFF8DC" |1,500 |
||
| + | :{{IIn|Macabre Gauntlets +1}} |
||
| − | | align="center" bgcolor="FFF8DC" |[[Sybaritic Samantha]] |
||
| + | :{{IIn|Abyssdiver's Feather}} <small style="color:#DAA520">#</small> |
||
| − | | align="center" bgcolor="FFF8DC" |[[Yuhtunga Jungle]]<br>(F-11, F-10, I-6) |
||
| + | | 1000 |
||
| − | | align="center" bgcolor="FFF8DC" |[[Unmoving Collar]]<br>[[Unmoving Collar +1]]<br>[[Metamorph Ring]]<br>[[Metamorph Ring +1]]<br>[[Sybaritic Samantha's Vine]]<span style="color:#DAA520"><small>#</small></span><br> |
||
| + | | 5000 |
||
| − | | align="center" bgcolor="FFF8DC" |1000 |
||
| + | | 1000 |
||
| − | | align="center" bgcolor="FFF8DC" |5000 |
||
| − | | align="center" |
+ | |- align="center" style="background-color:#FFF8DC" |
| + | | 119 |
||
| − | |- |
||
| + | | 1,500 |
||
| − | | align="center" bgcolor="FFF8DC" |119 |
||
| + | | [[Immanibugard]] |
||
| − | | align="center" bgcolor="FFF8DC" |1,500 |
||
| + | | |
||
| − | | align="center" bgcolor="FFF8DC" |[[Valkurm Imperator]] |
||
| + | :[[Lufaise Meadows]] |
||
| − | | align="center" bgcolor="FFF8DC" |[[Valkurm Dunes]]<br>(D-6, E-8, K-9) |
||
| + | :(G-7, J-9, K-9) |
||
| − | | align="center" bgcolor="FFF8DC" |[[Imperial Wing Hairpin]]<br>[[Imperial Wing Hairpin +1]]<br>[[Regal Pumps]]<br>[[Regal Pumps +1]]<br>[[Imperator's Wing]] <span style="color:#DAA520"><small>#</small></span> |
||
| + | | |
||
| − | | align="center" bgcolor="FFF8DC" |1000 |
||
| + | :{{IIn|Apeile Ring}} |
||
| − | | align="center" bgcolor="FFF8DC" |5000 |
||
| + | :{{IIn|Apeile Ring +1}} |
||
| − | | align="center" bgcolor="FFF8DC" |1000 |
||
| + | :{{IIn|Hippomenes Socks}} |
||
| − | |- |
||
| + | :{{IIn|Hippomenes Socks +1}} |
||
| − | | align="center" bgcolor="FFF8DC" |122 |
||
| + | :{{IIn|Immanibugard's Hide}} <small style="color:#DAA520">#</small> |
||
| − | | align="center" bgcolor="FFF8DC" |1,800 |
||
| + | | 1000 |
||
| − | | align="center" bgcolor="FFF8DC" |[[Cactrot Veloz]] |
||
| + | | 5000 |
||
| − | | align="center" bgcolor="FFF8DC" |[[Eastern Altepa Desert]]<br>(G-10, I-5, J-9) |
||
| + | | 1000 |
||
| − | | align="center" bgcolor="FFF8DC" |[[Arete Del Luna]]<br>[[Arete Del Luna +1]]<br>[[Mengado]]<br>[[Mengado +1]]<br>[[Veloz's Needle]] <span style="color:#DAA520"><small>#</small></span> |
||
| − | | align="center" |
+ | |- align="center" style="background-color:#FFF8DC" |
| + | | 119 |
||
| − | | align="center" bgcolor="FFF8DC" |6000 |
||
| + | | 1,500 |
||
| − | | align="center" bgcolor="FFF8DC" |1500 |
||
| + | | [[Intuila]] |
||
| − | |- |
||
| + | | |
||
| − | | align="center" bgcolor="FFF8DC" |122 |
||
| + | :[[Bibiki Bay]] |
||
| − | | align="center" bgcolor="FFF8DC" |1,800 |
||
| + | :(I-6, G-8, H-10) |
||
| − | | align="center" bgcolor="FFF8DC" |[[Garbage Gel]] |
||
| + | | |
||
| − | | align="center" bgcolor="FFF8DC" |[[Bostaunieux Oubliette]]<br>(J-7, J-10, F-8) |
||
| + | :{{IIn|Assiduity Pants}} |
||
| − | | align="center" bgcolor="FFF8DC" |[[Gelatinous Ring]]<br>[[Gelatinous Ring +1]]<br>[[Emeici]]<br>[[Emeici +1]]<br>[[Garbage Gel's Mucus]] <span style="color:#DAA520"><small>#</small></span> |
||
| + | :{{IIn|Assiduity Pants +1}} |
||
| − | | align="center" bgcolor="FFF8DC" |1250 |
||
| + | :{{IIn|Nourishing Earring}} |
||
| − | | align="center" bgcolor="FFF8DC" |6000 |
||
| + | :{{IIn|Nourishing Earring +1}} |
||
| − | | align="center" bgcolor="FFF8DC" |1500 |
||
| + | :{{IIn|Intuila's Hide}} <small style="color:#DAA520">#</small> |
||
| − | |- |
||
| + | | 1000 |
||
| − | | align="center" bgcolor="FFF8DC" |122 |
||
| + | | 5000 |
||
| − | | align="center" bgcolor="FFF8DC" |1,800 |
||
| + | | 1000 |
||
| − | | align="center" bgcolor="FFF8DC" |[[Emperor Arthro]] |
||
| − | | align="center" |
+ | |- align="center" style="background-color:#FFF8DC" |
| + | | 119 |
||
| − | | align="center" bgcolor="FFF8DC" |[[Sailfi Belt]]<br>[[Sailfi Belt +1]]<br>[[Augury Cuisses]]<br>[[Augury Cuisses +1]]<br>[[Emperor Arthro's Shell]] <span style="color:#DAA520"><small>#</small></span> |
||
| + | | 1,500 |
||
| − | | align="center" bgcolor="FFF8DC" |1250 |
||
| + | | [[Jester Malatrix]] |
||
| − | | align="center" bgcolor="FFF8DC" |6000 |
||
| + | | |
||
| − | | align="center" bgcolor="FFF8DC" |1500 |
||
| + | :[[Qufim Island]] |
||
| − | |- |
||
| + | :(I-8, G-8, G-7) |
||
| − | | align="center" bgcolor="FFF8DC" |122 |
||
| + | | |
||
| − | | align="center" bgcolor="FFF8DC" |1,800 |
||
| + | :{{IIn|Buramgh}} |
||
| − | | align="center" bgcolor="FFF8DC" |[[Joyous Green]] |
||
| + | :{{IIn|Buramgh +1}} |
||
| − | | align="Center" bgcolor="FFF8DC" |[[Pashhow Marshlands]]<br>(J-9, H-9, I-6) |
||
| + | :{{IIn|Evalach}} |
||
| − | | align="Center" bgcolor="FFF8DC" |[[Acuity Belt]]<br>[[Acuity Belt +1]]<br>[[Canto Necklace]]<br>[[Canto Necklace +1]]<br>[[Joyous Green's Moss]] <span style="color:#DAA520"><small>#</small></span> |
||
| + | :{{IIn|Evalach +1}} |
||
| − | | align="Center" bgcolor="FFF8DC" |1250 |
||
| + | :{{IIn|Malatrix's Shard}} <small style="color:#DAA520">#</small> |
||
| − | | align="center" bgcolor="FFF8DC" |6000 |
||
| + | | 1000 |
||
| − | | align="center" bgcolor="FFF8DC" |1500 |
||
| + | | 5000 |
||
| − | |- |
||
| + | | 1000 |
||
| − | | align="center" bgcolor="FFF8DC" |122 |
||
| − | | align=" |
+ | |- align="center" style="background-color:#FFF8DC" |
| + | | 119 |
||
| − | | align="Center" bgcolor="FFF8DC" |[[Keeper of Heiligtum]] |
||
| + | | 1,500 |
||
| − | | align="Center" bgcolor="FFF8DC" |[[Sanctuary of Zi'Tah]]<br>(J-11, K-9, J-10) |
||
| + | | [[Orcfeltrap]] |
||
| − | | align="Center" bgcolor="FFF8DC" |[[Kunimune]]<br>[[Kunimune +1]]<br>[[Zoar Subligar]]<br>[[Zoar Subligar +1]]<br>[[Heiligtum's Moss]] <span style="color:#DAA520"><small>#</small></span> |
||
| + | | |
||
| − | | align="Center" bgcolor="FFF8DC" |1250 |
||
| + | :[[Carpenters' Landing]] |
||
| − | | align="center" bgcolor="FFF8DC" |6000 |
||
| + | :(I-9, H-9, I-11) |
||
| − | | align="center" bgcolor="FFF8DC" |1500 |
||
| − | | |
+ | | |
| + | :{{IIn|Shinjutsu-no-Obi}} |
||
| − | | align="center" bgcolor="FFF8DC" |122 |
||
| + | :{{IIn|Shinjutsu-no-Obi +1}} |
||
| − | | align="center" bgcolor="FFF8DC" |1,800 |
||
| + | :{{IIn|Tancho}} |
||
| − | | align="center" bgcolor="FFF8DC" |[[Tiyanak]] |
||
| + | :{{IIn|Tancho +1}} |
||
| − | | align="center" bgcolor="FFF8DC" |[[Misareaux Coast]]<br>(G-8, F-8, I-11) |
||
| + | :{{IIn|Orcfeltrap's Leaf}} <small style="color:#DAA520">#</small> |
||
| − | | align="center" bgcolor="FFF8DC" |[[Lugra Cloak]]<br>[[Lugra Cloak +1]]<br>[[Lugra Earring]]<br>[[Lugra Earring +1]]<br>[[Tiyanak's Fang]]<span style="color:#DAA520"><small>#</small></span><br> |
||
| + | | 1000 |
||
| − | | align="center" bgcolor="FFF8DC" |1250 |
||
| + | | 5000 |
||
| − | | align="center" bgcolor="FFF8DC" |6000 |
||
| + | | 1000 |
||
| − | | align="center" bgcolor="FFF8DC" |1500 |
||
| + | |- align="center" style="background-color:#FFF8DC" |
||
| − | |- |
||
| + | | 119 |
||
| − | | align="center" bgcolor="FFF8DC" |122 |
||
| + | | 1,500 |
||
| − | | align="Center" bgcolor="FFF8DC" |1,800 |
||
| + | | [[Sybaritic Samantha]] |
||
| − | | align="Center" bgcolor="FFF8DC" |[[Warblade Beak]] |
||
| + | | |
||
| − | | align="Center" bgcolor="FFF8DC" |[[Meriphataud Mountains]]<br>(K-11, G-9, I-9) |
||
| + | :[[Yuhtunga Jungle]] |
||
| − | | align="Center" bgcolor="FFF8DC" |[[Shigure Tekko]]<br>[[Shigure Tekko +1]]<br>[[Handler's Earring]]<br>[[Handler's Earring +1]]<br>[[Warblade Beak's Hide]]<span style="color:#DAA520"><small>#</small></span><br> |
||
| + | :(F-11, F-10, I-6) |
||
| − | | align="Center" bgcolor="FFF8DC" |1250 |
||
| + | | |
||
| − | | align="center" bgcolor="FFF8DC" |6000 |
||
| + | :{{IIn|Unmoving Collar}} |
||
| − | | align="center" bgcolor="FFF8DC" |1500 |
||
| + | :{{IIn|Unmoving Collar +1}} |
||
| − | |- |
||
| + | :{{IIn|Metamorph Ring}} |
||
| − | | align="center" bgcolor="FFF8DC" |122 |
||
| + | :{{IIn|Metamorph Ring +1}} |
||
| − | | align="Center" bgcolor="FFF8DC" |1,800 |
||
| + | :{{IIn|Sybaritic Samantha's Vine}} <small style="color:#DAA520">#</small> |
||
| − | | align="Center" bgcolor="FFF8DC" |[[Voso]] |
||
| + | | 1000 |
||
| − | | align="Center" bgcolor="FFF8DC" |[[Labyrinth of Onzozo]]<br>(G-6, I-5, H-7) |
||
| + | | 5000 |
||
| − | | align="Center" bgcolor="FFF8DC" |[[Agony Jerkin]]<br>[[Agony Jerkin +1]]<br>[[Refined Grip]]<br>[[Refined Grip +1]]<br>[[Voso's Hide]]<span style="color:#DAA520"><small>#</small></span><br> |
||
| + | | 1000 |
||
| − | | align="Center" bgcolor="FFF8DC" |1250 |
||
| − | | align="center" |
+ | |- align="center" style="background-color:#FFF8DC" |
| + | | 119 |
||
| − | | align="center" bgcolor="FFF8DC" |1500 |
||
| + | | 1,500 |
||
| − | |- |
||
| + | | [[Valkurm Imperator]] |
||
| − | | align="center" bgcolor="FFF8DC" |122 |
||
| + | | |
||
| − | | align="Center" bgcolor="FFF8DC" |1,800 |
||
| + | :[[Valkurm Dunes]] |
||
| − | | align="Center" bgcolor="FFF8DC" |[[Woodland Mender]] |
||
| + | :(D-6, E-8, K-9) |
||
| − | | align="Center" bgcolor="FFF8DC" |[[Yhoator Jungle]]<br>(G-10, I-10, H-7) |
||
| + | | |
||
| − | | align="Center" bgcolor="FFF8DC" |[[Rosette Jaseran]]<br>[[Rosette Jaseran +1]]<br>[[Pouwhenua]]<br>[[Pouwhenua +1]]<br>[[Woodland Mender's Log]]<span style="color:#DAA520"><small>#</small></span><br> |
||
| + | :{{IIn|Imperial Wing Hairpin}} |
||
| − | | align="Center" bgcolor="FFF8DC" |1250 |
||
| + | :{{IIn|Imperial Wing Hairpin +1}} |
||
| − | | align="center" bgcolor="FFF8DC" |6000 |
||
| + | :{{IIn|Regal Pumps}} |
||
| − | | align="center" bgcolor="FFF8DC" |1500 |
||
| + | :{{IIn|Regal Pumps +1}} |
||
| − | |- |
||
| + | :{{IIn|Imperator's Wing}} <small style="color:#DAA520">#</small> |
||
| − | | align="center" bgcolor="FFF8DC" |125 |
||
| + | | 1000 |
||
| − | | align="center" bgcolor="FFF8DC" |2,100 |
||
| + | | 5000 |
||
| − | | align="center" bgcolor="FFF8DC" |[[Arke]] |
||
| + | | 1000 |
||
| − | | align="center" bgcolor="FFF8DC" |[[Sauromugue Champaign]]<br>(J-9, G-8, L-7) |
||
| + | |- align="center" style="background-color:#FFF8DC" |
||
| − | | align="center" bgcolor="FFF8DC" |[[Ababinili]]<br>[[Ababinili +1]]<br>[[Pukulatmuj]]<br>[[Pukulatmuj +1]]<br>[[Arke's Wing]]<span style="color:#DAA520"><small>#</small></span><br> |
||
| + | | 122 |
||
| − | | align="center" bgcolor="FFF8DC" |1500 |
||
| + | | 1,800 |
||
| − | | align="center" bgcolor="FFF8DC" |7500 |
||
| + | | [[Cactrot Veloz]] |
||
| − | | align="center" bgcolor="FFF8DC" |2000 |
||
| − | | |
+ | | |
| + | :[[Eastern Altepa Desert]] |
||
| − | | align="center" bgcolor="FFF8DC" |125 |
||
| + | :(G-10, I-5, J-9) |
||
| − | | align="center" bgcolor="FFF8DC" |2,100 |
||
| + | | |
||
| − | | align="center" bgcolor="FFF8DC" |[[Beist]] |
||
| + | :{{IIn|Arete del Luna}} |
||
| − | | align="center" bgcolor="FFF8DC" |[[Xarcabard]]<br>(I-9, I-8, I-7) |
||
| + | :{{IIn|Arete del Luna +1}} |
||
| − | | align="center" bgcolor="FFF8DC" |[[Adorned Helm]]<br>[[Adorned Helm +1]]<br>[[Hime Domaru]]<br>[[Hime Domaru +1]]<br>[[Beist's Blood]]<span style="color:#DAA520"><small>#</small></span><br> |
||
| + | :{{IIn|Mengado}} |
||
| − | | align="center" bgcolor="FFF8DC" |1500 |
||
| + | :{{IIn|Mengado +1}} |
||
| − | | align="center" bgcolor="FFF8DC" |7500 |
||
| + | :{{IIn|Veloz's Needle}} <small style="color:#DAA520">#</small> |
||
| − | | align="center" bgcolor="FFF8DC" |2000 |
||
| + | | 1250 |
||
| − | |- |
||
| + | | 6000 |
||
| − | | align="center" bgcolor="FFF8DC" |125 |
||
| + | | 1500 |
||
| − | | align="center" bgcolor="FFF8DC" |2,100 |
||
| − | | align="center" |
+ | |- align="center" style="background-color:#FFF8DC" |
| + | | 122 |
||
| − | | align="center" bgcolor="FFF8DC" |[[Ro'Maeve]]<br>(I-10, G-11, C-9) |
||
| + | | 1,800 |
||
| − | | align="center" bgcolor="FFF8DC" |[[Shomonjijoe]]<br>[[Shomonjijoe +1]]<br>[[Rigorous Grip]]<br>[[Rigorous Grip +1]]<br>[[Douma Weapon's Shard]]<span style="color:#DAA520"><small>#</small></span><br> |
||
| + | | [[Garbage Gel]] |
||
| − | | align="center" bgcolor="FFF8DC" |1500 |
||
| + | | |
||
| − | | align="center" bgcolor="FFF8DC" |7500 |
||
| + | :[[Bostaunieux Oubliette]] |
||
| − | | align="center" bgcolor="FFF8DC" |2000 |
||
| + | :(J-7, J-10, F-8) |
||
| − | |- |
||
| + | | |
||
| − | | align="center" bgcolor="FFF8DC" |125 |
||
| + | :{{IIn|Gelatinous Ring}} |
||
| − | | align="Center" bgcolor="FFF8DC" |2,100 |
||
| + | :{{IIn|Gelatinous Ring +1}} |
||
| − | | align="Center" bgcolor="FFF8DC" |[[King Uropygid]] |
||
| + | :{{IIn|Emeici}} |
||
| − | | align="Center" bgcolor="FFF8DC" |[[Western Altepa Desert]]<br>(F-10, F-8, J-6) |
||
| + | :{{IIn|Emeici +1}} |
||
| − | | align="Center" bgcolor="FFF8DC" |[[Stinger Bullet]]<br>[[Stinger Helm]]<br>[[Stinger Helm +1]]<br>[[King Uropygid's Needle]] <span style="color:#DAA520"><small>#</small></span> |
||
| + | :{{IIn|Garbage Gel's Mucus}} <small style="color:#DAA520">#</small> |
||
| − | | align="Center" bgcolor="FFF8DC" |1500 |
||
| + | | 1250 |
||
| − | | align="center" bgcolor="FFF8DC" |7500 |
||
| + | | 6000 |
||
| − | | align="center" bgcolor="FFF8DC" |2000 |
||
| + | | 1500 |
||
| − | |- |
||
| − | | align="center" |
+ | |- align="center" style="background-color:#FFF8DC" |
| + | | 122 |
||
| − | | align="Center" bgcolor="FFF8DC" |2,100 |
||
| + | | 1,800 |
||
| − | | align="Center" bgcolor="FFF8DC" |[[Largantua]] |
||
| + | | [[Emperor Arthro]] |
||
| − | | align="Center" bgcolor="FFF8DC" |[[Beaucedine Glacier]]<br>(K-9, K-8, J-7) |
||
| + | | |
||
| − | | align="Center" bgcolor="FFF8DC" |[[Emet Harness]]<br>[[Emet Harness +1]]<br>[[Warder's Charm]]<br>[[Warder's Charm +1]]<br>[[Largantua's Shard]] <span style="color:#DAA520"><small>#</small></span> |
||
| + | :[[Jugner Forest]] |
||
| − | | align="Center" bgcolor="FFF8DC" |1500 |
||
| + | :(I-9, I-6, J-11) |
||
| − | | align="center" bgcolor="FFF8DC" |7500 |
||
| + | | |
||
| − | | align="center" bgcolor="FFF8DC" |2000 |
||
| + | :{{IIn|Sailfi Belt}} |
||
| − | |- |
||
| + | :{{IIn|Sailfi Belt +1}} |
||
| − | | align="center" bgcolor="FFF8DC" |125 |
||
| + | :{{IIn|Augury Cuisses}} |
||
| − | | align="center" bgcolor="FFF8DC" |2,100 |
||
| + | :{{IIn|Augury Cuisses +1}} |
||
| − | | align="center" bgcolor="FFF8DC" |[[Lumber Jill]] |
||
| + | :{{IIn|Emperor Arthro's Shell}} <small style="color:#DAA520">#</small> |
||
| − | | align="center" bgcolor="FFF8DC" |[[Batallia Downs]]<br>(E-5, J-7, H-9) |
||
| + | | 1250 |
||
| − | | align="center" bgcolor="FFF8DC" |[[Grounded Mantle]]<br>[[Grounded Mantle +1]]<br>[[Sangarius]]<br>[[Sangarius +1]]<br>[[Jill's Spittle]]<span style="color:#DAA520"><small>#</small></span><br> |
||
| + | | 6000 |
||
| − | | align="center" bgcolor="FFF8DC" |1500 |
||
| + | | 1500 |
||
| − | | align="center" bgcolor="FFF8DC" |7500 |
||
| − | | align="center" |
+ | |- align="center" style="background-color:#FFF8DC" |
| + | | 122 |
||
| − | |- |
||
| + | | 1,800 |
||
| − | | align="center" bgcolor="FFF8DC" |125 |
||
| + | | [[Joyous Green]] |
||
| − | | align="Center" bgcolor="FFF8DC" |2,100 |
||
| + | | |
||
| − | | align="Center" bgcolor="FFF8DC" |[[Muut]] |
||
| + | :[[Pashhow Marshlands]] |
||
| − | | align="Center" bgcolor="FFF8DC" |[[Attohwa Chasm]]<br>(F-7, R-8, G-9) |
||
| + | :(J-9, H-9, I-6) |
||
| − | | align="Center" bgcolor="FFF8DC" |[[Anathema Harpe]]<br>[[Anathema Harpe +1]]<br>[[Kachimusha Kote]]<br>[[Kachimusha Kote +1]]<br>[[Muut's Vestment]]<span style="color:#DAA520"><small>#</small></span><br> |
||
| + | | |
||
| − | | align="Center" bgcolor="FFF8DC" |1500 |
||
| + | :{{IIn|Acuity Belt}} |
||
| − | | align="center" bgcolor="FFF8DC" |7500 |
||
| + | :{{IIn|Acuity Belt +1}} |
||
| − | | align="center" bgcolor="FFF8DC" |2000 |
||
| + | :{{IIn|Canto Necklace}} |
||
| − | |- |
||
| + | :{{IIn|Canto Necklace +1}} |
||
| − | | align="center" bgcolor="FFF8DC" |125 |
||
| + | :{{IIn|Joyous's Moss}} <small style="color:#DAA520">#</small> |
||
| − | | align="center" bgcolor="FFF8DC" |2,100 |
||
| + | | 1250 |
||
| − | | align="center" bgcolor="FFF8DC" |[[Strix]] |
||
| + | | 6000 |
||
| − | | align="center" bgcolor="FFF8DC" |[[Rolanberry Fields]]<br>(E-11, F-8, J-8) |
||
| + | | 1500 |
||
| − | | align="center" bgcolor="FFF8DC" |[[Magesmasher]]<br>[[Magesmasher +1]]<br>[[Jute Boots]]<br>[[Jute Boots +1]]<br>[[Strix's Tailfeather]]<span style="color:#DAA520"><small>#</small></span><br> |
||
| − | | align="center" |
+ | |- align="center" style="background-color:#FFF8DC" |
| + | | 122 |
||
| − | | align="center" bgcolor="FFF8DC" |7500 |
||
| + | | 1,800 |
||
| − | | align="center" bgcolor="FFF8DC" |2000 |
||
| + | | [[Keeper of Heiligtum]] |
||
| − | |- |
||
| + | | |
||
| − | | align="center" bgcolor="FFF8DC" |125 |
||
| + | :[[Sanctuary of Zi'Tah]] |
||
| − | | align="center" bgcolor="FFF8DC" |2,100 |
||
| + | :(J-11, K-9, J-10) |
||
| − | | align="center" bgcolor="FFF8DC" |[[Mephitas]] |
||
| + | | |
||
| − | | align="center" bgcolor="FFF8DC" |[[Garlaige Citadel]]<br>(I-6, G-7, H-8) |
||
| + | :{{IIn|Kunimune}} |
||
| − | | align="center" bgcolor="FFF8DC" |[[Mephitas's Ring]]<br>[[Mephitas's Ring +1]]<br>[[Ternion Dagger]]<br>[[Ternion Dagger +1]]<br>[[Mephitas's Claw]]<span style="color:#DAA520"><small>#</small></span><br> |
||
| + | :{{IIn|Kunimune +1}} |
||
| − | | align="center" bgcolor="FFF8DC" |1500 |
||
| + | :{{IIn|Zoar Subligar}} |
||
| − | | align="center" bgcolor="FFF8DC" |7500 |
||
| + | :{{IIn|Zoar Subligar +1}} |
||
| − | | align="center" bgcolor="FFF8DC" |2000 |
||
| + | :{{IIn|Heiligtum's Moss}} <small style="color:#DAA520">#</small> |
||
| − | |- |
||
| + | | 1250 |
||
| − | | align="center" bgcolor="FFF8DC" |125 |
||
| + | | 6000 |
||
| − | | align="center" bgcolor="FFF8DC" |2,100 |
||
| + | | 1500 |
||
| − | | align="center" bgcolor="FFF8DC" |[[Coca]] |
||
| − | | align="center" |
+ | |- align="center" style="background-color:#FFF8DC" |
| + | | 122 |
||
| − | | align="center" bgcolor="FFF8DC" |[[Gae Derg]]<br>[[Gae Derg +1]]<br>[[Ajax]]<br>[[Ajax +1]]<br>[[Coca's Wing]]<span style="color:#DAA520"><small>#</small></span><br> |
||
| + | | 1,800 |
||
| − | | align="center" bgcolor="FFF8DC" |1500 |
||
| + | | [[Tiyanak]] |
||
| − | | align="center" bgcolor="FFF8DC" |7500 |
||
| + | | |
||
| − | | align="center" bgcolor="FFF8DC" |2000 |
||
| + | :[[Misareaux Coast]] |
||
| − | |- |
||
| + | :(G-8, F-8, I-11) |
||
| − | | align="center" bgcolor="FFF8DC" |125 |
||
| + | | |
||
| − | | align="center" bgcolor="FFF8DC" |2,100 |
||
| + | :{{IIn|Lugra Cloak}} |
||
| − | | align="center" bgcolor="FFF8DC" |[[Ayapec]] |
||
| + | :{{IIn|Lugra Cloak +1}} |
||
| − | | align="center" bgcolor="FFF8DC" |[[The Boyahda Tree]]<br>(D-6) Map 1, (I-10) Map 2, (H-6) Map 3 |
||
| + | :{{IIn|Lugra Earring}} |
||
| − | | align="center" bgcolor="FFF8DC" |[[Hike Khat]]<br>[[Hike Khat +1]]<br>[[Perun]]<br>[[Perun +1]]<br>[[Ayapec's Shell]]<span style="color:#DAA520"><small>#</small></span><br> |
||
| + | :{{IIn|Lugra Earring +1}} |
||
| − | | align="center" bgcolor="FFF8DC" |1500 |
||
| + | :{{IIn|Tiyanak's Fang}} <small style="color:#DAA520">#</small> |
||
| − | | align="center" bgcolor="FFF8DC" |7500 |
||
| + | | 1250 |
||
| − | | align="center" bgcolor="FFF8DC" |2000 |
||
| + | | 6000 |
||
| − | |- |
||
| + | | 1500 |
||
| − | | align="center" bgcolor="FFF8DC" |125 |
||
| − | | align="center" |
+ | |- align="center" style="background-color:#FFF8DC" |
| + | | 122 |
||
| − | | align="center" bgcolor="FFF8DC" |[[Specter Worm]] |
||
| + | | 1,800 |
||
| − | | align="center" bgcolor="FFF8DC" |[[Kuftal Tunnel]]<br>(F-9) Map 4, (H-5, J-11) Map 2 |
||
| + | | [[Warblade Beak]] |
||
| − | | align="center" bgcolor="FFF8DC" |[[Ghastly Tathlum]]<br>[[Ghastly Tathlum +1]]<br>[[Kladenets]]<br>[[Kladenets +1]]<br>[[Specter's Ore]]<span style="color:#DAA520"><small>#</small></span><br> |
||
| + | | |
||
| − | | align="center" bgcolor="FFF8DC" |1500 |
||
| + | :[[Meriphataud Mountains]] |
||
| − | | align="center" bgcolor="FFF8DC" |7500 |
||
| + | :(K-11, G-9, I-9) |
||
| − | | align="center" bgcolor="FFF8DC" |2000 |
||
| − | | |
+ | | |
| + | :{{IIn|Shigure Tekko}} |
||
| − | | align="center" bgcolor="FFF8DC" |128 |
||
| + | :{{IIn|Shigure Tekko +1}} |
||
| − | | align="center" bgcolor="FFF8DC" |2,400 |
||
| + | :{{IIn|Handler's Earring}} |
||
| − | | align="center" bgcolor="FFF8DC" |[[Azrael]] |
||
| + | :{{IIn|Handler's Earring +1}} |
||
| − | | align="center" bgcolor="FFF8DC" |[[Den of Rancor]]<br>(H-5, G-10) Map 2, (G-9) Map 3 |
||
| + | :{{IIn|Warblade Beak's Hide}} <small style="color:#DAA520">#</small> |
||
| − | | align="center" bgcolor="FFF8DC" |[[Aizkora]]<br>[[Aizkora +1]]<br>[[Alhazen Hat]]<br>[[Alhazen Hat +1]]<br>[[Azrael's Eye]]<span style="color:#DAA520"><small>#</small></span><br> |
||
| + | | 1250 |
||
| − | | align="center" bgcolor="FFF8DC" |1750 |
||
| + | | 6000 |
||
| − | | align="center" bgcolor="FFF8DC" |9000 |
||
| + | | 1500 |
||
| − | | align="center" bgcolor="FFF8DC" |2500 |
||
| + | |- align="center" style="background-color:#FFF8DC" |
||
| − | |- |
||
| + | | 122 |
||
| − | | align="center" bgcolor="FFF8DC" |125 |
||
| + | | 1,800 |
||
| − | | align="center" bgcolor="FFF8DC" |2,100 |
||
| + | | [[Voso]] |
||
| − | | align="center" bgcolor="FFF8DC" |[[Bakunawa]] |
||
| + | | |
||
| − | | align="center" bgcolor="FFF8DC" |[[Sea Serpent Grotto]]<br>(J-8, I-10, D-9) Map 4 |
||
| + | :[[Labyrinth of Onzozo]] |
||
| − | | align="center" bgcolor="FFF8DC" |[[Bathy Choker]]<br>[[Bathy Choker +1]]<br>[[Demersal Degen]]<br>[[Demersal Degen +1]]<br>[[Bakunawa's Ink]]<span style="color:#DAA520"><small>#</small></span><br> |
||
| + | :(G-6, I-5, H-7) |
||
| − | | align="center" bgcolor="FFF8DC" |1500 |
||
| + | | |
||
| − | | align="center" bgcolor="FFF8DC" |7500 |
||
| + | :{{IIn|Agony Jerkin}} |
||
| − | | align="center" bgcolor="FFF8DC" |2000 |
||
| + | :{{IIn|Agony Jerkin +1}} |
||
| − | |- |
||
| + | :{{IIn|Refined Grip}} |
||
| − | | align="center" bgcolor="FFF8DC" |125 |
||
| + | :{{IIn|Refined Grip +1}} |
||
| − | | align="center" bgcolor="FFF8DC" |2,100 |
||
| + | :{{IIn|Voso's Hide}} <small style="color:#DAA520">#</small> |
||
| − | | align="center" bgcolor="FFF8DC" |[[Azure-toothed Clawberry]] |
||
| + | | 1250 |
||
| − | | align="center" bgcolor="FFF8DC" |[[Temple of Uggalepih]]<br>(J-8) Map 1, (H-9, F-7) Map 2 |
||
| + | | 6000 |
||
| − | | align="center" bgcolor="FFF8DC" |[[Asteria Mitts]]<br>[[Asteria Mitts +1]]<br>[[Lamassu Mitts]]<br>[[Lamassu Mitts +1]]<br>[[Azure-toothed Clawberry's Coat]]<span style="color:#DAA520"><small>#</small></span><br> |
||
| + | | 1500 |
||
| − | | align="center" bgcolor="FFF8DC" |1500 |
||
| − | | align="center" |
+ | |- align="center" style="background-color:#FFF8DC" |
| + | | 122 |
||
| − | | align="center" bgcolor="FFF8DC" |2000 |
||
| + | | 1,800 |
||
| − | |- |
||
| + | | [[Woodland Mender]] |
||
| − | | align="center" bgcolor="FFF8DC" |125 |
||
| + | | |
||
| − | | align="center" bgcolor="FFF8DC" |2,100 |
||
| + | :[[Yhoator Jungle]] |
||
| − | | align="center" bgcolor="FFF8DC" |[[Centurio XX-I]] |
||
| + | :(G-10, I-10, H-7) |
||
| − | | align="center" bgcolor="FFF8DC" |[[Quicksand Caves]]<br>(H-12, I-5, I-9) Map 1 |
||
| + | | |
||
| − | | align="center" bgcolor="FFF8DC" |[[Cohort Cloak]]<br>[[Cohort Cloak +1]]<br>[[Kentarch Belt]]<br>[[Kentarch Belt +1]]<br>[[Centurio XX-I's Armor]]<span style="color:#DAA520"><small>#</small></span><br> |
||
| + | :{{IIn|Rosette Jaseran}} |
||
| − | | align="center" bgcolor="FFF8DC" |1500 |
||
| + | :{{IIn|Rosette Jaseran +1}} |
||
| − | | align="center" bgcolor="FFF8DC" |7500 |
||
| + | :{{IIn|Pouwhenua}} |
||
| − | | align="center" bgcolor="FFF8DC" |2000 |
||
| + | :{{IIn|Pouwhenua +1}} |
||
| − | |- |
||
| + | :{{IIn|Mender's Log}} <small style="color:#DAA520">#</small> |
||
| − | | align="center" bgcolor="FFF8DC" |125 |
||
| + | | 1250 |
||
| − | | align="center" bgcolor="FFF8DC" |2,100 |
||
| + | | 6000 |
||
| − | | align="center" bgcolor="FFF8DC" |[[Kubool Ja's Mhuufya]] |
||
| + | | 1500 |
||
| − | | align="center" bgcolor="FFF8DC" |[[Wajaom Woodlands]]<br>(K-9, I-9, I-8) |
||
| + | |- align="center" style="background-color:#FFF8DC" |
||
| − | | align="center" bgcolor="FFF8DC" |[[Zwazo Earring]]<br>[[Zwazo Earring +1]]<br>[[Mdomo Axe]]<br>[[Mdomo Axe +1]]<br>[[Mhuufya's Beak]]<span style="color:#DAA520"><small>#</small></span><br> |
||
| + | | 125 |
||
| − | | align="center" bgcolor="FFF8DC" |1500 |
||
| + | | 2,100 |
||
| − | | align="center" bgcolor="FFF8DC" |7500 |
||
| + | | [[Arke]] |
||
| − | | align="center" bgcolor="FFF8DC" |2000 |
||
| − | | |
+ | | |
| + | :[[Sauromugue Champaign]] |
||
| − | | align="center" bgcolor="FFF8DC" |125 |
||
| + | :(J-9, G-8, L-7) |
||
| − | | align="center" bgcolor="FFF8DC" |2,100 |
||
| + | | |
||
| − | | align="center" bgcolor="FFF8DC" |[[Vermillion Fishfly]] |
||
| + | :{{IIn|Ababinili}} |
||
| − | | align="center" bgcolor="FFF8DC" |[[Lufaise Meadows]]<br>(G-7, J-9, K-9) |
||
| + | :{{IIn|Ababinili +1}} |
||
| − | | align="center" bgcolor="FFF8DC" |[[Blistering Sallet]]<br>[[Blistering Sallet +1]]<br>[[Cacoethic Ring]]<br>[[Cacoethic Ring +1]]<br>[[Vermillion Fishfly's Wing]]<span style="color:#DAA520"><small>#</small></span><br> |
||
| + | :{{IIn|Pukulatmuj}} |
||
| − | | align="center" bgcolor="FFF8DC" |1500 |
||
| + | :{{IIn|Pukulatmuj +1}} |
||
| − | | align="center" bgcolor="FFF8DC" |7500 |
||
| + | :{{IIn|Arke's Wing}} <small style="color:#DAA520">#</small> |
||
| − | | align="center" bgcolor="FFF8DC" |2000 |
||
| + | | 1500 |
||
| − | |- |
||
| + | | 7500 |
||
| − | | align="center" bgcolor="FFF8DC" |128 |
||
| + | | 2000 |
||
| − | | align="center" bgcolor="FFF8DC" |2,400 |
||
| − | | align="center" |
+ | |- align="center" style="background-color:#FFF8DC" |
| + | | 125 |
||
| − | | align="center" bgcolor="FFF8DC" |[[Cape Teriggan]]<br>(I-7, H-8, I-8) |
||
| + | | 2,100 |
||
| − | | align="center" bgcolor="FFF8DC" |[[Jugo Kukri]]<br>[[Jugo Kukri +1]]<br>[[Marin Staff]]<br>[[Marin Staff +1]]<br>[[Vedrfolnir's Wing]] <span style="color:#DAA520"><small>#</small></span> |
||
| + | | [[Beist]] |
||
| − | | align="center" bgcolor="FFF8DC" |1750 |
||
| + | | |
||
| − | | align="center" bgcolor="FFF8DC" |9000 |
||
| + | :[[Xarcabard]] |
||
| − | | align="center" bgcolor="FFF8DC" |2500 |
||
| + | :(I-9, I-8, I-7) |
||
| − | |- |
||
| + | | |
||
| − | | align="center" bgcolor="FFF8DC" |128 |
||
| + | :{{IIn|Adorned Helm}} |
||
| − | | align="center" bgcolor="FFF8DC" |2,400 |
||
| + | :{{IIn|Adorned Helm +1}} |
||
| − | | align="center" bgcolor="FFF8DC" |[[Camahueto]] |
||
| + | :{{IIn|Hime Domaru}} |
||
| − | | align="center" bgcolor="FFF8DC" |[[Uleguerand Range]]<br>(G-10, D-9, D-8) |
||
| + | :{{IIn|Hime Domaru +1}} |
||
| − | | align="center" bgcolor="FFF8DC" |[[Hygieia Clogs]]<br>[[Hygieia Clogs +1]]<br>[[Triska Scythe]]<br>[[Triska Scythe +1]]<br>[[Camahueto's Fur]]<span style="color:#DAA520"><small>#</small></span><br> |
||
| + | :{{IIn|Beist's Blood}} <small style="color:#DAA520">#</small> |
||
| − | | align="center" bgcolor="FFF8DC" |1750 |
||
| + | | 1500 |
||
| − | | align="center" bgcolor="FFF8DC" |9000 |
||
| + | | 7500 |
||
| − | | align="center" bgcolor="FFF8DC" |2500 |
||
| + | | 2000 |
||
| − | |- |
||
| − | | align="center" |
+ | |- align="center" style="background-color:#FFF8DC" |
| + | | 125 |
||
| − | | align="center" bgcolor="FFF8DC" |2,400 |
||
| + | | 2,100 |
||
| − | | align="center" bgcolor="FFF8DC" |[[Vidmapire]] |
||
| + | | [[Douma Weapon]] |
||
| − | | align="center" bgcolor="FFF8DC" |[[Alzadaal Undersea Ruins]]<br>(F-7, F-10, I-10) Map 5 |
||
| + | | |
||
| − | | align="center" bgcolor="FFF8DC" |[[Raicho]]<br>[[Raicho +1]]<br>[[Fi Follet Cape]]<br>[[Fi Follet Cape +1]]<br>[[Vidmapire's Claw]]<span style="color:#DAA520"><small>#</small></span><br> |
||
| + | :[[Ro'Maeve]] |
||
| − | | align="center" bgcolor="FFF8DC" |1750 |
||
| + | :(I-10, G-11, C-9) |
||
| − | | align="center" bgcolor="FFF8DC" |9000 |
||
| + | | |
||
| − | | align="center" bgcolor="FFF8DC" |2500 |
||
| + | :{{IIn|Shomonjijoe}} |
||
| − | |- |
||
| + | :{{IIn|Shomonjijoe +1}} |
||
| − | | align="center" bgcolor="FFF8DC" |128 |
||
| + | :{{IIn|Rigorous Grip}} |
||
| − | | align="center" bgcolor="FFF8DC" |2,400 |
||
| + | :{{IIn|Rigorous Grip +1}} |
||
| − | | align="center" bgcolor="FFF8DC" |[[Borealis Shadow]] |
||
| + | :{{IIn|Douma's Shard}} <small style="color:#DAA520">#</small> |
||
| − | | align="center" bgcolor="FFF8DC" |[[Fei'Yin]]<br>(I-7, J-8, F-9) Map 1 |
||
| + | | 1500 |
||
| − | | align="center" bgcolor="FFF8DC" |[[Beheader]]<br>[[Beheader +1]]<br>[[Deliverance]]<br>[[Deliverance +1]]<br>[[Fists of Fury]]<br>[[Fists of Fury +1]]<br>[[Paloma Bow]]<br>[[Paloma Bow +1]]<br>[[Ethereal Incense]]<span style="color:#DAA520"><small>#</small></span><br> |
||
| + | | 7500 |
||
| − | | align="center" bgcolor="FFF8DC" |1750 |
||
| + | | 2000 |
||
| − | | align="center" bgcolor="FFF8DC" |9000 |
||
| − | | align="center" |
+ | |- align="center" style="background-color:#FFF8DC" |
| + | | 125 |
||
| − | |- |
||
| + | | 2,100 |
||
| − | | align="center" bgcolor="FFF8DC" |128 |
||
| + | | [[King Uropygid]] |
||
| − | | align="center" bgcolor="FFF8DC" |2,400 |
||
| + | | |
||
| − | | align="center" bgcolor="FFF8DC" |[[Volatile Cluster]] |
||
| + | :[[Western Altepa Desert]] |
||
| − | | align="center" bgcolor="FFF8DC" |[[Misareaux Coast]]<br>(G-8, F-8, I-11) |
||
| + | :(F-10, F-8, J-6) |
||
| − | | align="center" bgcolor="FFF8DC" |[[Aurist's Cloak]]<br>[[Aurist's Cloak +1]]<br>[[Norifusa]]<br>[[Norifusa +1]]<br>[[Volatile Cluster's Ash]]<span style="color:#DAA520"><small>#</small></span><br> |
||
| + | | |
||
| − | | align="center" bgcolor="FFF8DC" |1750 |
||
| + | :{{IIn|Stinger Bullet}} |
||
| − | | align="center" bgcolor="FFF8DC" |9000 |
||
| + | :{{IIn|Stinger Helm}} |
||
| − | | align="center" bgcolor="FFF8DC" |2500 |
||
| + | :{{IIn|Stinger Helm +1}} |
||
| − | |- |
||
| + | :{{IIn|King Uropygid's Needle}} <small style="color:#DAA520">#</small> |
||
| − | | align="center" bgcolor="FFF8DC" |128 |
||
| + | | 1500 |
||
| − | | align="center" bgcolor="FFF8DC" |2,400 |
||
| + | | 7500 |
||
| − | | align="center" bgcolor="FFF8DC" |[[Grand Grenade]] |
||
| + | | 2000 |
||
| − | | align="center" bgcolor="FFF8DC" |[[Mount Zhayolm]]<br>(D-5, C-6, E-7) |
||
| + | |- align="center" style="background-color:#FFF8DC" |
||
| − | | align="center" bgcolor="FFF8DC" |[[Loxotic Mace]]<br>[[Loxotic Mace +1]]<br>[[Seething Bomblet]]<br>[[Seething Bomblet +1]]<br>[[Grand Grenade's Ash]]<span style="color:#DAA520"><small>#</small></span><br> |
||
| + | | 125 |
||
| − | | align="center" bgcolor="FFF8DC" |1750 |
||
| + | | 2,100 |
||
| − | | align="center" bgcolor="FFF8DC" |9000 |
||
| + | | [[Largantua]] |
||
| − | | align="center" bgcolor="FFF8DC" |2500 |
||
| − | | |
+ | | |
| + | :[[Beaucedine Glacier]] |
||
| − | | align="center" bgcolor="FFF8DC" |128 |
||
| + | :(K-9, K-8, J-7) |
||
| − | | align="center" bgcolor="FFF8DC" |2,400 |
||
| + | | |
||
| − | | align="center" bgcolor="FFF8DC" |[[Carousing Celine]] |
||
| + | :{{IIn|Emet Harness}} |
||
| − | | align="center" bgcolor="FFF8DC" |[[Fei'Yin]]<br>(I-7, J-8, F-9) Map 1 |
||
| + | :{{IIn|Emet Harness +1}} |
||
| − | | align="center" bgcolor="FFF8DC" |[[Gazu Bracelet]]<br>[[Gazu Bracelet +1]]<br>[[Odnowa Earring]]<br>[[Odnowa Earring +1]]<br>[[Celine's Vine]]<span style="color:#DAA520"><small>#</small></span><br> |
||
| + | :{{IIn|Warder's Charm}} |
||
| − | | align="center" bgcolor="FFF8DC" |1750 |
||
| + | :{{IIn|Warder's Charm +1}} |
||
| − | | align="center" bgcolor="FFF8DC" |9000 |
||
| + | :{{IIn|Largantua's Shard}} <small style="color:#DAA520">#</small> |
||
| − | | align="center" bgcolor="FFF8DC" |2500 |
||
| + | | 1500 |
||
| − | |- |
||
| + | | 7500 |
||
| − | | align="center" bgcolor="FFF8DC" |128 |
||
| + | | 2000 |
||
| − | | align="center" bgcolor="FFF8DC" |2,400 |
||
| − | | align="center" |
+ | |- align="center" style="background-color:#FFF8DC" |
| + | | 125 |
||
| − | | align="center" bgcolor="FFF8DC" |[[Cape Teriggan]]<br>(I-7, H-8, I-8) |
||
| + | | 2,100 |
||
| − | | align="center" bgcolor="FFF8DC" |[[Kustawi]]<br>[[Kustawi +1]]<br>[[Ushenzi]]<br>[[Ushenzi +1]]<br>[[Glazemane's Fang]]<span style="color:#DAA520"><small>#</small></span><br> |
||
| + | | [[Lumber Jill]] |
||
| − | | align="center" bgcolor="FFF8DC" |1750 |
||
| + | | |
||
| − | | align="center" bgcolor="FFF8DC" |9000 |
||
| + | :[[Batallia Downs]] |
||
| − | | align="center" bgcolor="FFF8DC" |2500 |
||
| + | :(E-5, J-7, H-9) |
||
| − | |- |
||
| + | | |
||
| − | | align="center" bgcolor="FFF8DC" |128 |
||
| + | :{{IIn|Grounded Mantle}} |
||
| − | | align="center" bgcolor="FFF8DC" |2,400 |
||
| + | :{{IIn|Grounded Mantle +1}} |
||
| − | | align="center" bgcolor="FFF8DC" |[[Wyvernhunter Bambrox]] |
||
| + | :{{IIn|Sangarius}} |
||
| − | | align="center" bgcolor="FFF8DC" |[[Gustav Tunnel]]<br>(H-6, G-7, F-7) Map 2 |
||
| + | :{{IIn|Sangarius +1}} |
||
| − | | align="center" bgcolor="FFF8DC" |[[Imati]]<br>[[Imati +1]]<br>[[Pixquizpan]]<br>[[Pixquizpan +1]]<br>[[Bambrox's Shawl]]<span style="color:#DAA520"><small>#</small></span><br> |
||
| + | :{{IIn|Jill's Spittle}} <small style="color:#DAA520">#</small> |
||
| − | | align="center" bgcolor="FFF8DC" |1750 |
||
| + | | 1500 |
||
| − | | align="center" bgcolor="FFF8DC" |9000 |
||
| + | | 7500 |
||
| − | | align="center" bgcolor="FFF8DC" |2500 |
||
| + | | 2000 |
||
| − | |- |
||
| − | | align="center" |
+ | |- align="center" style="background-color:#FFF8DC" |
| + | | 125 |
||
| − | | align="center" bgcolor="FFF8DC" |3,100 |
||
| + | | 2,100 |
||
| − | | align="center" bgcolor="FFF8DC" |[[Sovereign Behemoth]] |
||
| + | | [[Muut]] |
||
| − | | align="center" bgcolor="FFF8DC" |[[Behemoth's Dominion]]<br>(E-8, G-8, J-9) |
||
| + | | |
||
| − | | align="center" bgcolor="FFF8DC" |[[Antitail]]<br>[[Antitail +1]]<br>[[Dominance Earring]]<br>[[Dominance Earring +1]]<br>[[Loricate Torque]]<br>[[Loricate Torque +1]]<br>[[Sovereign Behemoth's Hide]]<span style="color:#DAA520"><small>#</small></span><br> |
||
| + | :[[Attohwa Chasm]] |
||
| − | | align="center" bgcolor="FFF8DC" |2,250 |
||
| + | :(F-7, R-8, G-9) |
||
| − | | align="center" bgcolor="FFF8DC" |12,000 |
||
| + | | |
||
| − | | align="center" bgcolor="FFF8DC" |3,500 |
||
| + | :{{IIn|Anathema Harpe}} |
||
| − | |- |
||
| + | :{{IIn|Anathema Harpe +1}} |
||
| − | | align="center" bgcolor="FFF8DC" |135 |
||
| + | :{{IIn|Kachimusha Kote}} |
||
| − | | align="center" bgcolor="FFF8DC" |3,100 |
||
| + | :{{IIn|Kachimusha Kote +1}} |
||
| − | | align="center" bgcolor="FFF8DC" |[[Hidhaegg]] |
||
| + | :{{IIn|Muut's Vestment}} <small style="color:#DAA520">#</small> |
||
| − | | align="center" bgcolor="FFF8DC" |[[The Boyahda Tree]]<br>(D-6) Map 1, (I-10) Map 2, (H-6) Map 3 |
||
| + | | 1500 |
||
| − | | align="center" bgcolor="FFF8DC" |[[Combuster]]<br>[[Combuster +1]]<br>[[Loess Barbuta]]<br>[[Loess Barbuta +1]]<br>[[Nullis]]<br>[[Nullis +1]]<br>[[Hidhaegg's Scale]]<span style="color:#DAA520"><small>#</small></span><br> |
||
| + | | 7500 |
||
| − | | align="center" bgcolor="FFF8DC" |2,250 |
||
| + | | 2000 |
||
| − | | align="center" bgcolor="FFF8DC" |12,000 |
||
| − | | align="center" |
+ | |- align="center" style="background-color:#FFF8DC" |
| + | | 125 |
||
| − | |- |
||
| + | | 2,100 |
||
| − | | align="center" bgcolor="FFF8DC" |135 |
||
| + | | [[Strix]] |
||
| − | | align="center" bgcolor="FFF8DC" |3,100 |
||
| + | | |
||
| − | | align="center" bgcolor="FFF8DC" |[[Tolba]] |
||
| + | :[[Rolanberry Fields]] |
||
| − | | align="center" bgcolor="FFF8DC" |[[Valley of Sorrows]]<br>(G-8, F-9, G-9) |
||
| + | :(E-11, F-8, J-8) |
||
| − | | align="center" bgcolor="FFF8DC" |[[Forfend]]<br>[[Forfend +1]]<br>[[Malison]]<br>[[Malison +1]]<br>[[Obviation Cuirass]]<br>[[Obviation Cuirass +1]]<br>[[Tolba's Shell]]<span style="color:#DAA520"><small>#</small></span><br> |
||
| + | | |
||
| − | | align="center" bgcolor="FFF8DC" |2,250 |
||
| + | :{{IIn|Magesmasher}} |
||
| − | | align="center" bgcolor="FFF8DC" |12,000 |
||
| + | :{{IIn|Magesmasher +1}} |
||
| − | | align="center" bgcolor="FFF8DC" |3,500 |
||
| + | :{{IIn|Jute Boots}} |
||
| − | |- |
||
| + | :{{IIn|Jute Boots +1}} |
||
| − | | align="center" bgcolor="FFF8DC" |135 |
||
| + | :{{IIn|Strix's Tailfeather}} <small style="color:#DAA520">#</small> |
||
| − | | align="center" bgcolor="FFF8DC" |3,100 |
||
| + | | 1500 |
||
| − | | align="center" bgcolor="FFF8DC" |[[Thu'ban]] |
||
| + | | 7500 |
||
| − | | align="center" bgcolor="FFF8DC" |[[Wajaom Woodlands]]<br>(K-9, I-9, I-8) |
||
| + | | 2000 |
||
| − | | align="center" bgcolor="FFF8DC" |[[Habilitator]]<br>[[Habilitator +1]]<br>[[Tatenashi Sune-ate]]<br>[[Tatenashi Sune-ate +1]]<br>[[Vim Torque]]<br>[[Vim Torque +1]]<br>[[Thu'ban's Scale]]<span style="color:#DAA520"><small>#</small></span><br> |
||
| − | | align="center" |
+ | |- align="center" style="background-color:#FFF8DC" |
| + | | 125 |
||
| − | | align="center" bgcolor="FFF8DC" |12,000 |
||
| + | | 2,100 |
||
| − | | align="center" bgcolor="FFF8DC" |3,500 |
||
| + | | [[Mephitas]] |
||
| − | |- |
||
| + | | |
||
| − | | align="center" bgcolor="FFF8DC" |135 |
||
| + | :[[Garlaige Citadel]] |
||
| − | | align="center" bgcolor="FFF8DC" |3,100 |
||
| + | :(I-6, G-7, H-8) |
||
| − | | align="center" bgcolor="FFF8DC" |[[Sarama]] |
||
| + | | |
||
| − | | align="center" bgcolor="FFF8DC" |[[Mount Zhayolm]]<br>(D-5, C-6, E-7) |
||
| + | :{{IIn|Mephitas's Ring}} |
||
| − | | align="center" bgcolor="FFF8DC" |[[Montante]]<br>[[Montante +1]]<br>[[Tanmogayi]]<br>[[Tanmogayi +1]]<br>[[Tatenashi Haidate]]<br>[[Tatenashi Haidate +1]]<br>[[Sarama's Hide]]<span style="color:#DAA520"><small>#</small></span><br> |
||
| + | :{{IIn|Mephitas's Ring +1}} |
||
| − | | align="center" bgcolor="FFF8DC" |2,250 |
||
| + | :{{IIn|Ternion Dagger}} |
||
| − | | align="center" bgcolor="FFF8DC" |12,000 |
||
| + | :{{IIn|Ternion Dagger +1}} |
||
| − | | align="center" bgcolor="FFF8DC" |3,500 |
||
| + | :{{IIn|Mephitas's Claw}} <small style="color:#DAA520">#</small> |
||
| − | |- |
||
| + | | 1500 |
||
| − | | align="center" bgcolor="FFF8DC" |135 |
||
| + | | 7500 |
||
| − | | align="center" bgcolor="FFF8DC" |3,100 |
||
| + | | 2000 |
||
| − | | align="center" bgcolor="FFF8DC" |[[Shedu]] |
||
| − | | align="center" |
+ | |- align="center" style="background-color:#FFF8DC" |
| + | | 125 |
||
| − | | align="center" bgcolor="FFF8DC" |[[Flyssa]]<br>[[Flyssa +1]]<br>[[Septopic]]<br>[[Septopic +1]]<br>[[Tatenashi Gote]]<br>[[Tatenashi Gote +1]]<br>[[Shedu's Mane]]<span style="color:#DAA520"><small>#</small></span><br> |
||
| + | | 2,100 |
||
| − | | align="center" bgcolor="FFF8DC" |2,250 |
||
| + | | [[Coca]] |
||
| − | | align="center" bgcolor="FFF8DC" |12,000 |
||
| + | | |
||
| − | | align="center" bgcolor="FFF8DC" |3,500 |
||
| + | :[[Ifrit's Cauldron]] |
||
| − | |- |
||
| + | :(I-7, F-10, H-6) |
||
| − | | align="center" bgcolor="FFF8DC" |145 |
||
| + | | |
||
| − | | align="center" bgcolor="FFF8DC" |4,100 |
||
| + | :{{IIn|Gae Derg}} |
||
| − | | align="center" bgcolor="FFF8DC" |[[Tumult Curator]] |
||
| + | :{{IIn|Gae Derg +1}} |
||
| − | | align="center" bgcolor="FFF8DC" |[[Aydeewa Subterrane]]<br>(J-9, L-8, K-7) |
||
| + | :{{IIn|Ajax}} |
||
| − | | align="center" bgcolor="FFF8DC" |[[Comeuppances]]<br>[[Comeuppances +1]]<br>[[Contemplator]]<br>[[Contemplator +1]]<br>[[Tatenashi Haramaki]]<br>[[Tatenashi Haramaki +1]]<br>[[Tumult Curator's Blood]]<span style="color:#DAA520"><small>#</small></span><br> |
||
| + | :{{IIn|Ajax +1}} |
||
| − | | align="center" bgcolor="FFF8DC" |3,000 |
||
| + | :{{IIn|Coca's Wing}} <small style="color:#DAA520">#</small> |
||
| − | | align="center" bgcolor="FFF8DC" |16,500 |
||
| + | | 1500 |
||
| − | | align="center" bgcolor="FFF8DC" |5,000 |
||
| + | | 7500 |
||
| + | | 2000 |
||
| + | |- align="center" style="background-color:#FFF8DC" |
||
| + | | 125 |
||
| + | | 2,100 |
||
| + | | [[Ayapec]] |
||
| + | | |
||
| + | :[[The Boyahda Tree]] |
||
| + | :(D-6) Map 1, (I-10) Map 2, (H-6) Map 3 |
||
| + | | |
||
| + | :{{IIn|Hike Khat}} |
||
| + | :{{IIn|Hike Khat +1}} |
||
| + | :{{IIn|Perun}} |
||
| + | :{{IIn|Perun +1}} |
||
| + | :{{IIn|Ayapec's Shell}} <small style="color:#DAA520">#</small> |
||
| + | | 1500 |
||
| + | | 7500 |
||
| + | | 2000 |
||
| + | |- align="center" style="background-color:#FFF8DC" |
||
| + | | 125 |
||
| + | | 2,100 |
||
| + | | [[Specter Worm]] |
||
| + | | |
||
| + | :[[Kuftal Tunnel]] |
||
| + | :(F-9) Map 4, (H-5, J-11) Map 2 |
||
| + | | |
||
| + | :{{IIn|Ghastly Tathlum}} |
||
| + | :{{IIn|Ghastly Tathlum +1}} |
||
| + | :{{IIn|Kladenets}} |
||
| + | :{{IIn|Kladenets +1}} |
||
| + | :{{IIn|Specter's Ore}} <small style="color:#DAA520">#</small> |
||
| + | | 1500 |
||
| + | | 7500 |
||
| + | | 2000 |
||
| + | |- align="center" style="background-color:#FFF8DC" |
||
| + | | 128 |
||
| + | | 2,400 |
||
| + | | [[Azrael]] |
||
| + | | |
||
| + | :[[Den of Rancor]] |
||
| + | :(H-5, G-10) Map 2, (G-9) Map 3 |
||
| + | | |
||
| + | :{{IIn|Aizkora}} |
||
| + | :{{IIn|Aizkora +1}} |
||
| + | :{{IIn|Alhazen Hat}} |
||
| + | :{{IIn|Alhazen Hat +1}} |
||
| + | :{{IIn|Azrael's Eye}} <small style="color:#DAA520">#</small> |
||
| + | | 1750 |
||
| + | | 9000 |
||
| + | | 2500 |
||
| + | |- align="center" style="background-color:#FFF8DC" |
||
| + | | 125 |
||
| + | | 2,100 |
||
| + | | [[Bakunawa]] |
||
| + | | |
||
| + | :[[Sea Serpent Grotto]] |
||
| + | :(J-8, I-10, D-9) Map 4 |
||
| + | | |
||
| + | :{{IIn|Bathy Choker}} |
||
| + | :{{IIn|Bathy Choker +1}} |
||
| + | :{{IIn|Demersal Degen}} |
||
| + | :{{IIn|Demersal Degen +1}} |
||
| + | :{{IIn|Bakunawa's Ink}} <small style="color:#DAA520">#</small> |
||
| + | | 1500 |
||
| + | | 7500 |
||
| + | | 2000 |
||
| + | |- align="center" style="background-color:#FFF8DC" |
||
| + | | 125 |
||
| + | | 2,100 |
||
| + | | [[Azure-toothed Clawberry]] |
||
| + | | |
||
| + | :[[Temple of Uggalepih]] |
||
| + | :(J-8) Map 1, (H-9, F-7) Map 2 |
||
| + | | |
||
| + | :{{IIn|Asteria Mitts}} |
||
| + | :{{IIn|Asteria Mitts +1}} |
||
| + | :{{IIn|Lamassu Mitts}} |
||
| + | :{{IIn|Lamassu Mitts +1}} |
||
| + | :{{IIn|Azure-toothed Clawberry's Coat}} <small style="color:#DAA520">#</small> |
||
| + | | 1500 |
||
| + | | 7500 |
||
| + | | 2000 |
||
| + | |- align="center" style="background-color:#FFF8DC" |
||
| + | | 125 |
||
| + | | 2,100 |
||
| + | | [[Centurio XX-I]] |
||
| + | | |
||
| + | :[[Quicksand Caves]] |
||
| + | :(H-12, I-5, I-9) Map 1 |
||
| + | | |
||
| + | :{{IIn|Cohort Cloak}} |
||
| + | :{{IIn|Cohort Cloak +1}} |
||
| + | :{{IIn|Kentarch Belt}} |
||
| + | :{{IIn|Kentarch Belt +1}} |
||
| + | :{{IIn|Centurio XX-I's Armor}} <small style="color:#DAA520">#</small> |
||
| + | | 1500 |
||
| + | | 7500 |
||
| + | | 2000 |
||
| + | |- align="center" style="background-color:#FFF8DC" |
||
| + | | 125 |
||
| + | | 2,100 |
||
| + | | [[Kubool Ja's Mhuufya]] |
||
| + | | |
||
| + | :[[Wajaom Woodlands]] |
||
| + | :(K-9, I-9, I-8) |
||
| + | | |
||
| + | :{{IIn|Zwazo Earring}} |
||
| + | :{{IIn|Zwazo Earring +1}} |
||
| + | :{{IIn|Mdomo Axe}} |
||
| + | :{{IIn|Mdomo Axe +1}} |
||
| + | :{{IIn|Mhuufya's Beak}} <small style="color:#DAA520">#</small> |
||
| + | | 1500 |
||
| + | | 7500 |
||
| + | | 2000 |
||
| + | |- align="center" style="background-color:#FFF8DC" |
||
| + | | 125 |
||
| + | | 2,100 |
||
| + | | [[Vermillion Fishfly]] |
||
| + | | |
||
| + | :[[Lufaise Meadows]] |
||
| + | :(G-7, J-9, K-9) |
||
| + | | |
||
| + | :{{IIn|Blistering Sallet}} |
||
| + | :{{IIn|Blistering Sallet +1}} |
||
| + | :{{IIn|Cacoethic Ring}} |
||
| + | :{{IIn|Cacoethic Ring +1}} |
||
| + | :{{IIn|Vermillion Fishfly's Wing}} <small style="color:#DAA520">#</small> |
||
| + | | 1500 |
||
| + | | 7500 |
||
| + | | 2000 |
||
| + | |- align="center" style="background-color:#FFF8DC" |
||
| + | | 128 |
||
| + | | 2,400 |
||
| + | | [[Vedrfolnir]] |
||
| + | | |
||
| + | :[[Cape Teriggan]] |
||
| + | :(I-7, H-8, I-8) |
||
| + | | |
||
| + | :{{IIn|Jugo Kukri}} |
||
| + | :{{IIn|Jugo Kukri +1}} |
||
| + | :{{IIn|Marin Staff}} |
||
| + | :{{IIn|Marin Staff +1}} |
||
| + | :{{IIn|Vedrfolnir's Wing}} <small style="color:#DAA520">#</small> |
||
| + | | 1750 |
||
| + | | 9000 |
||
| + | | 2500 |
||
| + | |- align="center" style="background-color:#FFF8DC" |
||
| + | | 128 |
||
| + | | 2,400 |
||
| + | | [[Camahueto]] |
||
| + | | |
||
| + | :[[Uleguerand Range]] |
||
| + | :(G-10, D-9, D-8) |
||
| + | | |
||
| + | :{{IIn|Hygieia Clogs}} |
||
| + | :{{IIn|Hygieia Clogs +1}} |
||
| + | :{{IIn|Triska Scythe}} |
||
| + | :{{IIn|Triska Scythe +1}} |
||
| + | :{{IIn|Camahueto's Fur}} <small style="color:#DAA520">#</small> |
||
| + | | 1750 |
||
| + | | 9000 |
||
| + | | 2500 |
||
| + | |- align="center" style="background-color:#FFF8DC" |
||
| + | | 128 |
||
| + | | 2,400 |
||
| + | | [[Vidmapire]] |
||
| + | | |
||
| + | :[[Alzadaal Undersea Ruins]] |
||
| + | :(F-7, F-10, I-10) Map 5 |
||
| + | | |
||
| + | :{{IIn|Raicho}} |
||
| + | :{{IIn|Raicho +1}} |
||
| + | :{{IIn|Fi Follet Cape}} |
||
| + | :{{IIn|Fi Follet Cape +1}} |
||
| + | :{{IIn|Vidmapire's Claw}} <small style="color:#DAA520">#</small> |
||
| + | | 1750 |
||
| + | | 9000 |
||
| + | | 2500 |
||
| + | |- align="center" style="background-color:#FFF8DC" |
||
| + | | 128 |
||
| + | | 2,400 |
||
| + | | [[Borealis Shadow]] |
||
| + | | |
||
| + | :[[Fei'Yin]] |
||
| + | :(I-7, J-8, F-9) Map 1 |
||
| + | | |
||
| + | :{{IIn|Beheader}} |
||
| + | :{{IIn|Beheader +1}} |
||
| + | :{{IIn|Deliverance}} |
||
| + | :{{IIn|Deliverance +1}} |
||
| + | :{{IIn|Fists of Fury}} |
||
| + | :{{IIn|Fists of Fury +1}} |
||
| + | :{{IIn|Paloma Bow}} |
||
| + | :{{IIn|Paloma Bow +1}} |
||
| + | :{{IIn|Ethereal Incense}} <small style="color:#DAA520">#</small> |
||
| + | | 1750 |
||
| + | | 9000 |
||
| + | | 2500 |
||
| + | |- align="center" style="background-color:#FFF8DC" |
||
| + | | 128 |
||
| + | | 2,400 |
||
| + | | [[Volatile Cluster]] |
||
| + | | |
||
| + | :[[Misareaux Coast]] |
||
| + | :(G-8, F-8, I-11) |
||
| + | | |
||
| + | :{{IIn|Aurist's Cape}} |
||
| + | :{{IIn|Aurist's Cape +1}} |
||
| + | :{{IIn|Norifusa}} |
||
| + | :{{IIn|Norifusa +1}} |
||
| + | :{{IIn|Volatile Cluster's Ash}} <small style="color:#DAA520">#</small> |
||
| + | | 1750 |
||
| + | | 9000 |
||
| + | | 2500 |
||
| + | |- align="center" style="background-color:#FFF8DC" |
||
| + | | 128 |
||
| + | | 2,400 |
||
| + | | [[Grand Grenade]] |
||
| + | | |
||
| + | :[[Mount Zhayolm]] |
||
| + | :(D-5, C-6, E-7) |
||
| + | | |
||
| + | :{{IIn|Loxotic Mace}} |
||
| + | :{{IIn|Loxotic Mace +1}} |
||
| + | :{{IIn|Seething Bomblet}} |
||
| + | :{{IIn|Seething Bomblet +1}} |
||
| + | :{{IIn|Grand Grenade's Ash}} <small style="color:#DAA520">#</small> |
||
| + | | 1750 |
||
| + | | 9000 |
||
| + | | 2500 |
||
| + | |- align="center" style="background-color:#FFF8DC" |
||
| + | | 128 |
||
| + | | 2,400 |
||
| + | | [[Carousing Celine]] |
||
| + | | |
||
| + | :[[Fei'Yin]] |
||
| + | :(I-7, J-8, F-9) Map 1 |
||
| + | | |
||
| + | :{{IIn|Gazu Bracelet}} |
||
| + | :{{IIn|Gazu Bracelet +1}} |
||
| + | :{{IIn|Odnowa Earring}} |
||
| + | :{{IIn|Odnowa Earring +1}} |
||
| + | :{{IIn|Celine's Vine}} <small style="color:#DAA520">#</small> |
||
| + | | 1750 |
||
| + | | 9000 |
||
| + | | 2500 |
||
| + | |- align="center" style="background-color:#FFF8DC" |
||
| + | | 128 |
||
| + | | 2,400 |
||
| + | | [[Glazemane]] |
||
| + | | |
||
| + | :[[Cape Teriggan]] |
||
| + | :(I-7, H-8, I-8) |
||
| + | | |
||
| + | :{{IIn|Kustawi}} |
||
| + | :{{IIn|Kustawi +1}} |
||
| + | :{{IIn|Ushenzi}} |
||
| + | :{{IIn|Ushenzi +1}} |
||
| + | :{{IIn|Glazemane's Fang}} <small style="color:#DAA520">#</small> |
||
| + | | 1750 |
||
| + | | 9000 |
||
| + | | 2500 |
||
| + | |- align="center" style="background-color:#FFF8DC" |
||
| + | | 128 |
||
| + | | 2,400 |
||
| + | | [[Wyvernhunter Bambrox]] |
||
| + | | |
||
| + | :[[Gustav Tunnel]] |
||
| + | :(H-6, G-7, F-7) Map 2 |
||
| + | | |
||
| + | :{{IIn|Imati}} |
||
| + | :{{IIn|Imati +1}} |
||
| + | :{{IIn|Pixquizpan}} |
||
| + | :{{IIn|Pixquizpan +1}} |
||
| + | :{{IIn|Bambrox's Shawl}} <small style="color:#DAA520">#</small> |
||
| + | | 1750 |
||
| + | | 9000 |
||
| + | | 2500 |
||
| + | |- align="center" style="background-color:#FFF8DC" |
||
| + | | 135 |
||
| + | | 3,100 |
||
| + | | [[Sovereign Behemoth]] |
||
| + | | |
||
| + | :[[Behemoth's Dominion]] |
||
| + | :(E-8, G-8, J-9) |
||
| + | | |
||
| + | :{{IIn|Antitail}} |
||
| + | :{{IIn|Antitail +1}} |
||
| + | :{{IIn|Defending Ring}} |
||
| + | :{{IIn|Dominance Earring}} |
||
| + | :{{IIn|Dominance Earring +1}} |
||
| + | :{{IIn|Loricate Torque}} |
||
| + | :{{IIn|Loricate Torque +1}} |
||
| + | :{{IIn|Sovereign Behemoth's Hide}} <small style="color:#DAA520">#</small> |
||
| + | | 2,250 |
||
| + | | 12,000 |
||
| + | | 3,500 |
||
| + | |- align="center" style="background-color:#FFF8DC" |
||
| + | | 135 |
||
| + | | 3,100 |
||
| + | | [[Hidhaegg]] |
||
| + | | |
||
| + | :[[The Boyahda Tree]] |
||
| + | :(D-6) Map 1, (I-10) Map 2, (H-6) Map 3 |
||
| + | | |
||
| + | :{{IIn|Combuster}} |
||
| + | :{{IIn|Combuster +1}} |
||
| + | :{{IIn|Loess Barbuta}} |
||
| + | :{{IIn|Loess Barbuta +1}} |
||
| + | :{{IIn|Nullis}} |
||
| + | :{{IIn|Nullis +1}} |
||
| + | :{{IIn|Hidhaegg's Scale}} <small style="color:#DAA520">#</small> |
||
| + | | 2,250 |
||
| + | | 12,000 |
||
| + | | 3,500 |
||
| + | |- align="center" style="background-color:#FFF8DC" |
||
| + | | 135 |
||
| + | | 3,100 |
||
| + | | [[Tolba]] |
||
| + | | |
||
| + | :[[Valley of Sorrows]] |
||
| + | :(G-8, F-9, G-9) |
||
| + | | |
||
| + | :{{IIn|Forfend}} |
||
| + | :{{IIn|Forfend +1}} |
||
| + | :{{IIn|Malison}} |
||
| + | :{{IIn|Malison +1}} |
||
| + | :{{IIn|Obviation Cuirass}} |
||
| + | :{{IIn|Obviation Cuirass +1}} |
||
| + | :{{IIn|Tolba's Shell}} <small style="color:#DAA520">#</small> |
||
| + | | 2,250 |
||
| + | | 12,000 |
||
| + | | 3,500 |
||
| + | |- align="center" style="background-color:#FFF8DC" |
||
| + | | 135 |
||
| + | | 3,100 |
||
| + | | [[Thu'ban]] |
||
| + | | |
||
| + | :[[Wajaom Woodlands]] |
||
| + | :(K-9, I-9, I-8) |
||
| + | | |
||
| + | :{{IIn|Habilitator}} |
||
| + | :{{IIn|Habilitator +1}} |
||
| + | :{{IIn|Tatenashi Sune-ate}} |
||
| + | :{{IIn|Tatenashi Sune-ate +1}} |
||
| + | :{{IIn|Vim Torque}} |
||
| + | :{{IIn|Vim Torque +1}} |
||
| + | :{{IIn|Thu'ban's Scale}} <small style="color:#DAA520">#</small> |
||
| + | | 2,250 |
||
| + | | 12,000 |
||
| + | | 3,500 |
||
| + | |- align="center" style="background-color:#FFF8DC" |
||
| + | | 135 |
||
| + | | 3,100 |
||
| + | | [[Sarama]] |
||
| + | | |
||
| + | :[[Mount Zhayolm]] |
||
| + | :(D-5, C-6, E-7) |
||
| + | | |
||
| + | :{{IIn|Montante}} |
||
| + | :{{IIn|Montante +1}} |
||
| + | :{{IIn|Tanmogayi}} |
||
| + | :{{IIn|Tanmogayi +1}} |
||
| + | :{{IIn|Tatenashi Haidate}} |
||
| + | :{{IIn|Tatenashi Haidate +1}} |
||
| + | :{{IIn|Sarama's Hide}} <small style="color:#DAA520">#</small> |
||
| + | | 2,250 |
||
| + | | 12,000 |
||
| + | | 3,500 |
||
| + | |- align="center" style="background-color:#FFF8DC" |
||
| + | | 135 |
||
| + | | 3,100 |
||
| + | | [[Shedu]] |
||
| + | | |
||
| + | :[[Caedarva Mire]] |
||
| + | :(H-7, G-8, I-7) Map 4 |
||
| + | | |
||
| + | :{{IIn|Flyssa}} |
||
| + | :{{IIn|Flyssa +1}} |
||
| + | :{{IIn|Septoptic}} |
||
| + | :{{IIn|Septoptic +1}} |
||
| + | :{{IIn|Tatenashi Gote}} |
||
| + | :{{IIn|Tatenashi Gote +1}} |
||
| + | :{{IIn|Shedu's Mane}} <small style="color:#DAA520">#</small> |
||
| + | | 2,250 |
||
| + | | 12,000 |
||
| + | | 3,500 |
||
| + | |- align="center" style="background-color:#FFF8DC" |
||
| + | | 145 |
||
| + | | 4,100 |
||
| + | | [[Tumult Curator]] |
||
| + | | |
||
| + | :[[Aydeewa Subterrane]] |
||
| + | :(J-9, L-8, K-7) |
||
| + | | |
||
| + | :{{IIn|Comeuppances}} |
||
| + | :{{IIn|Comeuppances +1}} |
||
| + | :{{IIn|Contemplator (Staff)|Contemplator}} |
||
| + | :{{IIn|Contemplator +1}} |
||
| + | :{{IIn|Tatenashi Haramaki}} |
||
| + | :{{IIn|Tatenashi Haramaki +1}} |
||
| + | :{{IIn|Tumult's Blood}} <small style="color:#DAA520">#</small> |
||
| + | | 3,000 |
||
| + | | 16,500 |
||
| + | | 5,000 |
||
|} |
|} |
||
| − | + | <small style="color:#DAA520">#</small> Material used to upgrade NQ items to their HQ version. |
|
== Wanted NM Coffers == |
== Wanted NM Coffers == |
||
Revision as of 01:24, 25 July 2019
Unity Concord (a.k.a. Unity) is a new type of loose in-game community--closer together than conquest, less binding than linkshells--that players can jump into and enjoy easily. Unities are named after and led by some of Vana'diel's biggest characters, and adventurers can make new friends with members of the same unity.
Unity Accolades
Unity Accolades can be earned by completing unity-centric Records of Eminence objectives; completing non-unity objectives and vanquishing particular monsters also awards a small amount. These can be used to purchase items, participate in new battle content known as "Wanted Battles" (described below), teleport to areas where these battles take place, enhance equipment earned therein, and obtain a variety of other benefits. Speak with a Unity Concord NPC to spend accolades.
Climb the Unity Ranking Ladder!
Accolades earned by members of a particular unity are tabulated each week, culminating in a ranking of which unities collected the most glory. For the duration of the next tabulation period, Wanted battle equipment effects will increase the higher a unity's ranking was in the previous period.
- You can see it using: Menu => Status => Unity => Unity Info
- This is at least a four digit field (1,000+).
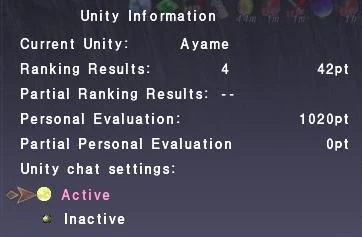 |
Unity Chat
Unity chat is the perfect place to form bonds with your fellow adventurers in much the same way as linkshells.
- Unity chat log can be enabled or disabled at any time in the same Unity Information menu shown above, allowing you to see your Unity members chat, or enjoy a quiet moment of solitude, based on your goals at the moment.
- Join Unity chat by typing the command "/cm u".
Unity-centric Objectives
Unity-centric objectives exist in Records of Eminence, allowing unity members to tackle special content together.
There are two kinds of unity Records of Eminence objectives. "Shared" objectives can be undertaken by any member of any Unity, while "Unity-Specific" objectives are only open to members of a particular Unity.
How to Participate
Joining
Join a Unity by speaking to an Adventurers' Mutual Aid Network representative in charge of the system located in various cities throughout Vana'diel. You will need at least 5 RoE quests completed. The following NPC are the A.M.A.N. representatives:
 Urbiolaine in Southern San d'Oria (G-10) |
 Igsli in Bastok Markets (E-11) |
  Teldro-Kesdrodo and Yonolala in Windurst Woods (J-10) |
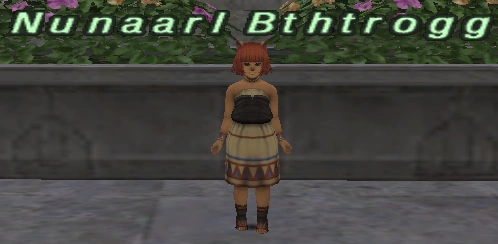  Nunaarl Bthtrogg in Western Adoulin (H-11) |
Changing Unities
You can switch to a different Unity by paying a fee (in Accolades) to one of the A.M.A.N. representatives (see above). This fee depends upon the difference between your current Unity's rank, and the one you desire. The fee is highest when moving from a lower to higher rank, such as (example) 1,800 unity points for someone moving from rank 3 to rank 1. A lower fee occurs when moving from, say, rank 3 to rank 5, which might be 300 unity points. You may only change your Unity once per conquest week.
NOTE: Any specific RoE UC quests you have outstanding will continue to exist, but you'll be unable to complete them, as you won't get credit (given you are no longer a member of that UC unity).
NOTE: You do not lose any unity Accolades (other than the fee) by changing to a different UC / unity.
Wanted Battles
Wanted battles are fast-paced combat against particular notorious monsters specified in Records of Eminence "Wanted" objectives. Joining the fray costs a certain amount of accolades. The stalwarts who vanquish these heinous foes will be rewarded with valuable equipment that can only be earned from these battles.
- Unity Notorious Monsters are spawned by inspecting Ethereal Junctions. Players must be in a party with 1 or more people and have the correct Wanted quest set under Records of Eminence under the Unity\Wanted tab. Players must also have the specified Unity Accolades to receive any rewards.
- Below is a table showing cost to set the battle, NMs, their 3 Ethereal Junction locations, and their rewards. Speak with a Unity Concord NPC to set the battle and be teleported to the battle site.
- Notable Rewards are received when opening the coffer dropped by the monster, not directly from the monster itself.
| Lvl | Acc | Unity NM | Zone | Notable Rewards | Sparks | XP | CP |
|---|---|---|---|---|---|---|---|
| 75 | 200 | Hugemaw Harold |
|
500 | 2500 | ||
| 75 | 200 | Bounding Belinda |
|
500 | 2500 | ||
| 75 | 200 | Prickly Pitriv |
|
500 | 2500 | ||
| 99 | 400 | Ironhorn Baldurno |
|
750 | 4000 | ||
| 99 | 400 | Sleepy Mabel |
|
750 | 4000 | ||
| 99 | 400 | Serpopard Ninlil |
|
750 | 4000 | ||
| 119 | 1,500 | Abyssdiver |
|
1000 | 5000 | 1000 | |
| 119 | 1,500 | Immanibugard |
|
1000 | 5000 | 1000 | |
| 119 | 1,500 | Intuila |
|
1000 | 5000 | 1000 | |
| 119 | 1,500 | Jester Malatrix |
|
1000 | 5000 | 1000 | |
| 119 | 1,500 | Orcfeltrap |
|
1000 | 5000 | 1000 | |
| 119 | 1,500 | Sybaritic Samantha |
|
1000 | 5000 | 1000 | |
| 119 | 1,500 | Valkurm Imperator |
|
1000 | 5000 | 1000 | |
| 122 | 1,800 | Cactrot Veloz |
|
1250 | 6000 | 1500 | |
| 122 | 1,800 | Garbage Gel |
|
1250 | 6000 | 1500 | |
| 122 | 1,800 | Emperor Arthro |
|
1250 | 6000 | 1500 | |
| 122 | 1,800 | Joyous Green |
|
1250 | 6000 | 1500 | |
| 122 | 1,800 | Keeper of Heiligtum |
|
1250 | 6000 | 1500 | |
| 122 | 1,800 | Tiyanak |
|
1250 | 6000 | 1500 | |
| 122 | 1,800 | Warblade Beak |
|
1250 | 6000 | 1500 | |
| 122 | 1,800 | Voso |
|
1250 | 6000 | 1500 | |
| 122 | 1,800 | Woodland Mender |
|
1250 | 6000 | 1500 | |
| 125 | 2,100 | Arke |
|
1500 | 7500 | 2000 | |
| 125 | 2,100 | Beist |
|
1500 | 7500 | 2000 | |
| 125 | 2,100 | Douma Weapon |
|
1500 | 7500 | 2000 | |
| 125 | 2,100 | King Uropygid |
|
|
1500 | 7500 | 2000 |
| 125 | 2,100 | Largantua |
|
1500 | 7500 | 2000 | |
| 125 | 2,100 | Lumber Jill |
|
1500 | 7500 | 2000 | |
| 125 | 2,100 | Muut |
|
1500 | 7500 | 2000 | |
| 125 | 2,100 | Strix |
|
1500 | 7500 | 2000 | |
| 125 | 2,100 | Mephitas |
|
1500 | 7500 | 2000 | |
| 125 | 2,100 | Coca |
|
1500 | 7500 | 2000 | |
| 125 | 2,100 | Ayapec |
|
1500 | 7500 | 2000 | |
| 125 | 2,100 | Specter Worm |
|
1500 | 7500 | 2000 | |
| 128 | 2,400 | Azrael |
|
1750 | 9000 | 2500 | |
| 125 | 2,100 | Bakunawa |
|
1500 | 7500 | 2000 | |
| 125 | 2,100 | Azure-toothed Clawberry |
|
1500 | 7500 | 2000 | |
| 125 | 2,100 | Centurio XX-I |
|
1500 | 7500 | 2000 | |
| 125 | 2,100 | Kubool Ja's Mhuufya |
|
1500 | 7500 | 2000 | |
| 125 | 2,100 | Vermillion Fishfly |
|
|
1500 | 7500 | 2000 |
| 128 | 2,400 | Vedrfolnir |
|
1750 | 9000 | 2500 | |
| 128 | 2,400 | Camahueto |
|
1750 | 9000 | 2500 | |
| 128 | 2,400 | Vidmapire |
|
1750 | 9000 | 2500 | |
| 128 | 2,400 | Borealis Shadow |
|
1750 | 9000 | 2500 | |
| 128 | 2,400 | Volatile Cluster |
|
1750 | 9000 | 2500 | |
| 128 | 2,400 | Grand Grenade |
|
1750 | 9000 | 2500 | |
| 128 | 2,400 | Carousing Celine |
|
1750 | 9000 | 2500 | |
| 128 | 2,400 | Glazemane |
|
1750 | 9000 | 2500 | |
| 128 | 2,400 | Wyvernhunter Bambrox |
|
1750 | 9000 | 2500 | |
| 135 | 3,100 | Sovereign Behemoth |
|
2,250 | 12,000 | 3,500 | |
| 135 | 3,100 | Hidhaegg |
|
2,250 | 12,000 | 3,500 | |
| 135 | 3,100 | Tolba |
|
2,250 | 12,000 | 3,500 | |
| 135 | 3,100 | Thu'ban |
|
|
2,250 | 12,000 | 3,500 |
| 135 | 3,100 | Sarama |
|
2,250 | 12,000 | 3,500 | |
| 135 | 3,100 | Shedu |
|
2,250 | 12,000 | 3,500 | |
| 145 | 4,100 | Tumult Curator |
|
3,000 | 16,500 | 5,000 |

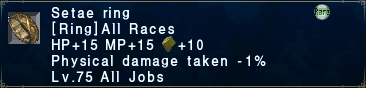


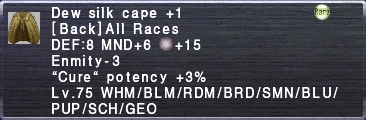

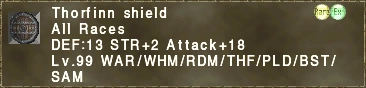
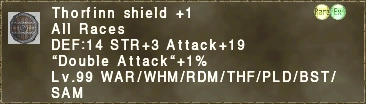

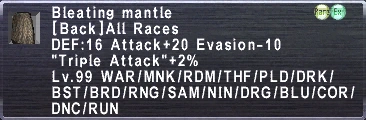

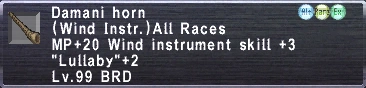
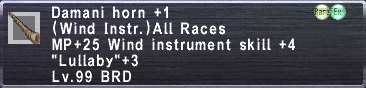


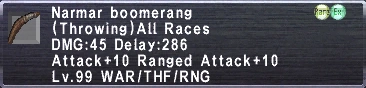
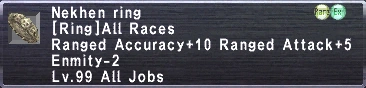
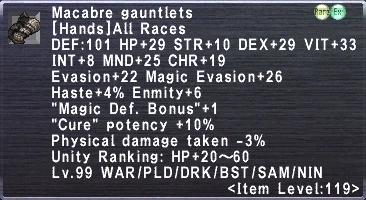
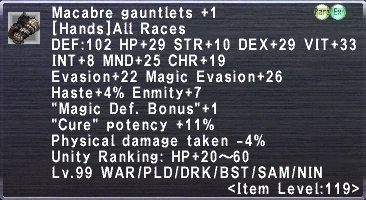


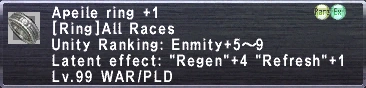
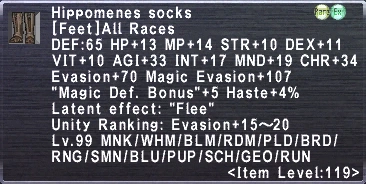
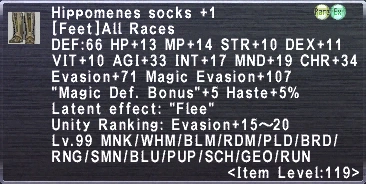

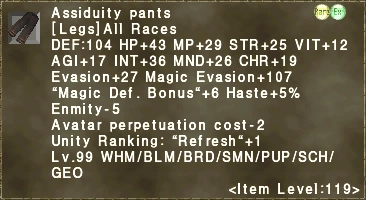
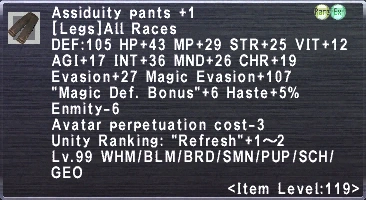
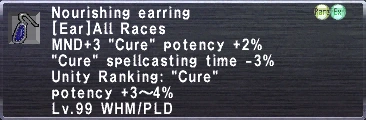
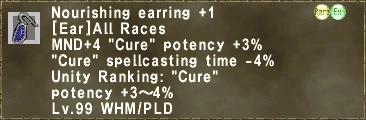

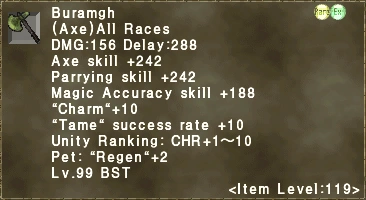
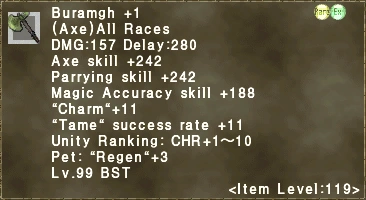
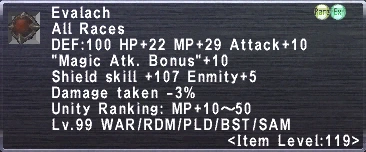
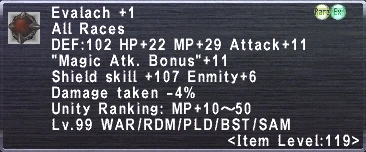

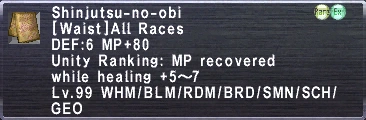
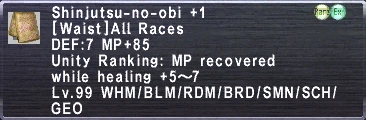
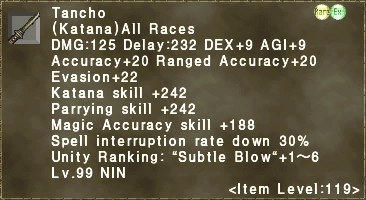


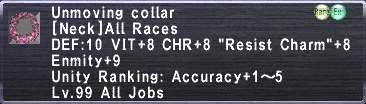
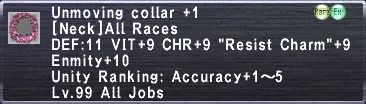
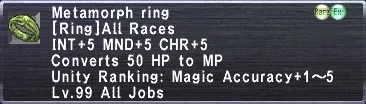
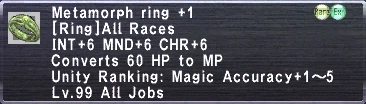
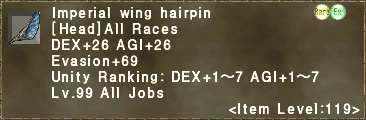


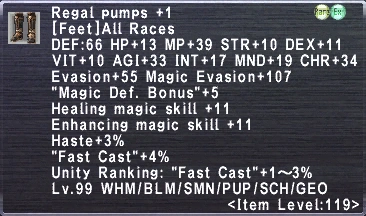

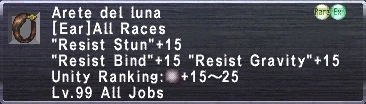
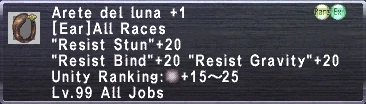
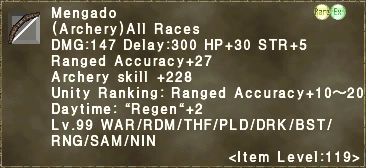
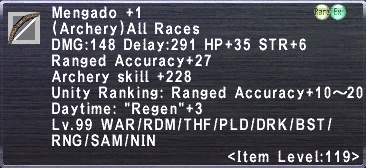

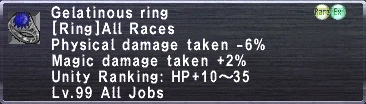
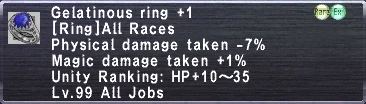
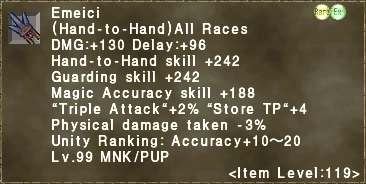
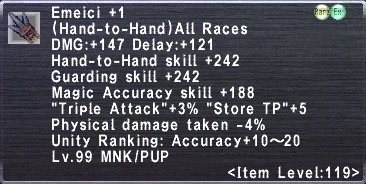

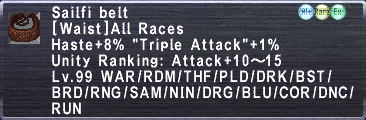
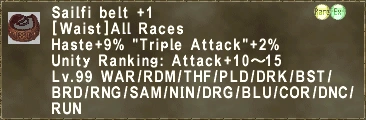
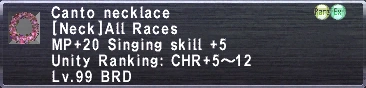
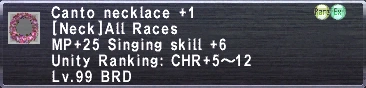

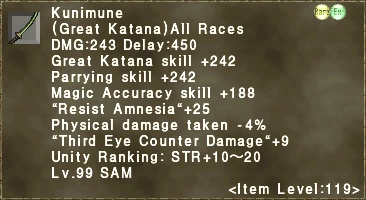
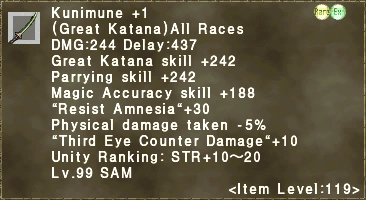
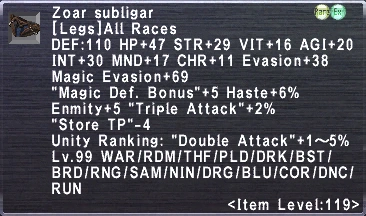
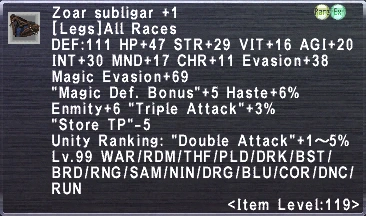

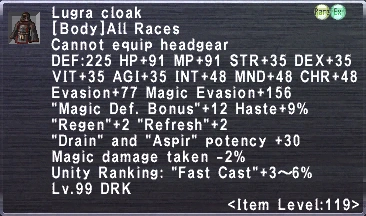
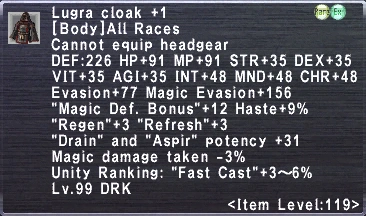

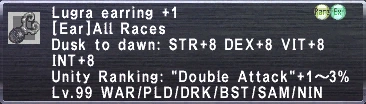
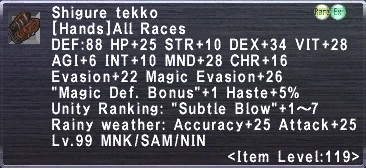
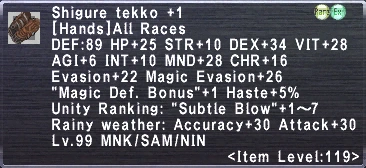
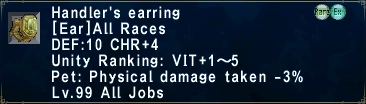
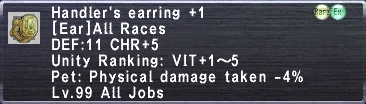
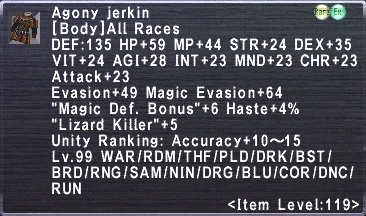
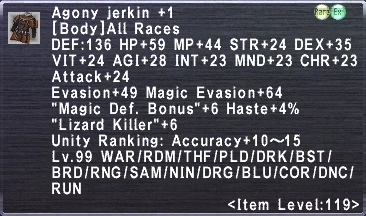

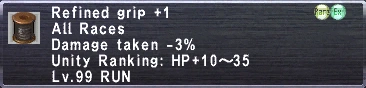

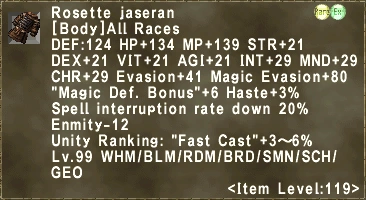
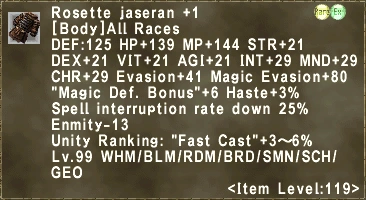
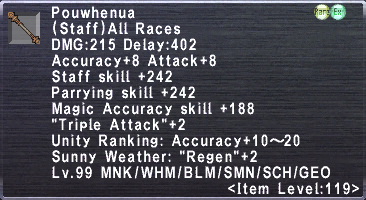
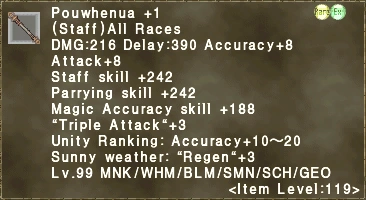

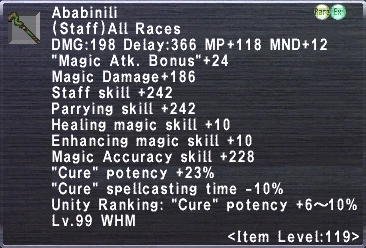
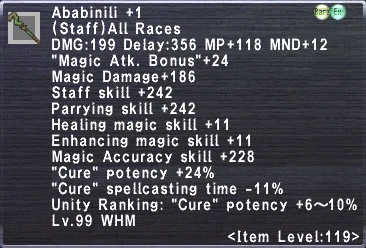
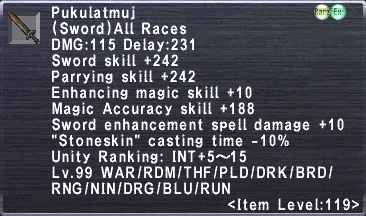
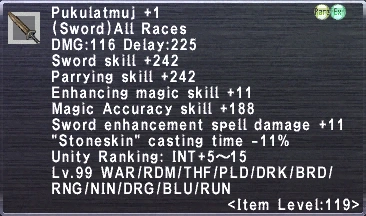

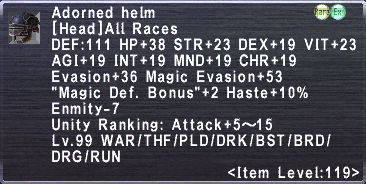
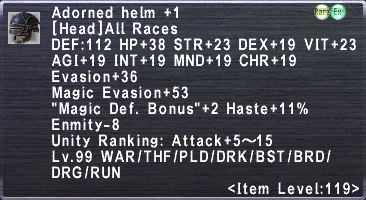

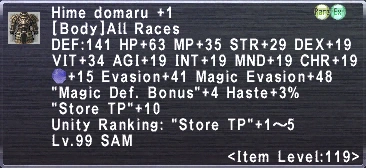

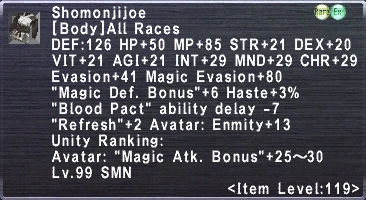
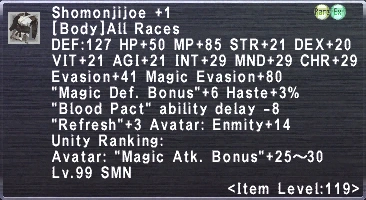
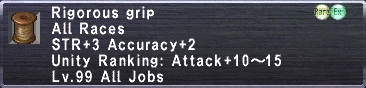
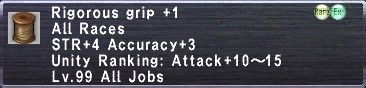

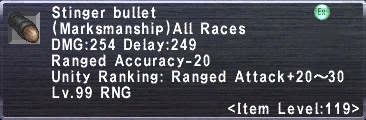
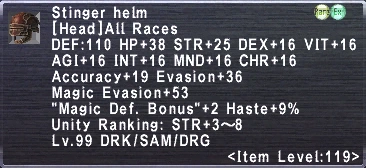


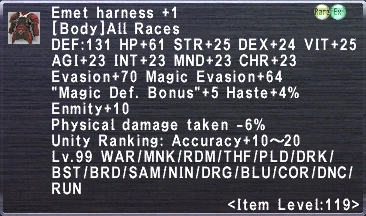
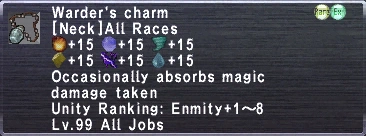


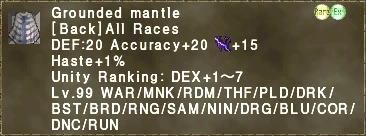
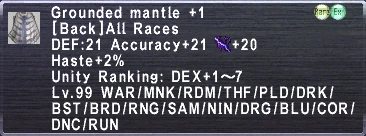
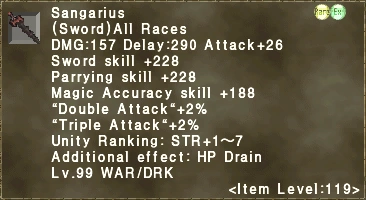
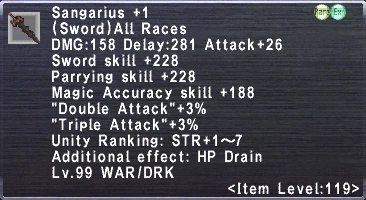

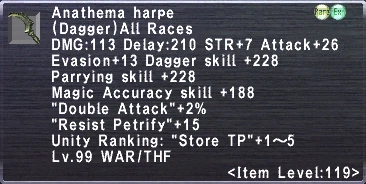
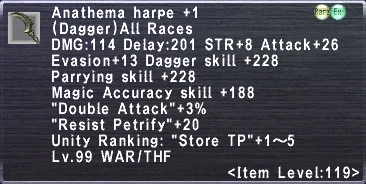
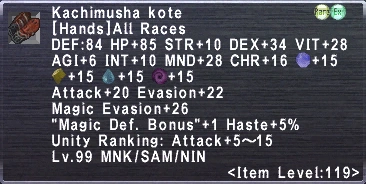
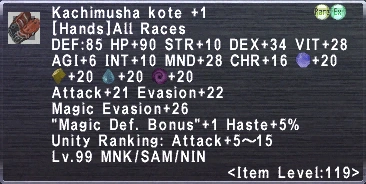
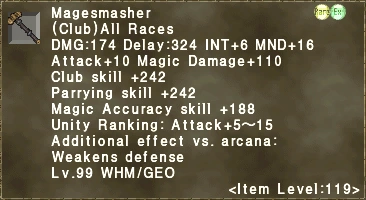
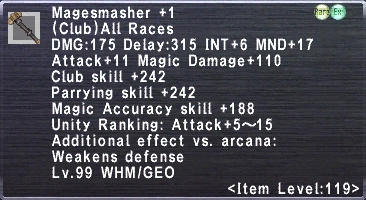

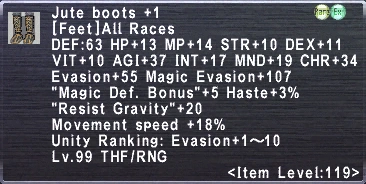

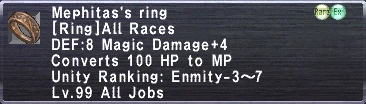
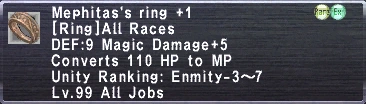
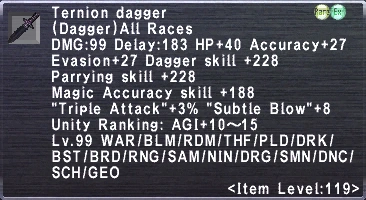
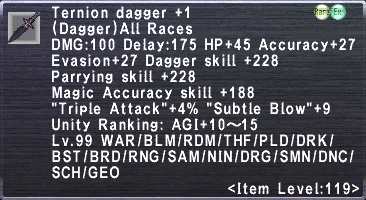

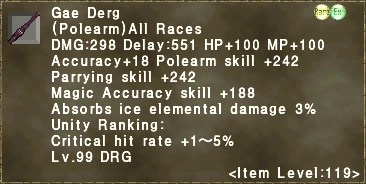
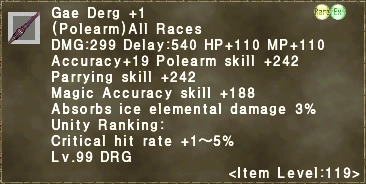

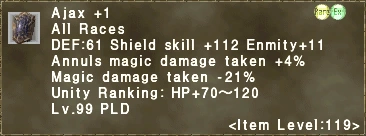

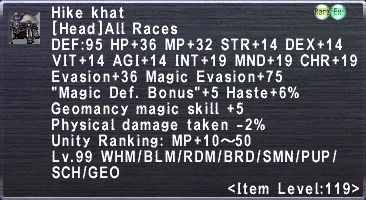
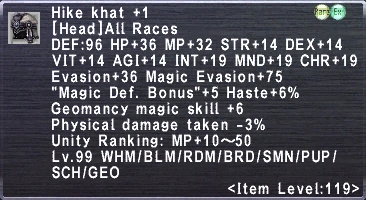
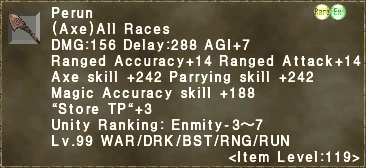
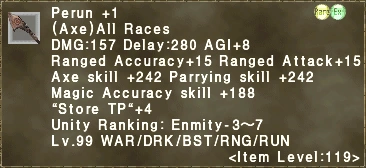

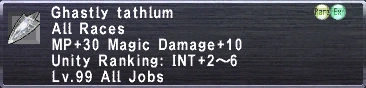
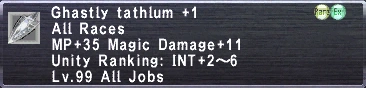
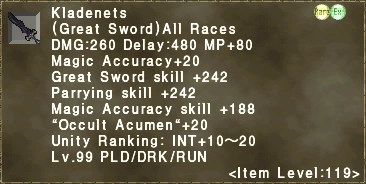
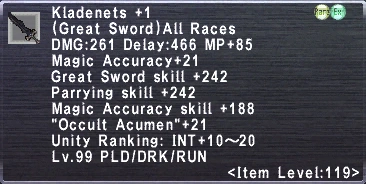

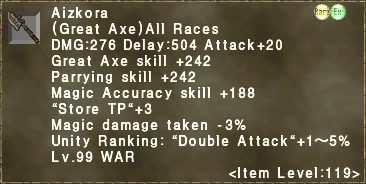
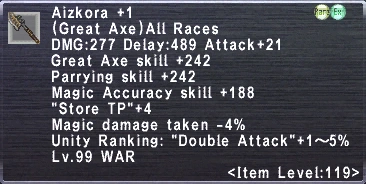
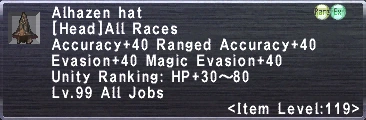


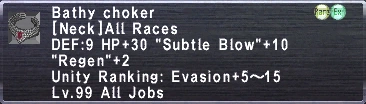
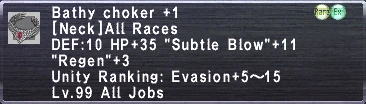

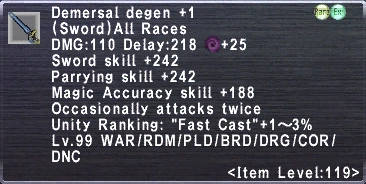

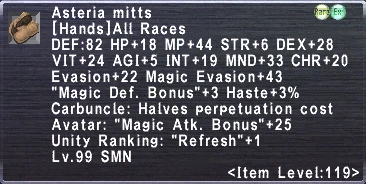
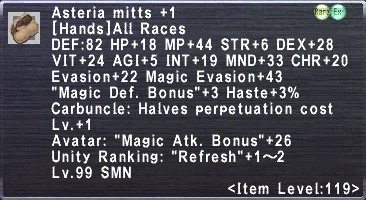
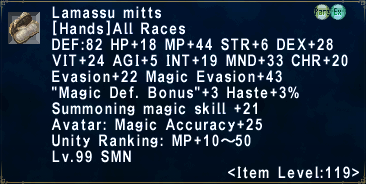
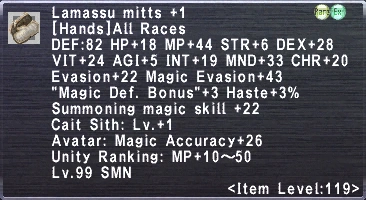
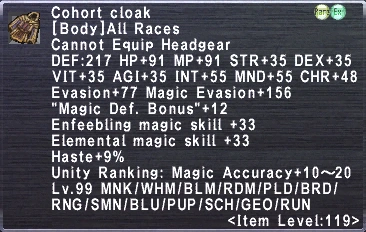
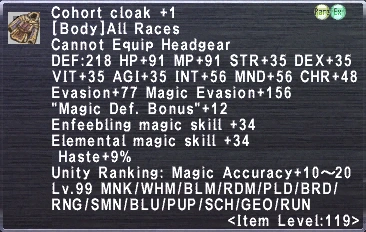
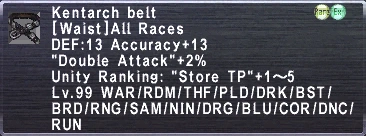
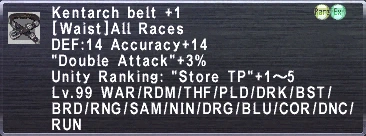
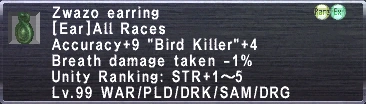
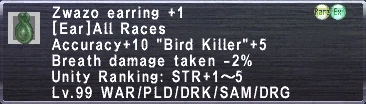


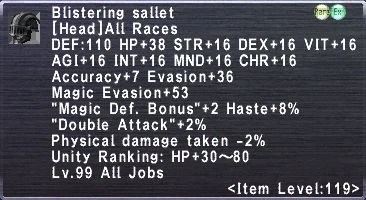
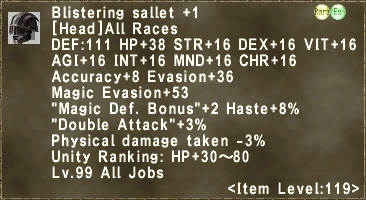
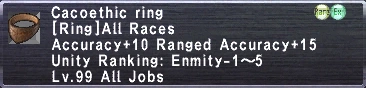
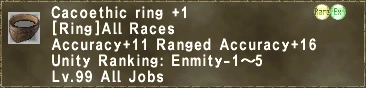
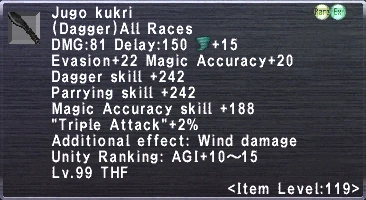
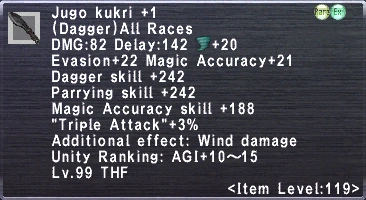
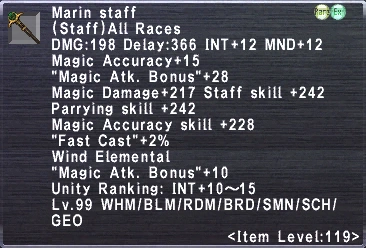
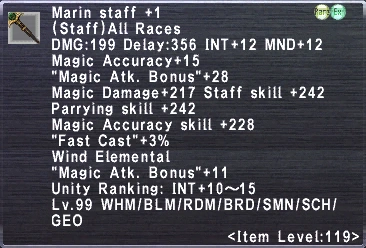

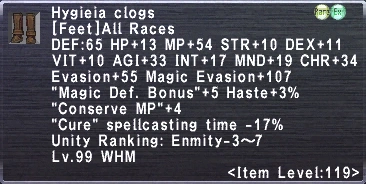
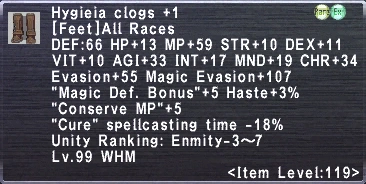
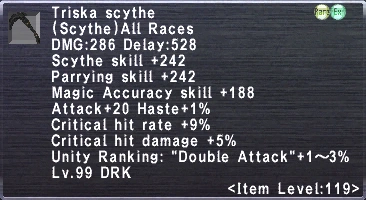
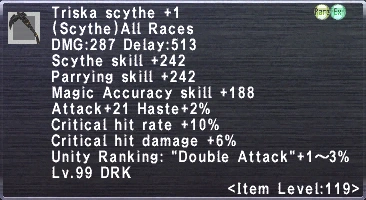

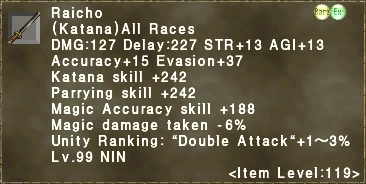
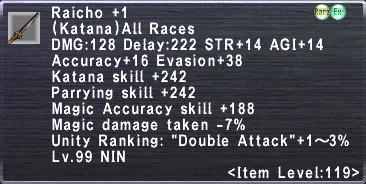
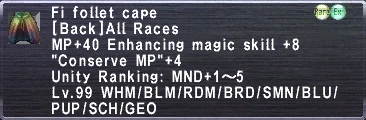


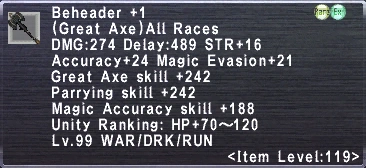
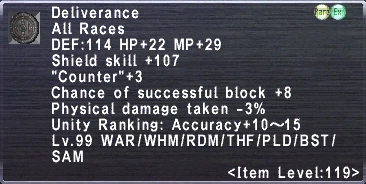
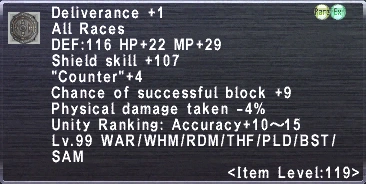
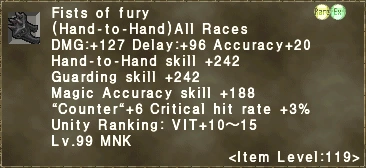
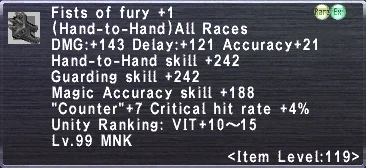
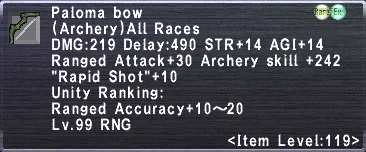
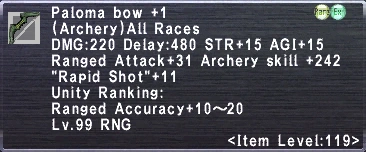

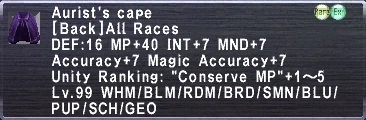

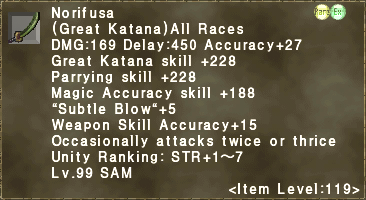
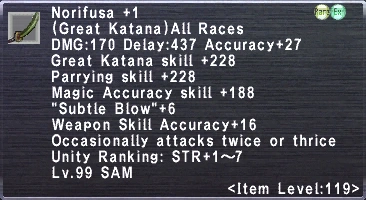

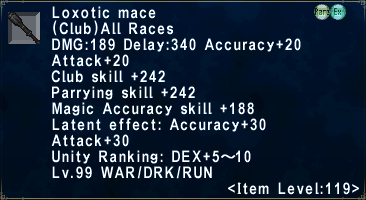
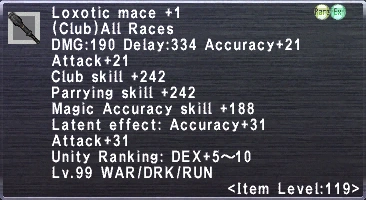
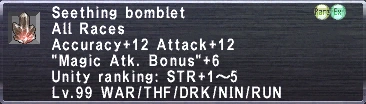
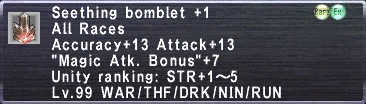

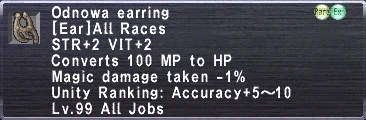
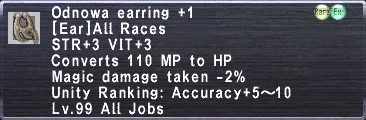


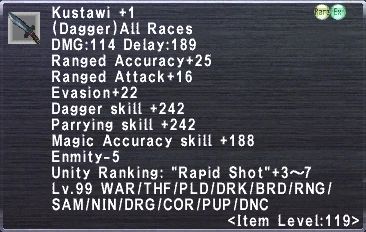
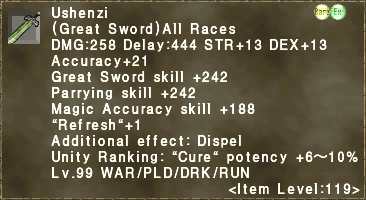
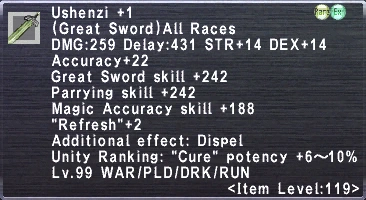


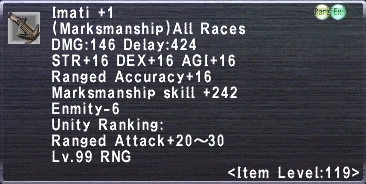
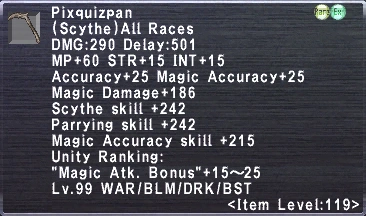
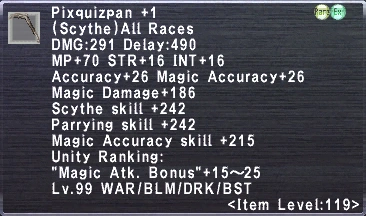


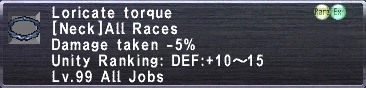
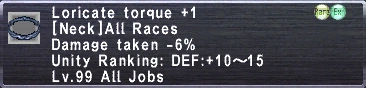
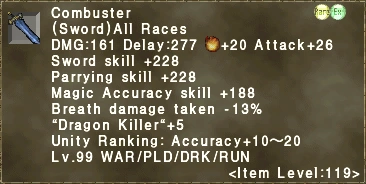
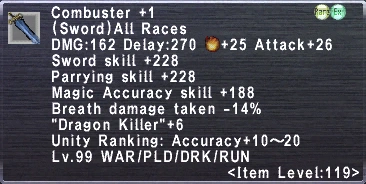

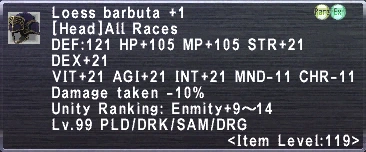
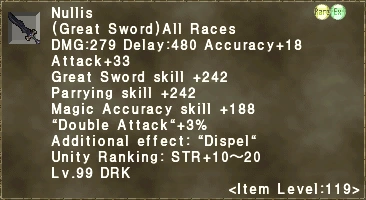
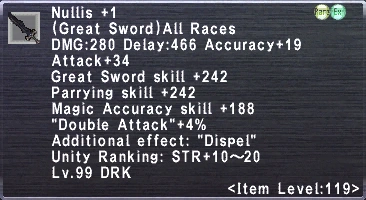

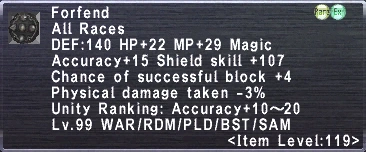
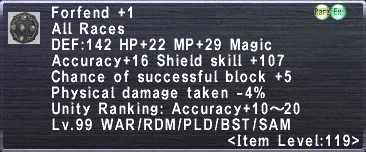
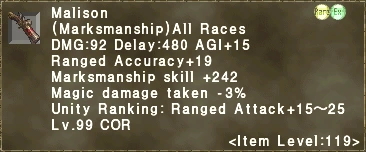
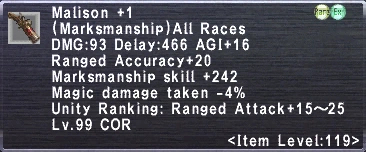
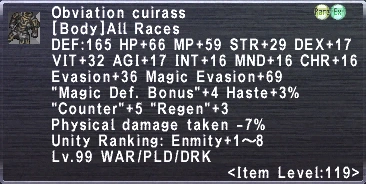
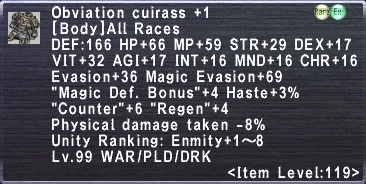

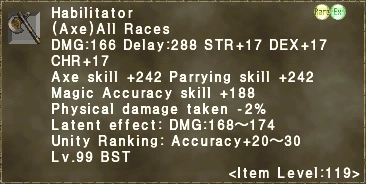
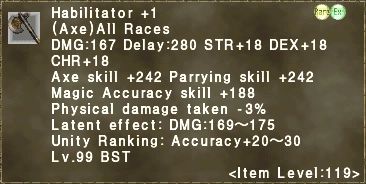
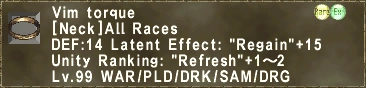
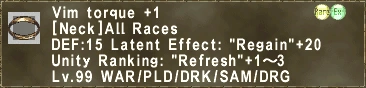

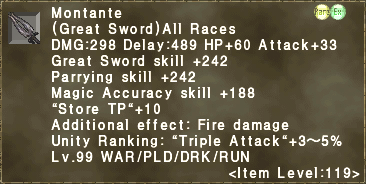

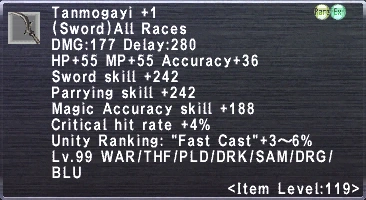
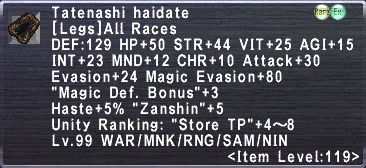
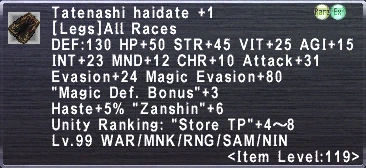

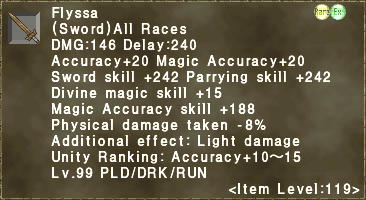
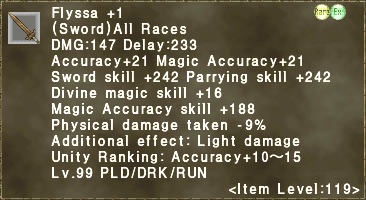

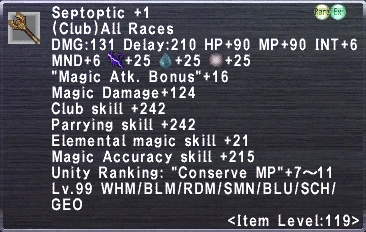
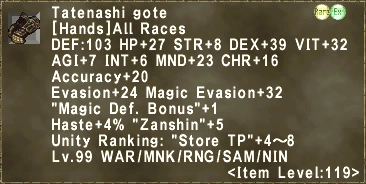
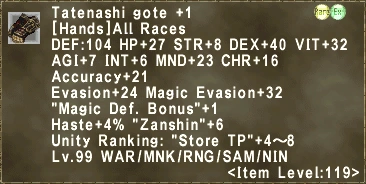

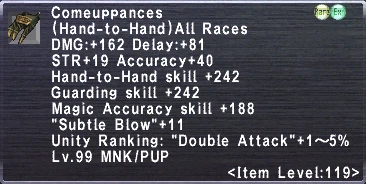
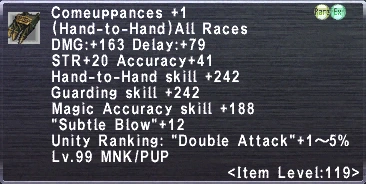

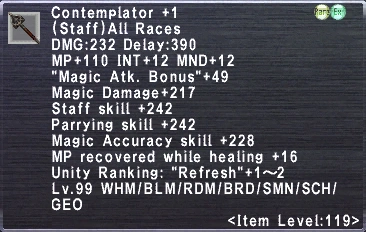
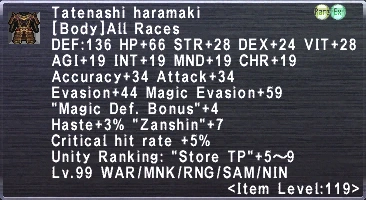
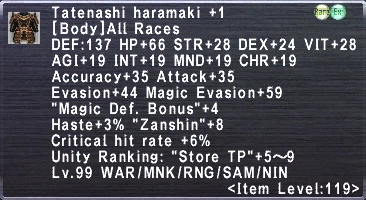

# Material used to upgrade NQ items to their HQ version.
Wanted NM Coffers
For lists of possible rewards from coffers and drop rates, see the individual item pages listed below.