m (→Drops: : Alphebatization of ??? Box drop list) |
(→Drops) |
||
| Line 77: | Line 77: | ||
! Ancient Lockbox |
! Ancient Lockbox |
||
|- BGCOLOR=#e3e6ff align=center |
|- BGCOLOR=#e3e6ff align=center |
||
| − | | [[Hi-Potion +3]] {{Drop Rate| |
+ | | [[Hi-Potion +3]] {{Drop Rate|117|117}} |
|- BGCOLOR=#e3e6ff align=center |
|- BGCOLOR=#e3e6ff align=center |
||
| − | | [[Hi-Reraiser]] {{Drop Rate| |
+ | | [[Hi-Reraiser]] {{Drop Rate| 31|117}} |
|- BGCOLOR=#e3e6ff align=center |
|- BGCOLOR=#e3e6ff align=center |
||
| − | | [[Hi-Potion Tank]] {{Drop Rate| 32| |
+ | | [[Hi-Potion Tank]] {{Drop Rate| 32|117}} |
|- BGCOLOR=#e3e6ff align=center |
|- BGCOLOR=#e3e6ff align=center |
||
| − | | [[Hi-Ether Tank]] {{Drop Rate| |
+ | | [[Hi-Ether Tank]] {{Drop Rate| 37|117}} |
|} |
|} |
||
| Line 89: | Line 89: | ||
{| width=100% |
{| width=100% |
||
|- BGCOLOR=#ffdead |
|- BGCOLOR=#ffdead |
||
| − | ! [[??? Sword]] {{Drop Rate| |
+ | ! [[??? Sword]] {{Drop Rate|48|117}} |
|- BGCOLOR=#e3e6ff align=center |
|- BGCOLOR=#e3e6ff align=center |
||
| − | | [[Djinnbringer]] {{Drop Rate| |
+ | | [[Djinnbringer]] {{Drop Rate| 5|48}} |
|- BGCOLOR=#e3e6ff align=center |
|- BGCOLOR=#e3e6ff align=center |
||
| − | | [[Gust Claymore]] {{Drop Rate|22| |
+ | | [[Gust Claymore]] {{Drop Rate|22|48}} |
|- BGCOLOR=#e3e6ff align=center |
|- BGCOLOR=#e3e6ff align=center |
||
| − | | [[Pealing Nagan]] {{Drop Rate| 0| |
+ | | [[Pealing Nagan]] {{Drop Rate| 0|48}} |
|- BGCOLOR=#e3e6ff align=center |
|- BGCOLOR=#e3e6ff align=center |
||
| − | | [[Uchigatana +1]] {{Drop Rate|19| |
+ | | [[Uchigatana +1]] {{Drop Rate|19|48}} |
|- BGCOLOR=#e3e6ff align=center |
|- BGCOLOR=#e3e6ff align=center |
||
| − | | [[Kagiroi]] {{Drop Rate| 2| |
+ | | [[Kagiroi]] {{Drop Rate| 2|48}} |
|} |
|} |
||
| Line 106: | Line 106: | ||
{| width=100% |
{| width=100% |
||
|- BGCOLOR=#ffdead |
|- BGCOLOR=#ffdead |
||
| − | ! [[??? Polearm]] {{Drop Rate| |
+ | ! [[??? Polearm]] {{Drop Rate|23|117}} |
|- BGCOLOR=#e3e6ff align=center |
|- BGCOLOR=#e3e6ff align=center |
||
| − | | [[Spark Spear]] {{Drop Rate| |
+ | | [[Spark Spear]] {{Drop Rate|23|23}} |
|} |
|} |
||
| Line 116: | Line 116: | ||
! [[??? Box]] {{Drop Rate|45|114}} |
! [[??? Box]] {{Drop Rate|45|114}} |
||
|- BGCOLOR=#e3e6ff align=center |
|- BGCOLOR=#e3e6ff align=center |
||
| − | | [[Date]] {{Drop Rate| |
+ | | [[Date]] {{Drop Rate|11|46}} |
|- BGCOLOR=#e3e6ff align=center |
|- BGCOLOR=#e3e6ff align=center |
||
| − | | [[Eggplant]] {{Drop Rate| 0| |
+ | | [[Eggplant]] {{Drop Rate| 0|46}} |
|- BGCOLOR=#e3e6ff align=center |
|- BGCOLOR=#e3e6ff align=center |
||
| − | | [[Ice Crystal]] {{Drop Rate| 0| |
+ | | [[Ice Crystal]] {{Drop Rate| 0|46}} |
|- BGCOLOR=#e3e6ff align=center |
|- BGCOLOR=#e3e6ff align=center |
||
| − | | [[Imperial Cermet]] {{Drop Rate| 2| |
+ | | [[Imperial Cermet]] {{Drop Rate| 2|46}} |
|- BGCOLOR=#e3e6ff align=center |
|- BGCOLOR=#e3e6ff align=center |
||
| − | |[[Imperial Tea Leaves]] {{Drop Rate| 0| |
+ | |[[Imperial Tea Leaves]] {{Drop Rate| 0|46}} |
|- BGCOLOR=#e3e6ff align=center |
|- BGCOLOR=#e3e6ff align=center |
||
| − | | [[Kaolin]] {{Drop Rate| 2| |
+ | | [[Kaolin]] {{Drop Rate| 2|46}} |
|- BGCOLOR=#e3e6ff align=center |
|- BGCOLOR=#e3e6ff align=center |
||
| − | |[[Mamool Ja Collar]] {{Drop Rate|13| |
+ | |[[Mamool Ja Collar]] {{Drop Rate|13|46}} |
|- BGCOLOR=#e3e6ff align=center |
|- BGCOLOR=#e3e6ff align=center |
||
| − | | [[Poroggo Hat]] {{Drop Rate|10| |
+ | | [[Poroggo Hat]] {{Drop Rate|10|46}} |
|- BGCOLOR=#e3e6ff align=center |
|- BGCOLOR=#e3e6ff align=center |
||
| − | | [[Sage]] {{Drop Rate| 0| |
+ | | [[Sage]] {{Drop Rate| 0|46}} |
|- BGCOLOR=#e3e6ff align=center |
|- BGCOLOR=#e3e6ff align=center |
||
| − | | [[Soulflayer Staff]] {{Drop Rate| 0| |
+ | | [[Soulflayer Staff]] {{Drop Rate| 0|46}} |
|- BGCOLOR=#e3e6ff align=center |
|- BGCOLOR=#e3e6ff align=center |
||
| − | | [[Toolbag (Hira)|Toolbag (Hiraishin)]] {{Drop Rate| 1| |
+ | | [[Toolbag (Hira)|Toolbag (Hiraishin)]] {{Drop Rate| 1|46}} |
|- BGCOLOR=#e3e6ff align=center |
|- BGCOLOR=#e3e6ff align=center |
||
| − | | [[Toolbag (Jusa)|Toolbag (Jusatsu)]] {{Drop Rate| 1| |
+ | | [[Toolbag (Jusa)|Toolbag (Jusatsu)]] {{Drop Rate| 1|46}} |
|- BGCOLOR=#e3e6ff align=center |
|- BGCOLOR=#e3e6ff align=center |
||
| − | | [[Toolbag (Kawa)|Toolbag (Kawahori-Ogi)]] {{Drop Rate| 1| |
+ | | [[Toolbag (Kawa)|Toolbag (Kawahori-Ogi)]] {{Drop Rate| 1|46}} |
|- BGCOLOR=#e3e6ff align=center |
|- BGCOLOR=#e3e6ff align=center |
||
| − | | [[Toolbag (Kodo)|Toolbag (Kodoku)]] {{Drop Rate| 0| |
+ | | [[Toolbag (Kodo)|Toolbag (Kodoku)]] {{Drop Rate| 0|46}} |
|- BGCOLOR=#e3e6ff align=center |
|- BGCOLOR=#e3e6ff align=center |
||
| − | | [[Toolbag (Mizu)|Toolbag (Mizu-Deppo)]] {{Drop Rate| 1| |
+ | | [[Toolbag (Mizu)|Toolbag (Mizu-Deppo)]] {{Drop Rate| 1|46}} |
|- BGCOLOR=#e3e6ff align=center |
|- BGCOLOR=#e3e6ff align=center |
||
| − | | [[Toolbag (Sai)|Toolbag (Sairui-Ran)]] {{Drop Rate| 1| |
+ | | [[Toolbag (Sai)|Toolbag (Sairui-Ran)]] {{Drop Rate| 1|46}} |
|- BGCOLOR=#e3e6ff align=center |
|- BGCOLOR=#e3e6ff align=center |
||
| − | | [[Toolbag (Shihei)]] {{Drop Rate| 1| |
+ | | [[Toolbag (Shihei)]] {{Drop Rate| 1|46}} |
|- BGCOLOR=#e3e6ff align=center |
|- BGCOLOR=#e3e6ff align=center |
||
| − | | [[Toolbag (Shino)|Toolbag (Shinobi-Tabi)]] {{Drop Rate| 1| |
+ | | [[Toolbag (Shino)|Toolbag (Shinobi-Tabi)]] {{Drop Rate| 1|46}} |
|- BGCOLOR=#e3e6ff align=center |
|- BGCOLOR=#e3e6ff align=center |
||
| − | | [[Toolbag (Tsura)|Toolbag (Tsurara)]] {{Drop Rate| 0| |
+ | | [[Toolbag (Tsura)|Toolbag (Tsurara)]] {{Drop Rate| 0|46}} |
|- BGCOLOR=#e3e6ff align=center |
|- BGCOLOR=#e3e6ff align=center |
||
| − | | [[Toolbag (Uchi)|Toolbag (Uchitake)]] {{Drop Rate| 1| |
+ | | [[Toolbag (Uchi)|Toolbag (Uchitake)]] {{Drop Rate| 1|46}} |
|- BGCOLOR=#e3e6ff align=center |
|- BGCOLOR=#e3e6ff align=center |
||
| − | | [[Wild Onion]] {{Drop Rate| 0| |
+ | | [[Wild Onion]] {{Drop Rate| 0|46}} |
|} |
|} |
||
Revision as of 05:02, 18 January 2009
|
Enemies
| Monster | Level | Strengths | Weaknesses | Spawns |
Notes |
|---|---|---|---|---|---|
|
62-67 |
|
|
9 |
A, T(S), L | |
|
HP = Detects Low HP; M = Detects Magic; Sc = Follows by Scent; T(S) = True-sight; T(H) = True-hearing JA = Detects job abilities; WS = Detects weaponskills; Z(D) = Asleep in Daytime; Z(N) = Asleep at Nighttime; A(R) = Aggressive to Reive participants | |||||
Drops
|
|
|
Walkthrough
Find the traitor within the legion of Qiqirn Spies by questioning them for clues and getting closer to him.
- The Qiqirn Spies are all around the map. There may even be some in the tunnels. (There are some in tunnel by the Rune of Release spawn spot.)
- When you speak to a Qiqirn Spy, you will have the option of capturing him or questioning him.
- It is best to question them until they say the spy is close.
- Questioning: Many of them will give you unhelpful hints. The helpful hints include direction and/or general distance to the spy. These Qiqirns will move around alot and their hints will vary according to their relative position to the spy.
- Most messages will include a general direction, e.g. "East", "South"
- When you get close to the traitor, they will tell you he is "very close".
- Other messages may include giving a numerical distance e.g. 182 Yalms or a general distance e.g. "Very far"
- The information obtained may not be completely accurate. A Qiqirn told me the spy was far away. Immediately after I questioned the Qiqirn next to him and it turned out to be the spy.
- Capturing: Once you have been told that the traitor is near, you will need to start capturing those you suspect.
- The traitor will either:
- claim the spy does not exist or is not close.
- lie about the direction of the spy. If you find discrepancies from the results of 2 Qiqirn Spies, you can be sure that one of them is the traitor.
- If you successfully capture the traitor, he will say "...How you know that?" and the Rune of Release will unlock.
- All unsuccessful captures will cause you to no longer be able to question that Qiqirn. He will just mention some dialogue about you getting wrong information and give you no choice option.
- The traitor will either:
- Questioning: Many of them will give you unhelpful hints. The helpful hints include direction and/or general distance to the spy. These Qiqirns will move around alot and their hints will vary according to their relative position to the spy.
- Beware of Puks roaming the areas.
- They are easy to take down and possible to avoid, there is no need to fight them.
- There are two puks to every pit of Qiqirn.
- They have a very fast respawn time (3 minutes).
- Additionally, sleeping or otherwise stalling a Puk and questioning/capturing a Qiqirn NPC will cause the player to lose the Puk's aggression. This includes a summoner's avatar attacking an aggro'ed Puk in "bodyguard" mode. When a Qiqirn npc is questioned, carbuncle will return to the summoner and the Puk will shed any aggression. Therefore, it is possible to complete this mission without engaging a single Puk using this technique.
- The Rune of Release is located at the southern part of (I-8).
- Players receive an Assault Points penalty for each incorrect guess they make.
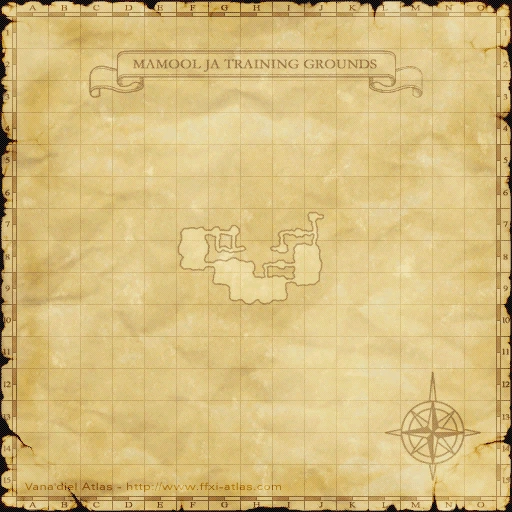
Map
| Assault | |
|---|---|
| Leujaoam Missions | |
| Mamool Ja Missions | |
| Lebros Missions | |
| Periqia Missions | |
| Ilrusi Missions | |
| Nyzul Isle Missions | |
| Assault Point Rewards | |
| Nyzul Isle Rewards | |