mNo edit summary Tags: Visual edit apiedit |
No edit summary Tag: sourceedit |
||
| (One intermediate revision by one other user not shown) | |||
| Line 47: | Line 47: | ||
== Drops == |
== Drops == |
||
| − | {| width=100% |
+ | {| width="100%" |
| − | |- valign=top |
+ | |- valign="top" |
<!-- Remember to update ALL items --> |
<!-- Remember to update ALL items --> |
||
| Line 58: | Line 58: | ||
| [[Hi-Potion +3]] {{Drop Rate|100%}} |
| [[Hi-Potion +3]] {{Drop Rate|100%}} |
||
|- BGCOLOR=#e3e6ff align=center |
|- BGCOLOR=#e3e6ff align=center |
||
| − | | [[Hi-Reraiser]] {{Drop Rate| 41| |
+ | | [[Hi-Reraiser]] {{Drop Rate| 41|138}} |
|- BGCOLOR=#e3e6ff align=center |
|- BGCOLOR=#e3e6ff align=center |
||
| − | | [[Hi-Potion Tank]] {{Drop Rate| 39| |
+ | | [[Hi-Potion Tank]] {{Drop Rate| 39|138}} |
|- BGCOLOR=#e3e6ff align=center |
|- BGCOLOR=#e3e6ff align=center |
||
| − | | [[Hi-Ether Tank]] {{Drop Rate| 42| |
+ | | [[Hi-Ether Tank]] {{Drop Rate| 42|138}} |
|} |
|} |
||
| − | |width=25%| |
+ | | width="25%" | |
| − | {| width=100% |
+ | {| width="100%" |
| − | |- |
+ | |- bgcolor="#ffdead" |
| − | ! [[??? Sword]] {{Drop Rate| |
+ | ! [[??? Sword]] {{Drop Rate|57|141}} |
| − | |- |
+ | |- align="center" bgcolor="#e3e6ff" |
| − | | [[Djinnbringer]] {{Drop Rate| 5| |
+ | | [[Djinnbringer]] {{Drop Rate| 5|57}} |
| − | |- |
+ | |- align="center" bgcolor="#e3e6ff" |
| − | | [[Gust Claymore]] {{Drop Rate| |
+ | | [[Gust Claymore]] {{Drop Rate|26|57}} |
| − | |- |
+ | |- align="center" bgcolor="#e3e6ff" |
| − | | [[Pealing Nagan]] {{Drop Rate| 2| |
+ | | [[Pealing Nagan]] {{Drop Rate| 2|57}} |
| − | |- |
+ | |- align="center" bgcolor="#e3e6ff" |
| − | | [[Uchigatana +1]] {{Drop Rate|22| |
+ | | [[Uchigatana +1]] {{Drop Rate|22|57}} |
| − | |- |
+ | |- align="center" bgcolor="#e3e6ff" |
| − | | [[Kagiroi]] {{Drop Rate| 2| |
+ | | [[Kagiroi]] {{Drop Rate| 2|57}} |
|} |
|} |
||
| ⚫ | |||
| − | |||
| − | |width= |
+ | {| width="100%" |
| ⚫ | |||
| ⚫ | |||
| ⚫ | |||
| ⚫ | |||
| + | |- align="center" bgcolor="#e3e6ff" |
||
| ⚫ | |||
| − | |- BGCOLOR=#e3e6ff align=center |
||
| [[Spark Spear]] {{Drop Rate|31|31}} |
| [[Spark Spear]] {{Drop Rate|31|31}} |
||
|} |
|} |
||
| − | |width=25%| |
+ | | width="25%" | |
| − | {| width=100% |
+ | {| width="100%" |
| − | |- |
+ | |- bgcolor="#ffdead" |
| − | ! [[??? Box]] {{Drop Rate|53| |
+ | ! [[??? Box]] {{Drop Rate|53|141}} |
| − | |- |
+ | |- align="center" bgcolor="#e3e6ff" |
| [[Date]] {{Drop Rate|13|53}} |
| [[Date]] {{Drop Rate|13|53}} |
||
| − | |- |
+ | |- align="center" bgcolor="#e3e6ff" |
| [[Eggplant]] {{Drop Rate| 0|53}} |
| [[Eggplant]] {{Drop Rate| 0|53}} |
||
| − | |- |
+ | |- align="center" bgcolor="#e3e6ff" |
| [[Ice Crystal]] {{Drop Rate| 0|53}} |
| [[Ice Crystal]] {{Drop Rate| 0|53}} |
||
| − | |- |
+ | |- align="center" bgcolor="#e3e6ff" |
| [[Imperial Cermet]] {{Drop Rate| 2|53}} |
| [[Imperial Cermet]] {{Drop Rate| 2|53}} |
||
| − | |- |
+ | |- align="center" bgcolor="#e3e6ff" |
|[[Imperial Tea Leaves]] {{Drop Rate| 0|53}} |
|[[Imperial Tea Leaves]] {{Drop Rate| 0|53}} |
||
| − | |- |
+ | |- align="center" bgcolor="#e3e6ff" |
| [[Kaolin]] {{Drop Rate| 2|53}} |
| [[Kaolin]] {{Drop Rate| 2|53}} |
||
| − | |- |
+ | |- align="center" bgcolor="#e3e6ff" |
|[[Mamool Ja Collar]] {{Drop Rate|15|53}} |
|[[Mamool Ja Collar]] {{Drop Rate|15|53}} |
||
| − | |- |
+ | |- align="center" bgcolor="#e3e6ff" |
| [[Poroggo Hat]] {{Drop Rate|12|53}} |
| [[Poroggo Hat]] {{Drop Rate|12|53}} |
||
| − | |- |
+ | |- align="center" bgcolor="#e3e6ff" |
| [[Sage]] {{Drop Rate| 0|53}} |
| [[Sage]] {{Drop Rate| 0|53}} |
||
| − | |- |
+ | |- align="center" bgcolor="#e3e6ff" |
| [[Soulflayer Staff]] {{Drop Rate| 0|53}} |
| [[Soulflayer Staff]] {{Drop Rate| 0|53}} |
||
| − | |- |
+ | |- align="center" bgcolor="#e3e6ff" |
| [[Toolbag (Hira)|Toolbag (Hiraishin)]] {{Drop Rate| 2|53}} |
| [[Toolbag (Hira)|Toolbag (Hiraishin)]] {{Drop Rate| 2|53}} |
||
| − | |- |
+ | |- align="center" bgcolor="#e3e6ff" |
| [[Toolbag (Jusa)|Toolbag (Jusatsu)]] {{Drop Rate| 1|53}} |
| [[Toolbag (Jusa)|Toolbag (Jusatsu)]] {{Drop Rate| 1|53}} |
||
| − | |- |
+ | |- align="center" bgcolor="#e3e6ff" |
| [[Toolbag (Kawa)|Toolbag (Kawahori-Ogi)]] {{Drop Rate| 1|53}} |
| [[Toolbag (Kawa)|Toolbag (Kawahori-Ogi)]] {{Drop Rate| 1|53}} |
||
| − | |- |
+ | |- align="center" bgcolor="#e3e6ff" |
| [[Toolbag (Kodo)|Toolbag (Kodoku)]] {{Drop Rate| 0|53}} |
| [[Toolbag (Kodo)|Toolbag (Kodoku)]] {{Drop Rate| 0|53}} |
||
| − | |- |
+ | |- align="center" bgcolor="#e3e6ff" |
| [[Toolbag (Mizu)|Toolbag (Mizu-Deppo)]] {{Drop Rate| 1|53}} |
| [[Toolbag (Mizu)|Toolbag (Mizu-Deppo)]] {{Drop Rate| 1|53}} |
||
| − | |- |
+ | |- align="center" bgcolor="#e3e6ff" |
| [[Toolbag (Sai)|Toolbag (Sairui-Ran)]] {{Drop Rate| 1|53}} |
| [[Toolbag (Sai)|Toolbag (Sairui-Ran)]] {{Drop Rate| 1|53}} |
||
| − | |- |
+ | |- align="center" bgcolor="#e3e6ff" |
| [[Toolbag (Shihei)]] {{Drop Rate| 1|53}} |
| [[Toolbag (Shihei)]] {{Drop Rate| 1|53}} |
||
| − | |- |
+ | |- align="center" bgcolor="#e3e6ff" |
| [[Toolbag (Shino)|Toolbag (Shinobi-Tabi)]] {{Drop Rate| 1|53}} |
| [[Toolbag (Shino)|Toolbag (Shinobi-Tabi)]] {{Drop Rate| 1|53}} |
||
| − | |- |
+ | |- align="center" bgcolor="#e3e6ff" |
| [[Toolbag (Tsura)|Toolbag (Tsurara)]] {{Drop Rate| 0|53}} |
| [[Toolbag (Tsura)|Toolbag (Tsurara)]] {{Drop Rate| 0|53}} |
||
| − | |- |
+ | |- align="center" bgcolor="#e3e6ff" |
| [[Toolbag (Uchi)|Toolbag (Uchitake)]] {{Drop Rate| 1|53}} |
| [[Toolbag (Uchi)|Toolbag (Uchitake)]] {{Drop Rate| 1|53}} |
||
| − | |- |
+ | |- align="center" bgcolor="#e3e6ff" |
| [[Wild Onion]] {{Drop Rate| 0|53}} |
| [[Wild Onion]] {{Drop Rate| 0|53}} |
||
| Line 152: | Line 151: | ||
*** The Qiqirn that is the spy will give false information. If, for example, two different Qiqirn appear to be pointing to the same suspect, and that suspect says the spy is in a completely different location, you've found your spy. Or, if all the other NPCs point in the direction of one, and that one points back in the direction of the others, you've found your spy. There's no reason to ever get it wrong. |
*** The Qiqirn that is the spy will give false information. If, for example, two different Qiqirn appear to be pointing to the same suspect, and that suspect says the spy is in a completely different location, you've found your spy. Or, if all the other NPCs point in the direction of one, and that one points back in the direction of the others, you've found your spy. There's no reason to ever get it wrong. |
||
***'''NOTE: Did on 7/18/09 and the one who was a spy gave no hint, just "Noooooo Listen", meaning the spy can give no hint at all. The others next to him, though, said the spy was close.''' |
***'''NOTE: Did on 7/18/09 and the one who was a spy gave no hint, just "Noooooo Listen", meaning the spy can give no hint at all. The others next to him, though, said the spy was close.''' |
||
| − | **** Did on 10/12/14 and the spy said "Hm hm hm... I know nooothing, yooo know?" |
+ | **** Did on 10/12/14 and the spy said "Hm hm hm... I know nooothing, yooo know?" |
| + | **** Did on 5/10/16 and the spy said "Hm hm hm... There nooo Qiqirn like that, yooo know?" The spy can give a hint, but it seems to be very different from any other hint. |
||
** '''Capturing''': Once you have deduced where the spy is, you need to attempt to capture them, with the "to capture yooo!" command. |
** '''Capturing''': Once you have deduced where the spy is, you need to attempt to capture them, with the "to capture yooo!" command. |
||
*** If you successfully capture the traitor, he will say "...How you know that?" and the Rune of Release will unlock. |
*** If you successfully capture the traitor, he will say "...How you know that?" and the Rune of Release will unlock. |
||
Revision as of 20:44, 10 May 2016
| Mission Name | The Double Agent |
|---|---|
| Mercenary Rank | Corporal |
| Mission NPC | Isdebaaq - Aht Urhgan Whitegate (L-10) |
| Staging Point | Mamool Ja Staging Point |
| Objective | Apprehend the spy |
| Recruitment | Lv.70, 1-6 mercenaries |
| Mission Orders | There is a double agent among the Imperial Qiqirn spies in the Mamool Ja Training Grounds. Find him before he puts the other spies in danger. |
| Time Limit | 30 minutes |
| Reward | Mamool Ja Training Grounds Assault Points
Varies based on the number of mistaken captures. There is a 66.67 point penalty, rounded down, for every false accusation you make. |
Enemies
| Monster | Level | Strengths | Weaknesses | Spawns |
Notes |
|---|---|---|---|---|---|
|
62-67 |
|
|
9 |
A, S, H | |
|
HP = Detects Low HP; M = Detects Magic; Sc = Follows by Scent; T(S) = True-sight; T(H) = True-hearing JA = Detects job abilities; WS = Detects weaponskills; Z(D) = Asleep in Daytime; Z(N) = Asleep at Nighttime; A(R) = Aggressive to Reive participants | |||||
Drops
|
|
|
Walkthrough
Find the traitor within the legion of Qiqirn Spies by questioning them for clues and getting closer to him.
- The Qiqirn Spies are all around the map. There may even be some in the tunnels. (There are some in tunnel by the Rune of Release spawn spot.)
- When you speak to a Qiqirn Spy, you will have the option of capturing him or questioning him.
- It is best to question them until they say the spy is close.
- Questioning: Many of them will give you unhelpful hints. The helpful hints include direction and/or general distance to the spy. These Qiqirns will move around alot and their hints will vary according to their relative position to the spy.
- Most messages will include a general direction, e.g. "East", "South"
- When you get close to the traitor, they will tell you he is "very close".
- Other messages may include giving a numerical distance e.g. 182 Yalms or a general distance e.g. "Very far"
- The Qiqirn that is the spy will give false information. If, for example, two different Qiqirn appear to be pointing to the same suspect, and that suspect says the spy is in a completely different location, you've found your spy. Or, if all the other NPCs point in the direction of one, and that one points back in the direction of the others, you've found your spy. There's no reason to ever get it wrong.
- NOTE: Did on 7/18/09 and the one who was a spy gave no hint, just "Noooooo Listen", meaning the spy can give no hint at all. The others next to him, though, said the spy was close.
- Did on 10/12/14 and the spy said "Hm hm hm... I know nooothing, yooo know?"
- Did on 5/10/16 and the spy said "Hm hm hm... There nooo Qiqirn like that, yooo know?" The spy can give a hint, but it seems to be very different from any other hint.
- Capturing: Once you have deduced where the spy is, you need to attempt to capture them, with the "to capture yooo!" command.
- If you successfully capture the traitor, he will say "...How you know that?" and the Rune of Release will unlock.
- All unsuccessful captures will cause you to no longer be able to question that Qiqirn. He will just mention some dialogue about you getting wrong information and give you no choice option.
- Questioning: Many of them will give you unhelpful hints. The helpful hints include direction and/or general distance to the spy. These Qiqirns will move around alot and their hints will vary according to their relative position to the spy.
- Beware of Puks roaming the areas.
- They are easy to take down and possible to avoid, there is no need to fight them.
- There are two puks to every pit of Qiqirn.
- They have a very fast respawn time (3 minutes).
- The Rune of Release is located at the southern part of (I-8).
- Players receive an Assault Points penalty for each incorrect guess they make.
- Solo'ed it with 3 wrong guesses; 1758 points.
- 1980 points for solo with no wrong guesses.
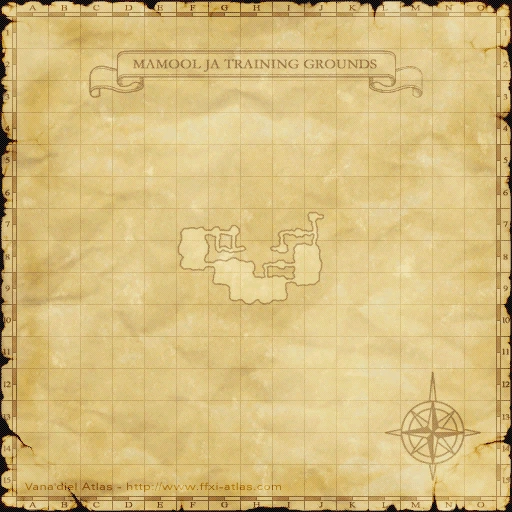
Map
| Assault | |
|---|---|
| Leujaoam Missions | |
| Mamool Ja Missions | |
| Lebros Missions | |
| Periqia Missions | |
| Ilrusi Missions | |
| Nyzul Isle Missions | |
| Assault Point Rewards | |
| Nyzul Isle Rewards | |