No edit summary Tag: sourceedit |
|||
| (5 intermediate revisions by 3 users not shown) | |||
| Line 14: | Line 14: | ||
| style="border:1px solid gray; padding-left:1em;" bgcolor="#fff3f3" valign="top" width="33%" | |
| style="border:1px solid gray; padding-left:1em;" bgcolor="#fff3f3" valign="top" width="33%" | |
||
===[[Bastok|The Republic of Bastok]]=== |
===[[Bastok|The Republic of Bastok]]=== |
||
| − | <!--* [[Bastok Markets]]--> |
+ | <!--* [[Bastok Markets]]-->Done |
* [[Bastok Mines]] (I-9) |
* [[Bastok Mines]] (I-9) |
||
<!--* [[Metalworks]]--> |
<!--* [[Metalworks]]--> |
||
| Line 49: | Line 49: | ||
| style="border: 1px solid gray; padding-left:1em;" bgcolor="#E3E6FF" valign="top" width="33%" | |
| style="border: 1px solid gray; padding-left:1em;" bgcolor="#E3E6FF" valign="top" width="33%" | |
||
===[[Aragoneu]]=== |
===[[Aragoneu]]=== |
||
| − | * [[Castle Oztroja]] |
+ | * [[Castle Oztroja]] (F-8) |
* [[Garlaige Citadel]] (G-7) |
* [[Garlaige Citadel]] (G-7) |
||
* [[Meriphataud Mountains]] (E-5) |
* [[Meriphataud Mountains]] (E-5) |
||
| Line 60: | Line 60: | ||
| style="border: 1px solid gray; padding-left:1em;" bgcolor="#E3E6FF" valign="top" width="33%" | |
| style="border: 1px solid gray; padding-left:1em;" bgcolor="#E3E6FF" valign="top" width="33%" | |
||
| + | |||
===[[Derfland]]=== |
===[[Derfland]]=== |
||
* [[Beadeaux]] (E-7) |
* [[Beadeaux]] (E-7) |
||
| Line 76: | Line 77: | ||
| style="border: 1px solid gray; padding-left:1em;" bgcolor="#E3E6FF" valign="top" width="33%" | |
| style="border: 1px solid gray; padding-left:1em;" bgcolor="#E3E6FF" valign="top" width="33%" | |
||
===[[Elshimo Uplands]]=== |
===[[Elshimo Uplands]]=== |
||
| − | * [[Temple of Uggalepih]] (F-6) |
+ | * [[Temple of Uggalepih]] (F-6) (Map 1) |
* [[Yhoator Jungle]] (I-8) |
* [[Yhoator Jungle]] (I-8) |
||
* [[Ifrit's Cauldron]] (K-9) Map 4 |
* [[Ifrit's Cauldron]] (K-9) Map 4 |
||
| Line 176: | Line 177: | ||
| style="border: 1px solid gray; padding-left:1em;" bgcolor="#E3E6FF" valign="top" width="33%" | |
| style="border: 1px solid gray; padding-left:1em;" bgcolor="#E3E6FF" valign="top" width="33%" | |
||
===[[Ronfaure]]=== |
===[[Ronfaure]]=== |
||
| − | * [[Bostaunieux Oubliette]] (I-6) |
+ | * [[Bostaunieux Oubliette]] (I-6) Map 2 |
* [[Fort Ghelsba]] (F-8) |
* [[Fort Ghelsba]] (F-8) |
||
* [[King Ranperre's Tomb]] (G-5) |
* [[King Ranperre's Tomb]] (G-5) |
||
| Line 257: | Line 258: | ||
===[[Mamool Ja Savagelands]]=== |
===[[Mamool Ja Savagelands]]=== |
||
* [[Wajaom Woodlands]] (C-8) |
* [[Wajaom Woodlands]] (C-8) |
||
| − | * [[Mamook]] (J-7) |
+ | * [[Mamook]] (J-7) Map 1 |
* [[Aydeewa Subterrane]] (H-10) Map 2 |
* [[Aydeewa Subterrane]] (H-10) Map 2 |
||
<!--* [[Jade Sepulcher]]--> |
<!--* [[Jade Sepulcher]]--> |
||
| Line 360: | Line 361: | ||
<!--* [[Throne Room (S)]]--> |
<!--* [[Throne Room (S)]]--> |
||
|} |
|} |
||
| + | |} |
||
| − | |||
| + | ==Adoulin Isles== |
||
| + | {| cellspacing="3" width="24%" |
||
| + | | style="border: 1px solid gray; padding-left:1em;" bgcolor="#E3E6FF" valign="top" width="33%" | |
||
| + | ===[[Adoulin]]=== |
||
| + | * [[Eastern Adoulin]] (H-11) |
||
| + | <!--* [[Western Adoulin]]--> |
||
|} |
|} |
||
Revision as of 20:09, 1 March 2020
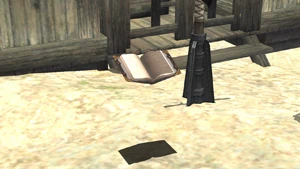
Survival Guides are floating black books which have been placed by the Adventurers' Mutual Aid Network to provide teleportation services. They are located at all Outposts in Conquest areas as well as a number of other locations. In dungeon areas, the guides are typically located at the main entrance. They appear on maps with a special ![]() icon.
icon.
You must speak to each Survival Guide to register it. Then you may teleport to previously registered guides for 1000 gil per trip base price (decreasing as you finish Rhapsodies of Vana'diel missions) or 50 tabs (or completely free when Thrifty Transit is active). The Survival Guide teleportation service operates independent of Outpost Teleportation.
Adoulin Isles
Adoulin
|