(→Notes) |
(drop rate) |
||
| Line 94: | Line 94: | ||
! Ancient Lockbox |
! Ancient Lockbox |
||
|- BGCOLOR=#e3e6ff align=center |
|- BGCOLOR=#e3e6ff align=center |
||
| − | |[[Remedy]] {{Drop Rate| |
+ | |[[Remedy]] {{Drop Rate|5|5}} |
|- BGCOLOR=#e3e6ff align=center |
|- BGCOLOR=#e3e6ff align=center |
||
| − | |[[Hi-Potion +3]] {{Drop Rate|3| |
+ | |[[Hi-Potion +3]] {{Drop Rate|3|5}} |
|} |
|} |
||
| Line 103: | Line 103: | ||
{| width=100% |
{| width=100% |
||
|- BGCOLOR=#ffdead |
|- BGCOLOR=#ffdead |
||
| − | ! [[??? Cape]] {{Drop Rate |
+ | ! [[??? Cape]] {{Drop Rate|4|5}} |
|- BGCOLOR=#e3e6ff align=center |
|- BGCOLOR=#e3e6ff align=center |
||
| − | | [[Cotton Cape +1]] {{Drop Rate|1| |
+ | | [[Cotton Cape +1]] {{Drop Rate|1|4}} |
|- BGCOLOR=#e3e6ff align=center |
|- BGCOLOR=#e3e6ff align=center |
||
| − | | [[Lizard Mantle +1]] {{Drop Rate|0| |
+ | | [[Lizard Mantle +1]] {{Drop Rate|0|4}} |
|- BGCOLOR=#e3e6ff align=center |
|- BGCOLOR=#e3e6ff align=center |
||
| − | | [[Dhalmel Mantle +1]] {{Drop Rate |
+ | | [[Dhalmel Mantle +1]] {{Drop Rate|3|4}} |
|- BGCOLOR=#e3e6ff align=center |
|- BGCOLOR=#e3e6ff align=center |
||
|[[Aileron Mantle]] {{Drop Rate|0|3}} |
|[[Aileron Mantle]] {{Drop Rate|0|3}} |
||
| Line 118: | Line 118: | ||
{| width=100% |
{| width=100% |
||
|- BGCOLOR=#ffdead |
|- BGCOLOR=#ffdead |
||
| − | ! [[??? Sword]] {{Drop Rate|0| |
+ | ! [[??? Sword]] {{Drop Rate|0|5}} |
|- BGCOLOR=#e3e6ff align=center |
|- BGCOLOR=#e3e6ff align=center |
||
| [[Gust Claymore]] {{Drop Rate|0|0}} |
| [[Gust Claymore]] {{Drop Rate|0|0}} |
||
| Line 131: | Line 131: | ||
{| width=100% |
{| width=100% |
||
|- BGCOLOR=#ffdead |
|- BGCOLOR=#ffdead |
||
| − | ! [[??? Box]] {{Drop Rate|1| |
+ | ! [[??? Box]] {{Drop Rate|1|5}} |
|- BGCOLOR=#e3e6ff align=center |
|- BGCOLOR=#e3e6ff align=center |
||
| [[Cleaning Tool Set]] {{Drop Rate|0|1}} |
| [[Cleaning Tool Set]] {{Drop Rate|0|1}} |
||
| Line 150: | Line 150: | ||
{| width=100% |
{| width=100% |
||
|- BGCOLOR=#ffdead |
|- BGCOLOR=#ffdead |
||
| − | ! [[??? Polearm]] {{Drop Rate|0| |
+ | ! [[??? Polearm]] {{Drop Rate|0|5}} |
|- BGCOLOR=#e3e6ff align=center |
|- BGCOLOR=#e3e6ff align=center |
||
| [[Spark Spear]] {{Drop Rate|0|0}} |
| [[Spark Spear]] {{Drop Rate|0|0}} |
||
Revision as of 00:16, 28 March 2009
|
Enemies
| Monster | Level | Strengths | Weaknesses | Spawns |
Notes |
|---|---|---|---|---|---|
|
|
35 |
A, S, H | ||
|
3 or 4 |
A, T(S) | |||
|
HP = Detects Low HP; M = Detects Magic; Sc = Follows by Scent; T(S) = True-sight; T(H) = True-hearing JA = Detects job abilities; WS = Detects weaponskills; Z(D) = Asleep in Daytime; Z(N) = Asleep at Nighttime; A(R) = Aggressive to Reive participants | |||||
Drops
|
|
|
|
|
Walkthrough
Kill all the Augmented Chigoes.
- You will spawn on the same map as Shooting Down the Baron at H-8.
- There are BLM Lamia named Chigoe Breeder that roams the map. It is not necessary to kill these to win.
- Chigoe Breeders respawn very quickly.
- They also have a LOT of HP, and tend to cast Sleepga and Sleepga II fairly often.
- Their aggro radius is also much longer than normal sight aggro.
- Augmented Chigoes hit fast but are very weak. Anyone with a Phalanx effect will take predominantly 0 damage.
- A single critical hit, a damaging job ability such as Jump, or a weaponskill will instantly kill a chigoe.
- A Dancer using Flourishes (Violent or Desperate only) can instantly kill a chigoe. This works with dancer as a subjob as well.
- A PUP Automaton's Flashbulb-Flash or Strobe-Provoke will instantly kill a chigoe.

- The rate of critical hits against these chigoes is greatly enhanced.
- It is important to be very thorough, especially in cage rooms. It is easy to miss chigoes since they blend in and don't show up on Widescan. Be sure to check on top and around behind the cages.
- You have to kill 35 Augmented Chigoe - when you do so - Rune of Release will spawn at (H-8).
Notes
- While Widescan or Monster Radar cannot be used to reveal the locations of chigoes, they would be very useful for tracking and avoiding lamiae. There are a lot of blind corners and column-crowded rooms where it is easy for them to sneak up on you.
- If you get aggro from a lamia and have a large enough party, send someone to continue killing chigoes so you don't waste time.
- The chigoes hit very quickly and you can lose several hundred HP very quickly if you are swarmed. This person should have a lot of HP, high defense, or be capable of healing themselves (preferably with dances, as the quick rate of attack will likely interrupt spells).
- A Summoner with a free Carbuncle is very strong in this assault. Time is very critical. Carbuncle will automatically engage and kill the chigoes (because of the enhanced critical hit rate) often before you even have a chance to target them.
- A Dancer subbing Samurai for Meditate can be very powerful here. Violent and Desperate Flourishes are one-hit KOs, and DNC has access to Cyclone, an AOE Weaponskill. Waltzes cannot be interrupted by taking hits. If survivability is an issue, /NIN or /WHM (Reraise) can be just as effective, since Steps only take 10TP, and Violent Flourish returns ~5.
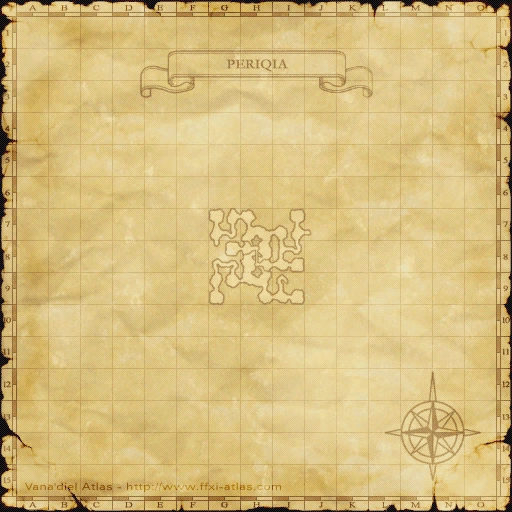
Map
| Assault | |
|---|---|
| Leujaoam Missions | |
| Mamool Ja Missions | |
| Lebros Missions | |
| Periqia Missions | |
| Ilrusi Missions | |
| Nyzul Isle Missions | |
| Assault Point Rewards | |
| Nyzul Isle Rewards | |