(→Drops) |
(→Drops) |
||
| Line 92: | Line 92: | ||
! Ancient Lockbox |
! Ancient Lockbox |
||
|- BGCOLOR=#e3e6ff align=center |
|- BGCOLOR=#e3e6ff align=center |
||
| − | |[[Hi-Potion +3]] {{Drop Rate| |
+ | |[[Hi-Potion +3]] {{Drop Rate|34|34}} |
|- BGCOLOR=#e3e6ff align=center |
|- BGCOLOR=#e3e6ff align=center |
||
| − | |[[Hi-Reraiser]] {{Drop Rate| 9| |
+ | |[[Hi-Reraiser]] {{Drop Rate| 9|34}} |
|- BGCOLOR=#e3e6ff align=center |
|- BGCOLOR=#e3e6ff align=center |
||
| − | |[[Hi-Ether Tank]] {{Drop Rate| |
+ | |[[Hi-Ether Tank]] {{Drop Rate| 8|34}} |
|- BGCOLOR=#e3e6ff align=center |
|- BGCOLOR=#e3e6ff align=center |
||
| − | |[[Hi-Potion Tank]] {{Drop Rate| |
+ | |[[Hi-Potion Tank]] {{Drop Rate|10|34}} |
|} |
|} |
||
| Line 104: | Line 104: | ||
{| width=100% |
{| width=100% |
||
|- BGCOLOR=#ffdead |
|- BGCOLOR=#ffdead |
||
| − | ! [[??? Earring]] {{Drop Rate| |
+ | ! [[??? Earring]] {{Drop Rate|12|40}} |
|- BGCOLOR=#e3e6ff align=center |
|- BGCOLOR=#e3e6ff align=center |
||
| − | |[[Beetle Earring]] {{Drop Rate| |
+ | |[[Beetle Earring]] {{Drop Rate|4|12}} |
|- BGCOLOR=#e3e6ff align=center |
|- BGCOLOR=#e3e6ff align=center |
||
| − | |[[Bone Earring]] {{Drop Rate|3| |
+ | |[[Bone Earring]] {{Drop Rate|3|12}} |
|- BGCOLOR=#e3e6ff align=center |
|- BGCOLOR=#e3e6ff align=center |
||
| − | |[[Shell Earring]] {{Drop Rate|1| |
+ | |[[Shell Earring]] {{Drop Rate|1|12}} |
|- BGCOLOR=#e3e6ff align=center |
|- BGCOLOR=#e3e6ff align=center |
||
| − | |[[Silver Earring]] {{Drop Rate|1| |
+ | |[[Silver Earring]] {{Drop Rate|1|12}} |
|- BGCOLOR=#e3e6ff align=center |
|- BGCOLOR=#e3e6ff align=center |
||
| − | |[[Sigma Earring]] {{Drop Rate|3| |
+ | |[[Sigma Earring]] {{Drop Rate|3|12}} |
|} |
|} |
||
| Line 120: | Line 120: | ||
{| width=100% |
{| width=100% |
||
|- BGCOLOR=#ffdead |
|- BGCOLOR=#ffdead |
||
| − | ! [[??? Sash]] {{Drop Rate|11| |
+ | ! [[??? Sash]] {{Drop Rate|11|40}} |
|- BGCOLOR=#e3e6ff align=center |
|- BGCOLOR=#e3e6ff align=center |
||
|[[Lugworm Belt]] {{Drop Rate|5|11}} |
|[[Lugworm Belt]] {{Drop Rate|5|11}} |
||
| Line 134: | Line 134: | ||
{| width=100% |
{| width=100% |
||
|- BGCOLOR=#ffdead |
|- BGCOLOR=#ffdead |
||
| − | ! [[??? Sword]] {{Drop Rate|0| |
+ | ! [[??? Sword]] {{Drop Rate|0|40}} |
|- BGCOLOR=#e3e6ff align=center |
|- BGCOLOR=#e3e6ff align=center |
||
|[[Kilij]] {{Drop Rate|0|0}} |
|[[Kilij]] {{Drop Rate|0|0}} |
||
| Line 142: | Line 142: | ||
{| width=100% |
{| width=100% |
||
|- BGCOLOR=#ffdead |
|- BGCOLOR=#ffdead |
||
| − | ! [[??? Box]] {{Drop Rate|16| |
+ | ! [[??? Box]] {{Drop Rate|16|40}} |
|- BGCOLOR=#e3e6ff align=center |
|- BGCOLOR=#e3e6ff align=center |
||
|[[Beetle Quiver]] {{Drop Rate|0|16}} |
|[[Beetle Quiver]] {{Drop Rate|0|16}} |
||
Revision as of 05:03, 22 August 2009
|
Enemies
| Monster | Level | Strengths | Weaknesses | Spawns |
Notes |
|---|---|---|---|---|---|
|
Immortals (Ghayaraan, Krinahal, Habraheem, Hkadouf, Afrhaad, Varajahl, Qudeen, Salyhaar, Mareyamad, Ubdeen, Sharayaan, Nareema, Udhaaman, Yhalbin) |
|
|
| ||
|
|
1 |
|||
|
HP = Detects Low HP; M = Detects Magic; Sc = Follows by Scent; T(S) = True-sight; T(H) = True-hearing JA = Detects job abilities; WS = Detects weaponskills; Z(D) = Asleep in Daytime; Z(N) = Asleep at Nighttime; A(R) = Aggressive to Reive participants | |||||
Drops
|
|
|
|
Walkthrough
Defeat Raubahn. Protect the Elvaan and Hume NPCs.
- The starting point is at (G-9).
- As of 07/01/2007, the NPC behavior may be broken, requiring the players to move around the map, leaving the NPCs at the start.
- There are 8 Elvaan NPCs (Ganmuul, Rahdjab, Ghahnis, Rhushouf, Jalyaat, et al) and Shailham.
- Speaking to the Shailham begins the Assault, causing the enemy mobs to pop.
- Mobs may aggro you at start, if all of them attack you, they will kill you before you are able to respond.
- When you begin the fight, the Elvaans will run off and start attacking blue mage NPCs that will pop in various places around the map.
- If Shailham is attacked and dies, you lose the Assault.
- If Elvaans die, you lose points. They have around 2500 HP.
- Be careful, because enemies may attack from behind.
- The blue mage groups can pop in different places each time this Assault is run.
- The enemies spawn in one of these four configurations:
- Configuration 1: All spawn near the start G-8. 6 will spawn, then another 6 after a set amount of time. The remaining "allies" will not assist you with Raubahn.
- Configuration 2: Both groups of allies move out at the start and split at H-8, one going east and one going north. Both groups will first come to 3 enemies each. After the northbound group defeats their 3 enemies, they will continue north towards Raubahn and find another set of 3 enemies. The eastbound group of allies eventually heads back to H-8 and north to assist the northbound group.
- Configuration 3: 1 group of allies leaves G-9 and heads north down the cliff at H-8. Only 3 enemies are waiting at H-7 (if there are 6, see configuration 4). If so, then another group of enemies will spawn back near the start. Allies will assist with Raubahn.
- Configuration 4: 1 group of allies leaves G-9 and heads north down the cliff at H-8. 6 enemies are waiting at H-7. 3 more enemies will spawn back at the start after some time. Allies will assist with Raubahn.
- The blue mage NPCs all have very low HP and can be solo'd easily. Immune to sleep.
- Raubahn spawns at the top of (I-6) in a group of blue mage NPCs.
- Next to Raubahn is a large pillar, the boss can easily be kited here while you pick off the BLU's.
- Raubahn, unlike the other BLUs, is not immune to sleep.
- Carby pull strategy WORKS GREAT.
- The Assault is won when Raubahn has been slain,approx. 3000 HP (2977). Killing him also depops remaining enemies.
- Raubahn hits DDs very hard, for approximately 300dmg a swing.
- The Rune of Release spawns at the starting point at (G-9).
- Raubahn can be carby-pulled, without aggroing the other BLUs, making it easy to kill him alone. (Take care with this strategy, because enemies aggro range is slight smaller than Assault range)
Strategy
See Strategies.
Notes
- A good method of dealing with these is to have a red mage diaga a group and kite them around while the other team members pick them off.
- Another method is to have all but one party member head to Raubahn's spawn location and have that one member pop the mobs when everyone is in place, having one other person kite the blue mages while the rest kill Raubahn.
- Another method that is effective is to have a NIN/THF or THF to talk to NPC and pop the BLUs, and have two SAM waiting at the NM. Have the NIN or THF flee to them, run in and aggro and kite. After aggro, have the two SAMs kill the NM. We went with NIN/THF, SAM/WAR, DRK/SAM during nighttime. We did not have to 2 hour and still win.
- Another method : DDs (preferably SAMs) with 1 Provoke + 1 RDM/THF (THF25+). RDM stays at start while DD Meditate and go next to boss pop area. When DDs are next to pillar, have the RDM buff up and talk to NPC. You can wait another Meditate, time won't be a problem. Then RDM runs to boss. Use Flee when you encounter the first ennemies (they'll try to follow, going far from NPCs for max points). When you are near boss, cast Diaga on an Immortal to have them follow and run towards Rune Of Release at starting point. DDs need to Provoke the boss, and eliminate it with charged TPs That should take a few seconds. RDM opens crate, Casts lots and exit area. Safe and fast points for Salvage.
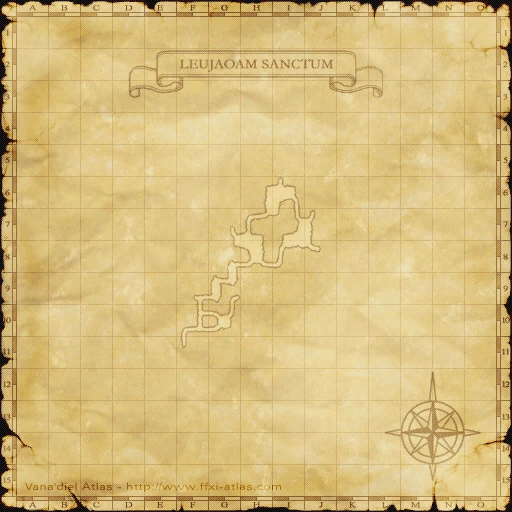
Map
| Assault | |
|---|---|
| Leujaoam Missions | |
| Mamool Ja Missions | |
| Lebros Missions | |
| Periqia Missions | |
| Ilrusi Missions | |
| Nyzul Isle Missions | |
| Assault Point Rewards | |
| Nyzul Isle Rewards | |