Note: A portion of this quest will require Excavation, requiring a pickaxe. These CAN break during quests that require their use; as a precaution, you may want to bring two or three to avoid having to backtrack. Also, digging during special event times (such as during Egg Hunt Egg-stravaganza) can result in less chance of digging up the item, finding special event items instead.
Option 1: Angelica
Talk to Angelica in Windurst Waters North (F-10) Rarab Tail Hostelry second floor for a cutscene with her and then a cutscene showing what was happening back in Bastok. Umberto mentions a Bal Shell and Angelica requests that you find one for her.
Take the Bal Shell and trade it (with the Signal Pearl on you does not have to be equipped) back to Umberto for another cutscene.
Return and talk to Diederik in Selbina for another cutscene in which you see that your friend is in trouble (make sure you have either a Signal Pearl or Tactics Pearl in your inventory).
After either option
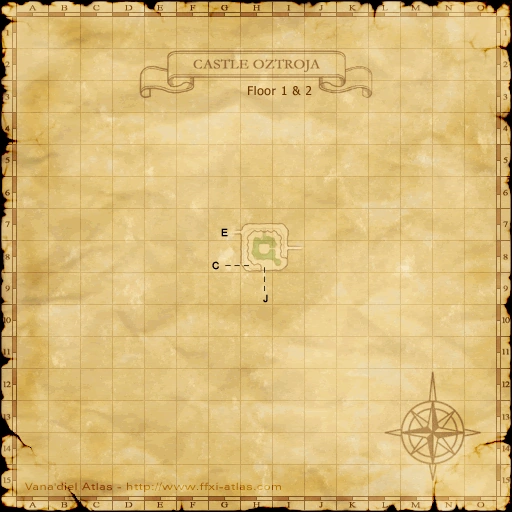
Travel to Castle Oztroja and open the Brass Door at I-8 to travel upstairs. Head South to I-9 and exit East to the 2nd floor of the courtyard, where Quu Domi the Gallant spawns.
Follow the path round to I-8 again, to a second Brass Door. Click on the door for a brief cutscene with your NPC. Click the door again to enter.
During the battle, your friend will appear and help you defeat the Yagudo.
Note: Anyone in your party, as long as they also have the quest, can enter the chamber and assist in the fight. However, in order for the next person to spawn the NM, a rezoning into the chamber is required. However, if the person who has just finished the fight also zones out, they will be unable to re-enter.
""Note."" However if they pull back to door you can heal them through the door.
When the NM is defeated, talk to your NPC first and then click the ??? again to get an Opalescent Stone (key item).
Diederik has lost a painting ordered by a valued customer. He wants you to help him earn time in order to get a replacement painting before anyone notices.
SPOILER WARNING: Click here for additional details about this story line.