|
Walkthrough
- Head to Metalworks and talk to Cid at H-8 for a cutscene.
- Head to Sealion's Den and view a cutscene.
- Examine the Iron Door and enter the BC for another cutscene. Note that if you zone out of Sealion's Den, you will have to rewatch the cutscene.
- You will only have 45 minutes to complete all three battles, including the cutscenes before and between the fights; if you run out of time before all three battles are cleared, you will be thrown out of the BC. You will have to work fast, but there is sufficient time, with records being set as low as 22 minutes.
- Before and between each fight, you will zone into a room on the airship. Here, you will be able to buff and eat food without interruption. Your HP and MP will be also healed to full, and you have the option of leaving the BC if you so desire.
- Being moved from a battle (e.g., after defeating the Mammets or Omega) into the buffing area will reset TP, but TP gained in the buffing area (such as from an Icarus Wing) will last into the next battle.
- Immediately buff up, rest MP and then have someone check the airship’s communication room, telling it to approach. Everyone on the airship will automatically get a cutscene that interrupts rest and any spells or items they were using. Consider skipping the cutscene to save time.
- A fair objective to set is starting the first battle with about 41 minutes left on the timer.
Notes:
- It's highly recommended that any melee damage dealers sub Ninja to absorb AoE damage by the two weapons. However, a Samurai with capped archery may find it beneficial to sub Ranger for this fight instead, tanking mammets with Seigan and shooting the two weapons from out of range.
- Blue Mage excels at this with Head Butt for stun.
- The level cap on this battle is 60.
- All Summoner party can win this fight. 2 Summoners Astral Flow on Omega at around 40%, using only regular blood pacts until that time (reference to the element of the day for avatar preferance). On Ultima, the remaining 4 summoners Astral Flow at around 50% health. Bring Hi-ethers or comparable items for gaining MP back while waiting for 60 second timer on Blood Pact and Yagudo Drinks for refresh.
- Having at least three damage dealers should be enough to win the fight, assuming the party does not wipe out. Damage dealers can include NIN and PLD/NIN(WAR also works if defender is off).
- If a party runs out of time, it is usually because they have wiped once or twice during battle.
- In other words, fighting the battle "Slow, steady, and safe" will usually ensure victory.
Mammet-22 Zeta x5
- You will enter the battlefield facing five Mammet-22 Zeta.
- Mammets in all four jobs
- These Mammets will change jobs, just like the Mammets-19 Epsilon you fought in Promathia Mission 2-5. Mages have staves and cast -ga II spells; Warriors have swords and spam TP; Dragoons have lances and concentrate on physical attack. They all have AoE TP abilities and magic. Transmogrification is still a very dangerous ability. However, these Mammets are significantly weaker (relative to the party) than the 19 Epsilon variety. They have 4000 HP each.
- They are resistant to Sleep; however, they are susceptible to Bind and Shadowbind (the latter of which can buy up to 30 seconds).
- Due to the size of the battlefield, kiting individual Mammets is no longer much of an option. Tanking is a safer bet. Ninja (and jobs that sub Ninja) can blink tank individual Mammets; Paladins can hold one, maybe two, for damage-dealers to finish off; Summoner Avatars and Beastmaster pets can tank single Mammets for a while.
- Yellow Liquid will again drop from defeated Mammets, as the fight goes on, so you may want to set one person to Quartermaster--that way, they can be immediately used. It can still be used to prevent Mammets from changing jobs for thirty seconds. Dragoon seems to to remain the most useful job to lock Mammets into for tanking.
- Strategy tips
- Remember to use Yellow Liquid to speed up the fight. Due to the number of additional Mammets and two to three Liquids dropping from each, you'll most likely end the fight with more than you use.
- Silence all of the Mammets from the start; Ensure that Silence sticks, even on the Mammets that have melee weapons out. When they switch to their Staves, it will keep them from using -ga AoE magic. (Staff Form may still have increased Silence resistance and shortened duration in general; Elemental Seal may help if Silence is immediately resisted. Debuffers should pay close attention.)
- Since most of the Mammet moves are AoE, the kiters and the rest of the party should spread out as much as possible to avoid damage.
- Continue to watch the log for Transmogrification. If you see yourself healing a Mammet with physical damage, drop target lock and turn around for about fifteen to eighteen seconds, "testing" occasionally with single swings.
- All players need to be self-sufficient at the beginning. If a player is having trouble handling a Mammet until he or she can receive backup, consider altering your strategy.
- An alternative strategy is to have one party member (probably your main tank or a Thief) receive sight aggro from all five Mammets, but do nothing that would "claim" them, or turn their name red (Provoke, use of Yellow Liquid, etc.), When this is done, the member could either run them all into a corner or kite them around. Since the player hasn't done anything aggressive to the Mammets, they have no hate, only aggro, so mages healing them will not receive hate, either. The rest of the party can then pull the Mammets off of the train one at a time, killing them at their leisure.
- A Paladin using Bat Earrings and Blinding Potions (or Melody Earrings and Dragonfoe Mambo and Sheepfoe Mambo from a Bard) would be effective for this strategy, as Mammets have poor accuracy. For this, it's best if the Paladin stand in one spot and cure himself rather than trying to kite.
- Note that anyone resting on the battlefield will draw aggro from the unclaimed Mammets, as will a Summoner or Beastmaster releasing a pet (the act of summoning, however, will not cause aggro).
- Try to conserve resources; however, don't try to save TP for the next battle, because it will be lost. Your objective should be to finish this fight without any deaths, with as much items as possible, and with no two-hour abilities used. Don't worry about the fight taking a couple of minutes longer as a result.
- Also remember that, should it be necessary, you can exit and re-enter the battle an unlimited number of times in order to practice Mammet strategies.
- A fair goal would be to have about 36 minutes left on the clock by the time you get through the next cutscene.
Omega
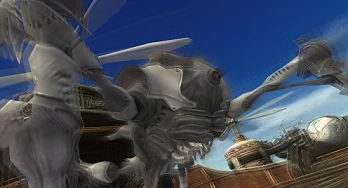
- When the mammets are defeated, everyone alive will be returned to full HP/MP (weakened members will still be weakened however). Raise your dead and rest to full as quickly as possible. When ready, re-enter the Battlefield to fight the Biotechnological Weapon Omega.
- Omega has around 14,000 HP. It uses damaging AoE attacks, and becomes especially dangerous when its HP reaches 25% or lower. Defeating Omega quickly as soon as it reaches low HP can be the most crucial part of the entire mission.
- Omega has an innate Additional Effect of Stun on all of its physical attacks.
- Omega is known to use the following abilities:
- From 25-100% HP:
- Ion Efflux: Cone Attack Paralyze (moderate).
- Rear Laser: Used if someone behind Omega gets hate. Damages the attacker and causes Petrification.
- Target Analysis: AoE Absorb-All, like Diabolos's Ultimate Terror. Absorbed by Utsusemi.
- Guided Missile: Physical damage AoE centered on the primary target. ~400 to Paladin, ~700 to others. Absorbed by Utsusemi.
- Hyper Pulse: AoE (magic?) damage and Bind. Strips Utsusemi like a Wyrm Wing attack.
- From 0-25% HP:(Started using occasionally at 50% HP for our pt.)
- Discharger: Gives Omega a Magic Shield effect that makes it 100% resist all spells for a limited period.
- Magic Shield does not protect from magic damage in general, just spells; elemental Weapon Skills and Astral Flow are not affected.
- Dispel or Magic Finale will not remove Discharger's effect; it must wear off on its own.
- Also gives Omega Shock Spikes (~25 damage per hit) for a short time; if the spikes have the same duration as the Magic Shield, that would be a convenient way to see when the Magic Shield has worn off.
- Pile Pitch: Reduces the target's HP to 5% of its current value and resets hate (similar to the Tonberry ability Throat Stab).
- Using a CCB Polymer Pump on Omega or Ultima will prevent them from using any special moves for exactly one minute.
- Contrary to popular belief, Ultima and Omega DO have a slight HP regen. It is very small and slow but they DO regen HP. After about 5 minutes they gain about 1% HP.
- Strategy tips
- When the battle begins, the tank should remain where he or she is, and engage Omega from there. Everyone else should move past Omega and stay in front of the airship door. Everyone should move away from the tank before engaging, as Omega always uses a special attack when it aggroes, and you don't want your mages getting hit by Guided Missile.
- Almost all of Omega’s moves before 25% HP are AoEs. Mages and ranged attackers should keep as much distance from Omega as possible. Any melee attackers other than the tank need to sub Ninja for Utsusemi to absorb Guided Missile, and stand at the sides of Omega to avoid Ion Efflux and Rear Lasers. If they lose any shadows, they should run away to recast Utsusemi before continuing to attack.
- Anyone with a damage-dealing job that can't sub Ninja seems to be best off bringing out their Ranged Weapon for Omega. Ranged Attacks can be used to build TP from a distance; each time the damage-dealers' TP reaches 100, they can run up to Omega, use their Weapon Skill, then quickly run back out of AoE range. They do not have to deal heavy ranged damage or be Rangers to do this, though some damage-dealers sub Ranger in this mission for that purpose.
- Once Omega starts using Discharger and Pile Pitch, it won't do any more AoE attacks, so they can move in and melee at this point, and reraise immediately if they get KO'd. Just don't let them suicide on the Shock Spikes.
- Omega won't go down quickly. Keep chipping away at it, but try not to cause any hate issues; do everything in your power to keep Omega facing the tank and only the tank.
- Use Yagudo Drinks and Potions, but try to conserve as much as you can for the next battle. However, don't try to save TP for the next battle, because it will be lost. Rest only when someone else can cover your job.
- CCB Polymer Pumps make this mission MUCH easier. Everyone in your party should have one. Plan to use 2 or 3 on Omega. Use one to give you some breathing room after 50% HP if necessary. Just before Omega reaches 25%, use a CCB Polymer Pump. A minute later, use another CCB Polymer Pump.
- Try to use a CCB before Omega switches modes and then kill it fast before it can use Discharger.
- Below 25%, hit Omega hard to kill it as fast as possible. You probably want to use Astral Flow, Icarus Wings or a melee DD 2-hour to finish off Omega. Discharger will prevent Black Mages from doing any damage. Hundred Fists also doesn't work too well with Discharger, as the Monk will spend a lot of time Stunned and/or kill themselves on the spikes.
- Don't use up all your damage on Omega, though, you'll need plenty for Ultima.
- Paladin tanks should not use Invincible on Omega, as the hate reset caused by Pile Pitch will most likely cause them to be ignored altogether.
- In the event a party member, who isn't the tank, gains hate after use of Pile Pitch, it may be necessary for that member to kite Omega around until the tank can regain hate. If you're a heavy damage dealer, be prepared to kite it for several seconds if possible.
- Defeating Omega with 15-20 minutes left on the timer would be a modest goal.
Ultima
- Ultima has slightly more HP than Omega (around 15,000). It only uses AoE attacks between 20-40% HP, but it has a wider variety of status-causing abilities, and has a tendency to go around one-shotting everyone once it drops below 20% HP.
- Ultima has an innate Additional Effect of Paralyze on all of its physical attacks.
- Ultima attacks about every 3.3 seconds, and has Double Attack.
- With Elegy, it attacks about every 5 seconds. With Slow+Elegy, about every 6 seconds.
- Ultima's attacks do not speed up at low HP.
- Ultima is known to use the following abilities:
- From 70%-100% HP:
- Wirecutter: Single-target physical damage (~400 to PLD), absorbed by Utsusemi (2 shadows)
- Particle Shield: Strong Defense Boost. Remove with Dispel/Magic Finale
- Chemical Bomb: Cone Attack Elegy and Slow (stronger than Haste). Remove with two Erases
- From 40-70% HP:
- Nuclear Waste: Causes a status effect that reduces all elemental resistances by 50. AoE
- Followed 5 seconds later by one of the following elemental Cone Attacks, all of which do 490 damage if unresisted:
- From 20-40% HP:
- From 0-20% HP:
- Strategy tips
- Use the same placing strategies as Omega: tank where you spawn, all other members on the other side. And again have everyone move away from the tank before pulling to avoid Chemical Bomb.
- Wipe where you spawn, so you can Reraise if need be.
- Mages should constantly use Yagudo Drinks, if they don't already have Refresh from a Red Mage.
- Ultima doesn't use any AoE attacks until 40% HP, so melees can move in right away even if they're weakened; just stand to the back or sides.
- If you have 3 CCB Polymer Pumps and start using them shortly after Ultima starts to use Equalizer, they ought to last until it is dead.
- At this point start to use damage two-hours (Mighty Strikes, Astral Flow, Hundred Fists, etc.) and Icarus Wings to wear it down as quickly as possible.
- If you run out of CCBs during the Antimatter stage, Invincible can protect everyone for another 30 seconds.
- Again, note that Ultima WILL Regenerate HP if left alone and unaggroed, but it is a very slow gain. Over 5 minutes he only gains 1%.
- The tank will need lots of White Mage attention, curing and status removal. Make sure the WHM has the meds or support (Mage's Ballad, Refresh) to stay casting without any rest, if necessary.
- A Paladin tank has decent survivability in this battle (provided they pack many Hi-Potions), and status effects will not have much of an impact (there have even been reports of parties with a Paladin tank completing this mission without a White Mage!).
- A Ninja tank will require more attention, and will need to be Hasted and Erased to keep damage output and shadows up. The Ninja must not cast Utsusemi with both Elegy and Slow on. But trying to keep up Haste early on will drain MP fast, so you may want to skip it until Ultima stops using Chemical Bomb.
- The White Mage should Haste themselves to lower Erase recast time.
- Keep mages as far away as possible to limit damage from the very deadly Equalizer.
- It is safe for a Paladin to move around for Cover once Ultima starts using Equalizer, as it won't use any more breath attacks after that point.
- A Blue Mage should use Filamented Hold and Head Butt in this battle. Also should use Bludgeon, and Chain Affinity with Red Lotus Blade>Death Scissors, Sickle Slash, or Jet Stream.
- Complete the mission successfully and you will appear in Lufaise Meadows. At the end of the cutscene, you will obtain a Ducal Guard's Ring.
- You will receive 1,500 experience points upon winning. (Only once per day) You will not receive experience if you are KO'ed upon Ultima's defeat, however.
Game Description
- Mission Orders
- The fifth verse of "Memoria de la S^tona" has been discovered. Now, with the help of Cid, you must fly beyond the sea of clouds and face Bahamut for what may be the final time...