mNo edit summary |
m (Geirrothr) |
||
| (191 intermediate revisions by 78 users not shown) | |||
| Line 1: | Line 1: | ||
| + | {{disambig3|the summoning magic [[Odin]], [[Odin II]], or [[Odin (Disambiguation)|another page with this name]]}} |
||
| ⚫ | |||
| + | |||
| ⚫ | |||
{| border="0" width="100%" |
{| border="0" width="100%" |
||
|width="50%" align="left" valign="center"| |
|width="50%" align="left" valign="center"| |
||
| − | '''Job:''' |
+ | '''Job:''' [[Dark Knight]]/[[Black Mage]]/[[Red Mage]]/[[Summoner]]<br> |
| − | '''Family:''' [[: |
+ | '''Family:''' [[:category:Avatars|Avatars]]<br> |
| − | ''' |
+ | '''Weak against:''' {{element|Light}}<br> |
| − | ''' |
+ | '''Title Obtained:''' Elite Einherjar<br> |
| + | '''Reward:''' 2880 [[Therion Ichor|Ampoules of Therion Ichor]]<br> |
||
| − | |||
| − | {{Color|NM|Notorious Monster}} |
||
|width="50%" align="center"| |
|width="50%" align="center"| |
||
| − | [[ |
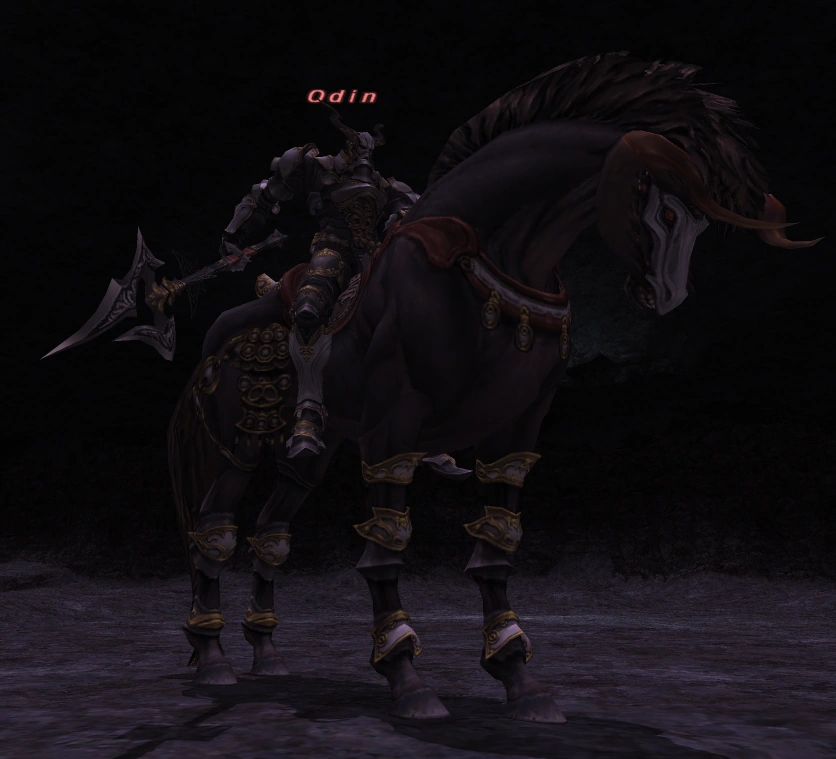
+ | [[File:Odin.png|350px|thumb|Odin]] |
|} |
|} |
||
{| border="0" width="100%" cellpadding="2" cellspacing="2" |
{| border="0" width="100%" cellpadding="2" cellspacing="2" |
||
|- BGCOLOR="#ffdead" |
|- BGCOLOR="#ffdead" |
||
| − | ! Zone || Level || Drops || Steal || Spawns || |
+ | ! Zone || Level || Drops || Steal || Spawns || Notes |
| ⚫ | |||
|- BGCOLOR="#ffd9d9" |
|- BGCOLOR="#ffd9d9" |
||
| − | |style="padding-left:1ex"| |
+ | |style="padding-left:1ex"|[[Odin's Chamber]] |
| − | <!--Add Zone Here-->[[Odin's Chamber]] |
||
|align="center"| |
|align="center"| |
||
| + | |<!--Update all drops here--> |
||
| − | <!--Add Level Here if known (replace question)-->{{question}} |
||
| + | *[[Aquarian Abjuration: Body]] {{Drop Rate|55|151}} (Can drop x2) |
||
| − | |<!--Add Items Dropped Here--> |
||
| − | *[[Aquarian Abjuration: |
+ | *[[Aquarian Abjuration: Feet]] {{Drop Rate|16|151}} |
| − | *[[Aquarian Abjuration: |
+ | *[[Aquarian Abjuration: Hands]] {{Drop Rate|13|151}} |
| − | *[[ |
+ | *[[Dryadic Abjuration: Feet]] {{Drop Rate|26|151}} |
| − | *[[ |
+ | *[[Earthen Abjuration: Legs]] {{Drop Rate| 6|151}} |
| − | *[[Earthen Abjuration: |
+ | *[[Earthen Abjuration: Body]] {{Drop Rate|56|151}} (Can drop x2) |
| − | *[[Earthen Abjuration: |
+ | *[[Earthen Abjuration: Hands]] {{Drop Rate|12|151}} |
| − | *[[Hadean Abjuration: Body]] {{Drop Rate| |
+ | *[[Hadean Abjuration: Body]] {{Drop Rate|33|151}} |
| − | *[[Hadean Abjuration: Hands]] {{Drop Rate| |
+ | *[[Hadean Abjuration: Hands]] {{Drop Rate|20|151}} |
| − | *[[Hadean Abjuration: Head]] {{Drop Rate| |
+ | *[[Hadean Abjuration: Head]] {{Drop Rate|28|151}} |
| − | *[[Hadean Abjuration: Feet]] {{Drop Rate| |
+ | *[[Hadean Abjuration: Feet]] {{Drop Rate|12|151}} |
| − | *[[Hadean Abjuration: Legs]] {{Drop Rate| |
+ | *[[Hadean Abjuration: Legs]] {{Drop Rate|24|151}} |
| − | *[[Hofud]] {{Drop Rate| |
+ | *[[Hofud]] {{Drop Rate|23|151}} |
| − | *[[Martial Abjuration: Body]] {{Drop Rate| |
+ | *[[Martial Abjuration: Body]] {{Drop Rate|42|151}} (Can drop x2) |
| − | *[[Martial Abjuration: |
+ | *[[Martial Abjuration: Legs]] {{Drop Rate|16|151}} |
| − | *[[Martial Abjuration: |
+ | *[[Martial Abjuration: Feet]] {{Drop Rate|16|151}} |
| − | *[[Neptunal Abjuration: Head]] {{Drop Rate| |
+ | *[[Neptunal Abjuration: Head]] {{Drop Rate|14|151}} |
| − | *[[Neptunal Abjuration: Legs]] {{Drop Rate| |
+ | *[[Neptunal Abjuration: Legs]] {{Drop Rate|18|151}} |
| − | *[[Phantasmal Abjuration: Body]] {{Drop Rate| |
+ | *[[Phantasmal Abjuration: Body]] {{Drop Rate|42|151}} |
| − | *[[Phantasmal Abjuration: Feet]] {{Drop Rate| |
+ | *[[Phantasmal Abjuration: Feet]] {{Drop Rate|10|151}} |
| − | *[[Phantasmal Abjuration: Hands]] {{Drop Rate| |
+ | *[[Phantasmal Abjuration: Hands]] {{Drop Rate|21|151}} |
| − | *[[Phantasmal Abjuration: Head]] {{Drop Rate| |
+ | *[[Phantasmal Abjuration: Head]] {{Drop Rate| 7|151}} |
| − | *[[Phantasmal Abjuration: Legs]] {{Drop Rate| |
+ | *[[Phantasmal Abjuration: Legs]] {{Drop Rate|11|151}} |
| − | *[[Wyrmal Abjuration: Head]] {{Drop Rate| |
+ | *[[Wyrmal Abjuration: Head]] {{Drop Rate|17|151}} |
| − | *[[Wyrmal Abjuration: Body]] {{Drop Rate| |
+ | *[[Wyrmal Abjuration: Body]] {{Drop Rate|47|151}} (Can drop x2) |
| − | *[[Valhalla Breastplate]] {{Drop Rate| |
+ | *[[Valhalla Breastplate]] {{Drop Rate|26|151}} |
| − | *[[Valhalla Helm]] {{Drop Rate| |
+ | *[[Valhalla Helm]] {{Drop Rate|32|151}} |
| − | *[[Valkyrie's Fork]] {{Drop Rate| |
+ | *[[Valkyrie's Fork]] {{Drop Rate|30|151}} |
| + | | |
||
| − | |<!--Add Items Stolen Here--> |
||
| ⚫ | |||
| − | |||
| − | |align="center"| |
+ | |align="center"|A, T(H), M<br>{{HPMP|low hp=110,000|high hp=|low mp=|high mp=}} |
| − | <!--Add Number of Spawn Points Here if known-->1 |
||
| ⚫ | |||
| − | <!--Single letters used to identify Aggressive, Links, etc as shown on the Monster Notes template-->A |
||
|- |
|- |
||
|align="center" colspan="6" BGCOLOR="#ffdead"| |
|align="center" colspan="6" BGCOLOR="#ffdead"| |
||
{{Monster Notes}} |
{{Monster Notes}} |
||
|} |
|} |
||
| ⚫ | |||
| − | |||
| + | *'''The following information is applicable to [[Odin's Chamber]] only.''' Odin adopts different attacks and rules with regard to TP move usage in [[Odin's Chamber II]]. |
||
| − | '''Notes:''' |
||
| + | *To enter Odin's Chamber, each participating player must possess at least 3 of the Einherjar feather key items, one from each wing. |
||
| − | :*100,000 HP |
||
| + | **Upon entrance, all feathers owned by every participant are consumed and lost. |
||
| ⚫ | |||
| + | *Estimated to have approximately 110,000 HP. |
||
| − | :*'''[[Sanngetall]]:''' [[AoE]] dispel that dispells all buffs. |
||
| ⚫ | |||
| − | :*'''[[Gagnrath]]:''' [[AoE]] damage and Terror. |
||
| + | *Uses the following TP moves, all of which have a range of 20' or larger: |
||
| − | :*'''[[Valfodr]]:''' [[AoE]] damage and [[Curse]] + [[Silence (Status Effect)|Silence]]. |
||
| − | + | **'''[[Gagnrath]]:''' Front-[[AoE]] damage and [[Terror]] |
|
| − | + | **'''[[Valfodr]]:''' [[AoE]] damage and [[Curse]] + [[Silence (Status Effect)|Silence]] |
|
| − | + | **'''[[Ofnir]]:''' [[AoE]] magic damage |
|
| + | **'''[[Yggr]]:''' Gives Odin the ability to Intimidate players |
||
| − | :*'''[[Zantetsuken]]:''' Astral Flow like ability, will use just as hp is ~5%. Deals death to everyone in range. He will speak about 5 seconds before performing the move, and it seems to be about a 15 ft radius around Odin. It is possible to have many people run out of the area before he performs this move. |
||
| + | **'''[[Geirrothr (ability)]]:''' [[AoE]] physical damage that acts as "10,000 Needles", dividing 10,000 points of damage among all players in range. Additional effect: [[Bind (Status Effect)|bind]]. Used 3 times, once when Odin reaches 74%, 49%, and 24% HP. Odin precedes this attack with a message in the chat log. |
||
| − | :**'''Note:''' It has been said before that using the /kneel or /heal command to Odin or healing before he performs this can also prevent the death from affecting players. {{verification}} |
||
| + | ***A good strategy is to ensure that every non-weakened member and any pets are near Odin at this time to help spread and reduce the damage. Alternatively, the damage can be absorbed using [[Migawari]] and similar abilities. |
||
| ⚫ | |||
| + | **'''[[Sanngetall]]:''' [[AoE]] full [[dispel]] that removes almost all buffs from players in range. Used 8 times, once when Odin reaches 89%, 79%, 69%, 59%, 49%, 39%, 29%, and 19% HP. Odin precedes this attack with a message in the chat log. |
||
| − | |||
| + | ***[[Reraise (Status Effect)|Reraise]] and [[Embrava]] will not be dispelled by Sanngetall. |
||
| − | Will summon 9 fomors during the battle. These fomors are named after the 9 chambers previous to Odin's Chamber and should be handled with care. 3 Will pop at a time. |
||
| + | *** At 49%, Geirrothr will be used first, followed by Sanngetall. At 9%, this ability is replaced by Zantetsuken. |
||
| + | **'''[[Zantetsuken (ability)]]:''' An [[Astral Flow]]-like ability. Used once when Odin reaches 9% HP. This move deals instant KO to all targets within a 30' radius around him. Odin precedes this attack with 3 messages in the chat log. |
||
| + | ***If Odin is performing a TP move or spell after the 3 messages are displayed, he will complete it before readying Zantetsuken. |
||
| + | ***If a character is in the /heal position when struck by Zantetsuken, there is a chance they will survive with moderate damage instead of being instantly KO'd. |
||
| + | ***/kneel does not prevent instant KO, only /heal works. |
||
| + | *Can drop up to 5 items. |
||
| ⚫ | |||
| + | **It is also possible for 2 of certain items to drop, such as M. Body. |
||
| + | **Loot pool follows the following formula: |
||
| + | ***Kings abjuration (100%) |
||
| + | ***Body abjuration, Odin or kings (100%) |
||
| + | ***Odin abjuration (100%) |
||
| + | ***Random abjuration (not 100%) |
||
| + | ***Odin Item (Spear, Sword, Helm, Body) (not 100%) |
||
| + | *During battle, Odin summons 9 fomors to assist him. These fomors are named after the other 9 chambers of Einherjar and should be handled with care. Only three fomors spawn at a time and after 10% damage has been done to Odin, they run back to Odin and despawn. |
||
| + | **First set (3 fomors) arrives at 90-60% health |
||
| + | **Second set (3 fomors) arrives at 50-20% health |
||
| + | **Third set (3 fomors) arrives after [[Zantetsuken (ability)]] is used (at <10%) |
||
| + | **Whoever the fomors spawn on will be "supertanking" them, meaning they can be healed without risk of pulling hate as long as no actions are performed on the fomors. |
||
| + | **At level 99 the fomors can usually be tanked without much issue, especially if the player has good evasion and/or Utsusemi. |
||
| + | *Receiving the title ''Elite Einherjar'' by defeating Odin is required for the quest "[[An Imperial Heist]]." Additionally, it allows the player to reserve [[Odin's Chamber II]]. |
||
| + | *Upon defeat, Odin says, |
||
| + | :''"Ahahahahaha! Fate hath smiled upon the sons of Men. Let us return to Asgarth, Sleipnir.'' |
||
| + | :''But as long as thine hearts yet festereth with corruption of rage, I shalt ne'er perish.'' |
||
| + | :''Farewell, Einherjar!"'' |
||
| + | ==Historical Background== |
||
| ⚫ | |||
| + | [[Category:Bestiary]] |
||
| ⚫ | |||
| + | [[Category:Avatars]] |
||
| + | [[Category:Einherjar]] |
||
Latest revision as of 11:09, 10 June 2019
|
Job: Dark Knight/Black Mage/Red Mage/Summoner |
 Odin |
Notes
- The following information is applicable to Odin's Chamber only. Odin adopts different attacks and rules with regard to TP move usage in Odin's Chamber II.
- To enter Odin's Chamber, each participating player must possess at least 3 of the Einherjar feather key items, one from each wing.
- Upon entrance, all feathers owned by every participant are consumed and lost.
- Estimated to have approximately 110,000 HP.
- Casts Sleepga II, Breakga, Blindga, Bindga, Blizzard IV, Blizzaga III, Blizzaga IV, Slowga, Paralyga, and Dread Spikes (can be dispelled with Finale).
- Uses the following TP moves, all of which have a range of 20' or larger:
- Gagnrath: Front-AoE damage and Terror
- Valfodr: AoE damage and Curse + Silence
- Ofnir: AoE magic damage
- Yggr: Gives Odin the ability to Intimidate players
- Geirrothr (ability): AoE physical damage that acts as "10,000 Needles", dividing 10,000 points of damage among all players in range. Additional effect: bind. Used 3 times, once when Odin reaches 74%, 49%, and 24% HP. Odin precedes this attack with a message in the chat log.
- A good strategy is to ensure that every non-weakened member and any pets are near Odin at this time to help spread and reduce the damage. Alternatively, the damage can be absorbed using Migawari and similar abilities.
- Sanngetall: AoE full dispel that removes almost all buffs from players in range. Used 8 times, once when Odin reaches 89%, 79%, 69%, 59%, 49%, 39%, 29%, and 19% HP. Odin precedes this attack with a message in the chat log.
- Zantetsuken (ability): An Astral Flow-like ability. Used once when Odin reaches 9% HP. This move deals instant KO to all targets within a 30' radius around him. Odin precedes this attack with 3 messages in the chat log.
- If Odin is performing a TP move or spell after the 3 messages are displayed, he will complete it before readying Zantetsuken.
- If a character is in the /heal position when struck by Zantetsuken, there is a chance they will survive with moderate damage instead of being instantly KO'd.
- /kneel does not prevent instant KO, only /heal works.
- Can drop up to 5 items.
- Only one can be an Odin-exclusive item. It is also possible for no Odin-exclusive items to drop.
- It is also possible for 2 of certain items to drop, such as M. Body.
- Loot pool follows the following formula:
- Kings abjuration (100%)
- Body abjuration, Odin or kings (100%)
- Odin abjuration (100%)
- Random abjuration (not 100%)
- Odin Item (Spear, Sword, Helm, Body) (not 100%)
- During battle, Odin summons 9 fomors to assist him. These fomors are named after the other 9 chambers of Einherjar and should be handled with care. Only three fomors spawn at a time and after 10% damage has been done to Odin, they run back to Odin and despawn.
- First set (3 fomors) arrives at 90-60% health
- Second set (3 fomors) arrives at 50-20% health
- Third set (3 fomors) arrives after Zantetsuken (ability) is used (at <10%)
- Whoever the fomors spawn on will be "supertanking" them, meaning they can be healed without risk of pulling hate as long as no actions are performed on the fomors.
- At level 99 the fomors can usually be tanked without much issue, especially if the player has good evasion and/or Utsusemi.
- Receiving the title Elite Einherjar by defeating Odin is required for the quest "An Imperial Heist." Additionally, it allows the player to reserve Odin's Chamber II.
- Upon defeat, Odin says,
- "Ahahahahaha! Fate hath smiled upon the sons of Men. Let us return to Asgarth, Sleipnir.
- But as long as thine hearts yet festereth with corruption of rage, I shalt ne'er perish.
- Farewell, Einherjar!"
Historical Background
See: "Odin (Server)"