| Line 51: | Line 51: | ||
**Anybody can help with the fight, including those that do not have an Omnis Stone or the add-on. |
**Anybody can help with the fight, including those that do not have an Omnis Stone or the add-on. |
||
**Buffs granted by spells and abilities will wear upon entry. However certain buffs granted by items, such as [[Reraise]] from [[Reraise Earring]] will not. |
**Buffs granted by spells and abilities will wear upon entry. However certain buffs granted by items, such as [[Reraise]] from [[Reraise Earring]] will not. |
||
| − | **The [[Omnis |
+ | **The [[Omnis stone]] is lost upon entry. In the event of a failure, you will need to climb the tower again to collect the stones in order to acquire another. |
**No exp is lost for dying. |
**No exp is lost for dying. |
||
Revision as of 17:51, 20 May 2009
|
|||||||||||||||||||||||||||

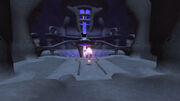
Hi-Res Battlefield Screenshot.
Walkthrough
- Examine the door to enter the battlefield.
- This is a six-person battle with a 30 minute time limit.
- Anybody can help with the fight, including those that do not have an Omnis Stone or the add-on.
- Buffs granted by spells and abilities will wear upon entry. However certain buffs granted by items, such as Reraise from Reraise Earring will not.
- The Omnis stone is lost upon entry. In the event of a failure, you will need to climb the tower again to collect the stones in order to acquire another.
- No exp is lost for dying.
The Battle
- The fight is against the Seed Crystal. The Seed Crystal remains stationary in the center of the battlefield. It has approximately 25,000 HP.
- It is possible to avoid the AoE attacks by standing against the door behind the entrance or in the corners at the back. It has a maximum distance of 17'.
- Caution: At the beginning of the fight the Seed Crystal may use its ability to disable all participants' 2-hour abilities.
- An alternative is to have all mages and damage dealers stand in the corners at the back of the BC.
- It has no front or back, making it impossible to Sneak Attack.
- Resistant to many enfeebling spells, like Slow and Silence, but is susceptible to Stun most of the time. However, it is resistant to Head Butt's stun effect.
- Repeatedly uses Draw In on anyone within melee range with enmity toward it.
- The Seed Thrall spawned by the Seed Crystal have extremely low HP; it is recommended to take them out immediately.
- In the event of a wipe, you can reraise and recover without being booted from the battlefield so long as you wipe out of aggro range from the Seed Crystal. Be warned, however, that the crystal usually regenerates its HP up to 100% within a minute of a wipe.
Reacquisition
- Turn in the Ebon Key previously received and wait the next Japanese midnight.
- If the key is in your inventory, you will not be able to start the battle, and the Omnis stone will not be consumed when entering.
- Repeat the acquisition of the Omnis stone.
- Drop your current body armor. This can be done at any time before entering the battlefield.
- Repeat the fight in Stellar Fulcrum to receive a new Prismatic Key.
- Talk to the coffer in Tenshodo and turn Prismatic Key.
- Reselect your reward.
Game Description
- Mission Orders
- The final confrontation awaits you within the Stellar Fulcrum...
Videos
http://www.youtube.com/watch?v=2Cb7URsxazI
