| Line 710: | Line 710: | ||
! Floor 80: |
! Floor 80: |
||
|- BGCOLOR=#e3e6ff align=center |
|- BGCOLOR=#e3e6ff align=center |
||
| − | |[[Denali Jacket]] {{Drop Rate| 40| |
+ | |[[Denali Jacket]] {{Drop Rate| 40|233}} |
|- BGCOLOR=#e3e6ff align=center |
|- BGCOLOR=#e3e6ff align=center |
||
| − | |[[Askar Korazin]] {{Drop Rate| 55| |
+ | |[[Askar Korazin]] {{Drop Rate| 55|233}} |
|- BGCOLOR=#e3e6ff align=center |
|- BGCOLOR=#e3e6ff align=center |
||
| − | |[[Goliard Saio]] {{Drop Rate| 33| |
+ | |[[Goliard Saio]] {{Drop Rate| 33|233}} |
|- BGCOLOR=#e3e6ff align=center |
|- BGCOLOR=#e3e6ff align=center |
||
| − | |No Armor Drop: {{Drop Rate| |
+ | |No Armor Drop: {{Drop Rate|110|233}} |
|} |
|} |
||
|width=5%| |
|width=5%| |
||
Revision as of 09:24, 9 June 2009
|
Rules
Unlike other Assault areas, Nyzul Isle Investigation incorporates a random progression of floors. The rules are as follows:
- There is a level cap of 75. Buffs will wear upon entry. However, any level job can enter.
- As with other Assault missions, Nyzul Isle Investigation requires an Imperial Army I.D. Tag.
- Assault Points will not be earned from successful completion of this mission. Instead, Tokens are earned. The amount of Tokens earned is determined by how many floors are successfully cleared before exiting, and how high the floors were.
- The player with the armband receives a 10% bonus to the number of Tokens earned.
- Tokens are required to start the Assault above floor 1.
- Tokens are required to purchase temporary items from the Vendor Box in the lobby at the start of the Assault.
- Unlike other Assaults which offer you a "complimentary" reward of 100 Assault Points in the appropriate area even if the mission is a failure, no such reward in Tokens is given if this Assault is finished unsuccessfully.
- Nyzul Isle Investigation counts as an Assault for purposes of Mercenary Rank Promotions.
A single run through "Nyzul Isle Investigation" consists of progressing up through various floors. Each floor has a random objective that must be completed before the party will be allowed the choice of moving on to the next floor, or exiting the Assault area. The standard goal of this Assault is to progress through five of these floors within the time limit of 30 minutes, although the amount remains somewhat arbitrary and is not restricted to just five floors.
Upon beginning this Assault, the party will show up in a "lobby" area. The lobby consists of a single room with a Rune of Transfer and a "Vending Box" where players can spend Tokens to get temporary items to be used inside Nyzul Isle only (see below). Players may use this area to buff up and prepare for their run, but bear in mind that the 30-minute Assault time limit keeps counting down while in the lobby, so it is best not to linger in this area for long.
Armoury Crates containing more temporary items may be dropped by various enemies throughout the Assault. They can also be found on "free" (no objective) floors. These items will usually be items that can already be bought from the lobby's Vending Box, but there will also be a few exclusive items that cannot be purchased, such as Revitalizer. These chests will be blue and gold in color, and behave in similar fashion to the temporary item chests found in Salvage; a player must examine the chest and choose the item from the displayed list to obtain it, as temporary items cannot enter the party's treasure pool. Alternatively, after examining the chest, the player may elect to take nothing, in order to leave the item for someone else to take.
Lobby
Any member of the party can use the lobby's Rune of Transfer to select the starting floor using the recorded progress on their Runic Disc or Runic Key. If the floor chosen is higher than floor 1, that person will be required to pay a certain fee in Tokens.
- If a player does not posess a Runic Disc from a previous run, they can obtain one by examining the Rune of Transfer.
Nyzul Isle consists of 100 floors, but each run only starts on the first floor after every five floors (1, 6, 11, 16, etc.). Each starting point is available if the Runic Disc has recorded up to at least the previous floor.
- For example, to start on floor 26, your Runic Disc must have recorded up to floor 25 or greater.
If a player possesses a Runic Key, they can choose any of the starting floors.
The number of Tokens required to start from a specified level increases as the level gets higher. The amount of Tokens rewarded for completing a certain series of floors (assuming the floor numbers are the same each time) will always be the same, no matter what the objectives were on each run or how many enemies were defeated.
Starting Floor Tokens Required Tokens Rewarded after climbing next 5 floors without armband Tokens Rewarded after climbing next 5 floors with armband Net Profit/Loss of Tokens after climbing next 5 floors for disc runic holder without armband Net Profit/Loss of Tokens after climbing next 5 floors for disc runic holder with armband 1 0 700 770 +700 +770 6 500 735 808 +235 +308 11 550 770 847 +220 +297 16 600 805 885 +205 +285 21 650 840 924 +190 +274 26 700 875 962 +175 +262 31 750 910 1001 +160 +251 36 800 945 1039 +145 +239 41 850 980 1078 +130 +228 46 900 1015 1116 +115 +216 51 1000 1050 1155 +50 +155 56 1100 1085 1131 -15 +31 61 1200 1120 1232 -80 +32 66 1300 1155 1270 -145 -30 71 1400 1190 1309 -210 -91 76 1500 1225 1347 -275 -153 81 1600 1260 1386 -340 -214 86 1700 1295 1424 -405 -276 91 1800 1330 1463 -470 -337 96 1900 1365 1501 -535 -399 Total for 1-100 20,800 20,650 22,653 -150 +1853
Temporary Items
The Vending Box is in the lobby next to the Rune of Transfer. Players may optionally purchase these temporary items at a cost of tokens:
|
|
| ||||||||||||||||||||||||||||||||||||||||||||||||||||||||||||||
- Any of these can also found in Armoury Crates left behind by some opponents.
Rune of Transfer
At the beginning of every floor of Nyzul Isle is a Rune of Transfer. The Rune of Transfer has the following properties:
- The Rune of Transfer will initially only display the floor objective when examined. Upon meeting the objective, the Rune will light up (similar to the Rune of Release in other assaults).
- Activating the Rune of Transfer after completing the floor objective will present options of exiting the assault or proceeding to the next floor.
If you choose to exit the Assault, it will be deemed a success, regardless of how many floors you've completed, and you will be awarded with a certain number of Tokens depending on how many floors you progressed through. If five floors were cleared and any party member's Runic Disc is eligible for having its progress updated, it will be updated at this point upon exiting (a message will confirm players when this happens).
At the end of a floor, occasionally the choice will be given to go either "left" or "right" when moving on to the next floor. One of these choices will effectively unleash a Pathos on the next floor, either beneficial or detrimental.
- A beneficial Pathos may be an attribute bonus, a Regen, Refresh, Regain, or Flurry effect.
- A detrimental Pathos may be a Debilitation, Omerta, or Impairment, but unlike in Salvage this only applies to a single attribute or magic.
- The Pathos will automatically wear off when advancing to the next floor.
If you choose to proceed to the next floor, you must complete its objective before you have another opportunity to exit. If you are short on time, you may not wish to choose this option, because if you cannot complete its objective in the time remaining, you will lose the Assault and will receive no tokens nor have any progress recorded.
Runic Disc
A player's progression through Nyzul Isle Investigation is saved on their Runic Disc.
- To obtain a Runic Disc, players must select the Rune of Transfer in the lobby the first time they undertake Nyzul Isle Investigation. It is very important for parties starting on floor 1 to ensure everyone has a Runic Disc before ascending, otherwise a player will not be able to save their progress upon exit.
If you have completed at least up to a level which is a multiple of 5 and successfully exit, each eligible party members' Runic Disc will record data up to that floor, allowing them to start from the next floor on a subsequent Assault run.
- To be eligible, your own disc's progress must be at least up to the previous fifth floor. For example, if your party started on floor 41, and cleared floor 45, but your own disc's progress was only up to floor 20, no progress will be saved to your disc upon exiting.
- If the party exits before clearing the fifth level (e.g. time running out), eligible party members will still be recorded to that last floor. However, you will not be able to reach the next floor range until the fifth consecutive floor is recorded onto the disc.
- The progress saved to your Runic Disc affects how many Weapon Skill Points are needed to unlock Mythic weapon skills.
- Players will still receive tokens and Mercenary Rank points on a successful exit even if their Runic Disc was ineligible for progression.
Enemy Layouts
Just as Nyzul Isle has randomly generated floors and objectives, the enemies encountered are chosen out of 16 possible "enemy layouts". These enemies are spawned from the Archaic Rampart found on each floor, are always aggressive (even if their normal counterparts are not) in a smiliar manner to their regular counterparts. All will grant Experience Points/Limit Points and can drop crystals and other items particular to their family.
| Layout | Family | Spawns |
|---|---|---|
| 1 | Aquans | Greatclaw x6, Stygian Pugil x4, Kulshedra x2 |
| 2 | Amorphs | Bouncing Ball x3, Thousand Eyes x3, Mousse x4, Black Pudding x2 |
| 3 | Arcana | Killing Weapon x2, Ominous Weapon x2, Magic Flagon x2, Friar's Lantern x4, Sweeping Cluster x2 |
| 4 | Undead | Garm x3, Tainted Flesh x3, Draugar x4 (Black Mage x2 / Thief x2), Bhoot x2 |
| 5 | Vermin | Carmine Eruca x3, Spinner x3, Wamouracampa x4, Wamoura x2 |
| 6 | Demons | Imp x10, Psycheflayer x2 |
| 7 | Dragons | Puk x10, Wyvern x2 |
| 8 | Birds | Marsh Murre x3, Lesser Colibri x3, Ziz x4, Peryton x2 |
| 9 | Beasts | Wild Karakul x3, Wajaom Tiger x3, Manticore x4, Marid x2 |
| 10 | Plantoids | Death Cap x3, Puktrap x3, Leshy x4, Ameretat x2 |
| 11 | Lizards | Sand Lizard x3, Deinonychus x3, Bull Bugard x4, Wivre x2 |
| 12 | Amorphs | Bouncing Ball x5, Thousand Eyes x5, Mousse x2 |
| 13 | Mixed | Peryton x10, Mousse x2 |
| 14 | Mixed | Draugar x10, Mousse x2 |
| 15 | Amorphs | Mousse x6, Black Pudding x6, Ebony Pudding x4 |
| 16 | Arcana | Killing Weapon x3, Ominous Weapon x3, Magic Flagon x6 |
- Notorious Monsters are not tied to any of these layouts.
- In addition, on floors with "eliminate all enemies" objective, a Dahak may be encountered regardless of layout.
- The actual amount that appears on any given floor may be less than listed.
Notorious Monsters
There are various Notorious Monsters from throughout Vana'diel that are summoned by the archaic ramparts of Nyzul Isle. The HP and overall strength of these NMs will not be as it is outside of this Assault, and their power will be scaled (generally upward) to be appropriate for a level 75 party to fight. The NMs are not necessarily going to match the floor's layout, and it is possible to encounter the same NM twice in the same run.
Upon defeat of one of these NMs, it will drop a Armoury Crate (brown and gold colored to distinguish them from the normal blue/gold chests that contain temporary items), and opening one will bestow a ??? Item that can be appraised. These have a possibility of becoming the special/unique item that the NM normally drops in the outside world. They also have a chance of dropping one of the Nyzul Weapons.
Be aware that unless the floor's objective is to "eliminate all enemies", it is never required for one or all of these NMs to be defeated. Because they can take some time to defeat due to their (usually) increased strength, it may be wise to pick and choose your fights, and leave behind NMs that do not need to be defeated, or have drops that are not particularly useful or valuable.
Every 20 floors, there are 18 different NMs that may spawn (with some overlapping):
- Floors 1 - 19: Bat Eye, Shadow Eye, Bomb King, Juggler Hecatomb, Smothered Schmidt, Hellion, Leaping Lizzy, Tom Tit Tat, Jaggedy-Eared Jack, Cactuar Cantautor, Gargantua, Gyre-Carlin, Asphyxiated Amsel, Frostmane, Peallaidh, Carnero, Falcatus Aranei, Emergent Elm
- Floors 21 - 39: Old Two-Wings, Aiatar, Intulo, Orctrap, Valkurm Emperor, Crushed Krause, Stinging Sophie, Serpopard Ishtar, Western Shadow, Bloodtear Baldurf, Zizzy Zillah, Ellyllon, Mischievous Micholas, Leech King, Eastern Shadow, Nunyenunc, Helldiver, Taisaijin, Aquarius
- Floor 41 - 59: Fungus Beetle, Friar Rush, Pulverized Pfeffer, Argus, Bloodpool Vorax, Nightmare Vase, Daggerclaw Dracos, Northern Shadow, Fraelissa, Roc, Sabotender Bailarin, Aquarius, Energetic Eruca, Spiny Spipi, Trickster Kinetix, Drooling Daisy, Bonnacon, Taisaijin
- Floor 61 - 79: Golden Bat, Steelfleece Baldarich, Sabotender Mariachi, Ungur, Swamfisk, Buburimboo, Keeper of Halidom, Serket, Dune Widow, Odqan, Burned Bergmann, Tom Tit Tat, Tyrannic Tunnok, Bloodsucker, Tottering Toby, Southern Shadow, Sharp-Eared Ropipi, Taisaijin, Unut, Vouivre
- Floor 81 - Floor 99: Panzer Percival, Vouivre, Jolly Green, Tumbling Truffle, Capricious Cassie, Amikiri, Stray Mary, Sewer Syrup, Unut, Simurgh, Pelican, Cargo Crab Colin, Wounded Wurfel, Peg Powler, Tom Tit Tat, Jaded Jody, Maighdean Uaine, Taisaijin
Objectives
There are a variety of possible objectives that a floor requires to activate the Rune of Transfer. Each are as follows:
Eliminate all enemies
You must defeat every enemy on the floor to unlock the Rune of Transfer. This includes the Archaic Rampart and any Notorious Monsters.
Sometimes a lone Dahak will appear on floors with this objective in addition to other enemies. The Dahak is a lot more dangerous than common opponents.
Despite the designation "all enemies", the gears in a secondary objective are not included; you will not need to kill them (especially if the directive is to not kill them).
Eliminate enemy leader
There is exactly one enemy on the floor that will unlock the Rune of Transfer. This leader is a Notorious Monster that is unique to Nyzul Isle (they do not appear anywhere else in Vana'diel). They have a unique appearance in contrast to regular members of their family, making them stand out.
They are a lot more challenging than the common enemies on the floor, and will take longer to defeat. It's highly recommended to clear any and all aggro nearby before engaging. Depending on the floor layout, it may be advisable to try to pull the leader to Rune of Transfer, or another safe corridor.
These are the possible leaders:
Eliminate specified enemy
There is exactly one enemy on the floor that will unlock the Rune of Transfer. The correct enemy does not have the name of a Notorious Monster. Rather, it will be a regular enemy from the floor layout that checks as Impossible to Gauge.
The correct enemy will not always be the only one of its kind on the entire floor. If multiple members of a specific family are present, the correct enemy will be the only member of its family that checks as "Impossible to Gauge".
- For example, there are multiple Lesser Colibri on the floor, but one checks as Impossible to Gauge. That specific monster is your intended target.
The target is never the Archaic Rampart, any randomly placed Notorious Monsters, nor any of the Archaic Gear or Archaic Gears on the floor (if they are present).
Eliminate specified enemies
There is a particular group of enemies, all of which must be defeated to unlock the Rune of Transfer. These enemies check as Impossible to Gauge, and will always be a group of either Ebony Puddings, Heraldic Imps, Poroggo Gents, Psycheflayers, Qiqirn Treasure Hunters and Qiqirn Archaeologists, or Racing Chariots. There will be 2-5 of these enemies to kill, and they are often scattered about, though sometimes they appear in pairs.
They will not necessarily match the floor layout. If they do, you will need to distinguish them from ordinary enemies of the same family (for example, Black Puddings are just normal monsters, Ebony Puddings are your targets).
You do not need to eliminate any normal monsters, even if they share the same family as the targets. However, it may be a good idea to eliminate those near the targets due to aggro.
Activate all lamps
This can mean one of three things:
- There is only one lamp, and everyone needs to activate it.
- When you use the lamp, it says "The certification code for all party members is required to activate this lamp."
- If a member of the party leaves the zone (using the fireflies or returning to home point), they will not be allowed back in and this objective will fail if they had not already touched the lamp.
- There are multiple (3-6) lamps which must be activated at the same time.
- When you use a lamp, it says "This lamp cannot be activated unless all other lamps are activated at the same time." and gives you the option to activate it. Do not activate it yet; wait until there is someone at all lamps, then everyone select "Yes" at the same time.
- If you activate your lamp but the others aren't all activated at the same time, it says "All lamps on this floor are activated, but some other action appears to be necessary in order to activate the rune of transfer." This means you need to wait for them all to turn off (after ~30 sec), then try again.
- Despite the wording of this message, it will also be displayed if several lamps are lit at the same time, but 1 or more remain unlit.
- After a lamp turns off, there is a cooldown period of ~30 seconds before you can activate it again. It says "It appears you cannot activate this lamp for some time..."
- There are multiple (3-6) lamps which must be activated in an unknown order. This is often the most difficult version.
- Activating a lamp doesn't turn it on (light it up) immediately, it will only turn on after all the lamps on that floor have been activated by clicking on them and selecting "Yes".
- When all lamps have been activated, they will all turn on. After a few seconds, lamps which were activated in the right order remain on, while those activated in the wrong order will turn off.
- The order of activation for the lamps that turned off needs to be adjusted until all of the lamps stay on and the Rune of Transfer is activated.
- A correctly activated lamp will need to be "activated" again, even though it will still appear to be on.
Free Floor!
There is no objective; the Rune of Transfer is already lit and you can immediately advance to the next floor. There are no enemies with this objective. However, there are random Armoury Crates scattered about that can be opened for temporary items.
- This objective is a very rare possible occurrence after a left/right choice when ascending floors.
Secondary Objectives
Ocassionally, a secondary objective will be given along with one of the others. Failing this secondary objective will not cause you to fail the mission, but you may be penalised with a random Pathos, a time limit penalty (-1 minute), or a token reward penalty at the end of the run.
Avoid discovery by archaic gears!
You must accomplish the primary objective without aggroing a single Archaic Gear/Archaic Gears.
- Pulling an Archaic Gear/Archaic Gears with Ranged Attack/Singing/Ninjutsu does not count as "discovery" (as you made the first strike), and avoids the penalty. You can also pull with magic spells, but only if you cast outside of the magic aggro radius. Care should be used as they may move closer while casting.
- When this secondary objective is given on an "Eliminate all enemies" floor, the gears do not need to be defeated to complete the primary objective.
- Archaic Gear/Archaic Gears all have True Sound detection and aggros any magic casting or job abilities, making it very difficult to avoid detection.
Do not destroy archaic gears!
You must accomplish the primary objective without killing a single Archaic Gear/Archaic Gears.
- When this secondary objective is given on an "Eliminate all enemies" floor, the gears are exempt from the primary objective.
- Both singular Archaic Gear and triple Archaic Gears run at the same speed as normal players, and can be despawned if aggro is lost. A player with enhanced movement speed can easily kite the gears and, provided only the kiter has hate, will lead to them despawning.
Boss Floors
On every twentieth floor, you will encounter a HNM that appears in other parts of Vana'diel that can drop pieces of the Goliard, Denali, or Askar sets and always drops one of the Nyzul Weapons.
- On floors 20 and 40, you will encounter either Adamantoise, Behemoth, or Fafnir.
- On floors 60, 80, and 100, you will encounter either Cerberus, the Hydra, or Khimaira.
These versions of the HNMs have some substantially lower stats than their standard Vana'diel counterparts, whereas others (attack, magic resist) may be similar. They can still be affected by most enfeebles. Some specific notes:
- Adamantoise's Tortoise Song is enhanced to dispel all buffs, instead of just song & roll effects.
- Fafnir's Hurricane Wing is actually stronger than his Dragon's Aery incarnation, and can still Spike Flail like all other wyrms.
- Cerberus' Magma Hoplon move cannot be dispelled. Must be broken through with about 700-1000 damage.
The floor 100 bosses, unlike at floors 60 and 80, can use their families' signature low-health desperation moves: Cerberus's Gates of Hades, Hydra's Nerve Gas, and Khimaira's Fulmination. Much like elsewhere, these moves will only be used once their health is lowered to 25%. This can be dangerous if they are not taken out quickly.
- There will also be an Archaic Rempart next to the HNM; this can be used to build TP before engaging the boss.
- Heavy DD that are expecting to pull hate on the HNM fights are recommended to purchase a Fanatic's Drink (Invincible effect - immunity to physical damage for 30 seconds) for 200 tokens from the Vending Box at the start.
- Samurai who will be using Meikyo Shisui along with a Fanatic's Drink are also recommended to purchase a Dusty Wing for 200 tokens. The wing will give you an instant 300 TP, and if Meikyo Shisui is still in effect, will allow 3 additional Weapon Skills. Because of this, Samurai are extremely effective at demolishing these bosses.
Rewards
??? items
The rewards this Assault mission are similar to that of the other 5 Assault areas, but with a different twist. Throughout the mission, you will (most likely) encounter a few familiar Notorious Monsters while completing your objectives. Upon defeating them, an "Armoury Crate" will drop, and whoever opens it will receive a ??? Item (for example, the Cactuar Cantautor, which usually drops Kung Fu Shoes, has ??? Footwear from its Armoury Crate). Be warned that these NMs are not as weak as they are outside of the Assault mission and should be treated with caution.
All ??? Items must be appraised like normal in order to obtain the true reward. Be advised that the appraisal rarely results in the NM's item drop; most of the time it will just be low level equipment. Also, for NMs such as Leaping Lizzy and Argus, the appraisal would only result in the Rare and Exclusive version currently dropped by the NM, not the original unexclusive version.
Nyzul Weapons
Notorious Monsters also have a chance of dropping one of the 20 "Nyzul Weapons" - the base form of the Mythic Weapons. These items are added to treasure pool along with any other item drops (not in the Armoury Crate).
All the HNM bosses every twenty floors will always drop one random weapon. The HNM on Floor 100 of Nyzul Isle will drop 2 of the 20 Nyzul Weapons; one weapon will be for the job of the Runic Disc holder (the one that selected floor 96 on entry), while the other weapon is for a random job.
| Nyzul weapons (???%) | |||
|---|---|---|---|
| Burning Fists (MNK) | Brave Blade (PLD) | Dancing Dagger (BRD) | Death Sickle (DRK) |
| Double Axe (BST) | Elder Staff (SCH) | Inferno Claws (PUP) | Killer Bow (RNG) |
| Mage's Staff (BLM) | Main Gauche (DNC) | Quicksilver (COR) | Radiant Lance (DRG) |
| Sasuke Katana (NIN) | Scepter Staff (SMN) | Sturdy Axe (WAR) | Swordbreaker (THF) |
| Vorpal Sword (RDM) | Wightslayer (BLU) | Werebuster (WHM) | Windslicer (SAM) |
Nyzul Armor
In addition to these potential rewards, every 20 floors there will be a HNM boss that has a chance to drop a new piece of armor from one of these sets:
The footwear are dropped on Floor 20, leg pieces on 40, handgears on 60, body piece on 80, and head gear on 100.
|
|
|
|
| ||||||||||||
Completion
Completing one or more floors of Nyzul Isle Investigation for the first time, as long as you exit via the rune of transfer will reward you with 5 points toward your Mercenary Rank promotion. Subsequent completions, as long as you exit via the rune of transfer, will reward you with 1 point.
Upon completing Floor 100, the entire party (if they are currently on floor 96-99) will receive a Runic Key. The Runic Key is required to begin An Imperial Heist, which is the first in a series of quests which allow you to upgrade the Mythic Weapons. The key also reduces the weapon skill point quota for "Unlocking a Myth" quests to 250.
Maps
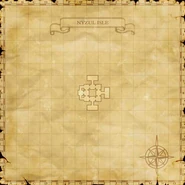
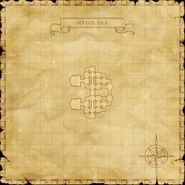
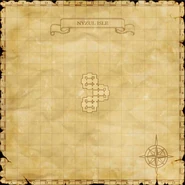
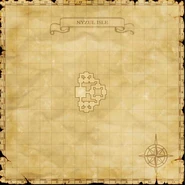
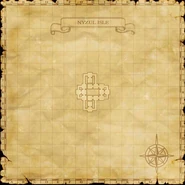
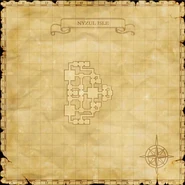
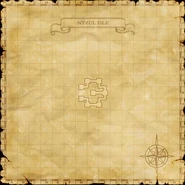
The in-game map function cannot be used within Nyzul Isle. However, the level layouts are comprised of sectioned off areas of the maps below:
Only a portion of these maps are actually used, with various paths being randomly blocked off to create the floor layout of any given floor.
See Also
Game Description
- Mission Orders
- You are to scout out the remnants before the A.A.R.I. sends an official research team. No rewards are offered for these unofficial missions.
| Assault | |
|---|---|
| Leujaoam Missions | |
| Mamool Ja Missions | |
| Lebros Missions | |
| Periqia Missions | |
| Ilrusi Missions | |
| Nyzul Isle Missions |
|
| Assault Point Rewards | |
| Nyzul Isle Rewards | |

