| Line 294: | Line 294: | ||
! Floor 20: |
! Floor 20: |
||
|- BGCOLOR=#e3e6ff align=center |
|- BGCOLOR=#e3e6ff align=center |
||
| − | |[[Denali Gamashes]] {{Drop Rate|0| |
+ | |[[Denali Gamashes]] {{Drop Rate|0|16}} |
|- BGCOLOR=#e3e6ff align=center |
|- BGCOLOR=#e3e6ff align=center |
||
| − | |[[Askar Gambieras]] {{Drop Rate|1| |
+ | |[[Askar Gambieras]] {{Drop Rate|1|16}} |
|- BGCOLOR=#e3e6ff align=center |
|- BGCOLOR=#e3e6ff align=center |
||
| − | |[[Goliard Clogs]] {{Drop Rate|5| |
+ | |[[Goliard Clogs]] {{Drop Rate|5|16}} |
|} |
|} |
||
Revision as of 03:13, 22 May 2008
|
Rules
Unlike other Assault areas, Nyzul Isle Investigation incorporates a random progression of floors. The rules are as follows:
- As with other Assault missions, Nyzul Isle Investigation requires an Imperial Army I.D. Tag.
- Assault Points will not be earned from successful completion of this mission.
- A single run through "Nyzul Isle Investigation" consists of progressing up through various floors, where each floor has a random objective.
- The lobby consists of a single room with a Rune of Transfer.
- Any member of the group can use the Rune of Transfer to select the starting floor using their recorded progress.
- If you have completed up to a level which is a multiple of 5, you can start from the next floor. So if your data is recorded up to floor 5, you can start from floor 6. If your data is recorded up to floor 40, you can start from floor 41. You can start from any floor which is a multiple of 5 + 1 (e.g. 6, 11, 16, etc.) up to the highest level recorded on your disc plus 1.
- The number of tokens required to start from a specified level increases as the level gets higher.
- Token cost increases by 50 from floors 6-46 every 5 floors. Floor 6 costs 500, 11 550, and so on.
- Token cost increases by 100 from floors 51+ every 5 floors. Floor 51 costs 1000, 56 1100, and so on.
- At the beginning of each subsequent floor is a Rune of Transfer. The Rune of Transfer has the following properties:
- Clicking the Rune of Transfer before the objective is complete will display the objective.
- Clicking the Rune of Transfer after the objective is complete will give you options of exiting the assault or proceeding to the next floor. If you choose to exit the Assault, it will be deemed a success, regardless of how many floors you've completed, and you will be awarded with a certain number of Tokens depending on how many floors you progressed through.
- The player with the armband receives a 10% bonus to the number of Tokens.
- The player who selected the starting floor will have their progress recorded by the game. The other members will not.
- You have to record the data on floor n*5 (eg.5, 10, 15 etc) - it will not save on your Runic Disc just by entering floor n*5+1 (eg floor 6). You have to either save on floor 5 or exit assault (it will save automatically)
- If you choose to proceed to the next floor, you must complete its new objective before you have another opportunity to exit. If you are short on time, you may not wish to choose this option, because if you cannot complete its objective in the time remaining, you will lose the assault and gain no tokens.
- Occasionally at the beginning of a floor, players will experience a beneficial or detrimental effect. In either case, the effect is very potent. These Pathos seem to be random, and may have huge impact (i.e. no casting of Ninjitsu) or minimal impact (i.e. CHR down). Regardless of the effect, it will only last one floor and seem to be relatively uncommon.
- At the end of a floor, occasionally the choice will be given to go either "left" or "right". It is unknown what effect this has on the next floor's layout at this time.
- Since June patch, if you win the mission on Floor 100, the Runic Disc user's data is erased.
- Since June patch, Inside the first room (before entering any floor) there is a chest where players can spend tokens to get temporary items to be used inside Nyzul Isle.
100 Tokens:
| Item | Effect |
| Barbarian's Drink | Increases Attack |
| Fighter's Drink | Increases Accuracy |
| Oracle's Drink | Increases Magic Attack |
| Assassin's Drink | Increases Magic Accuracy |
| Spy's Drink | Gives Haste effect |
| Gnostic's Drink | Effect of Pax - Enmity generation is reduced |
| Shepherd's Drink | Restores pet HP |
| Dusty Reraise | Reraise III |
| Strange Milk | 5 HP/tick Regen |
| Strange Juice | 2 MP/tick Refresh |
| Vicar's Drink | Removes 2 random status ailments |
| Sprinter's Drink | This medicine temporarily boosts movement speed. |
200 Tokens:
| Item | Effect |
| Braver's Drink | +15 to all attributes |
| Soldier's Drink | Slightly Increases Attack |
| Champion's Drink | Increases crit. hit rate |
| Monarch's Drink | Effect of Regain - TP gradually restored |
| Dusty Potion | 300 HP Potion |
| Dusty Ether | 150 MP Potion |
| Fanatic's Drink | Provides invulnerability to physical attacks |
| Fool's Drink | Magic Defense |
| Dusty Wing | When used, these man-made wings instantly raise TP. Due to muscle strain, repeated use is prohibited. (Gives 300% TP) |
| Body Boost | HP Boost |
| Mana Boost | MP Boost |
| Cleric's Drink | Divine Veil+Erase+Paralyna+Blindna+Silena+Poisona effect. It will remove more than 1 status effect. |
300 Tokens:
| Item | Effect |
| Dusty Elixir | Restores a few HP and MP |
Possible Enemies
Just as Nyzul Isle has randomly generated maps, the enemies encountered are chosen out of 17 possible "enemy layouts". These enemies are spawned from the archaic rampart found on each floor with enemies on them.![]()
- Possible enemies:
- Layout 1 (Aquans): Greatclaw x6, Stygian Pugil x4, Kulshedra x2
- Layout 2 (Amorphs): Bouncing Ball x3, Thousand Eyes x3, Mousse x4, Black Pudding x2
- Layout 3 (Arcana): Killing Weapon x2, Ominous Weapon x2, Magic Flagon x2, Friar's Lantern x2 (Previously Cannonball x2), Sweeping Cluster x2, Friar's Lantern x2 (Previously Bifrons x2)
- Layout 4 (Undead): Garm x3, Tainted Flesh x3, Draugar x4 (Black Mage x2 / Thief x2
 ), Bhoot x2
 - Layout 5 (Vermin): Carmine Eruca x3, Spinner x3, Wamouracampa x4, Wamoura x2
- Layout 6 (Demons): Imp x10, Psycheflayer x2
- Layout 7 (Dragons): Puk x10, Wyvern x2
- Layout 8 (Birds): Marsh Murre x3, Lesser Colibri x3, Ziz x4, Peryton x2
- Layout 9 (Beasts): Wild Karakul x3, Wajaom Tiger x3, Manticore x4, Marid x2
- Layout 10 (Plantoids): Death Cap x3, Puktrap x3, Leshy x4, Ameretat x2
- Layout 11 (Lizards): Sand Lizard x3, Deinonychus x3, Bull Bugard x4, Wivre x2
- Layout 12 (Amorphs #2): Bouncing Ball x5, Thousand Eyes x5, Mousse x2
- Layout 13 (Other): Peryton x10, Mousse x2
- Layout 14 (Other #2): Draugar x10 (Black Mage x5 / Thief x5
 ), Mousse x2
 - Layout 15 (Amorphs #3): Mousse x6, Black Pudding x6
- Layout 16 (Arcana #2): Killing Weapon x3, Ominous Weapon x3, Magic Flagon x6
- Layout 17 (Dahak): Dahak x1, possible to have just a Dahak, or a Dahak and other monsters.
- Possible enemies:
Notorious Monsters
There are also various non-beastman Notorious Monsters (NMs) found throughout Vana'diel that are summoned by the archaic ramparts of Nyzul Isle. Every 20 floors, there are 18 different NMs that may spawn. They are as follows:
Floor 1-Floor 20: Bat Eye, Shadow Eye, Bomb King, Juggler Hecatomb, Smothered Schmidt, Hellion, Leaping Lizzy, Tom Tit Tat, Jaggedy-Eared Jack, Cactuar Cantautor, Gargantua, Gyre-Carlin, Asphyxiated Amsel, Frostmane, Peallaidh, Carnero, Falcatus Aranei, Emergent Elm, Peallaidh
Floor 21-Floor 40: Old Two-Wings, Aiatar, Intulo, Orctrap, Valkurm Emperor, Crushed Krause, Stinging Sophie, Serpopard Ishtar, Western Shadow, Bloodtear Baldurf, Zizzy Zillah, Ellyllon, Mischievous Micholas, Leech King, Eastern Shadow, Nunyenunc, Helldiver, Taisaijin, Aquarius
Floor 41-Floor 60: Fungus Beetle, Friar Rush, Pulverized Pfeffer, Argus, Bloodpool Vorax, Nightmare Vase, Daggerclaw Dracos, Northern Shadow, Fraelissa, Roc, Sabotender Bailarin, Aquarius, Energetic Eruca, Spiny Spipi, Trickster Kinetix, Drooling Daisy, Bonnacon, Taisaijin
Floor 61-Floor 80: Golden Bat, Steelfleece Baldarich, Sabotender Mariachi, Ungur, Swamfisk, Buburimboo, Keeper of Halidom, Serket, Dune Widow, Odqan, Burned Bergmann, Tom Tit Tat, Tyrannic Tunnok, Bloodsucker, Tottering Toby, Southern Shadow, Sharp-Eared Ropipi, Taisaijin, Unut, Vouivre
Floor 81-Floor 100: Panzer Percival, Vouivre, Jolly Green, Tumbling Truffle, Capricious Cassie, Amikiri, Stray Mary, Sewer Syrup, Unut, Simurgh, Pelican, Cargo Crab Colin, Wounded Wurfel, Peg Powler, Tom Tit Tat, Jaded Jody, Maighdean Uaine, Taisaijin
Objectives
Eliminate enemy leader.
- There is exactly one enemy on the floor that will unlock the Rune of Transfer.
- The leader always checks Impossible to Gauge, and is usually "out of place" with respect to the other monsters in the room.
- Possible leaders
- Mokke, Mokka, Mokku (Imps)
- Vile Wahdaha, Vile Ineef, Vile Yabeewa (Soulflayers)
- Uriri Samariri, Eriri Samariri, Oriri Samariri (Poroggos)
- Ginger Custard, Anise Custard, Cumin Custard, Nutmeg Custard, Mint Custard, Cinnamon Custard, Caraway Custard, Vanilla Custard (Flan)
- Gem Heister Roorooroon (THF), Stealth Bomber Gagaroon (THF), Quick Draw Sasaroon (RNG) (Qiqirn)
- Shielded Chariot, Battledressed Chariot, Long-Gunned Chariot, Long-Horned Chariot (Chariots)
- The leader will never be a Notorious Monster that appears in other parts of Vana'diel. Instead, the leader will always be an imp, soulflayer, Poroggo, flan, Qiqirn, or chariot NM without their respective family's usual design. However, every twenty floors, you will encounter a HNM that appears in other parts of Vana'diel that can drop pieces of the Goliard/Denali/Askar sets, with the pieces varying for each floor. Whichever HNM is present, it can drop a piece from any of the sets. The enemies, which floors they appear on, and which armor pieces they drop are as follows:
- Floor 20
- Slot: Feet (Askar Gambieras / Goliard Clogs / Denali Gamashes)
- Possible enemy leaders: Adamantoise, Behemoth, Fafnir
- Floor 40
- Slot: Legs (Askar Dirs / Goliard Trews / Denali Kecks)
- Possible enemy leaders: Adamantoise, Behemoth, Fafnir
- Floor 60
- Slot: Hands (Askar Manopolas / Goliard Cuffs / Denali Wristbands)
- Possible enemy leaders: Khimaira, Hydra, Cerberus
- Floor 80
- Slot: Body (Askar Korazin / Goliard Saio / Denali Jacket)
- Possible enemy leaders: Khimaira, Hydra, Cerberus
- Floor 100
- Slot: Head (Askar Zucchetto / Goliard Chapeau / Denali Bonnet)
- Possible enemy leaders: Khimaira, Hydra, Cerberus
- These versions of the HNMs have some substantially lower stats than their standard Vana'diel counterparts (HP, defense), whereas others (attack, magic resist) may be similar. Additionally, some special abilities used by the normal versions might not be used here. Fafnir can Spike Flail just like the normal version.
- The floor 100 bosses can use their previously restricted TP moves.
- Floor 20
- The leader will never be a Notorious Monster that appears in other parts of Vana'diel. Instead, the leader will always be an imp, soulflayer, Poroggo, flan, Qiqirn, or chariot NM without their respective family's usual design. However, every twenty floors, you will encounter a HNM that appears in other parts of Vana'diel that can drop pieces of the Goliard/Denali/Askar sets, with the pieces varying for each floor. Whichever HNM is present, it can drop a piece from any of the sets. The enemies, which floors they appear on, and which armor pieces they drop are as follows:
Eliminate all enemies.
- You must defeat every enemy on the floor to unlock the Rune of Transfer.
- If you receive a secondary objective "Avoid discovery by archaic gears!" or "Do not destroy archaic gears!", the gears do not need to be defeated.
Eliminate specified enemy.
- There is exactly one enemy on the floor that will unlock the Rune of Transfer.
- The correct enemy to end the floor will not have the name of a notorious monster. It will be a regular enemy that checks as Impossible to Gauge.
- Example: Lesser Colibri or Mousse.
- The correct enemy will not always be the only one of its family on the entire floor. If multiple members of a specific family are present, the correct enemy will be the only member of its family that checks as "Impossible to Gauge".
- Example: There are multiple Lesser Colibri on the floor. But one checks as Impossible to Gauge. That specific monster is your intended target.
Eliminate specified enemies.
- There is a particular family of enemies, all of which must be defeated to unlock the Rune of Transfer.
- These enemies will always be Imps, soulflayers, Poroggos, Flan, Qiqirn, or chariots.
- These enemies will all check Impossible to Gauge. This is one way to determine "rampart-spawned" flan, soulflayers, and imps apart from those involved in this objective. The monsters involved with your objective will have different names than regular monsters.
- Example: Black Puddings are normal monsters and do not need to be killed. Ebony Puddings however check as Impossible to Gauge, and therefor need to be killed.
- Enemies that are not of the same family of the specified enemies do not need to be eliminated, and, in the case of flan and soulflayers, not all enemies of that family need to be eliminated. (See above.)
- There will always be 2-5 enemies to kill.
- Possible enemy families
Activate all lamps.
- This can mean one of three things:
- There is one lamp, everyone needs to activate it.
- When you use the lamp, it says "The certification code for all party members is required to activate this lamp."
- There are multiple (3-5) lamps which must be activated at the same time.
- When you use the lamp, it says "This lamp cannot be activated unless all other lamps are activated at the same time." and gives you the option to activate it. Do not activate it yet; wait until there is someone at all lamps, then everyone select "Yes" at the same time.
- If you activate your lamp but the others aren't all activated at the same time it says "All lamps on this floor are activated, but some other action appears to be necessary in order to activate the rune of transfer." This means you need to wait for them all to turn off (after ~30 sec), then try again. Despite the wording of this message, it will also be displayed if several lamps are lit at the same time, but 1 or more remain unlit.
- After a lamp turns off there is a cool down period of ~30 seconds before you can activate it again; it says "It appears you cannot activate this lamp for some time..."
- There are multiple (3-5) lamps which must be activated in an unknown order.
- Activating a lamp doesn't turn it on. Activate all of them, and remember the order you used.
- When all lamps have been activated, they all turn on. Lamps which were at the right place in the order remain on, while those at the wrong place in the order turn off again.
- Adjust the order of the lamps that turned off and try again until all the lamps stay on and the level is complete.
- There is one lamp, everyone needs to activate it.
- This can mean one of three things:
Avoid discovery by archaic gears!
- This is a secondary objective, given along with one of the first five objectives.
- You must accomplish the primary objective without aggroing a single Archaic Gear/Archaic Gears.
- If you do aggro an Archaic Gear, you can still win by clearing the rest of the enemies on the floor, however you will experience either a token reward penalty, a time limit penalty (-1 minute), or a random Pathos inflicted upon you (such as a Ninjutsu Restriction).
- Pulling an Archaic Gear/Archaic Gears with Ranged Attack/Singing/Ninjutsu does not count as "discovery", and avoids the penalty.
- When this secondary objective is given on an "Elminate all enemies" floor, the gears do not need to be defeated to complete the primary objective.
- You can pull Gears without penalty by using non-magic aggro means. (Ranged Attack or Bard songs.)
- The number of possible single gears is 4, 8, 12, 16, and 20, and the number of possible triple gears is 2, 4, 6, 8, and 10, with the amount depending on the map generated.

- Archaic Gear/Archaic Gears will aggro to Job Abilities, White/Black/Blue Magic (just like other magic aggro monsters), they have True Sound, and the aggro range is quite larger than regular monsters.
Do not destroy archaic gears!
- This is a secondary objective, given along with one of the first five objectives.
- You must accomplish the primary objective without killing a single Archaic Gear/Archaic Gears.
- When this secondary objective is given on an "Eliminate all enemies" floor, the gears do not need to be defeated to complete the primary objective.
- If you do kill an Archaic Gear/Archaic Gears, you can still win by clearing the rest of the enemies on the floor, however your token reward or time limit (-1 minute) will be reduced, and you will also have a random Pathos inflicted upon you.
- The number of possible single gears is 4, 8, 12, 16, and 20, and the number of possible triple gears is 2, 4, 6, 8, and 10, with the amount depending on the map generated.

Both Archaic Gear and Archaic Gears run the same speed as normal players, and can be de-poped. So someone with movement speed increase gear (Example: Crimson Cuisses) can easily kite the gears and, as long as only the kiter has done something to engage the gear, eventually de-pop the gear.
Free Floor!
- No objective, move to the next floor. There are also random Armoury crates on these floors you can open for some interesting items.
Rewards
??? items
The rewards this Assault mission are similar to that of the other 5 areas, but with a different twist. Throughout the mission, you (most likely) will encounter a few familiar Notorious Monsters while completing your objectives. Upon defeating them, an "Armoury Crate" will drop, and whoever opens it will receive a ??? Item (For example, the Cactuar Cantautor, which usually drops Kung Fu Shoes, drops ??? Footwear from its Armoury crate. Be warned that these NMs are not as weak as they are outside of the Assault mission and should be treated with caution.
All ??? Items must be appraised like normal in order to obtain the true (or different) reward. (Based on current speculation, higher floors could mean better chances at items and/or better item holding NM's appearing.)![]()
Nyzul armor and weapons
In addition to these potential rewards, every 20 floors there will be a HNM boss that has a chance to drop a new piece of armor from one of these sets:
The footwear are dropped on Floor 20, leg pieces on 40, handgears on 60, body piece on 80, and headgears on 100. The bosses follow a similar pattern, with Fafnir, Behemoth or Adamantoise on Floors 20 & 40, and Cerberus, Hydra, or Khimaira on Floors 60, 80 & 100.
On top of that, the HNM on Floor 100 of Nyzul Isle has a chance of dropping 1 of the 20 Nyzul Weapons.
CompletionCompleting 1 or more levels of Nyzul Isle Investigation for the first time, as long as you exit via the rune of transfer will reward you with 5 points toward your Mercenary Rank promotion. Subsequent completions, as long as you exit via the rune of transfer, will reward you with 1 point. A "Runic Key" key item is also rewarded to the player with the recorded data upon completing Floor 100. As of the June update, more light has been shed on the purpose of the item: "The reward for re-completing the 100th floor (by returning to the 100th floor via the key item received upon the first completion) has been adjusted." Completing floor 100 a second time results in an additional reward. If the player with the Runic Key clears a second Runic Disc up to floor 100, the floor 100 boss is guaranteed to drop the Nyzul weapon for the job they are currently on. Game Description
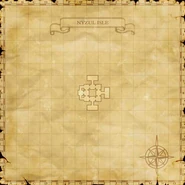
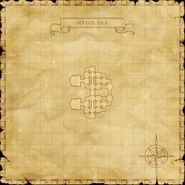
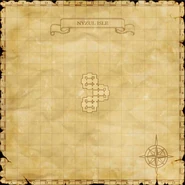
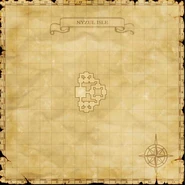
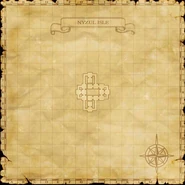
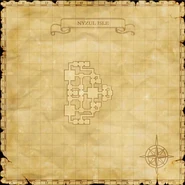
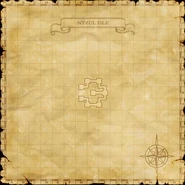
MapThe in-game map function cannot be used within Nyzul Isle. However, the level layouts may be based on these maps:
|
||||||||||||||||||||||||||||||||||||||||||||||||||||||||||||||||||||||||||

