m (Added Mandragora Sproutling, Watermelon, Saruta Orange, Amrita) |
m (→Responses) |
||
| (39 intermediate revisions by 3 users not shown) | |||
| Line 1: | Line 1: | ||
| − | [[Category: |
+ | [[Category:Mog Garden]] |
[[File:LittleSheep.png|thumb]] |
[[File:LittleSheep.png|thumb]] |
||
| − | Monster Rearing is a feature of [[Mog Garden]]s in which players can raise monsters from childhood to maturity. When cared for properly, the monsters can provide the player with items, change appearances, and even confer global bonuses (called a "cheer" effect) similar to |
+ | Monster Rearing is a feature of [[Mog Garden]]s in which players can raise monsters from childhood to maturity. When cared for properly, the monsters can provide the player with items, change appearances, and even confer global bonuses (called a "[[Cheers|cheer]]" effect), similar to how a Moghancement works. |
==Eligibility== |
==Eligibility== |
||
*Complete [[Jingly Dangler]]. |
*Complete [[Jingly Dangler]]. |
||
| − | * |
+ | *Do any gathering activities until their combined ranks total 20: [[Garden Furrow]], [[Mineral Vein]], [[Pond Dredger]], [[Arboreal Grove]], [[Coastal Fishing Net]]. |
| − | Once you meet |
+ | Once you meet those requirements, you can speak to [[Green Thumb Moogle]] to begin [[Release the Fleece]]. You will begin rearing a Sheep named "LittleSheep" by default. Once you complete the quest line (continuing with [[Feeding Frenzy]], ending with [[Cry Not, Caretaker]]), Monster Rearing will be fully unlocked, starting with '''Rank 1''' monsters. Your first monster will be named "Monster" by default. |
| − | *Rank 2 monsters are unlocked if you obtain {{KeyItem}}[["Sakura and the Magic Spoon"]] and complete [[Chacharoon's Cheer]]. You will also be able to activate " |
+ | *'''Rank 2''' monsters are unlocked if you obtain {{KeyItem}} [["Sakura and the Magic Spoon"]] and complete [[Chacharoon's Cheer]]. You will also be able to activate "[[Cheers|cheer]]" bonuses (which are based on mementos you have earned). |
| − | *Rank 3 monsters are unlocked if you obtain {{KeyItem}}[["Sakura and the Fountain"]] and complete [[Trial of the Chacharoon]]. You will also be able to raise two monsters at once after visiting the Rearing Grounds. Green Thumb Moogle will begin selling [[Bastore Sardine]] in his "Rank 3 |
+ | *'''Rank 3''' monsters are unlocked if you obtain {{KeyItem}} [["Sakura and the Fountain"]] and complete [[Trial of the Chacharoon]]. You will also be able to raise two monsters at once after visiting the ''Rearing Grounds''. Green Thumb Moogle will begin selling [[Bastore Sardine]] in his "Rank 3 monsters" shop. |
| − | *Rank 4 monsters are unlocked if you obtain {{KeyItem}}[["Sakura and the Magicked Net"]]. |
+ | *'''Rank 4''' monsters are unlocked if you obtain {{KeyItem}} [["Sakura and the Magicked Net"]]. |
| − | *Rank 5 monsters are unlocked if you obtain {{KeyItem}}[["Sakura's Excellent Adventure"]] and complete [[Doctor Chacharoon]]. You will also be able to raise three monsters at once. Green Thumb Moogle will begin selling [[San d'Orian Carrot]] in his "Rank 5 monsters" shop. |
+ | *'''Rank 5''' monsters are unlocked if you obtain {{KeyItem}} [["Sakura's Excellent Adventure"]] and complete [[Doctor Chacharoon]]. You will also be able to raise three monsters at once. Green Thumb Moogle will begin selling [[San d'Orian Carrot]] in his "Rank 5 monsters" shop. |
| − | *Rank 6 monsters are unlocked if you obtain {{KeyItem}}[["Sakura and the Cactus Corps"]]. |
+ | *'''Rank 6''' monsters are unlocked if you obtain {{KeyItem}} [["Sakura and the Cactus Corps"]]. |
| − | *Rank 7 monsters are unlocked if you obtain {{KeyItem}}[["Sakura and the Holy Grail" |
+ | *'''Rank 7''' monsters are unlocked if you obtain {{KeyItem}} [["Sakura and the Holy Grail"]]. You will also be able to raise four monsters at once. |
==Monster Management== |
==Monster Management== |
||
| − | + | Talk to Chacharoon to start rearing a new monster. This can be done once per day (twice starting at rank 5). You will have to remove one you are already rearing for each new one you wish to rear if you are already at the maximum number of monsters (per the Eligibility list above). |
|
* Rank 1 monsters: |
* Rank 1 monsters: |
||
** [[Monster Rearing/Lamb|Sheep]] |
** [[Monster Rearing/Lamb|Sheep]] |
||
| Line 42: | Line 42: | ||
** [[Monster Rearing/Buffalo Calf|Buffalo]] |
** [[Monster Rearing/Buffalo Calf|Buffalo]] |
||
** [[Monster Rearing/Mini Slime|Slime]] |
** [[Monster Rearing/Mini Slime|Slime]] |
||
| − | ** [[Monster Rearing/Mandragora Sproutling|Mandragora |
+ | ** [[Monster Rearing/Mandragora Sproutling|Mandragora]] |
* Rank 5 monsters: |
* Rank 5 monsters: |
||
** [[Monster Rearing/Tiny Bugard|Bugard]] |
** [[Monster Rearing/Tiny Bugard|Bugard]] |
||
| Line 53: | Line 53: | ||
** [[Monster Rearing/Pequetender|Sabotender]] |
** [[Monster Rearing/Pequetender|Sabotender]] |
||
| + | All monsters can be seen in the ''Rearing Grounds'', which can be reached through Chacharoon, Green Thumb Moogle, Mog Dinghy, or walking through the passage. |
||
| − | * Monsters will come with randomly generated names until you give them a new name. |
||
| + | ===Names=== |
||
| − | ** The random names are often the same ones you see in [[Chocobo Racing]]. |
||
| + | Monsters will come with randomly generated names until you give them a new name. |
||
| − | ** Some names are not allowed, such as profane words, "ad", and "gm". |
||
| + | * The random names are often the same ones you see in [[Chocobo Racing]]. |
||
| − | ** Giving your monster a name will cause a 3 red hearts animation, signifying a positive effect on its mood. |
||
| + | * Some names are not allowed, such as profane words, "ad", and "gm". |
||
| − | * In the '''Personal Growth''' parental style, monsters will gradually mature every day, though their mood will gradually degrade unless you check, feed and/or interact with them. |
||
| + | * Giving your monster a name will cause a "3 red hearts" animation, signifying a ''Somewhat Positive'' effect on its mood. |
||
| − | ** All new monsters received are set to this style by default. |
||
| + | ===Rearing Options=== |
||
| − | * In the '''Enjoying the Moment''' parental style, the monster's growth level will remain constant, even if you feed it. |
||
| + | * '''Parental Style''' |
||
| − | * Talking to Chacharoon allows you to change which one of your monsters will be shown in the Mog Garden, and it will be given "rearing priority". |
||
| + | ** ''Personal Growth'' - Monster will gradually mature every day, though its mood will gradually degrade unless you feed and/or interact with it. An exception to the interaction part would be a monster that does not like any interaction, such as the [[Monster Rearing/Behemoth Cub|Behemoth]] family or [[Monster Rearing/Great Adamantoise|Great Adamantoise]]. |
||
| − | ** All monsters can be seen in the Rearing Grounds, which can be reached through Chacharoon, Green Thumb Moogle, Mog Dinghy, or walking through the ravine. |
||
| + | *** All new monsters spawned are set to this style by default. |
||
| − | *Feeding, interacting with, or collecting items from substantially-matured monsters has a high chance of obtaining a '''"memento"''' (see below) from them, from which Chacharoon gains access to new '''Cheers''', each conferring different global bonuses when activated. To change your current Memento Cheer Effect, you must talk to [[Chacharoon]] and select ''talk about cheers''. There will be a shining star cost equal to the memento-giving monster's rank to change to the new effect. Only one Cheer may be active at a time. |
||
| + | ** ''Enjoying the Moment'' - Monster's growth level will not increase, even if you feed it. |
||
| − | ** [[Green Thumb Moogle]] will begin selling an additional item according to each memento acquired. |
||
| + | * '''Rearing Priority''' - Talking to Chacharoon allows you to change which one of your monsters will be showcased in the Mog Garden, and it will be given "rearing priority." |
||
| − | * You may part with your monster permanently using two different methods. You can begin rearing a new monster immediately if you have not already that day. |
||
| + | |||
| − | ** Choosing to '''Send It Back Home''' will earn you a gil reward and up to 4 Mog Garden items, depending on maturation level and player interaction: |
||
| + | ===Mementos=== |
||
| − | *** [[Cactus Stems]], [[Tree Cuttings]], [[Tree Saplings]], [[Coalition Serum]], [[Coalition Humus]], [[Coalition Fertilizer]], [[Star Sprinkles]], [[Super Baitball]] |
||
| + | Obtaining a {{KeyItem}} '''"<Monster type> memento"''' from a monster (e.g., {{KeyItem}} [[Sheep memento]]) unlocks one of Chacharoon's [[Cheers|Cheer]]s and an item in [[Green Thumb Moogle]]'s shop. Each Cheer confers different global bonuses when activated. Feeding, interacting with, or collecting items from a monster gives you a chance at obtaining a memento from it. |
||
| − | *** Obtaining a new monster and then immediately sending it away results in no reward. |
||
| + | *Feeding, interacting with, or collecting items from a baby monster (1st stage evolution) may earn you its memento at around 2 stars of growth. An adult monster can give its memento at any time. |
||
| − | ** Choosing to '''Put It Down''' will earn you 1-3 items tagged as "Put down" in the Collected Items table. |
||
| + | * A 2nd stage (adult) monster will occasionally grant the memento of its baby version if you have not received it already, but a 3rd stage adult monster will never grant its 2nd stage's memento. Putting a monster on '''Enjoying the Moment''' if it is approaching the maximum 3 stars growth will ensure you do not miss it if you have not gotten it by then. |
||
| + | *To change your current Memento Cheer effect, you must talk to [[Chacharoon]] and select "talk about cheers". There will be a [[Shining Stars]] cost (listed on the [[Cheers]] page). |
||
| + | *Only one Cheer may be active at a time. |
||
| + | *Each monster's memento is listed on its [[Monster Rearing#Available Monsters|page]]. |
||
| + | ===Parting=== |
||
| + | You have two options to part with your monster permanently. You can begin rearing a new monster immediately (see "Monster Management" introduction above for qualifications). |
||
| + | * '''Send It Back Home''' - will earn you a gil reward and up to 4 Mog Garden items, depending on maturation level and player interaction: |
||
| + | ** [[Cactus Stems]], [[Tree Cuttings]], [[Tree Saplings]], [[Coalition Serum]], [[Coalition Humus]], [[Coalition Fertilizer]], [[Star Sprinkles]], [[Super Baitball]]. |
||
| + | ** Obtaining a new monster and then immediately sending it away results in no reward. |
||
| + | * '''Put It Down''' - will earn you 1-3 items tagged as "Put down" on each monster's page. |
||
==Monster Care== |
==Monster Care== |
||
| − | + | The monster's mood falls on a scale between the extreme states of "succumbing to darkness," to "beaming with pure contentment." |
|
| + | *The farther from Neutral a monster's response is, the more its mood is affected. A Neutral response does not affect its mood one way or the other. |
||
| − | **An interaction that is "surprisingly not worthless" yields the 3 red hearts animation, a positive mood reinforcement. |
||
| + | * An interaction that normally "strongly resonates" with a monster will reward you with a [[Shining Stars|Shining Star]] if done when it is "beaming with pure contentment". If a monster normally does not "strongly resonate" with any interaction, such as the [[Monster Rearing/Great Adamantoise|Great Adamantoise]], you cannot receive this reward. Feed will not earn you Shining Stars. |
||
| − | **An interaction that "strongly resonates with <monster's name>" yields the yellow & orange notes animation, an even better positive mood reinforcement. |
||
| + | * Checking a monster that is "succumbing to darkness" will render all Mog Garden activities unusable, except Flotsam. If 2 or more monsters are in this state, this will automatically occur (without checking). Only the following actions may be performed on a monster in this mood: |
||
| − | ** An interaction that "strongly resonates" with a monster that is "beaming with pure contentment" will reward you with Shining Stars, unless the monster does not "strongly resonate" with any interaction normally, such as the [[Monster Rearing/Great Adamantoise|Great Adamantoise]]. Food will not earn you Shining Stars. |
||
| + | ** Use moogle magic to improve the monster's mood. Requires an expenditure of Shining Stars equal to the monster's family rank, with the number increasing per use, and may not work. |
||
| − | ** A monster that is "succumbing to darkness" will render all Mog Garden activities unusable, except for Flotsam. Only the following actions may be performed on a monster in this mood: |
||
| + | ** The monster may be put down. |
||
| − | *** Use moogle magic to improve the monster's mood. Requires an expenditure of Shining Stars, with the number increasing per use, and may not work. |
||
| − | *** The monster may be put down. |
||
* The monster's growth level is represented by 0-3 stars (an unfilled star denoting one-half star). |
* The monster's growth level is represented by 0-3 stars (an unfilled star denoting one-half star). |
||
| + | ** Japanese Midnight |
||
| − | ** At Japanese Midnight, a monster on the '''Personal Growth''' parental style will grow by 0-0.5 stars. A baby monster at 3 stars will have a chance to evolve into its normal adult form, starting again at 0.5 stars. |
||
| + | *** A monster on the '''Personal Growth''' parental style will grow by 0-0.5 stars. Each species seems to have its own number of days that must pass before a 0.5 stars growth has a chance to occur. Different species within the same family ([[Monster Rearing/Sapling|sapling]] and [[Monster Rearing/Red Foliage Treant|red foliage treant]], e.g.) can noticeably vary. |
||
| − | *** Monsters with three stages of growth typically do not evolve into their third forms without evolution food. |
||
| + | *** A monster at 3 stars on '''Personal Growth''' will have an evolutionary dice roll chance to evolve into its next stage normal adult form, if there is one (an example of a monster that doesn't have another stage is the [[Monster Rearing/Adamantoise|Adamantoise]]). So, if you want the monster to evolve to a variant form instead, if there is one (or two), it is recommended to set it to '''Enjoying the Moment''' before it reaches 3 stars, to prevent it from normal evolution. |
||
| − | * Once per day, you may interact with the monster. Interactions will have either a positive, neutral or negative effect on its mood, per the table below. |
||
| + | ** Monsters with three stages typically do not evolve into their third forms without specific evolution feed. |
||
| − | * Once per day, you may feed the monster. Certain foods the monster will accept (as per the '''Evolutions''' table below) and will affect its mood in a positive way. |
||
| + | ===Responses=== |
||
| − | ** A fed monster will grow faster than an unfed one, but still no more than 0-0.5 stars per day. |
||
| + | Once per Earth day, you may interact with each monster. There are 6 interaction choices: '''Do nothing''', '''Pet it''', '''Poke it''', '''Slap it''', '''Yell at it''' or '''Get Angry at it'''. "Do nothing" seems to, well, do nothing, and merely act as an Escape key. Interactions will have either a positive, neutral or negative effect on its mood, per the messages below. |
||
| − | ** Most monsters will "squirm uncontrollably" if you feed it a specific food after reaching a certain growth level. This may randomly cause it to evolve immediately after zoning. Sometimes it may "shudder violently", seemingly after evolution variant food. |
||
| + | *'''Strongly Positive''' {{ReactionResonated}} - ''"That strongly resonated with <MonsterName>."'' (Animation: yellow/orange notes) |
||
| − | *** Some monsters have two types of foods: one will cause it to evolve into its typical adult form, the other into its adult variant form. |
||
| + | *'''Somewhat Positive''' {{ReactionNotWorthless}} - ''"That was surprisingly not worthless in the eyes of <MonsterName>."'' (Animation: 3 hearts) |
||
| − | *** Evolution by feeding can be achieved while on the '''Enjoying the Moment''' parental style. This can be useful for forcing a variant evolution to occur. |
||
| + | *'''Neutral''' {{ReactionStaresOff}} - ''"<MonsterName> stares off into the distance as if you're not even there."'' (Animation: none) |
||
| − | *** Monsters can begin squirming at 1.5-2.5 stars, depending on the monster. Since not all minimum squirm levels are known, it is recommended to wait until 2.5-3 stars growth before feeding a very expensive item such as [[Savory Shank]]. |
||
| + | *'''Somewhat Negative''' {{ReactionDidntGoOver}} - ''"That didn't go over too well with <MonsterName>."'' (Animation: none) |
||
| − | ** Adult monsters can continue growing until they reach 3 full stars again. At this point, the '''Personal Growth''' parental style will have no effect on either its mood or its growth. |
||
| + | *'''Strongly Negative''' {{ReactionVisiblyAngry}} - ''"<MonsterName> is visibly angry at what you just did."'' (Animation: black scribbles in gray clouds) |
||
| − | * Once per day, you may collect up to 3 items from the monster. This will always "not go over well", unless the monster is "beaming with pure contentment", or a [[Mog Gardens Campaign]] is going on. |
||
| + | Once per Earth day, you may give the monster a "treat" (Chacharoon tends to the regular feedings). Monsters will only accept certain things to ingest, as per the '''Feed''' table below. |
||
| − | * '''Memento''': Obtaining a memento from a monster unlocks a Chacharoon's Cheer and an item in [[Green Thumb Moogle]]'s shop. |
||
| + | * A monster you feed will grow faster than one you don't, but still no more than 0-0.5 stars per Earth day. |
||
| − | **Interacting with, feeding, or collecting items from a baby monster may earn you its memento at around 2 stars of growth. An adult monster can give its memento at any time. |
||
| + | * ''Normal feed'' - Any feed that cannot cause evolution, only growth. Any monster will accept anything from the Feed chart, but each species has its own likes and dislikes, which affect its mood. |
||
| − | ** An adult monster will occasionally grant the memento of its baby version if you have not received it already, but a third stage monster will never grant its second stage's memento. It may be helpful to put them on '''Enjoying the Moment''' to ensure you do not miss it. |
||
| + | * ''Evolution feed'' - Some species have a feed that will give them a chance to evolve into a ''variant'' adult form; it will act as ''normal'' feed to other monsters. |
||
| + | ** These monsters will "squirm uncontrollably", or even "shudder violently", if you feed them their specific evolution feed, beginning at 1.5-2.5 stars growth level (exact growth level depending on the species). The monster will not evolve after it squirms (failed dice roll), but it will always evolve after it shudders (successful dice roll) immediately after you zone out of the mog garden. |
||
| + | *** Since not all minimum squirm levels are known, it is recommended to wait until 2.5 stars growth before feeding an expensive and/or harder-to-get item such as [[Savory Shank]]. |
||
| + | ** Since '''Enjoying the Moment''' parental style blocks normal evolution, it can be useful when you want a variant evolution. |
||
| + | * There are also species that have both a ''normal'' and an ''evolution'' feed (e.g., [[Monster Rearing/Pequetender|Pequetender]]). Feeding the ''evolution'' feed allows those species a chance to evolve into their ''normal'' adult form sooner than 3 stars. |
||
| + | * After evolving, adult monsters can again start growing (up to the maximum of 3 full stars). At 3 stars, the '''Personal Growth''' parental style will have no effect on either its mood or its growth. |
||
| + | Once per Earth day, you may collect 1-4 items from the monster. This will always "not go over well", unless the monster is "beaming with pure contentment", or a [[Mog Gardens Campaign]] is going on. During the campaign, you may collect items twice per Earth day. |
||
| − | === |
+ | ===Feed=== |
| + | {| class=ffxi-table style=width:100% |
||
| − | |||
| + | |- |
||
| − | {| border="0" width="100%" cellpadding="2" cellspacing="2" |
||
| + | ! width=33% | Berries |
||
| − | |- bgcolor="#ffdead" |
||
| + | ! width=34% | Fishes |
||
| − | ! Greens || Fruits || Fungi || Seeds |
||
| + | ! width=33% | Fruits |
||
| − | |- bgcolor="#e3e6ff" |
||
| + | |- |
||
| − | |<section begin="Greens"/> |
||
| + | |<section begin="Berries"/> |
||
| − | * [[Batagreens]] ☆ |
||
| + | <ul> |
||
| − | * [[Blue Pondweed]] |
||
| + | <li>{{IIn|Habaneros}}</li> |
||
| − | * [[Boyahda Moss]] |
||
| + | <li>'''{{IIn|Kazham Peppers}}''' ★</li> |
||
| − | * [[Great Boyahda Moss]] |
||
| + | <li>'''{{IIn|Thundermelon}}'''</li> |
||
| − | * [[La Theine Cabbage]] ★ |
||
| + | </ul> |
||
| − | * [[Moko Grass]] ★☆ |
||
| + | <section end="Berries"/> |
||
| − | * [[Napa]] |
||
| + | |<section begin="Fishes"/> |
||
| − | * [[Papaka Grass]] |
||
| + | <ul> |
||
| − | * [[Red Moko Grass]] |
||
| + | <li>{{IIn|Bastore Sardine}} ★☆</li> |
||
| − | * [[Red Pondweed]] |
||
| + | <li>'''{{IIn|Bibiki Slug}}'''</li> |
||
| − | <section end="Greens"/> |
||
| + | <li>{{IIn|Bibiki Urchin}}</li> |
||
| + | <li>'''{{IIn|Coral Butterfly}}'''</li> |
||
| + | <li>'''{{IIn|Denizanasi}}''' ★☆</li> |
||
| + | <li>{{IIn|Noble Lady}}</li> |
||
| + | <li>'''{{IIn|Quus}}'''</li> |
||
| + | <li>'''{{IIn|Three-eyed Fish}}'''</li> |
||
| + | </ul> |
||
| + | <section end="Fishes"/> |
||
|<section begin="Fruits"/> |
|<section begin="Fruits"/> |
||
| + | <ul> |
||
| − | * [[Acorn]] ★ |
||
| + | <li>{{IIn|Acorn}} ★</li> |
||
| − | * [[Chestnut]] |
||
| + | <li>{{IIn|Chestnut}}</li> |
||
| − | * [[Date]] |
||
| + | <li>'''{{IIn|Date}}'''</li> |
||
| − | * [[Dragon Fruit]] |
||
| + | <li>{{IIn|Dragon Fruit}}</li> |
||
| − | * [[Faerie Apple]] |
||
| + | <li>{{IIn|Faerie Apple}}</li> |
||
| − | * [[Habaneros]] |
||
| + | <li>{{IIn|Kitron}}</li> |
||
| − | * [[Kazham Peppers]] |
||
| + | <li>{{IIn|Millioncorn}} ☆</li> |
||
| − | * [[Kitron]] |
||
| + | <li>{{IIn|Persikos}}</li> |
||
| − | * [[Millioncorn]] ☆ |
||
| + | <li>{{IIn|Pine Nuts}} ★</li> |
||
| − | * [[Persikos]] |
||
| + | <li>'''{{IIn|Royal Grape}}'''</li> |
||
| − | * [[Pine Nuts]] ★ |
||
| + | <li>{{IIn|Saruta Orange}} ☆</li> |
||
| − | * [[Royal Grape]] |
||
| + | <li>'''{{IIn|Watermelon}}''' ☆</li> |
||
| − | * [[Saruta Orange]] |
||
| + | <li>{{IIn|Yagudo Cherry}} ★</li> |
||
| − | * [[Thundermelon]] |
||
| + | </ul> |
||
| − | * [[Watermelon]] |
||
| − | * [[Yagudo Cherry]] ★ |
||
<section end="Fruits"/> |
<section end="Fruits"/> |
||
| + | |- bgcolor="#ffdead" |
||
| + | ! Fungi || Greens || Liquids |
||
| + | |- bgcolor="#e3e6ff" |
||
|<section begin="Fungi"/> |
|<section begin="Fungi"/> |
||
| + | <ul> |
||
| − | * [[Agaricus]] |
||
| + | <li>{{IIn|Agaricus}}</li> |
||
| − | * [[Coral Fungus]] |
||
| + | <li>{{IIn|Coral Fungus}}</li> |
||
| − | * [[Reishi Mushroom]] |
||
| + | <li>{{IIn|Reishi Mushroom}}</li> |
||
| − | * [[Sobbing Fungus]] ★ |
||
| + | <li>{{IIn|Sobbing Fungus}} ★</li> |
||
| + | </ul> |
||
<section end="Fungi"/> |
<section end="Fungi"/> |
||
| − | |<section begin=" |
+ | |<section begin="Greens"/> |
| + | <ul> |
||
| − | * [[Blue Peas]] ★ |
||
| + | <li>'''{{IIn|Batagreens}}''' ☆</li> |
||
| − | * [[Burdock]] |
||
| + | <li>'''{{IIn|Blue Pondweed}}'''</li> |
||
| − | * [[Deluxe Carrot]] |
||
| + | <li>'''{{IIn|Boyahda Moss}}'''</li> |
||
| − | * [[Moon Carrot]] |
||
| + | <li>'''{{IIn|Great Boyahda Moss}}'''</li> |
||
| − | * [[Popoto]] ★ |
||
| + | <li>{{IIn|La Theine Cabbage}} ★</li> |
||
| − | * [[San d'Orian Carrot]] ★☆ |
||
| + | <li>{{IIn|Moko Grass}} ★☆</li> |
||
| − | * [[Sunflower Seeds]] |
||
| + | <li>'''{{IIn|Napa}}'''</li> |
||
| − | * [[Vomp Carrot]] |
||
| + | <li>'''{{IIn|Papaka Grass}}'''</li> |
||
| − | * [[Walnut]] |
||
| + | <li>'''{{IIn|Red Moko Grass}}'''</li> |
||
| − | * [[Zegham Carrot]] |
||
| + | <li>'''{{IIn|Red Pondweed}}'''</li> |
||
| − | <section end="Seeds"/> |
||
| + | </ul> |
||
| + | <section end="Greens"/> |
||
| + | |<section begin="Liquids"/> |
||
| + | <ul> |
||
| + | <li>{{IIn|Ahriman Tears}}</li> |
||
| + | <li>{{IIn|Amrita}}</li> |
||
| + | <li>'''{{IIn|Beastman Blood}}''' ☆</li> |
||
| + | <li>'''{{IIn|Chimera Blood}}'''</li> |
||
| + | <li>'''{{IIn|Distilled Water}}''' ★☆</li> |
||
| + | <li>{{IIn|Elixir}}</li> |
||
| + | <li>'''{{IIn|Fiend Blood}}'''</li> |
||
| + | <li>'''{{IIn|Holy Water}}'''</li> |
||
| + | <li>'''{{IIn|Honey Wine}}'''</li> |
||
| + | <li>'''{{IIn|Mulsum}}'''</li> |
||
| + | <li>'''{{IIn|Potion}}'''</li> |
||
| + | <li>'''{{IIn|Sweet Tea}}'''</li> |
||
| + | </ul> |
||
| + | <section end="Liquids"/> |
||
|- bgcolor="#ffdead" |
|- bgcolor="#ffdead" |
||
| − | ! Meats || |
+ | ! Meats || Minerals || Seeds |
|- bgcolor="#e3e6ff" |
|- bgcolor="#e3e6ff" |
||
|<section begin="Meats"/> |
|<section begin="Meats"/> |
||
| + | <ul> |
||
| − | * [[Beastly Shank]] |
||
| + | <li>'''{{IIn|Beastly Shank}}'''</li> |
||
| − | * [[Buffalo Meat]] ☆ |
||
| + | <li>{{IIn|Buffalo Meat}} ☆</li> |
||
| − | * [[Cerberus Meat]] |
||
| + | <li>'''{{IIn|Cerberus Meat}}'''</li> |
||
| − | * [[Cockatrice Meat]] ☆ |
||
| + | <li>'''{{IIn|Cockatrice Meat}}''' ☆</li> |
||
| − | * [[Dragon Meat]] |
||
| + | <li>'''{{IIn|Dragon Meat}}'''</li> |
||
| − | * [[Gabbrath Meat]] |
||
| + | <li>'''{{IIn|Gabbrath Meat}}'''</li> |
||
| − | * [[Giant Sheep Meat]] ★ |
||
| + | <li>{{IIn|Giant Sheep Meat}} ★</li> |
||
| − | * [[Hare Meat]] ★☆ |
||
| + | <li>{{IIn|Hare Meat}} ★☆</li> |
||
| − | * [[Hydra Meat]] |
||
| + | <li>{{IIn|Hydra Meat}}</li> |
||
| − | * [[Lesser Chigoe]] |
||
| + | <li>'''{{IIn|Lesser Chigoe}}'''</li> |
||
| − | * [[Rotten Meat]] ★☆ |
||
| + | <li>'''{{IIn|Rotten Meat}}''' ★☆</li> |
||
| − | * [[Savory Shank]] |
||
| + | <li>'''{{IIn|Savory Shank}}'''</li> |
||
| − | * [[Tavnazian Liver]] |
||
| + | <li>'''{{IIn|Tavnazian Liver}}'''</li> |
||
| − | * [[Warthog Meat]] |
||
| + | <li>{{IIn|Warthog Meat}}</li> |
||
| + | </ul> |
||
<section end="Meats"/> |
<section end="Meats"/> |
||
| − | |<section begin=" |
+ | |<section begin="Minerals"/> |
| + | <ul> |
||
| − | * [[Bastore Sardine]] ★☆ |
||
| + | <li>'''{{IIn|Acidic Humus}}'''</li> |
||
| − | * [[Bibiki Slug]] |
||
| + | <li>'''{{IIn|Alkaline Humus}}'''</li> |
||
| − | * [[Bibiki Urchin]] |
||
| + | <li>'''{{IIn|Dark Cluster}}'''</li> |
||
| − | * [[Coral Butterfly]] |
||
| + | <li>{{IIn|Earth Cluster}}</li> |
||
| − | * [[Denizanasi]] ★☆ |
||
| + | <li>'''{{IIn|Fire Cluster}}'''</li> |
||
| − | * [[Noble Lady]] |
||
| + | <li>'''{{IIn|Ice Cluster}}'''</li> |
||
| − | * [[Quus]] |
||
| + | <li>{{IIn|Light Cluster}}</li> |
||
| − | * [[Three-eyed Fish]] |
||
| + | <li>{{IIn|Lightning Cluster}}</li> |
||
| − | <section end="Fish"/> |
||
| + | <li>{{IIn|Water Cluster}}</li> |
||
| − | |<section begin="Liquids"/> |
||
| + | <li>{{IIn|Wind Cluster}}</li> |
||
| − | * [[Ahriman Tears]] |
||
| + | <li>{{IIn|Gem of the North}}</li> |
||
| − | * [[Amrita]] |
||
| + | <li>'''{{IIn|Gem of the East}}'''</li> |
||
| − | * [[Beastman Blood]] ☆ |
||
| + | <li>{{IIn|Gem of the South}}</li> |
||
| − | * [[Chimera Blood]] |
||
| + | <li>{{IIn|Gem of the West}}</li> |
||
| − | * [[Distilled Water]] ★☆ |
||
| + | </ul> |
||
| − | * [[Elixir]] |
||
| + | <section end="Minerals"/> |
||
| − | * [[Fiend Blood]] |
||
| + | |<section begin="Seeds"/> |
||
| − | * [[Holy Water]] |
||
| + | <ul> |
||
| − | * [[Honey Wine]] |
||
| + | <li>{{IIn|Blue Peas}} ★</li> |
||
| − | * [[Mulsum]] |
||
| + | <li>'''{{IIn|Burdock}}'''</li> |
||
| − | * [[Potion]] |
||
| + | <li>{{IIn|Deluxe Carrot}}</li> |
||
| − | * [[Sweet Tea]] |
||
| + | <li>{{IIn|Moon Carrot}}</li> |
||
| − | * [[Yellow Ginseng]] |
||
| + | <li>{{IIn|Popoto}} ★</li> |
||
| − | <section end="Liquids"/> |
||
| + | <li>'''{{IIn|San d'Orian Carrot}}''' ★☆</li> |
||
| − | |<section begin="Gems"/> |
||
| + | <li>'''{{IIn|Sunflower Seeds}}'''</li> |
||
| − | * [[Fire Cluster]] |
||
| + | <li>{{IIn|Vomp Carrot}}</li> |
||
| − | * [[Ice Cluster]] |
||
| + | <li>{{IIn|Walnut}}</li> |
||
| − | * [[Wind Cluster]] |
||
| + | <li>{{IIn|Yellow Ginseng}}</li> |
||
| − | * [[Earth Cluster]] |
||
| + | <li>{{IIn|Zegham Carrot}}</li> |
||
| − | * [[Lightning Cluster]] |
||
| + | </ul> |
||
| − | * [[Water Cluster]] |
||
| + | <section end="Seeds"/> |
||
| − | * [[Light Cluster]] |
||
| − | * [[Dark Cluster]] |
||
| − | * [[Gem of the North]] |
||
| − | * [[Gem of the East]] |
||
| − | * [[Gem of the South]] |
||
| − | * [[Gem of the West]] |
||
| − | <section end="Gems"/> |
||
|} |
|} |
||
☆ Available from the Green Thumb Moogle with the appropriate Memento acquired.<br> |
☆ Available from the Green Thumb Moogle with the appropriate Memento acquired.<br> |
||
| − | ★ Represents the cheapest NPC-sold options. Clusters are not sold by NPCs, but are easily hunted in [[Ru'Aun Gardens]] or gotten from an [[Ephemeral Moogle]], and Gems can typically be purchased with Login Points. |
+ | ★ Represents the cheapest NPC-sold options. Clusters are not sold by NPCs, but are easily hunted in [[Ru'Aun Gardens]] or gotten from an [[Ephemeral Moogle]], and Gems can typically be purchased with Login Points.<br> |
| + | '''Bold''' items are evolutionary variant feeds, each used to evolve a specific monster to a variant form. |
||
| + | |||
| + | ==Items That Enhance Monster Rearing== |
||
| + | {|class="ffxi-table wide-table" |
||
| + | |- |
||
| + | !align="center"|Item |
||
| + | !align="center"|Notes |
||
| + | |- |
||
| + | |align="center"|[[Jubilee Shirt]] {{rare|nc}}{{exclusive|nc}} |
||
| + | |align="center"|Speeds up growth rate of monster feed. |
||
| + | |} |
||
==Available Monsters== |
==Available Monsters== |
||
Revision as of 21:28, 30 June 2022
Monster Rearing is a feature of Mog Gardens in which players can raise monsters from childhood to maturity. When cared for properly, the monsters can provide the player with items, change appearances, and even confer global bonuses (called a "cheer" effect), similar to how a Moghancement works.
Eligibility
- Complete Jingly Dangler.
- Do any gathering activities until their combined ranks total 20: Garden Furrow, Mineral Vein, Pond Dredger, Arboreal Grove, Coastal Fishing Net.
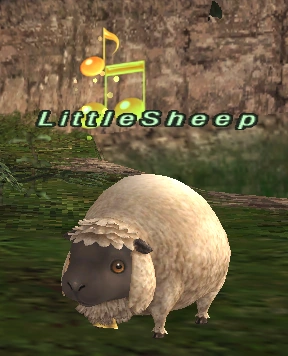
Once you meet those requirements, you can speak to Green Thumb Moogle to begin Release the Fleece. You will begin rearing a Sheep named "LittleSheep" by default. Once you complete the quest line (continuing with Feeding Frenzy, ending with Cry Not, Caretaker), Monster Rearing will be fully unlocked, starting with Rank 1 monsters. Your first monster will be named "Monster" by default.
- Rank 2 monsters are unlocked if you obtain
 "Sakura and the Magic Spoon" and complete Chacharoon's Cheer. You will also be able to activate "cheer" bonuses (which are based on mementos you have earned).
- Rank 3 monsters are unlocked if you obtain "Sakura and the Fountain" and complete Trial of the Chacharoon. You will also be able to raise two monsters at once after visiting the Rearing Grounds. Green Thumb Moogle will begin selling Bastore Sardine in his "Rank 3 monsters" shop.
- Rank 4 monsters are unlocked if you obtain
 "Sakura and the Magicked Net".
- Rank 5 monsters are unlocked if you obtain "Sakura's Excellent Adventure" and complete Doctor Chacharoon. You will also be able to raise three monsters at once. Green Thumb Moogle will begin selling San d'Orian Carrot in his "Rank 5 monsters" shop.
- Rank 6 monsters are unlocked if you obtain "Sakura and the Cactus Corps".
- Rank 7 monsters are unlocked if you obtain "Sakura and the Holy Grail". You will also be able to raise four monsters at once.
Monster Management
Talk to Chacharoon to start rearing a new monster. This can be done once per day (twice starting at rank 5). You will have to remove one you are already rearing for each new one you wish to rear if you are already at the maximum number of monsters (per the Eligibility list above).
- Rank 1 monsters:
- Rank 2 monsters:
- Rank 3 monsters:
- Rank 4 monsters:
- Rank 5 monsters:
- Rank 6 monsters:
- Rank 7 monsters:
All monsters can be seen in the Rearing Grounds, which can be reached through Chacharoon, Green Thumb Moogle, Mog Dinghy, or walking through the passage.
Names
Monsters will come with randomly generated names until you give them a new name.
- The random names are often the same ones you see in Chocobo Racing.
- Some names are not allowed, such as profane words, "ad", and "gm".
- Giving your monster a name will cause a "3 red hearts" animation, signifying a Somewhat Positive effect on its mood.
Rearing Options
- Parental Style
- Personal Growth - Monster will gradually mature every day, though its mood will gradually degrade unless you feed and/or interact with it. An exception to the interaction part would be a monster that does not like any interaction, such as the Behemoth family or Great Adamantoise.
- All new monsters spawned are set to this style by default.
- Enjoying the Moment - Monster's growth level will not increase, even if you feed it.
- Personal Growth - Monster will gradually mature every day, though its mood will gradually degrade unless you feed and/or interact with it. An exception to the interaction part would be a monster that does not like any interaction, such as the Behemoth family or Great Adamantoise.
- Rearing Priority - Talking to Chacharoon allows you to change which one of your monsters will be showcased in the Mog Garden, and it will be given "rearing priority."
Mementos
Obtaining a ![]() "<Monster type> memento" from a monster (e.g.,
"<Monster type> memento" from a monster (e.g., ![]() Sheep memento) unlocks one of Chacharoon's Cheers and an item in Green Thumb Moogle's shop. Each Cheer confers different global bonuses when activated. Feeding, interacting with, or collecting items from a monster gives you a chance at obtaining a memento from it.
Sheep memento) unlocks one of Chacharoon's Cheers and an item in Green Thumb Moogle's shop. Each Cheer confers different global bonuses when activated. Feeding, interacting with, or collecting items from a monster gives you a chance at obtaining a memento from it.
- Feeding, interacting with, or collecting items from a baby monster (1st stage evolution) may earn you its memento at around 2 stars of growth. An adult monster can give its memento at any time.
- A 2nd stage (adult) monster will occasionally grant the memento of its baby version if you have not received it already, but a 3rd stage adult monster will never grant its 2nd stage's memento. Putting a monster on Enjoying the Moment if it is approaching the maximum 3 stars growth will ensure you do not miss it if you have not gotten it by then.
- To change your current Memento Cheer effect, you must talk to Chacharoon and select "talk about cheers". There will be a Shining Stars cost (listed on the Cheers page).
- Only one Cheer may be active at a time.
- Each monster's memento is listed on its page.
Parting
You have two options to part with your monster permanently. You can begin rearing a new monster immediately (see "Monster Management" introduction above for qualifications).
- Send It Back Home - will earn you a gil reward and up to 4 Mog Garden items, depending on maturation level and player interaction:
- Cactus Stems, Tree Cuttings, Tree Saplings, Coalition Serum, Coalition Humus, Coalition Fertilizer, Star Sprinkles, Super Baitball.
- Obtaining a new monster and then immediately sending it away results in no reward.
- Put It Down - will earn you 1-3 items tagged as "Put down" on each monster's page.
Monster Care
The monster's mood falls on a scale between the extreme states of "succumbing to darkness," to "beaming with pure contentment."
- The farther from Neutral a monster's response is, the more its mood is affected. A Neutral response does not affect its mood one way or the other.
- An interaction that normally "strongly resonates" with a monster will reward you with a Shining Star if done when it is "beaming with pure contentment". If a monster normally does not "strongly resonate" with any interaction, such as the Great Adamantoise, you cannot receive this reward. Feed will not earn you Shining Stars.
- Checking a monster that is "succumbing to darkness" will render all Mog Garden activities unusable, except Flotsam. If 2 or more monsters are in this state, this will automatically occur (without checking). Only the following actions may be performed on a monster in this mood:
- Use moogle magic to improve the monster's mood. Requires an expenditure of Shining Stars equal to the monster's family rank, with the number increasing per use, and may not work.
- The monster may be put down.
- The monster's growth level is represented by 0-3 stars (an unfilled star denoting one-half star).
- Japanese Midnight
- A monster on the Personal Growth parental style will grow by 0-0.5 stars. Each species seems to have its own number of days that must pass before a 0.5 stars growth has a chance to occur. Different species within the same family (sapling and red foliage treant, e.g.) can noticeably vary.
- A monster at 3 stars on Personal Growth will have an evolutionary dice roll chance to evolve into its next stage normal adult form, if there is one (an example of a monster that doesn't have another stage is the Adamantoise). So, if you want the monster to evolve to a variant form instead, if there is one (or two), it is recommended to set it to Enjoying the Moment before it reaches 3 stars, to prevent it from normal evolution.
- Monsters with three stages typically do not evolve into their third forms without specific evolution feed.
- Japanese Midnight
Responses
Once per Earth day, you may interact with each monster. There are 6 interaction choices: Do nothing, Pet it, Poke it, Slap it, Yell at it or Get Angry at it. "Do nothing" seems to, well, do nothing, and merely act as an Escape key. Interactions will have either a positive, neutral or negative effect on its mood, per the messages below.
- Strongly Positive - "That strongly resonated with <MonsterName>." (Animation: yellow/orange notes)
- Somewhat Positive - "That was surprisingly not worthless in the eyes of <MonsterName>." (Animation: 3 hearts)
- Neutral - "<MonsterName> stares off into the distance as if you're not even there." (Animation: none)
- Somewhat Negative - "That didn't go over too well with <MonsterName>." (Animation: none)
- Strongly Negative - "<MonsterName> is visibly angry at what you just did." (Animation: black scribbles in gray clouds)
Once per Earth day, you may give the monster a "treat" (Chacharoon tends to the regular feedings). Monsters will only accept certain things to ingest, as per the Feed table below.
- A monster you feed will grow faster than one you don't, but still no more than 0-0.5 stars per Earth day.
- Normal feed - Any feed that cannot cause evolution, only growth. Any monster will accept anything from the Feed chart, but each species has its own likes and dislikes, which affect its mood.
- Evolution feed - Some species have a feed that will give them a chance to evolve into a variant adult form; it will act as normal feed to other monsters.
- These monsters will "squirm uncontrollably", or even "shudder violently", if you feed them their specific evolution feed, beginning at 1.5-2.5 stars growth level (exact growth level depending on the species). The monster will not evolve after it squirms (failed dice roll), but it will always evolve after it shudders (successful dice roll) immediately after you zone out of the mog garden.
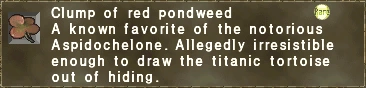
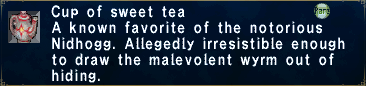
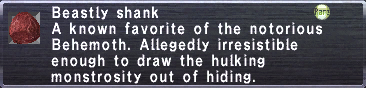
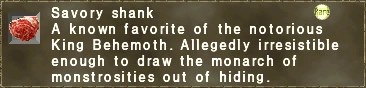
- Since not all minimum squirm levels are known, it is recommended to wait until 2.5 stars growth before feeding an expensive and/or harder-to-get item such as Savory Shank.
- Since Enjoying the Moment parental style blocks normal evolution, it can be useful when you want a variant evolution.
- These monsters will "squirm uncontrollably", or even "shudder violently", if you feed them their specific evolution feed, beginning at 1.5-2.5 stars growth level (exact growth level depending on the species). The monster will not evolve after it squirms (failed dice roll), but it will always evolve after it shudders (successful dice roll) immediately after you zone out of the mog garden.
- There are also species that have both a normal and an evolution feed (e.g., Pequetender). Feeding the evolution feed allows those species a chance to evolve into their normal adult form sooner than 3 stars.
- After evolving, adult monsters can again start growing (up to the maximum of 3 full stars). At 3 stars, the Personal Growth parental style will have no effect on either its mood or its growth.
Once per Earth day, you may collect 1-4 items from the monster. This will always "not go over well", unless the monster is "beaming with pure contentment", or a Mog Gardens Campaign is going on. During the campaign, you may collect items twice per Earth day.
Feed
| Berries | Fishes | Fruits |
|---|---|---|
| Fungi | Greens | Liquids |
| Meats | Minerals | Seeds |


☆ Available from the Green Thumb Moogle with the appropriate Memento acquired.
★ Represents the cheapest NPC-sold options. Clusters are not sold by NPCs, but are easily hunted in Ru'Aun Gardens or gotten from an Ephemeral Moogle, and Gems can typically be purchased with Login Points.
Bold items are evolutionary variant feeds, each used to evolve a specific monster to a variant form.
Items That Enhance Monster Rearing
| Item | Notes |
|---|---|
| Jubilee Shirt |
Speeds up growth rate of monster feed. |
Available Monsters
The pages found at the links below list each monster's Evolutions, Interactions, Feed, Memento bonuses, Collected and Put Down items.
| Monster Rearing Index | |
|---|---|
| Rank 1: | |
| Rank 2: | |
| Rank 3: | |
| Rank 4: | Coeurl Cub • Coeurl • Lynx
Buffalo Calf • Buffalo Mini Slime • Slime • Clot • Hecteyes Mandragora Sproutling • Mandragora • Elder Mandragora • Lycopodium • Ake-Ome • Adenium • Elder Adenium • Korrigan • Pachypodium • Citrullus |
| Rank 5: | |
| Rank 6: | |
| Rank 7: |