(removed testimonials so that I can move them to Talk page.) |
|||
| (34 intermediate revisions by 24 users not shown) | |||
| Line 1: | Line 1: | ||
| − | [[Category:Missions]][[Category:Assault]] |
+ | [[Category:Missions]][[Category:Assault Missions]][[Category:Chief Sergeant Missions]][[Category:Mamool Ja Training Grounds Missions]][[de:Großwildjagd]] |
| − | {| |
+ | {|cellpadding="5" width="100%" |
|width="70%" valign="top"| |
|width="70%" valign="top"| |
||
{|border="0" width="80%" cellpadding="0" cellspacing="3" |
{|border="0" width="80%" cellpadding="0" cellspacing="3" |
||
| Line 25: | Line 25: | ||
|- |
|- |
||
|valign="top" style="padding-left:1ex; background:#ceffc7"|'''Time Limit:''' |
|valign="top" style="padding-left:1ex; background:#ceffc7"|'''Time Limit:''' |
||
| − | |valign="top" style="padding-left:1ex; background:#deffd9"| |
+ | |valign="top" style="padding-left:1ex; background:#deffd9"|30 minutes |
|- |
|- |
||
|valign="top" style="padding-left:1ex; background:#ceffc7"|'''Reward:''' |
|valign="top" style="padding-left:1ex; background:#ceffc7"|'''Reward:''' |
||
| Line 32: | Line 32: | ||
*''4 Members:'' 1200<br> |
*''4 Members:'' 1200<br> |
||
*''5 Members:'' 1067<br> |
*''5 Members:'' 1067<br> |
||
| − | *''6 Members:'' |
+ | *''6 Members:'' 934 |
''Varies based on the number of marids killed instead of tranquilized. A penalty is assessed for each marid killed.'' |
''Varies based on the number of marids killed instead of tranquilized. A penalty is assessed for each marid killed.'' |
||
|- |
|- |
||
| Line 44: | Line 44: | ||
{| border="0" width="100%" cellpadding="2" cellspacing="2" |
{| border="0" width="100%" cellpadding="2" cellspacing="2" |
||
|- BGCOLOR="#ffdead" |
|- BGCOLOR="#ffdead" |
||
| − | ! Monster || Level || Strengths || Weaknesses || Spawns || |
+ | ! Monster || Level || Strengths || Weaknesses || Spawns || Notes |
| ⚫ | |||
| − | Notes |
||
| ⚫ | |||
| ⚫ | |||
| ⚫ | |||
| ⚫ | |||
| + | |<!--Add Strengths Here--> |
||
| − | Chigoe |
||
| + | *''Immune to:'' [[Charm]]<br> |
||
| ⚫ | |||
| − | <!--Add |
+ | |<!--Add Weaknesses Here--> |
| + | *''Susceptible to:'' [[Sleep]], [[Lullaby]], [[Slow]], [[Paralyze]], [[Gravity]]<br> |
||
| ⚫ | |||
| ⚫ | |||
| + | |||
| ⚫ | |||
| + | |style="padding-left:1ex"|[[Chigoe]] |
||
| ⚫ | |||
|<!--Add Strengths Here--> |
|<!--Add Strengths Here--> |
||
*''Immune to:'' <br> |
*''Immune to:'' <br> |
||
| Line 57: | Line 64: | ||
*''Susceptible to:'' <br> |
*''Susceptible to:'' <br> |
||
*''Weak to:'' |
*''Weak to:'' |
||
| − | |align="center"| |
+ | |align="center"|3 |
| ⚫ | |||
| − | <!--Add Number of Spawn Points Here, if known--> |
||
| ⚫ | |||
| − | ''Assists: [[Marid]]'' |
||
| − | |- BGCOLOR="# |
+ | |- BGCOLOR="#e3e6ff" |
| − | |style="padding-left:1ex"| |
+ | |style="padding-left:1ex"|[[Mamool Ja Breeder]] |
| ⚫ | |||
| − | [[Marid]] |
||
| ⚫ | |||
| − | 80 |
||
|<!--Add Strengths Here--> |
|<!--Add Strengths Here--> |
||
| − | *''Immune to:'' |
+ | *''Immune to:'' <br> |
| + | *''Strong to:'' {{Wind}} |
||
|<!--Add Weaknesses Here--> |
|<!--Add Weaknesses Here--> |
||
| − | *''Susceptible to:'' |
+ | *''Susceptible to:'' <br> |
| + | *''Weak to:'' {{Ice}} |
||
| ⚫ | |||
| + | |align="center"|5 |
||
| − | 8 |
||
| − | |align="center"| |
+ | |align="center"|A, L, S |
| − | ''Assisted by: Chigoe'' |
||
| − | <br> |
||
| − | |- BGCOLOR="# |
+ | |- BGCOLOR="#e3e6ff" |
| − | |style="padding-left:1ex"| |
+ | |style="padding-left:1ex"|[[Mamool Ja Farrier]] |
| + | |align="center"|76 - 78 |
||
| − | Mamool Ja |
||
| ⚫ | |||
| − | <!--Add Level Here. Use {{question}} if unknown--> |
||
|<!--Add Strengths Here--> |
|<!--Add Strengths Here--> |
||
*''Immune to:'' <br> |
*''Immune to:'' <br> |
||
| − | *''Strong to: |
+ | *''Strong to:'' {{Wind}} |
|<!--Add Weaknesses Here--> |
|<!--Add Weaknesses Here--> |
||
*''Susceptible to:'' <br> |
*''Susceptible to:'' <br> |
||
| − | *''Weak to:'' |
+ | *''Weak to:'' {{Ice}} |
| − | |align="center"| |
+ | |align="center"|5 |
| + | |align="center"|A, L, S |
||
| − | <!--Add Number of Spawn Points Here, if known--> |
||
| ⚫ | |||
| − | A, S, L {{verification}} |
||
| ⚫ | |||
| + | |style="padding-left:1ex"|[[Mamool Ja Mahout]] |
||
| + | |align="center"|76 - 78 |
||
| + | |<!--Add Strengths Here--> |
||
| + | *''Immune to:'' <br> |
||
| + | *''Strong to:'' {{Wind}} |
||
| + | |<!--Add Weaknesses Here--> |
||
| + | *''Susceptible to:'' <br> |
||
| + | *''Weak to:'' {{Ice}} |
||
| + | |align="center"|5 |
||
| + | |align="center"|A, L, S |
||
|- |
|- |
||
|align="center" colspan="6" BGCOLOR="#ffdead"| |
|align="center" colspan="6" BGCOLOR="#ffdead"| |
||
| Line 99: | Line 108: | ||
== Drops == |
== Drops == |
||
| − | {| width= |
+ | {| width="75%" |
| − | |- valign=top |
+ | |- valign="top" |
| − | |width=25%| |
+ | | width="25%" | |
| − | {| width=100% |
+ | {| width="100%" |
|- BGCOLOR=#ffdead |
|- BGCOLOR=#ffdead |
||
! [[Ancient Lockbox]] |
! [[Ancient Lockbox]] |
||
| − | |- |
+ | |- align="center" bgcolor="#e3e6ff" |
| − | |[[ |
+ | |[[Hi-Potion +3]] {{Drop Rate|08|08}} |
| − | |- |
+ | |- align="center" bgcolor="#e3e6ff" |
| − | |[[Hi-Ether Tank]] |
+ | |[[Hi-Ether Tank]] {{Drop Rate|03|08}} |
| − | |- |
+ | |- align="center" bgcolor="#e3e6ff" |
| + | |[[Hi-Potion Tank]] {{Drop Rate|04|08}} |
||
| − | |[[Hi-Reraiser]] |
||
| + | |- align="center" bgcolor="#e3e6ff" |
||
| + | |[[Hi-Reraiser]] {{Drop Rate|03|08}} |
||
|} |
|} |
||
| ⚫ | |||
| − | |||
| − | |width= |
+ | {| width="100%" |
| + | |- bgcolor="#ffdead" |
||
| ⚫ | |||
| + | ! [[??? Necklace]] {{Drop Rate|05|09}} |
||
| ⚫ | |||
| + | |- align="center" bgcolor="#e3e6ff" |
||
| − | ! [[??? Box]] |
||
| ⚫ | |||
| ⚫ | |||
| + | |- align="center" bgcolor="#e3e6ff" |
||
| ⚫ | |||
| + | |[[Gorget +1]] {{Drop Rate|03|05}} |
||
| − | |- BGCOLOR=#e3e6ff align=center |
||
| + | |- align="center" bgcolor="#e3e6ff" |
||
| ⚫ | |||
| ⚫ | |||
| − | |- BGCOLOR=#e3e6ff align=center |
||
| − | |[[Eggplant]] |
||
| − | |- BGCOLOR=#e3e6ff align=center |
||
| − | |[[Date]] |
||
| − | |- BGCOLOR=#e3e6ff align=center |
||
| − | |[[Poroggo Hat]] |
||
| − | |- BGCOLOR=#e3e6ff align=center |
||
| ⚫ | |||
|} |
|} |
||
| − | |width=25%| |
+ | | width="25%" | |
| − | {| width=100% |
+ | {| width="100%" |
| − | |- |
+ | |- bgcolor="#ffdead" |
| + | ! [[??? Ring]] {{Drop Rate|03|09}} |
||
| − | ! [[??? Necklace]] |
||
| − | |- |
+ | |- align="center" bgcolor="#e3e6ff" |
| + | |[[Copper Ring]] {{Drop Rate|02|03}} |
||
| ⚫ | |||
| − | |- |
+ | |- align="center" bgcolor="#e3e6ff" |
| + | |[[Brass Ring]] {{Drop Rate|01|03}} |
||
| − | |[[Gorget Plus 1|Gorget +1]] |
||
| − | |- |
+ | |- align="center" bgcolor="#e3e6ff" |
| + | |[[Tau Ring]] {{Drop Rate|00|03}} |
||
| ⚫ | |||
|} |
|} |
||
| − | |width=25%| |
+ | | width="25%" | |
| − | {| width=100% |
+ | {| width="100%" |
| − | |- |
+ | |- bgcolor="#ffdead" |
| − | ! [[??? |
+ | ! [[??? Box]] {{Drop Rate|01|09}} |
| − | |- |
+ | |- align="center" bgcolor="#e3e6ff" |
| + | |[[Date]] {{Drop Rate|00|01}} |
||
| − | |[[Copper Ring]] |
||
| − | |- |
+ | |- align="center" bgcolor="#e3e6ff" |
| + | |[[Eggplant]] {{Drop Rate|00|01}} |
||
| − | |[[Brass Ring]] |
||
| − | |- |
+ | |- align="center" bgcolor="#e3e6ff" |
| ⚫ | |||
| − | |[[Tau Ring]] |
||
| + | |- align="center" bgcolor="#e3e6ff" |
||
| ⚫ | |||
| + | |- align="center" bgcolor="#e3e6ff" |
||
| + | |[[Poroggo Hat]] {{Drop Rate|00|01}} |
||
| + | |- align="center" bgcolor="#e3e6ff" |
||
| ⚫ | |||
| + | |- align="center" bgcolor="#e3e6ff" |
||
| + | |[[Toolbag (Jusa)]] {{Drop Rate|00|01}} |
||
| + | |- align="center" bgcolor="#e3e6ff" |
||
| + | |[[Toolbag (Kagi)]] {{Drop Rate|00|01}} |
||
| + | |- align="center" bgcolor="#e3e6ff" |
||
| + | |[[Toolbag (Sai)]] {{Drop Rate|00|01}} |
||
| + | |- align="center" bgcolor="#e3e6ff" |
||
| + | |[[Toolbag (Uchi)]] {{Drop Rate|00|01}} |
||
|} |
|} |
||
|} |
|} |
||
| Line 164: | Line 182: | ||
**The darts are used to tame the eight marids. |
**The darts are used to tame the eight marids. |
||
*There are two marids per room. |
*There are two marids per room. |
||
| − | * The marids are |
+ | * The marids are susceptible to sleep, gravity and bind. |
*They move very slowly and are easy to pull. |
*They move very slowly and are easy to pull. |
||
**It is simple and usually necessary that you pull two at one time and keep one slept or gravitied to beat this assault in time as the Marids are extremely long pulls. |
**It is simple and usually necessary that you pull two at one time and keep one slept or gravitied to beat this assault in time as the Marids are extremely long pulls. |
||
| Line 171: | Line 189: | ||
* When using the tranquilizers, they will either have no effect or fall out. |
* When using the tranquilizers, they will either have no effect or fall out. |
||
**If the dart "falls out" the Marid goes into a berserk state. During this time they will run at full speed and hit much harder(300+ on a BLM) |
**If the dart "falls out" the Marid goes into a berserk state. During this time they will run at full speed and hit much harder(300+ on a BLM) |
||
| + | **This only happens if the Marid is awake. Sleeping the Marid prior to using tranquilizers will prevent it from happening. -- Boogers on Hades |
||
| − | * One person (probably a ninja) can hold the marid and damage it to about 75%. Around 75% start using the tranquilizer darts on the marid. Simply use them from your item menu. Once the marid has been tamed it will |
+ | * One person (probably a ninja) can hold the marid and damage it to about 75%. Around 75% start using the tranquilizer darts on the marid. Simply use them from your item menu. Once the marid has been tamed it will disappear. |
* Someone should be assigned to killing chigoes that the marids will summon. These have very low HP and are easy to kill. A good strategy is to get TP on the marid and use them on the chigoes that pop. |
* Someone should be assigned to killing chigoes that the marids will summon. These have very low HP and are easy to kill. A good strategy is to get TP on the marid and use them on the chigoes that pop. |
||
*There are also a number of Mamool Ja throughout the map. |
*There are also a number of Mamool Ja throughout the map. |
||
| − | * All eight of the |
+ | * All eight of the Marids must either be killed or tamed to win this assault, if you successfully tame all eight marids you will earn full points. Killing a marid will lower the points. |
==Notes== |
==Notes== |
||
| + | |||
| − | * This Assault was trio'd with some difficulty by BLM BLM THF. The BLMs should each nuke once to bring them down to 75% then proceed to throw darts along with the third member untill it disappears. I suggest pulling both marids in the rooms at once to the NPC due to time restraints. |
||
| + | * At G-9/H-9 players can only go east, the ramp going up does not connect to allow players to go west in this tunnel. |
||
| − | * Another strategy is to have two black mages nuking a marid to 50% then bind/sleep/gravity it while using darts. |
||
| + | * There are two obvious shorts cuts. Pullers do not have to go up a ramp until the last two Marids. Take the G-6 ramp going up and go south hanging right. |
||
| − | * This Assault can easily be trio'd with NIN RDM and any job for third. RDM will sleep pull, invisible, then run back to the NPC. NIN tank until 70% and lower and start using darts. while NIN and DD is fighting, RDM will start pulling again to save time. |
||
==Map== |
==Map== |
||
Revision as of 19:42, 16 September 2020
|
Enemies
| Monster | Level | Strengths | Weaknesses | Spawns | Notes |
|---|---|---|---|---|---|
| Marid | 80 |
|
8 | S, Sc | |
| Chigoe | 74 |
|
|
3 | A, S, H |
| Mamool Ja Breeder | 76 - 78 |
|
|
5 | A, L, S |
| Mamool Ja Farrier | 76 - 78 |
|
|
5 | A, L, S |
| Mamool Ja Mahout | 76 - 78 |
|
|
5 | A, L, S |
|
HP = Detects Low HP; M = Detects Magic; Sc = Follows by Scent; T(S) = True-sight; T(H) = True-hearing JA = Detects job abilities; WS = Detects weaponskills; Z(D) = Asleep in Daytime; Z(N) = Asleep at Nighttime; A(R) = Aggressive to Reive participants | |||||
Drops
Walkthrough
Tranquilize or kill all 8 Marids.
- The starting point is in the lower southeast tunnels of the map.
- Talk to the NPC Zimahd to obtain a Thunderguard Dart.
- The darts are used to tame the eight marids.
- There are two marids per room.
- The marids are susceptible to sleep, gravity and bind.
- They move very slowly and are easy to pull.
- It is simple and usually necessary that you pull two at one time and keep one slept or gravitied to beat this assault in time as the Marids are extremely long pulls.
- Pull the marid you are fighting as close to the NPC as possible in order to keep a constant supply of darts.
- The marids become immune to all effects and spells while the darts are taking place (roughly 2-3 seconds).
- When using the tranquilizers, they will either have no effect or fall out.
- If the dart "falls out" the Marid goes into a berserk state. During this time they will run at full speed and hit much harder(300+ on a BLM)
- This only happens if the Marid is awake. Sleeping the Marid prior to using tranquilizers will prevent it from happening. -- Boogers on Hades
- One person (probably a ninja) can hold the marid and damage it to about 75%. Around 75% start using the tranquilizer darts on the marid. Simply use them from your item menu. Once the marid has been tamed it will disappear.
- Someone should be assigned to killing chigoes that the marids will summon. These have very low HP and are easy to kill. A good strategy is to get TP on the marid and use them on the chigoes that pop.
- There are also a number of Mamool Ja throughout the map.
- All eight of the Marids must either be killed or tamed to win this assault, if you successfully tame all eight marids you will earn full points. Killing a marid will lower the points.
Notes
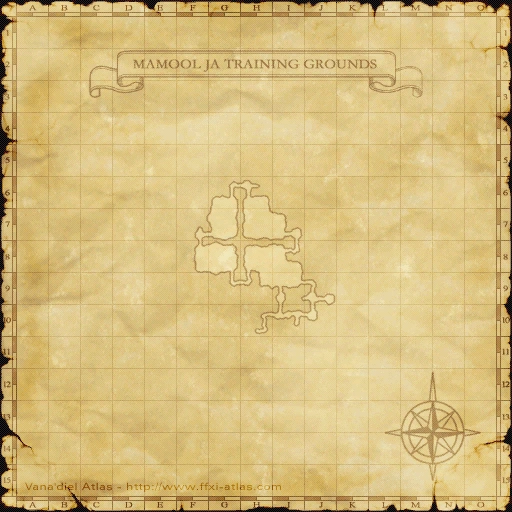
- At G-9/H-9 players can only go east, the ramp going up does not connect to allow players to go west in this tunnel.
- There are two obvious shorts cuts. Pullers do not have to go up a ramp until the last two Marids. Take the G-6 ramp going up and go south hanging right.
Map
| Assault | |
|---|---|
| Leujaoam Missions | |
| Mamool Ja Missions | |
| Lebros Missions | |
| Periqia Missions | |
| Ilrusi Missions | |
| Nyzul Isle Missions | |
| Assault Point Rewards | |
| Nyzul Isle Rewards | |