m (Let's keep testimonials on the talk page or a subpage.) |
No edit summary |
||
| Line 56: | Line 56: | ||
:<p align="justify">Wander to the end of the canyon to find the headstone.</p> |
:<p align="justify">Wander to the end of the canyon to find the headstone.</p> |
||
| − | *'''[[Earth Fragment]]:''' <p align="justify">Go to J-9 in [[Western Altepa Desert]] and enter the [[Quicksand Caves]]. Go up to [[:Image:Quicksand-caves-3.jpg|K-6]] and drop down a sand pit (stand in the center and when it blows sand you'll fall). Follow the path until you exit back into [[Western Altepa Desert]]. Make your way to H-9 through the tunnels (basically south-west) to find the headstone. Sneak and Invisible are recommended highly for any player under Lv. 65.</p> |
+ | *'''[[Earth Fragment]]:''' <p align="justify">Go to J-9 in [[Western Altepa Desert]] and enter the [[Quicksand Caves]]. Go up to [[:Image:Quicksand-caves-3.jpg|K-6]] and drop down a sand pit (stand in the center and when it blows sand you'll fall). Follow the path until you exit back into [[Western Altepa Desert]]. Make your way to H-9 through the tunnels (basically south-west) to find the headstone. Sneak and Invisible are recommended highly for any player under Lv. 65.: for this last part : you arrive at J-7 : go left; then at the first intersection, take left again until you arrive to "Ruby column". Here take right and you arrive to a square at I-8. Take a left and enter the tunnel you see. Go straight and you find at the very end : Cermet Headstone.</p> |
===Battles=== |
===Battles=== |
||
Revision as of 14:09, 21 July 2008
|
Headstone
Walkthrough
- After completing Zilart Mission 4, Grav'iton tells you that you need to collect eight different fragments from across Vana'diel.
- To get a fragment, click on the headstone. Make sure to select yes.
- You must stand very very close to the headstone to obtain the fragment.
- You must see the the message "Obtained key item: XXXX fragment."
- You should always check your key items to ensure that you really obtained it.
- Upon obtaining your final fragment, the mission is complete and you will receive the message, "You now have all 8 fragments of light!"
- Only one player at a time can get the fragment. All others clicking the headstone at the same time will only get a message and have to click on the headstone again.
No Battles
- Dark Fragment:
This fragment is given to you by Grav'iton when you complete ZM4.
- Ice Fragment:
To get this fragment you need to go to Fei'Yin. Once you enter, go to G-9 and head downstairs. Go to I-5 to enter the Cloister of Frost. Note: Sneak will be required to get past the weapons even at 75. The headstone is against the wall past the crystal.
- Note: If you have a level 15+ Summoner (that hasn't already beat the level 20 Shiva fight) and sufficient fame for a Mini Tuning Fork of Ice from Castilchat in Northern San d'Oria, you can warp directly to the Ice headstone.
- Water Fragment:
Go to La Theine Plateau and enter Ordelle's Caves through the canyon at F-7.
- Head east down to I-6 where you'll switch to another map. Follow the tunnel south-west to G-8. At G-8 go east and take the south tunnel at H-9. Follow the stairs upwards and continue south-ish until H-11/12. Drop down the hole here. (Note: It isn't the first hole you come across, it is the second, on the border of H-11 / 12 on the map)
Head east to yet another tunnel (do not fall off any cliffs here!) and follow it upwards. When you reach I-6, head south. Keep going until H-9 where you'll find a tunnel that breaks off to the west. Continue past the bombs to zone into La Theine Plateau again.
Wander to the end of the canyon to find the headstone.
- Earth Fragment:
Go to J-9 in Western Altepa Desert and enter the Quicksand Caves. Go up to K-6 and drop down a sand pit (stand in the center and when it blows sand you'll fall). Follow the path until you exit back into Western Altepa Desert. Make your way to H-9 through the tunnels (basically south-west) to find the headstone. Sneak and Invisible are recommended highly for any player under Lv. 65.: for this last part : you arrive at J-7 : go left; then at the first intersection, take left again until you arrive to "Ruby column". Here take right and you arrive to a square at I-8. Take a left and enter the tunnel you see. Go straight and you find at the very end : Cermet Headstone.
Battles
Notes:
- All required mobs for this are killable by 6 level 64 players or by a good 75nin/37war equiped for evasion, not DD, with a 50+ whm.
- Waiting 15 minutes+ after kill will cause the NM to respawn.
- If the NM was defeated before you, the standard wait time is 15 minutes to respawn the NM.
- Lightning Fragment:
Go to G-9 in Behemoth's Dominion. Kill the mobs in the area, and then touch the headstone. Two Weapons will appear: Legendary Weapon and Ancient Weapon. Defeat them and get the fragment. Note: If the person who touches the headstone has Sneak on them, you can pull just one Weapon without the other one attacking (note that they DO magic aggro). It is possible to defeat only one of them and still get credit; however, you must allow the other Weapon to despawn first before defeating the one you pulled. If you defeat it before the other one despawns, you must pull the other one and defeat it as well.
- Can be easily soloed by a level 67 NIN by Sneak pulling. Be sure to keep it enfeebled, and you should have no trouble with it.
- Fire Fragment:
This one is involved...
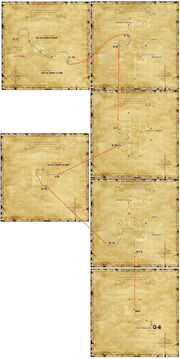
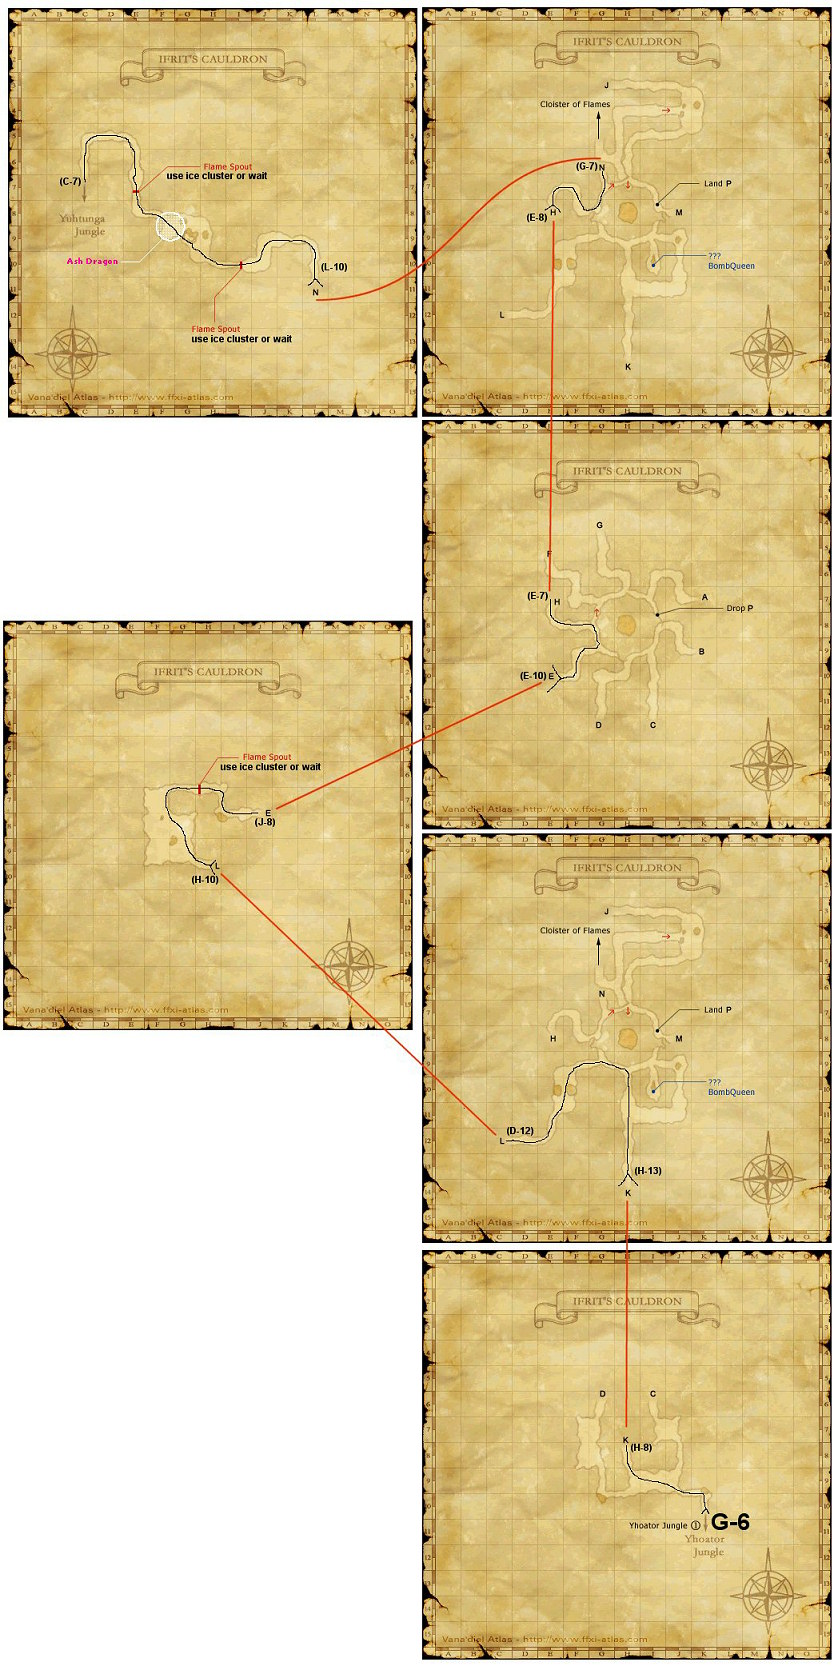
Ifrit's Cauldron Map
View the map to the right for a beautiful illustration; beware, it's kinda large.
Another tip: once you zone into Ifrit's Cauldron and have gone to H-8, just follow the left wall the entire rest of the way until you zone back out. Otherwise, you can follow the directions below.
Enter Ifrit's Cauldron from Yhoator Jungle at G-6. You will want to make sure everyone stays Sneak/Invis'd. Be wary of magic aggroing mobs (ie: Bombs).
You're on Map 5 - Head to J-8 to get to Map 2. There will be a Flame Spout in the way at H-6/7. Just wait, or trade an Ice Cluster to it. If you choose to trade, be wary of a Volcanic Gas nearby - you may have to kill it.
You're on Map 8 - Follow the tunnel all the way to C-7 where you exit out into Yuhtunga Jungle. You'll pass by two Flame Spouts on the way.
So basically it's: G-6 > H-8 > D-12 > J-8 > E-7 > G-7 > C-7
Note: The Ash Dragon is usually guarding the path at the very end (before the last Fire Spout). He has True Sight, and will also use Draw In to warp anyone who has aggro back to him. Fighting it is not recommended; he approaches the level of an HNM and will make mince meat out of almost any group that is here trying to complete the mission at the level it is typically attempted. Time it right and you can possibly walk into the tunnel without incident when he's far enough away from the entrance. Alternatively, you can have a "sacrifice" run in to aggro the dragon and keep him busy long enough for the rest of the party to get past. If one of the party member assisted the person holding the dragon such as casting Haste, Cure, etc, no matter how far away from the dragon, it still able to Draw In this person after the "sacrifice" member's death. Also, be aware of the nearby Volcanic Bombs when attempting to Tractor and Raise, you may need to kill a couple. They are slightly stronger than the Volcanic Gas.
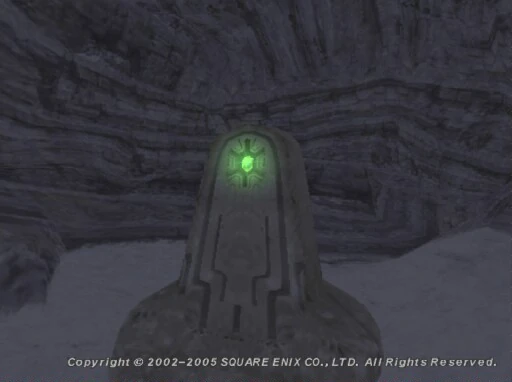
Now that you're in Yuhtunga Jungle, go to K-7 through one of the tunnels under the waterfall. Go to the headstone at L-6. Or, follow the left wall again and take the second tunnel. The Cermet Headstone is located exactly at the North Western edge of L-7
Two Opo-Opo will spawn when you touch the headstone: Carthi and Tipha. They both aggro. Defeat them and get your fragment.
- Note: You can Sneak/Deodorize pull Tipha, Carthi will stay behind the headstone while you kill Tipha.
- Note: We just verifed this now 1 June, 2008; Shaawn & Nastirh on Asura Server.
- Note: Yes verifed ! Used this Methode today 17 July 2008 , Dickerchen on Remora
- Note: While you're at it, if you want an Opo-opo Necklace, trade a Garnet to this headstone after obtaining the fragment.
- Wind Fragment:
Go to F-7 in Cape Teriggan to find a secret tunnel. Follow this tunnel north out into the open again. Then go to another tunnel at G-5. Follow it back to find the head stone at H-5. A Shadow called Axesarion the Wanderer will spawn when you touch the headstone. This NM resides Dimensional Death frequently. Also, beware of Goblins that wander around here; since it is an outdoor area they will respawn quickly upon being defeated (5 minutes Earth time).
Note: While you're at it, if you want a Flagellant's Rope, trade a Rain Lily to this headstone after obtaining the fragment.
- Light Fragment:
Go to The Sanctuary of Zi'Tah and head to J-9. Follow a path north-ish to I-7 to find the headstone. When you touch the headstone a Doomed type mob will appear, called Doomed Pilgrims. It is generally regarded as the most difficult of the headstone NMs and hits hard and fast, so be careful. After it's defeated, get your fragment.
- Note: Those that have completed Zilart Mission 7 - The Chamber of Oracles can click on the headstone and get a Bat Earring.
- All these battles is soloble by a decent equipped THF75/NIN37 with the help of soothing healer NPC LV60 +
Game Description
- Mission Orders
- Somewhere on the island of Zepwell lie the remains of an ancient temple.