| Line 18: | Line 18: | ||
== Walkthrough == |
== Walkthrough == |
||
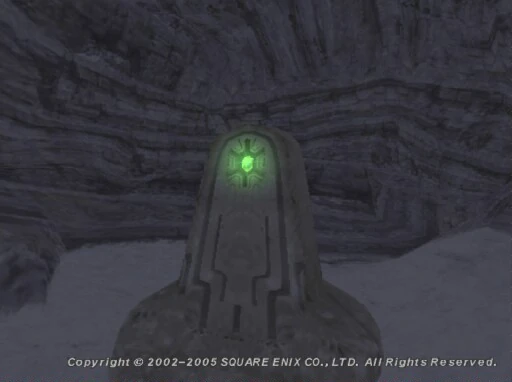
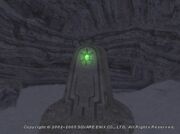
[[Image:Headstone.jpg|thumb|A Cermet Headstone]] |
[[Image:Headstone.jpg|thumb|A Cermet Headstone]] |
||
| − | *'''If you're just doing Rise of the Zilart for [[:Category:Rhapsodies of Vana'diel Missions|Rhapsodies of Vana'diel]], you don't need to do |
+ | *'''If you're just doing Rise of the Zilart for [[:Category:Rhapsodies of Vana'diel Missions|Rhapsodies of Vana'diel]], you don't need to do the following or get to any further missions to progress.''' |
*After completing [[The Temple of Uggalepih]], [[Grav'iton]] tells you that you need to collect eight different fragments from across [[Vana'diel]]. |
*After completing [[The Temple of Uggalepih]], [[Grav'iton]] tells you that you need to collect eight different fragments from across [[Vana'diel]]. |
||
**The {{KeyItem}}[[Dark Fragment]] was obtained from completion of the previous mission. |
**The {{KeyItem}}[[Dark Fragment]] was obtained from completion of the previous mission. |
||
Revision as of 16:48, 31 January 2020
| Mission Name | Headstone Pilgrimage |
|---|---|
| Number | ZM5 |
| Start NPC | Grav'iton - Sacrificial Chamber |
| Level | 60+ |
| Title Granted | Bearer of the Eight Prayers |
| Reward | |
| Repeatable | No |
| ← Previous Mission | Next Mission → |
|---|---|
| The Temple of Uggalepih | Through the Quicksand Caves |
Walkthrough
A Cermet Headstone
- If you're just doing Rise of the Zilart for Rhapsodies of Vana'diel, you don't need to do the following or get to any further missions to progress.
- After completing The Temple of Uggalepih, Grav'iton tells you that you need to collect eight different fragments from across Vana'diel.
- The
 Dark Fragment was obtained from completion of the previous mission.
- The
- To obtain one, examine a headstone and choose to remove the fragment.
- Only one fight is required per party/alliance requiring the key item.
- It is a good idea to check your list of Temporary Key Items to ensure you have obtained the fragment.
- Upon obtaining your final fragment, the mission is complete and you receive the message, "You now have all 8 fragments of light!"
- See the Discussion page for Testimonials and Strategies.
No Battles
Water Fragment
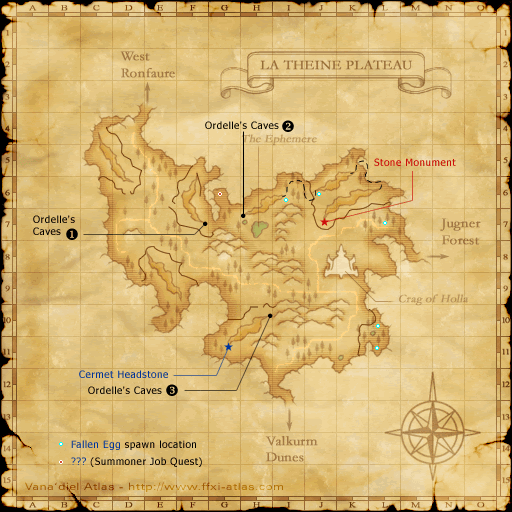
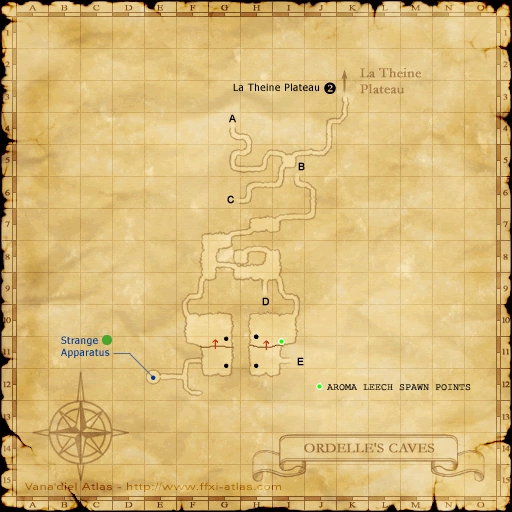
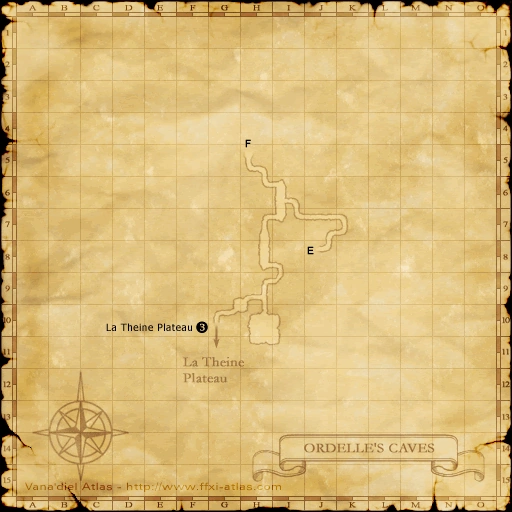
- Travel to La Theine Plateau and enter the Ordelle's Caves through the canyon at (F-7).
- Head east, then south to (I-6), which is the 2nd map on most atlas sites.
- Onto Map 1, enter the tunnel leading to the south at (H-9).
- Follow the path leading upwards and continue south-east, to the southeastern little room at (H-11)/(H-12) of Map 2 and drop down the hole.
- Now head east to (I-11) to yet another tunnel leading upwards to the map 3. Mobs here are aggressive,
- Keep going until you reach (I-6), and head south until (H-9) and go west.
- Continue past the Napalms and the occasional elementals to exit to the La Theine Plateau.
- Wander to the end of the canyon to find the Cermet Headstone to extract the Water Fragment.
- NOTE: Alternatively, you can use the Geomagnetic Fount and run to the other end of the chasm.

Ice Fragment
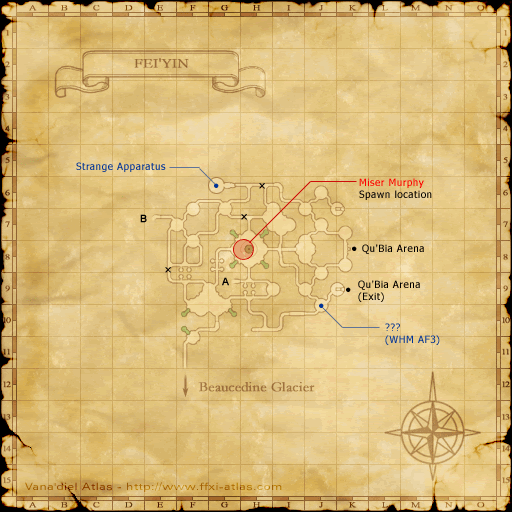
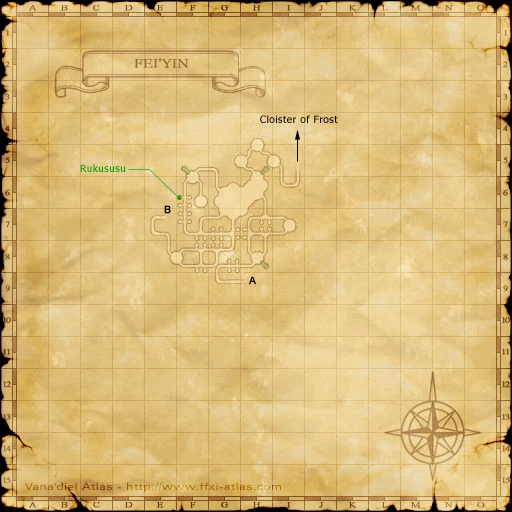
- The Ice Fragment is in the Cloister of Frost
- Travel to Fei'Yin.
- Players that have access to Fei'Yin Home Point #2 can teleport there. The Cloister is a short walk north.
- Characters that have the Mini Tuning Fork of Ice can warp to the Cloister directly from Northern San d'Oria.
- Players with access to Domenic's Warp service can warp to Qu'Bia Arena for quick travel to Fei'Yin.
- Once inside, go to (G-9) and head downstairs.
- Next, go to (I-5) and enter the Cloister of Frost.
- Sneak is required to get past the Evil Weapons without aggravating them near the Cloister of Frost, even at level 99.
- The Cermet Headstone is against the wall, past the protocrystal.
Earth Fragment
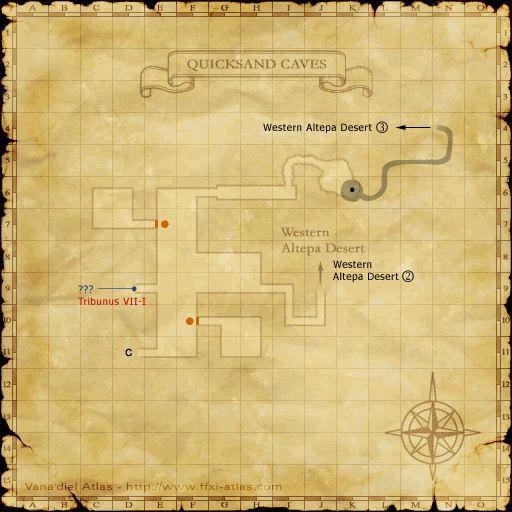
- It's recommended you do this one last since the next mission takes place in Quicksand Caves.
- (Last as in after you've collected all the other fragments including the ones listed below.)
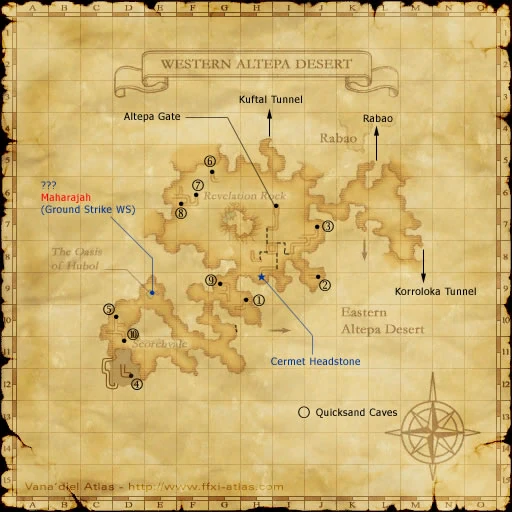
- Travel to Western Altepa Desert and enter the Quicksand Caves at (J-9).
- If you are under 65, you can grab Circumspection from the Grounds Tome once inside to avoid aggro.
- You can also use the Unity Teleport (Content Level 125) to Western Altepa Desert to skip Quicksand Caves since it drops you right above the pit that the caves get you to.
- After zoning, drop down through the sand pit at (K-6) then head east to re-enter Western Altepa Desert.
- Drop down and follow the below ground level path/tunnel to (H-9) and touch the Cermet Headstone.
Battle Time
After defeating the monster(s) at a headstone, you have 15 minutes to collect your fragment, or you will have to respawn them.
- Attempting to remove a fragment after the monsters have spawned but are still undefeated results in the message:
- Don't you have something better to do right now?
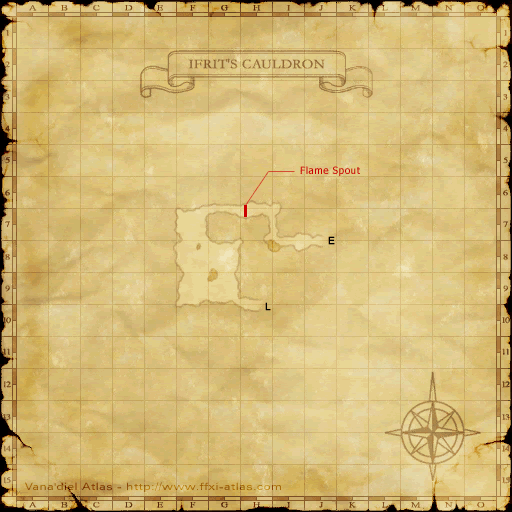
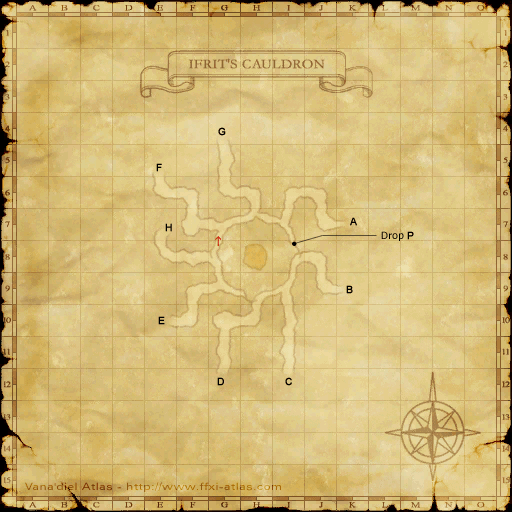
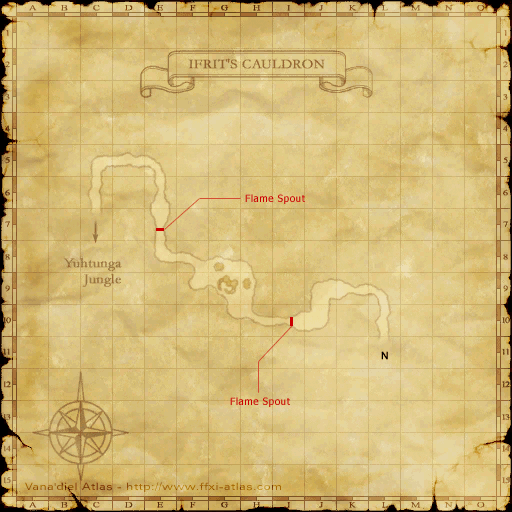
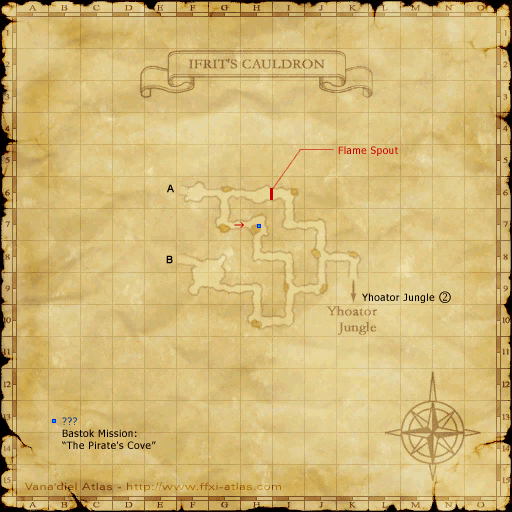
Fire Fragment
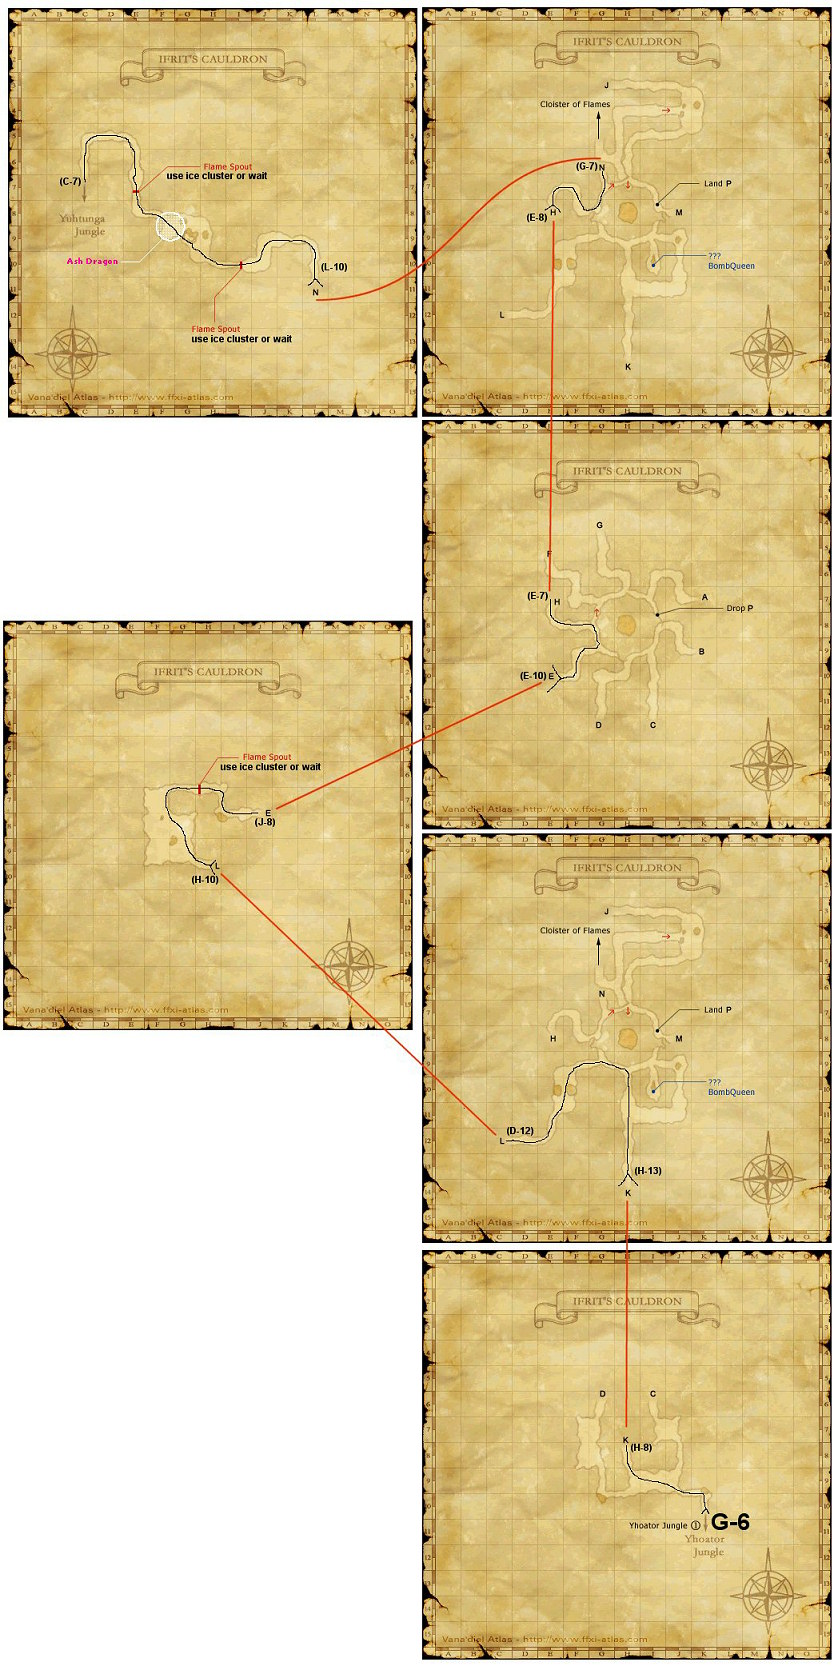
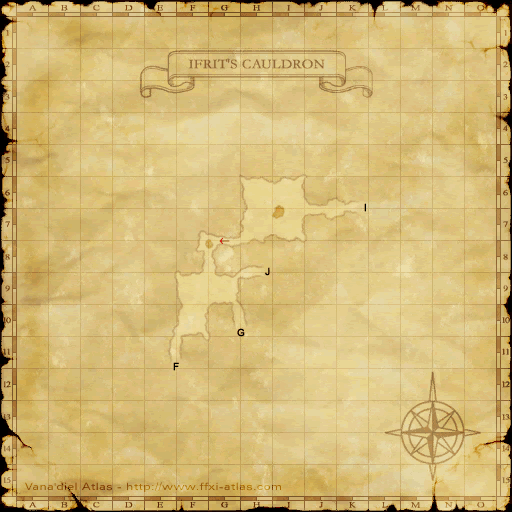
Ifrit's Cauldron Map
- If you want the Opo-opo Necklace, it can be obtained by trading a Garnet to this headstone AFTER defeating the NMs(optional).
- This one involves navigating through Ifrit's Cauldron. Refer to the map on the right. And bring 3 or more Ice Clusters for Flame Spouts.
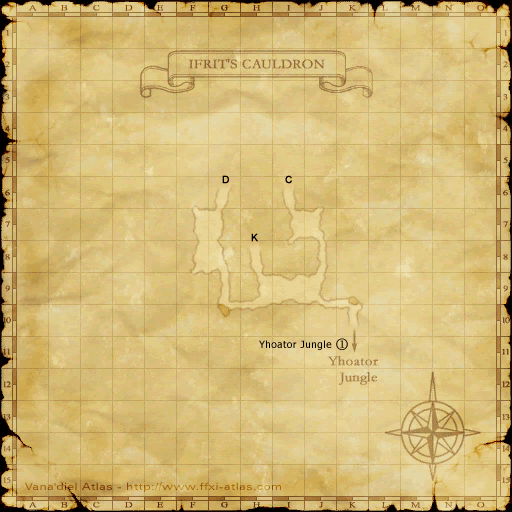
- General method: Zone into Cauldron from the left Yhoator entrance, head shortly to tunnel K which is northwest after you enter, and then hug the left wall all the way through.
- Essentially, once you enter Ifrit's Cauldron and arrive to (H-8), follow the left wall for the rest of the way until you exit to the jungle.
- Everyone needs a form of Sneak and Invisible. Be aware that Bombs detect the use of magic in addition to sight.
- Magic can be especially dangerous due to the fact that at some point, Flame Spouts block the way and they always have at least one Bomb nearby.
- These spouts go down for a while occasionally, but they can be immediately settled by trading an Ice Cluster to them.
- NOTE: You can take the Survival Guide which will put you right at (G-6) Yhoator Jungle entrance.
- Enter Ifrit's Cauldron from Yhoator Jungle, at (G-6).
- On the Map 4 - Venture to (H-8) to get to the Map 7.
- On the Map 7 - Go to (D-12) to get to the Map 5.
- On the Map 5 - Head to (J-8) to get to Map 2.
- On the Map 2 - Go to (E-7) to get back to the Map 7.
- On the Map 7 - Go to (G-7) to get to the Map 8.
- On the Map 8 - Follow the tunnel all the way to (C-7), where you exit to that closed-off northeastern part of Yuhtunga Jungle.
- There are two Flame Spouts on the way.
- These will go down on their own within approximately 5 minutes (3 hours game time).
- There are two Flame Spouts on the way.
- Be alert of the Ash Dragon near the end (before the last Flame Spout). It has a wide sight and sound detection range and uses Draw In. Time it right and you can walk into the tunnel without a problem when it is far enough from the entrance.
- Now in Yuhtunga Jungle, go out the tunnel and turn left and then keep going straight to find the Cermet Headstone.
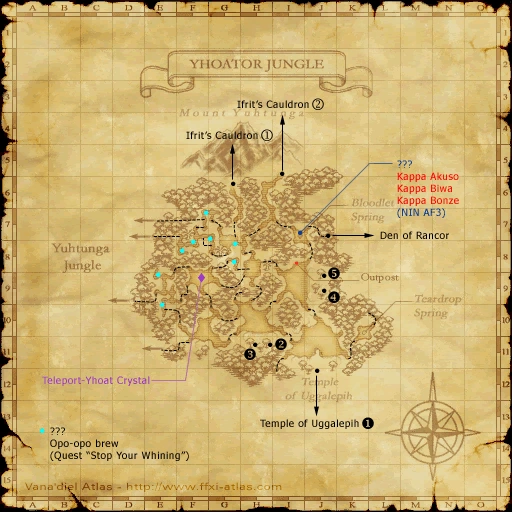
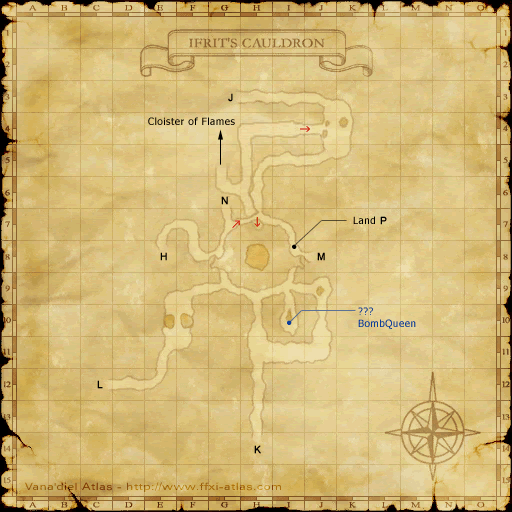
- If you are traveling from the Cloister of Flames home point: Head to the J exit on map 7 at G-3. Then take F exit on map 3 at E/F-11. Then take A exit on map 2 at K-7. Then take exit B on map 1 at F-8. Then take exit D on map 2 at G-11. From here travel the original route above.
Two Opo-Opos spawn upon examining the stone: Carthi and Tipha.
- After defeating the Opo-Opos examine the Cermet Headstone again to receive the Fire Fragment.
- After defeating the Opo-Opos examine the Cermet Headstone again to receive the
Wind Fragment
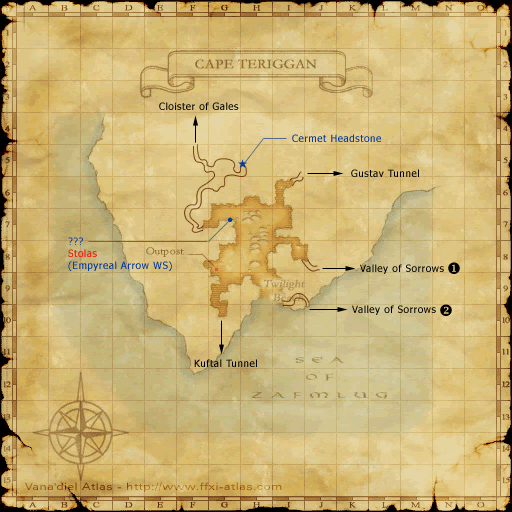
- The Flagellant's Rope can be obtained by trading a Rain Lily to this headstone.
- Travel to Cape Teriggan (F-7) to find an uncharted tunnel.
- You can take the Home Point #1 at the Cloister of Gales. From there, simply follow the left wall.
- If you've never been there, you can Unity warp (Level 128 category) to Cape Teriggan.
- Follow this tunnel north out into the open again, then enter another tunnel at (G-5) which will have the headstone at (H-5).
- A Shadow called Axesarion the Wanderer spawns when you examine the headstone.
- Uses Dimensional Death frequently.
- Immune to Head Butt and possibly all other forms of Stun as well. (Confirmed using Sudden Lunge and Stun)
- The Goblins that wander around here respawn in 5 minutes.
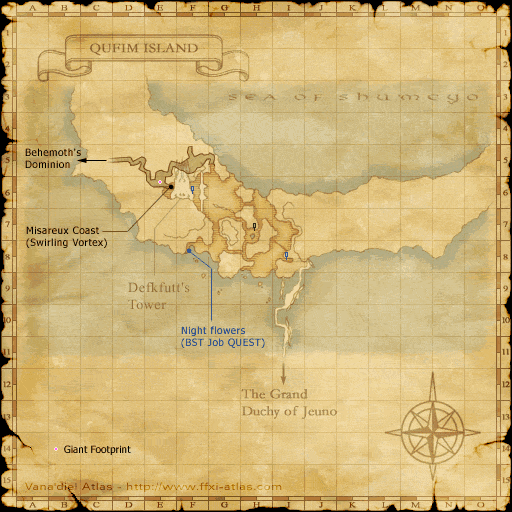
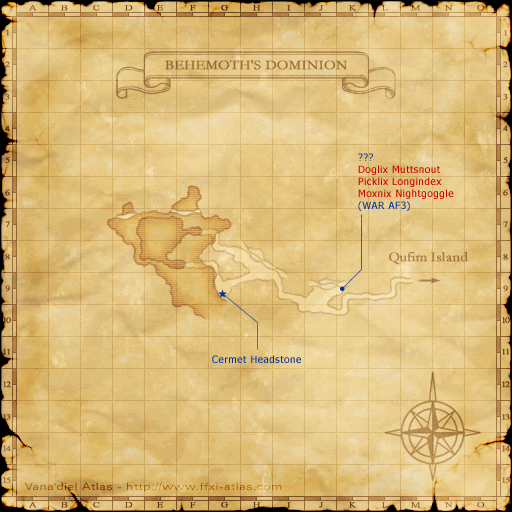
Lightning Fragment
- Travel to Behemoth's Dominion.
- Fast way: Unity warp (Level 135 category) to Behemoth's Dominion or use a Survival Guide.
- Normal way: Enter the tunnel at (D-5) of Qufim Island and follow it to the west.
- Once in Behemoth's Dominion, proceed to (G-9).
- Two Weapons appear upon examining the headstone: Legendary Weapon (RDM) and Ancient Weapon (WAR).
- If the character who examines the headstone has Sneak applied, they do not attack immediately.
- You do not need to kill both to get the fragment. If sneak was applied. Move to a safe distance, grab the Ancient Weapon, kill it and wait for the Legendary Weapon to despawn.
- If the character who examines the headstone has Sneak applied, they do not attack immediately.
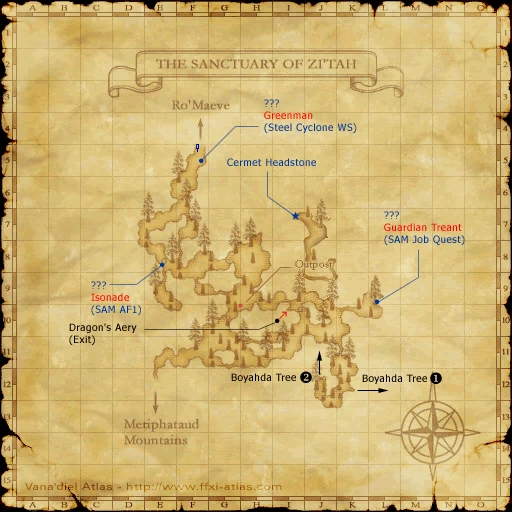
Light Fragment
- Characters that have completed the Zilart Mission 7 - The Chamber of Oracles, can obtain a Bat Earring from this headstone.
- Travel to The Sanctuary of Zi'Tah and head to the top-right side of (J-9).
- Hug left and follow the uncharted path, leading towards north, to (I-7) to find the headstone.
- The Doomed named Doomed Pilgrims spawns here when the stone is examined. It is generally regarded as the most difficult of the headstone fights. It hits hard and fast, so be careful. High evasion works well.
Game Description
- Mission Orders
- Somewhere on the island of Zepwell lie the remains of an ancient temple.