Trading items to them has a chance of rewarding items or a costume effect appropriate for the year. Possible rewards:


Most of the time, trading items only grants a short-duration buff including Protect, Shell, Enthunder, Shock Spikes.
This year's lucky animals can be found prancing through:
West Ronfaure / East Ronfaure / La Theine Plateau / Valkurm Dunes / Jugner Forest / Batallia Downs / North Gustaberg / South Gustaberg / Konschtat Highlands / Pashhow Marshlands / Rolanberry Fields / Beaucedine Glacier / Western Altepa Desert / Eastern Altepa Desert / West Sarutabaruta / East Sarutabaruta / Tahrongi Canyon / Buburimu Peninsula / Meriphataud Mountains / Sauromugue Champaign / The Sanctuary of Zi'Tah / Yuhtunga Jungle / Yhoator Jungle / Qufim Island / Xarcabard
Wide Scan is essential to tracking them down.
Ake-Ome Spirit
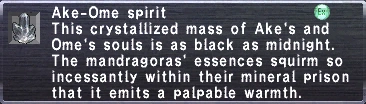
- A Monstrosity item that unlocks the species called
New Year Mandragora (MON). See also: Ake and Ome.
- Talk to Ake or Ome next to the Odyssean Passage.
- Talking to either while in possession of the Ake-Ome Spirit will give you a costume.
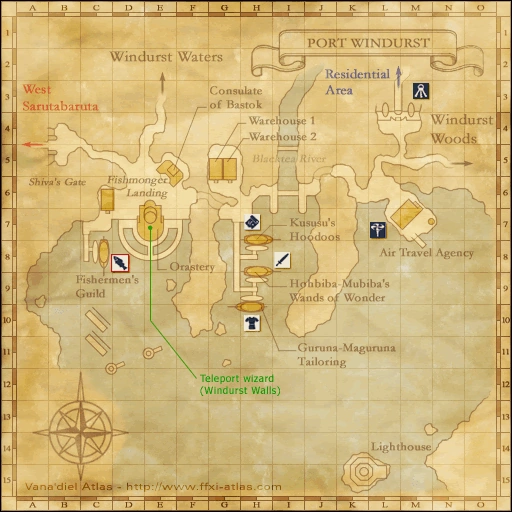
Holiday Moogle Stands
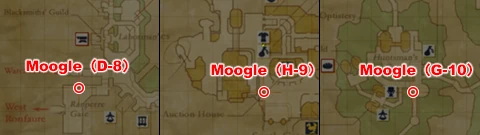
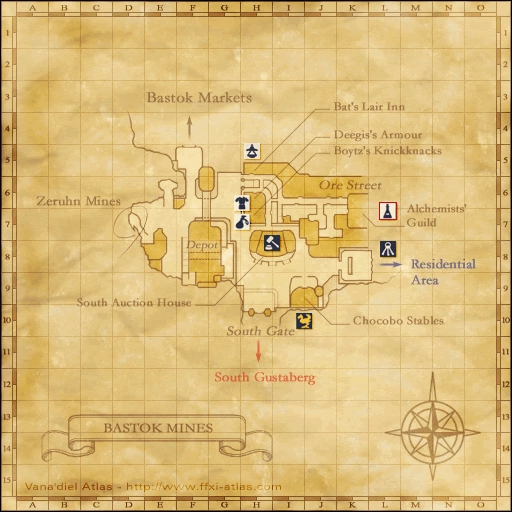
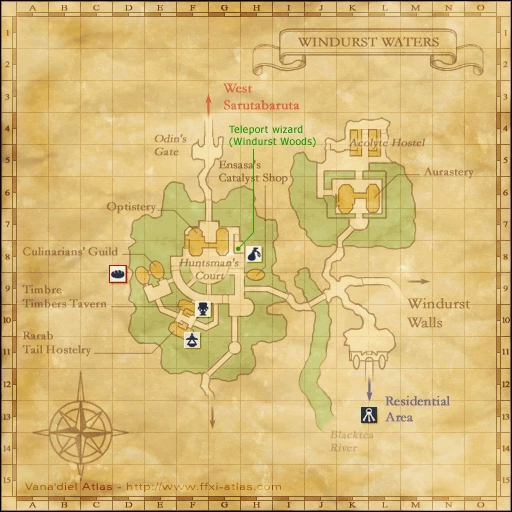
Locations: Northern San d'Oria (D-8) Bastok Mines (H-8) Windurst Waters, North (G-10)
Left Moogle's Wares
 Popstar - 40 gil
- Brilliant Snow - 40 gil
- Sparkling Hand - 25 gil
- Air Rider - 100 gil
- Cracker - 8 gil
- Twinkle Shower - 25 gil
- Little Comet - 25 gil
- Dream Hat - 10,000 gil
- San d'Orian Tree - 10,000 gil
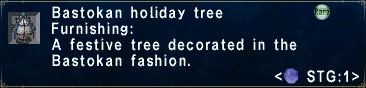
- Bastokan Tree - 10,000 gil
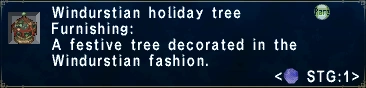
- Windurstian Tree - 10,000 gil


Right Moogle's Wares
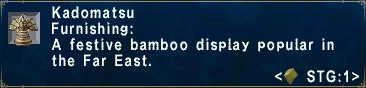
- Kadomatsu - 5,000 gil
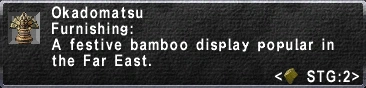
- Okadomatsu - 10,000 gil
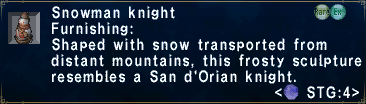
- Snowman Knight - 10,000 gil
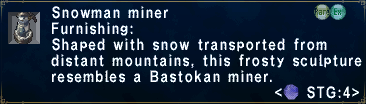
- Snowman Miner - 10,000 gil
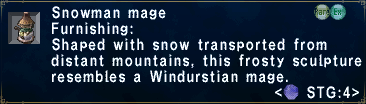
- Snowman Mage - 10,000 gil
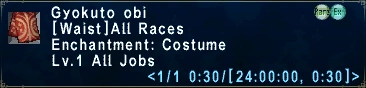
- Gyokuto Obi - 10,000 gil
- Snowman Cap - 10,000 gil
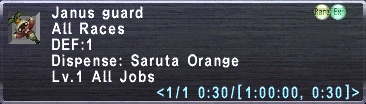
- Janus Guard - 10,000 gil
- Hagoita - 10,000 gil
- Floral Hagoita - 10,000 gil
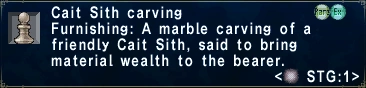
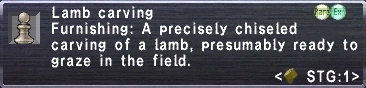
- Lamb Carving - 10,000 gil
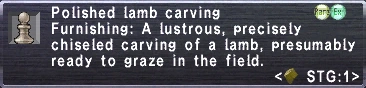
- Polished Lamb Carving - 10,000 gil
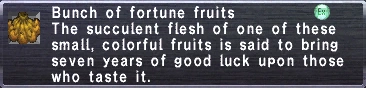
- Fortune Fruits - 777 gil
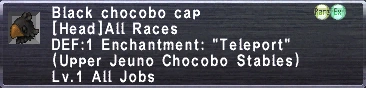
- Black Chocobo Cap - 10,000 gil
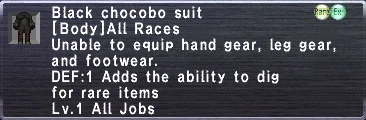
- Black Chocobo Suit - 10,000 gil


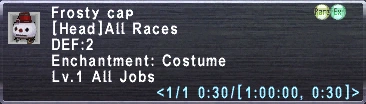
Synergizing (no skill required) a Snowman Cap with a Brilliant Snow will yield a ![]() Frosty Cap
Frosty Cap ![]()
![]() .
.
New Year's Gift
Talk to one of the Event Starter NPCs in the 3 nations. Bring any one of the kinds of New Year's Gifts to the Event Starter NPC and choose the second option to obtain the ![]() Battledore
Battledore ![]()
![]() .
.

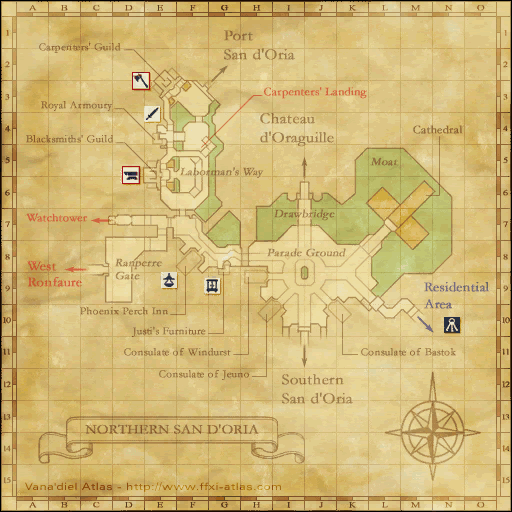
- Bunta, Bastok Markets (E-10)
- Jeanparmand, Northern San d'Oria (D-8)
- Pyru-Copyru, Port Windurst (B-4)
- You need to speak with the event starters to trade the item in, even if you have already obtained a New Year's Gift.

Options:
- Let you ask Grandpa a question.
- Give you something from my pocket. (Choose this one)
- Tell you more about Grandpa.
- After obtaining the Battledore, on subsequent trades you will receive fireworks when selecting option 2.
- Note: If you trade the New Year's Gift back, or you "use" the Gift, you will receive a special buff for one hour depending on which language it is written in.
Copy of "Hoary Spire"

- Equip the Battledore and board the Windurst-Jeuno Airship. Travel may originate in either Windurst or Jeuno for this portion of the event.
- Locate the NPC Dilauriome on the West side of the upper deck. Talk to Dilauriome while having the Battledore equipped. Bring him two Black Ink and one Bast Parchment to obtain Copy of "Hoary Spire".
Bring Cheer To Those In Need
You heard the Moogles! Grab your Caver's Shovel and saddle up; it's time to trample those Goblins in a race to the cards! Search high and low for the Overturned Soil outside of the nation cities in order to unearth the cards of fortune! But don't forget to bring your friends, because for every extra party member you have, you'll find +1 random card in each spot they've been hidden! Once you've gotten the right cards, return to the Moogles to reap your merry holiday bounty!
- Don't actually need a Caver's Shovel. That was just in the official story.
The moogles are found in the following locations:
- Windurst Waters, North (F-5), near exit to West Sarutabaruta
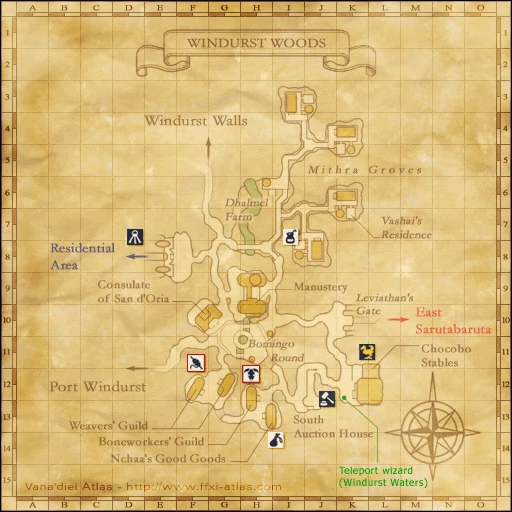
- Windurst Woods (K-10), near exit to East Sarutabaruta
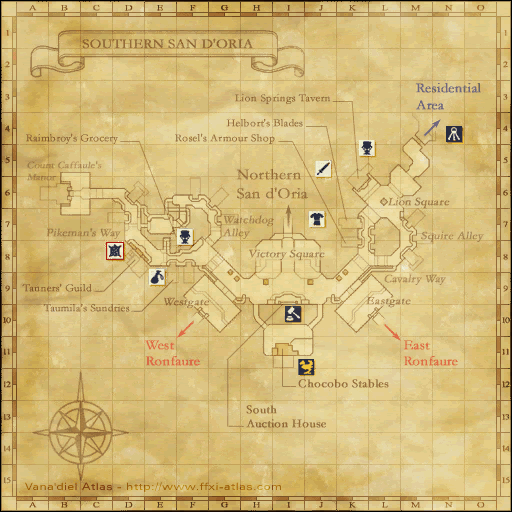
- Southern San d'Oria (K-9)
- Northern San d'Oria (D-8)
- Bastok Markets (G-8), in front of the fountain.
- Bastok Mines (I-9), next to Christina.
Card Combinations
Trade in the following cards combos to the Event Moogle for the corresponding rewards and gifts!
Initial Three
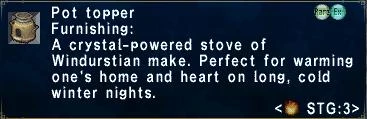
The initial three combo bestows upon you a fantastical new stove (one from Bastok, San d'Oria and Windurst!) for your cozy Mog House! Just in time for the cold, Winter nights too!


From Bastok:
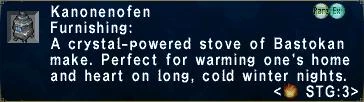
From San d'Oria
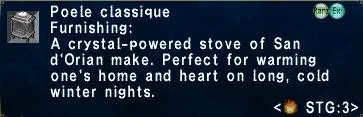
From Windurst:
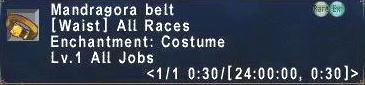
Secondary Three
The secondary three combo adds a dazzling new belt with audacious, mooglerific motif to your already-festive raiment (they have mystic transformation abilities too)! Wear it while you help your friends for a +2 to your "In Your Face Goblins!" job trait!


From Bastok:
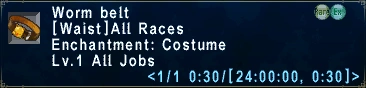
From San d'Oria:
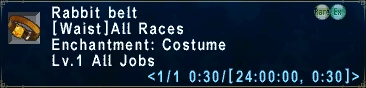
From Windurst:
Straight Seven
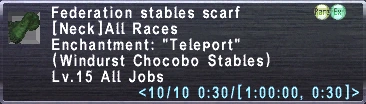
The straight seven combo is the ultimate combination you can make with the cards of fortune, and for good reason too! Turning in all seven cards at once is going to score you a marvelous piece of attire that'll not only keep your neck warm against the frosty weather, but spirit you away to any one of the three starter nations within the blink of an eye!
Players may only receive this bonus once they have received the rewards from Initial Three and Secondary Three.

From Bastok:
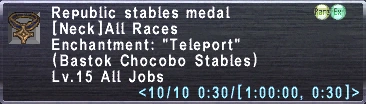
From San d'Oria
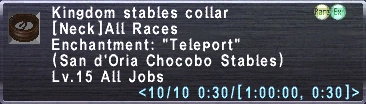
From Windurst:
Digging up Cards
Goblins will run towards where the cards are so following them can allow you to find the next card spawn area. However, because they are on chocobos, without movement speed (such as flee) you will quickly be left behind if they are running far away.
Additionally, each zone seems to have preferences for which cards drop with which frequency. Most common cards in each zone listed below in bolded text
- Ronfaure: Bishamon Card, Daikoku Card, Benten Card, Fukurokuju Card, Hotei Card, Jurojin Card
- La Theine Plateau: Benten Card, Daikoku Card, Bishamon Card, Hotei Card, Jurojin Card, Fukurokuju Card.
- Jugner Forest: Bishamon Card, Hotei Card, Jurojin Card, Benten Card, Fukurokuju Card
- Batallia Downs: Ebisu Card
- South Gustaberg: Bishamon Card, Benten Card, Hotei Card, Daikoku Card, Jurojin Card, Fukurokuju Card, Ebisu Card
- Konschtat Highlands: Benten Card, Hotei Card, Daikoku Card, Fukurokuju Card, Jurojin Card
- Pashhow Marshlands: Fukurokuju Card, Hotei Card, Jurojin Card
- Rolanberry Fields:
- East Sarutabaruta: Benten Card, Daikoku Card, Bishamon Card, Jurojin Card, Fukurokuju Card, Hotei Card, Ebisu Card.
- Tahrongi Canyon: Bishamon Card, Daikoku Card, Fukurokuju Card Hotei Card
- Meriphataud Mountains: Hotei Card, Jurojin Card, Fukurokuju Card
- Sauromugue Champaign: Ebisu Card, Daikoku Card, Jurojin Card, Fukurokuju Card, Benten Card, Hotei Card.
Because of this, it is efficient (especially if working towards the items with friends) to move between areas if you aren't having luck with the "rare cards" in a specific zone.
Ebisu Card is rare everywhere!
"Overturned Soil"
Goblin Riders and Fablinix are in every area listed above and are competing with you to find "Overturned Soil." When they dig at one it will vanish, so be fast!
- Being in a party will increase cards dropped by "overturned soil" by the number of members.
- "Overturned soil" can occasionally spawn the Wayward Worm who will immediately cast Bind or Bindga.(Wayward Worm can be attacked but not killed and does not attack but depops after spell is cast.)
- Although the goblins are on a Chocobo , "Overturned soil" cannot be examined while on a mount.
- Movement Speed of some type helps, as well as some way to erase bind if you get a worm. A pet, like Carbuncle, will auto-attack (but not kill the worm, as it can't be killed) and stop it from binding you. Also, having Wide Scan to track the Goblin Riders helps a lot.