m (→Facts and Info) |
|||
| Line 42: | Line 42: | ||
:*I started this guide at level 14 PUP, mostly because I wanted to challenge myself. I had exactly 2 guard skill at the time. |
:*I started this guide at level 14 PUP, mostly because I wanted to challenge myself. I had exactly 2 guard skill at the time. |
||
| + | :*At the time of writing, I was not at the level cap. This was to be an ongoing chronicling of my endeavors. |
||
| − | :*I AM NOT a 75PUP. Getting there though... |
||
:*If you truly love your puppet, you will pour two things into it: [[Gil]] and [[Automaton Oil]]. Make friends with an Alchemist. |
:*If you truly love your puppet, you will pour two things into it: [[Gil]] and [[Automaton Oil]]. Make friends with an Alchemist. |
||
:*This guide will require you to fight EM's and Toughs. If you can't do it, you're doing something wrong. If you still can't do it, consider inviting your adventuring fellow NPC. |
:*This guide will require you to fight EM's and Toughs. If you can't do it, you're doing something wrong. If you still can't do it, consider inviting your adventuring fellow NPC. |
||
| Line 48: | Line 48: | ||
:*/MNK gives counter: stay away. |
:*/MNK gives counter: stay away. |
||
:*/BLU can be great for Cocoon if you have the refresh/mp for it. |
:*/BLU can be great for Cocoon if you have the refresh/mp for it. |
||
| − | :*I personally believe that /WAR is the best choice for the job. |
+ | :*I personally believe that /WAR is the best choice for the job. |
:*This might just be the only time you will ever regret seeing the words "Level Up!" |
:*This might just be the only time you will ever regret seeing the words "Level Up!" |
||
:*You will be keeping hate off your puppet at all times. |
:*You will be keeping hate off your puppet at all times. |
||
| − | :*This requires the CureBot setup. Stormwaker is a must. Soulsoother head if you have it. |
+ | :*This requires the CureBot setup. Stormwaker is a must. Soulsoother head is a plus if you have it. |
:*[[WHM]], [[RDM]], and [[SCH]] friends are great fun ways to mix it up (rather than sticking to making the puppet heal.) Remember, you have to enjoy this to some extent :) |
:*[[WHM]], [[RDM]], and [[SCH]] friends are great fun ways to mix it up (rather than sticking to making the puppet heal.) Remember, you have to enjoy this to some extent :) |
||
:*You will need to use the Deactivate trick to keep your puppet's MP up, so keep your puppet's HP at 100% all the time. |
:*You will need to use the Deactivate trick to keep your puppet's MP up, so keep your puppet's HP at 100% all the time. |
||
| − | |||
==Master Setup== |
==Master Setup== |
||
Latest revision as of 10:24, 25 February 2014
| This Article is a Community Guide |
|---|
| Guides exist as a community effort to help fellow players navigate the game. Opinions and strategies in their content may vary from editor to editor, but feel free to add new or correct out of date information. Guides are subject to the same editing standards of other FFXIclopedia articles. |
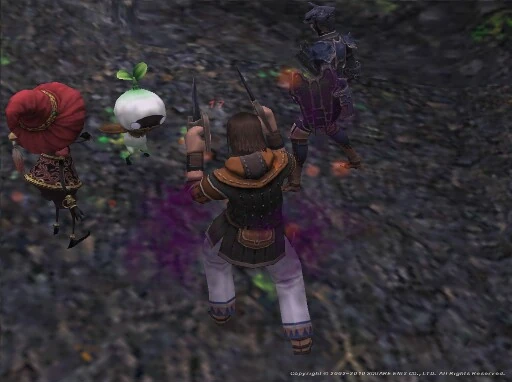
Guarding a Critical Hit at Yhoator Jungle
Updates
Lot's of things going on personally for me, but just to sum up: - Guarding is finally capped for the original goal, Level 75: 240/240 (248 if you count merits.) Mar 16, 2012. - Updates came out 12-14-11, which might make some of my tactics outdated. I don't plan on revising them for the new AI (which is supposed to be awesome) but I believe that the addition of Stoneskin and Phalanx will make the arduous goal of capping Guard a much easier task to complete.
Updates still coming soon. Revising below a bit:
Lesser Gaylas / Greater Gayla (40-44)
Orcs (41-44)
Goblins! (44-49)
Desert Beetle (47-51)
Lesser Roc (49-53) << This was experimental
Blazer Beetle (52-54)
Chamber Beetle (56-58)
Robber Crab (60-63)
Mourioche (62-68)
Korrigan (72-75)
- Keep on Guarding!!! {Tetsujin of Cerb/Hades}
So, I've seen lots and lots of posts on forums that follow the format: "My guarding skill is x, where should I train?"
I'm not 75 yet, and I'm definitely not an expert. Guarding is just what I do - it makes my playing experience more enjoyable, and I'm here to share that experience.
Feel free to post suggestions - So long as they are based on testimonies (e.g. you've gotten decent guard skillups, especially at an Even Match or Tougher level)
What this Guide is About
Essentially, I'll be outlining my progress as a PUP attempting to cap guarding. This helps both players at high levels with uncapped skills (offers good camps) and Puppetmasters who want to level up with their abilities maxed out - a tough and entertaining challenge to take up.
The reason I say "outlining my progress" is because of the fact that I'm running through a testimony in itself (a "Tetsimony" if you don't mind the pun.) It also proves that this isn't hypothetical because I'm actively doing this.
Facts and Info
If you more or less know your way around pup, go ahead and scroll down to the camps.
- I started this guide at level 14 PUP, mostly because I wanted to challenge myself. I had exactly 2 guard skill at the time.
- At the time of writing, I was not at the level cap. This was to be an ongoing chronicling of my endeavors.
- If you truly love your puppet, you will pour two things into it: Gil and Automaton Oil. Make friends with an Alchemist.
- This guide will require you to fight EM's and Toughs. If you can't do it, you're doing something wrong. If you still can't do it, consider inviting your adventuring fellow NPC.
- If you "need" to sub dancer, you're doing it wrong.
- /MNK gives counter: stay away.
- /BLU can be great for Cocoon if you have the refresh/mp for it.
- I personally believe that /WAR is the best choice for the job.
- This might just be the only time you will ever regret seeing the words "Level Up!"
- You will be keeping hate off your puppet at all times.
- This requires the CureBot setup. Stormwaker is a must. Soulsoother head is a plus if you have it.
- WHM, RDM, and SCH friends are great fun ways to mix it up (rather than sticking to making the puppet heal.) Remember, you have to enjoy this to some extent :)
- You will need to use the Deactivate trick to keep your puppet's MP up, so keep your puppet's HP at 100% all the time.
Master Setup

Seer's Slacks used here to adjust my evasion rate without sacrificing too much defense.
I aim my gear towards evasion style pup. Sometimes during guard training I'll swap out as much gear as I can to lower the proc rate on evasion. Beetle earrings are good for minus evasion early in. Adjust your gear for survivability based on the difficulty and accuracy of the mob. Remember, enmity minus is almost never good.
I macro the Buffoon's Collar and AF hands in when I maneuver. These two are must-haves as they raise the overload threshold.
Also, you'll wanna guard as often as possible so...Guarding Earring, Adargas, Black Adargas, Guarding Torque, and Boxer's Mantle.
These are the only Guard Skill Enhancing items available to PUP. If you have em, use em. They're definitely worth it.
Automaton Setup
Again, you'll be wanting to stick with the stormwaker frame/head. If you have soulsoother, even better. You'll be using a CureBot setup or else you'll die trying to get skillups.
- At times, you may fight mobs that inflict status debuffs like poison, paralyze, and blind. If this is the case, do not use the Soulsoother Head. It will waste "turns" removing these debuffs rather than curing you (and potentially cause your death). In these situations, use the Stormwaker Head.
- Skillup targets generally avoid these kinds of mobs.
Below is a list of attachment must-haves and recommendations. Remember, if you love your puppet, you will spend gil on it.
Necessary
- Damage Guage: So long as you have one Light Maneuver up, this attachment will make sure the automaton places Curing at the top of its priorities. Also adjusts the HP% required to trigger cures. Very important.
- Mana Booster: Thanks to a much needed PUPdate, this now gives Fast Cast.
- Mana Tank I&II: Gives your puppet a nice MP boost and strong refresh if you pop Dark Maneuvers. Use both!
- If you're using the Soulsoother Head, you don't have room for both. You'll need to get used to Deactivating.
Great to Have
- Stealth Screen: Enmity Minus for the automaton. I never have Water Maneuvers up,
but the base adjustment it gives is worth it.this is a passive effect.
- Loudspeaker I&II: Improves MAB by a lot. Since I sometimes do Ice,Ice,Light Maneuvers and have the Damage Gauge on, my puppet will only cast elemental magic if I'm in white hit points, the mob is close to death, or if my light maneuver wears. Great for that extra punch. Horrible if you have problems keeping hate.
- Not applicable on Soulsoother of course.
- Shock Absorber: Uses Stoneskin as a job ability with an earth maneuver up. For those who just can't keep hate off the automaton, this will buy you two or three hits most of the time. Best at early levels.
- Stabilizer II: I usually have my puppet melee with me, so I like to make sure it can hit the mob.
- Target Marker: Increases accuracy on Tough, VT, and IT mobs. Extremely worth it.
- Eraser: Erases negative status effects. Also erases all maneuvers. Sometimes it hurts more than helps. Great if your puppet gets silenced though.
- Flashbulb: Inflicts mobs with a flash effect without the enmity build up. Annoying if you're fighting weaker mobs with horrible accuracy, but its helpful for surviving the tougher mobs. Careful, the automaton likes to open with this and might get hit.
- Condenser: Amazing for when you're concerned about overloading. Works when stringing three maneuvers back to back.
- Flame Holder: Exchanges Fire Maneuvers for TP modifier on automaton weaponskills. See "Generating Damage" below for why this rocks.
- Attuner: Target marker but for melee damage purposes. :D
- Inhibitor: Store TP for fire maneuvers AND causes the puppet to save TP for skillchains. This is a great way to do damage OR make your puppet not weaponskill.
Making Effective Use of Puppetry
Okay, so aside from skilling up on Guard you might want to crank out some sick damage. The best part of this process is that it does multiple things at once. Through this method you'll get to...
- Restore your automaton's MP
- Reset automaton hate
- Reset automaton burden (sometimes this is a bad thing)
- Deal a ridiculous amount of damage, especially with the Flame Holder.
- Cure yourself.
- Actually puts a decent amount of hate on the master.
Okay so... thanks to a specific update, there's a minute long recast on deactivate. Before, people would spam deactivate/activate/deploy to fire Blizzard IV off indefinitely, but we can't do that anymore. Why does this matter?
Deactivating a puppet at 100% Hit Points drops the Activate timer to 0:00. This will bring the puppet's MP back to full, erase enmity, and reset burden to a certain point. It also resets recast timers. So what I usually do is this. . .
- Build TP and wait until my puppet has between 80 and 90 TP.
- Start popping fire maneuvers. This will noticeably increase the damage done from its weaponskill.
- Skillchain (Slapstick with Combo or Raging Fists to make Impaction, for example.) You will almost always have more TP than your puppet.
- WAIT for the puppet to fire off a spell (Cure, Nuke, whatever).
- Deactivate, Activate, Deploy. This causes it to immediately start casting again, taking advantage of the reset casting timers.
- On the right automaton magic skill levels, you might see a magic burst if you time it right!
This process above cranks out so much and can be done at an early level.
Alternatively, you can use the deactivate/activate/deploy tactic to get back-to-back Cures if you have the correct setup.
NOTE: Skillchains will vary from level to level. Refer to the Pup Solo Skillchain guide for more info.
I recommend this mainly because it RESTORES MP and RESETS HATE. You can kill yourself with this method due to overloading, so be careful.
On the same note, using Automaton Oil to restore my puppet from, say, 97% HP to 100% HP has saved my life several times. Never underestimate Automaton Oil.
Most PUPs will do this just to restore MP (i.e. they leave out the damage bit) which is a great practice altogether. For this purpose I strongly suggest having a macro somewhere to make sure you don't deactivate at... 99% HP. Here's a sample from my macro set from when I first started...
 /echo Tetsujin .:<hpp>:. Loustic .:<pethpp>:.
 /echo TP <tp> - <pettp>
 /recast "Activate"
 /recast "Provoke"
 /recast "Berserk"
 /equip neck "Spike Necklace"
I hit this macro after every maneuver because my Buffoon's Collar is tied to each maneuver macro. This way I'll reequip whatever neck piece I might be using.
I also use this to check my light maneuvers for cures. With the damage gaage, one light maneuver will force a cure so long as your hpp is at 69% or less.
Skillup Camps and Guard Progress
OKAY! Now to start our guarding skillups.
- Remember, targetting a mob in the distance will alow you to guard so long as A.) the player model is in a battle stance, and B.) you are facing the mob attacking you.
- Big Tip: Avoid complications! Work a mob down to low hp -before- linking another one. This way, if things are looking bad, it'll only take a few punches (or AoE WS) to eliminate a squad of mandies or what have you.
- Hate Issues: If you're having difficulty keeping hate off your puppet...
- Try only deploying the puppet for cures, then Retrieve immediately.
- So long as the puppet doesn't damage or debuff the mob, it won't pop onto its hate list.
- Deactivation clears hate completely.
- Remember, targetting a mob in the distance will alow you to guard so long as A.) the player model is in a battle stance, and B.) you are facing the mob attacking you.
Explanations
- "Level 10 capped skill (31)." In other words, the capped guard skill for a level 10 PUP is 31.
- "Guard Skill Range" refers to a Puppetmaster's B- Skill in Guard and explains the range of skill attainable from the specified mob. (e.g. Guard Skill Range: 75-99 means that the lowest level mobs will give you up to 75 guard skill. The highest level mobs will give you up to 99 guard skill.)
- "Higher Levelled Players" is for people who are trying to catch up with guard skill and are skilling up on EP and TW's. The recommendations here are offered because you honestly won't be able to tell what level the mob is (they will always con as "Too Weak" etc etc.)
- "Even Match Players" is for players who are fighting DC to Tough mobs for their skillups. Because of scarcity and level range, I don't always advise taking a certain camp to cap.
- These camps vary in difficulty, don't be discouraged by repeated deaths. Adventuring Fellows can be helpful in aiding your survivability.
- EDIT: Expect to die. With every death you get stronger. Laugh at Level Downs; get up, punch bad luck in the face, and try again.
- If my descriptions above are a little fuzzy, just read on. I'm sure the content below will clear some things up.
Here's a general outline of my progress so far, to be reflected below. Everytime I complete a camp, I'll add it to the list below.
| Mob Name | Level | Zone | ||||||
|---|---|---|---|---|---|---|---|---|
| Pygmaioi | 7 - 11 | Tahrongi Canyon | ||||||
| Tiny Lycopodium | 10 - 12 | West Sarutabaruta (S) | ||||||
| Sylvestre | 15 - 19 | Buburimu Peninsula | ||||||
| Lycopodium | 22 - 25 | Fort Karugo-Narugo (S) | ||||||
| Berry Grub | 25 - 28 | Rolanberry Fields | ||||||
| Chaos Idol | 29 - 30 | Lower Delkfutt's Tower | ||||||
| Lycopodium | 31 - 34 | Meriphataud Mountains (S) | ||||||
| Yhoator Mandragora | 35 - 37 | Yhoator Jungle | ||||||
| Alraune | 37 - 40 | Bibiki Bay - Purgonorgo Isle | ||||||
| Lesser Gaylas | 40 - 42 | Behemoth's Dominion | ||||||
| Greater Gayla | 42 - 44 | Behemoth's Dominion | ||||||
| Orcs and Gigas | 41 - 44 | Misareaux Coast | ||||||
| Goblins+ | 44 - 49 | Eastern Altepa Desert | ||||||
| Desert Beetle | 47 - 51 | Western Altepa Desert | ||||||
| Blazer Beetle | 52 - 54 | Crawler's Nest | ||||||
| Chamber Beetle | 56 - 58 | Garlaige Citadel | ||||||
OKAY!!!
Here goes...
Tahrongi Canyon 7 - 11

Pygmaioi at the Canyon
- Mob: Pygmaioi
- Guard Skill Range: (22 - 34)
- Tetsu's Experience: I came here with 2 or so guard skill for the first time and did the traditional guard/parry skill up procedure - I kited 4 to 5 mandies and got as many skillups as I could without dying. Can't recall how far I took this.
- Higher Levelled Players: Take this up to level 7 capped skill. (22)
- Even Match Players: I would recommend taking this up to 10 capped skill (31) and moving on to the next camp.
- Tetsu's Experience: I came here with 2 or so guard skill for the first time and did the traditional guard/parry skill up procedure - I kited 4 to 5 mandies and got as many skillups as I could without dying. Can't recall how far I took this.
West Sarutabaruta (S) 10 - 12
- Mob: Tiny Lycopodium
- Guard Skill Range: (31 - 36)
- Tetsu's Experience: Similarly, I wittled down a mandy to near death and then found another to beat up and do the same. I recall limiting myself to three at a time due to my level. Pretty sure I took this to 30ish skill. I got some pretty solid 0.3's here.
- Higher Levelled Players: Take this up to level 10 capped skill (31).
- Even Match Players: I would recommend taking this up to 12 capped skill (36). Lycopodiae (is that right?) are great mobs to skill up on and NEVER use dream flower. Also a great time to experiment with PUP cures.
- Tetsu's Experience: Similarly, I wittled down a mandy to near death and then found another to beat up and do the same. I recall limiting myself to three at a time due to my level. Pretty sure I took this to 30ish skill. I got some pretty solid 0.3's here.
Buburimu Peninsula 15 - 19
- Mob: Sylvestre
- Guard Skill Range: (45 - 57)
- Tetsu's Experience: At this point, I had to limit myself to two mobs, and sometimes that killed me when I was careless. Still hadn't capped my skill, but I did get a nice chunk at this camp. I took this as far as I could before exp got stale.
- Higher Levelled Players: Again, go for the lower end ones and take this to 16 capped skill (48).
- Even Match Players: Milk these for skillups. You have to venture out farther to find the higher levelled ones. Get as many skillups as you can here because its a pretty large gap to the next set of mobs.
- Cure II is available at level 14, and heals a ridiculous chunk of HP at low levels. Learn to make full use of the damage gauge.
- Tetsu's Experience: At this point, I had to limit myself to two mobs, and sometimes that killed me when I was careless. Still hadn't capped my skill, but I did get a nice chunk at this camp. I took this as far as I could before exp got stale.
Fort Karugo-Narugo (S) 22 - 25

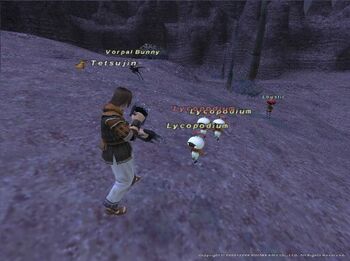
Lycopodiae at Fort Karugo Narugo (S)
- Mob: Lycopodium
- Guard Skill Range: (65 - 74)
- Tetsu's Experience: I solo'd (sp?) random mobs until this point for whatever skillups I could find. I came here at level 21 so they all con'd tough to me, yet I pulled out consistent kills. I had some close calls, but I managed to chain exp on certain occassions. The gap to capped guard skill was extremely narrow at this point, but I kept levelling up before I got close.
- Higher Levelled Player: Again, lower levelled base skill - Level 22 cap (65).
- Even Match Players: Amazing camp if you can work it right. Here's where you can really close that gap. Spammed Cure II's is a must. The level range seems to vary. Sometimes they all spawn weak and sometimes they all spawn tough. Regardless of that - floor them all.
- Tetsu's Experience: I solo'd (sp?) random mobs until this point for whatever skillups I could find. I came here at level 21 so they all con'd tough to me, yet I pulled out consistent kills. I had some close calls, but I managed to chain exp on certain occassions. The gap to capped guard skill was extremely narrow at this point, but I kept levelling up before I got close.
Rolanberry Fields 25 - 28
- Mob: Berry Grub
- Guard Skill Range: (74 - 83)
- Tetsu's Experience: I know this is bizarre, but the point of this is adaptivity. Sometimes mandies aren't always there, so you gotta find mobs like these (Double Attack, No AoE, etc.) I started fighting these at 26 when I got Cure III, only because they were Even Match and I needed random mobs to kill. I didn't exclusively fight these. I actually tried to fight everything Even Matched in the zone. If you don't feel like fighting in Rolanberry, do anything where you can take EM's. Quite Ironically, I hit the 28 cap here, but that was right after I hit 29, so I wasn't "capped" on guarding yet.
- Higher Levelled Players: I would skip straight to the next camp. Don't bother here.
- Even Match Players: Follow my experience. Non-Mandragora mobs are great for getting used to playing the job. Remember, PUPs are versatile. Try new things. Skillup your other frames. Explore different subjobs. This is the perfect time to do so.
- Cure III becomes available at level 26. Use it. Cry tears of joy. Understand why PUP can solo Toughs.
- Tetsu's Experience: I know this is bizarre, but the point of this is adaptivity. Sometimes mandies aren't always there, so you gotta find mobs like these (Double Attack, No AoE, etc.) I started fighting these at 26 when I got Cure III, only because they were Even Match and I needed random mobs to kill. I didn't exclusively fight these. I actually tried to fight everything Even Matched in the zone. If you don't feel like fighting in Rolanberry, do anything where you can take EM's. Quite Ironically, I hit the 28 cap here, but that was right after I hit 29, so I wasn't "capped" on guarding yet.
Lower Delkfutt's Tower 29 - 30


Chaos Idols at the Tower
- Mob: Chaos Idol
- Guard Skill Range: (86 - 89)
- Tetsu's Experience: This AMAZING camp requires some directions. Upon zoning into the tower, take the first right. The first room should be full of goblins. Sneak past them or pull them one by one (they're cake.) The next room North-East is similar. The hallway north of that room will have some bats. You have to fight them (unless you have Silent Oils.) These bats are useful for builing TP to counter Meltdown. Take a left turn (West) and you'll enter a room with three Chaos Idols and maybe an NM named Tyrant. I capped guarding here at two in the morning. It was a very defining moment.
- Very Awesome: These mobs only aggro to magic. They don't link, and they don't harass you when you /heal in front of them. The NM is totally cool with you being there as well. Best part is, Cure III (or any Automaton spell) draws no aggro.
- Higher Levelled Players: Take this camp to level 30 cap (89). It's fantastic. Most of the mob spawns are level 30 rather than 29.
- Even Match Players: Do NOT use your TP for Combo. Save up TP. Keep it at 300% if you have to. You should ONLY use TP to Shoulder Tackle the Self-Destruct move. If you see the doll curl up into a ball, SHOULDER TACKLE IMMEDIATELY! In case you can't do that, set your Home Point just outside the tower (I did.) They're pretty daunting mobs, but Cure III's are glorious here. Take to 30 cap, it's well worth it. Don't forget to deactivate for hate reset/mp restore.
- Edit: If it works for you - I recall keeping my automaton on standby and only deploying it for Cure III's, followed by immediately by Retrieve. Made the mobs last a bit longer in my opinion. Just a tip.
- Tetsu's Experience: This AMAZING camp requires some directions. Upon zoning into the tower, take the first right. The first room should be full of goblins. Sneak past them or pull them one by one (they're cake.) The next room North-East is similar. The hallway north of that room will have some bats. You have to fight them (unless you have Silent Oils.) These bats are useful for builing TP to counter Meltdown. Take a left turn (West) and you'll enter a room with three Chaos Idols and maybe an NM named Tyrant. I capped guarding here at two in the morning. It was a very defining moment.
Meriphataud Mountains (S) 31 - 34
- Mob: Lycopodium
- Guard Skill Range: (92 - 100)
- Tetsu's Experience: Great camp. It's a bit of a trek (Retrace + Allied Warp) but well worth it. I found very little difficulty soloing here and had very few deaths. With Thunder, you may find your automaton Magic Bursting with your Impaction skillchains, which is awesome. Be sure to Deactivate/Activate for hate control/mp restoration.
- Higher Levelled Players: The level range is sporadic enough to only take this to 31 (92).
- Even Match Players: Take to level 34 cap (100). It's well worth it. If you get frustrated with the lack of level 34 Lycopodiae, it's sensible enough to stop at 33 (97).
- Hunting for Mobs: Can't find enough Lyco's to spar with? The zone area (where you pop after the allied warp) is pretty good for starters. If that isn't plentiful enough, try around (D/E/F-8). That usually holds plenty of Lycopodiae wandering around the mountains and near the road.
- Tetsu's Experience: Great camp. It's a bit of a trek (Retrace + Allied Warp) but well worth it. I found very little difficulty soloing here and had very few deaths. With Thunder, you may find your automaton Magic Bursting with your Impaction skillchains, which is awesome. Be sure to Deactivate/Activate for hate control/mp restoration.
Yhoator Jungle 35 - 37
- Mob: Yhoator Mandragora
- Guard Skill Range: (103 - 109)
- Tetsu's Experience: I suggest coming in through chocobo and arriving at (F-7) where the FoV book is. You won't be doing pages, but it would be a great idea to pick up Reraise as needed. The occasional experience party might be here (a good opportunity to take a break from guarding and skilling up that powerful ranged frame.) I never found a shortage of mobs to fight. No link, no aggro, etc. You can overcome the Dream Flower on your puppet by using Deactivate/Activate.
- Higher Levelled Players: Take this one to level 35 (103). I would advise wandering around different areas of the jungle; you don't want to steal exp mobs from hard-working parties.
- Even Match Players: Definitely take this one to 37 cap (109). Take care not to disrupt the flow of mobs for parties (better to join them in my opinion) and watch out for gobbie aggro. The zone (and reraise) is nearby if you need it.
- Tetsu's Experience: I suggest coming in through chocobo and arriving at (F-7) where the FoV book is. You won't be doing pages, but it would be a great idea to pick up Reraise as needed. The occasional experience party might be here (a good opportunity to take a break from guarding and skilling up that powerful ranged frame.) I never found a shortage of mobs to fight. No link, no aggro, etc. You can overcome the Dream Flower on your puppet by using Deactivate/Activate.
Bibiki Bay - Purgonorgo Isle 37 - 40

Alraune at the Isle
- Mob: Alraune
- Guard Skill Range: (109 - 118)
- Tetsu's Experience: The lowest Alraune I found here was level 38, so the real level range is something like 38 - 40 for guarding purposes (besides, you capped at the last camp right?) Head left from the dock and into some cavey looking area to find these daunting mobs. At level 38, I would definitely recommend bringing your Tactics Pearl to help you out. At 39, it's easier to discern what will give you skillups and what won't (i.e. all DC are level 38, all EM at 39, all T's at 40.) The major problem here is that Alraune link, unlike their friendlier cousins. My Automaton ran itself dry of MP multiple times (double ice maneuvers for faster cures, rather than double dark for refresh,) so the DAD trick is almost a necessity to stay alive here, as well as dispelling sleep from the automaton.
- Higher Levelled Players: Take this one to 39 (115). Pretty simple.
- Even Match Players: This one can be taken to cap, but if you feel like stopping at 39 you can move to Behemoth's Dominion early. Careful with the deaths and homepointing here; the trip to the isle is a damn long one since you have to wait for the right manaclipper to board. Don't be a derp like me: get the manaclipper ticket before you get on the boat!
- Tetsu's Experience: The lowest Alraune I found here was level 38, so the real level range is something like 38 - 40 for guarding purposes (besides, you capped at the last camp right?) Head left from the dock and into some cavey looking area to find these daunting mobs. At level 38, I would definitely recommend bringing your Tactics Pearl to help you out. At 39, it's easier to discern what will give you skillups and what won't (i.e. all DC are level 38, all EM at 39, all T's at 40.) The major problem here is that Alraune link, unlike their friendlier cousins. My Automaton ran itself dry of MP multiple times (double ice maneuvers for faster cures, rather than double dark for refresh,) so the DAD trick is almost a necessity to stay alive here, as well as dispelling sleep from the automaton.
Behemoth's Dominion 40 - 42, 42 - 44
- Mob: Lesser Gaylas and Greater Gayla
- Guard Skill Range: (118 - 123), (123 - 129)
- Tetsu's Experience: Bats! Camp is easy to get to. Enter the Dominion via Qufim Island and follow the path until you run into a large room with bats. Bats have an evasion down move, can double attack, and have no damaging AoE's. Good stuff!
- Higher Levelled Players: The level distribution is pretty nice. You can link a few lesser gaylas until your guarding reaches level 40 (118) and then kill them off and move onto greater ones until you hit the level 42 cap (123).
- Even Match Players: Careful with allowing the puppet to deal damage and take hate. Also, level correction is a huge factor when fighting the greater bats, damage from the level 44 bats is a lot heavier than the 43 bats based on your level.
Misareaux Coast 41 - 44


Orc at the Coast
- Mob: Orcs and Gigas
- Guard Skill Range: (121 - 129)
- Tetsu's Experience: I came here around level 42 for variety/relief from the previous camp. Personally, I moved back and forth based on population in my camps. The orcs and gigas here are all between levels 41 and 44, roaming just about the entire zone. I found the big open area below the river around (I-7) to be resourceful. I took this to 43 cap (126) and then moved back to the Dominion.
- Higher Levelled Players: I would suggest skipping this cap altogether and sticking with Behemoth's Dominion's Greater Gaylas.
- Even Match Players: Great place to have fun with your job and mess around. Take it to 42 cap (123) if you're going to be here. I vaguely remember having trouble finding appropriately levelled mobs.
Eastern Altepa Desert 45 - 49
- Mob: Goblins + The general population
- Guard Skill Range: (132 - 144)
- Tetsu's Experience: Camp is... the entire map! But mostly the Oasis at the beginning. Goblins here range from levels 44 to 49, but tons of other things inhabit the land. Beetles, Manticore, Spiders etc. Try to avoid undead, antican, and scorpions for their ability to inflict status debuffs. Also avoid cactuars for their ability to distribute 1000 damage between you and your puppet (That's 500 each.) Bomb toss is KILLER if used at nearfull hit points, so take care. Note: Cures will be relatively weak here. The manticore are fun to play with :)
- Higher Levelled Players: Take the gobbies to 45ish (132) and then take the manticore up to 47 (138), then move on to the next camp.
- Even Match Players: Highly suggest setting your Home Point at the outpost. Death will have to be a routine part of this process. Routine, but necessary. Ranger and BST gobs are great (kill the pet first) but try to stay away from magic casting gobs if at all possible.
- Stranded in the Desert: I remember being stuck here forever. I felt like I was never going to escape.. had my guide come to an end? FALSE. When you and your puppet ding level 48 and gain Cure IV you will feel new and unstoppable. Believe me.
Western Altepa Desert 47 - 51
- Mob: Desert Beetle
- Guard Skill Range: (138 - 151)
- Tetsu's Experience: Didn't actually take this to cap. A really tough (but fun) camp is around revelation rock. There's tons of beetles standing around waiting to be wailed on. The problem is the high probability for link, so be careful!
- Higher Levelled Players: Revelation rock provides for all your beetle needs. I say, take it as high as you can until you get bored. The next few camps are gonna be rocky...
- Even Match Players: Brace yourself for Defender, an ability you'll be using a lot from now on. Your attacks will weaken, but it'll save you from being pummelled to death. Personally, I think weakened attacks is a plus (the mobs last longer.) Just be sure to keep hate off the automaton.
Tets. Ya done goofed
- I had been outlining my progress as a Puppetmaster with capped guarding and it felt great. The problem arised when I started to party and became hungry for levels. Before I knew it I was level 60 and sporting an impressive AF only to feel empty inside at the sight of 40 missing skill levels...
Slowly but surely, I got back onto my old gameplan for guard skillups, only this time attempting to follow any advice that I would give to "Higher Levelled Players." Training at least two mobs, dropping evasion gear, popping defender, putting up reraise, I continued with my struggle to cap guarding.
- Capped 75 guarding the tough way, capped 99 guarding not too long after.
- My slow update rate/progress on this task is attributed to real life and the inevitable levelling of subjobs. I apologize for the former and in advance.
- Pics shall be posted eventually
Zone Name # - #
- Mob: Mob Name
- Guard Skill Range: (# - #)
- Tetsu's Experience:
- Higher Levelled Players:
- Even Match Players: