m (→Walkthrough) |
m (added location of warp in Nyzul Isle Stating point for step 4.) |
||
| (48 intermediate revisions by 28 users not shown) | |||
| Line 1: | Line 1: | ||
| + | [[de:Im Bilde sein]][[fr:Souvenirs souvenirs]] |
||
[[Category:Quests]][[Category:Aht Urhgan Quests]] |
[[Category:Quests]][[Category:Aht Urhgan Quests]] |
||
| + | {{Quest |
||
| − | {|border="0" width="100%" |
||
| ⚫ | |||
| − | |width="70%" valign="top"| |
||
| + | |requirements= |
||
| − | {|border="0" width="70%" cellpadding="0" cellspacing="3" |
||
| + | |items=[[Light Cluster]] x3<br>[[Light Crystal]] x5 |
||
| − | |valign="top" BGCOLOR="#D5D9FF"| '''Start NPC:''' |
||
| + | |title=Scenic Snapshotter |
||
| ⚫ | |||
| + | |repeatable=No |
||
| − | |- |
||
| ⚫ | |||
| − | |valign="top" BGCOLOR="#D5D9FF"| '''Requirements:'''<br /> |
||
| + | |previous= |
||
| − | |valign="top" BGCOLOR="#E0E0E0"| None |
||
| + | |next=[[Five Seconds of Fame]] |
||
| − | |- |
||
| + | |cutscenes= |
||
| − | |valign="top" BGCOLOR="#D5D9FF"| '''Items Needed:''' |
||
| ⚫ | |||
| − | |valign="top" BGCOLOR="#E0E0E0"| [[Light Crystal]], [[Light Cluster]] |
||
| − | |- |
||
| − | |valign="top" BGCOLOR="#D5D9FF"| '''Title:''' |
||
| − | |valign="top" BGCOLOR="#E0E0E0"| Scenic Snapshotter |
||
| − | |- |
||
| − | |valign="top" BGCOLOR="#D5D9FF"| '''Repeatable:''' |
||
| − | |valign="top" BGCOLOR="#E0E0E0"| No |
||
| − | |- |
||
| − | |valign="top" BGCOLOR="#D5D9FF"| '''Reward:''' |
||
| ⚫ | |||
| − | |- |
||
| − | ||<br /> |
||
| − | |- |
||
| − | |valign="top" BGCOLOR="#D5D9FF"| '''Previous Quest:''' |
||
| − | |valign="top" BGCOLOR="#E0E0E0"| |
||
| − | |- |
||
| − | |valign="top" BGCOLOR="#D5D9FF"| '''Next Quest:''' |
||
| − | |valign="top" BGCOLOR="#E0E0E0"| |
||
| ⚫ | |||
| − | |width="30%" valign="top"| |
||
| − | __TOC__ |
||
| ⚫ | |||
| ⚫ | |||
| − | ---- |
||
| + | * Talk to [[Balakaf]]. He will give you the {{keyItem}}[[Image Recorder]] and send you to take a picture that fits his description. |
||
| ⚫ | |||
| − | * |
+ | ** After returning to Balakaf with the correct picture, you will receive an [[Imperial Silver Piece]]. Then you must zone and wait until JST midnight to continue. |
| + | ** If he tells you it is the wrong picture, you must zone, talk to him again, and then trade him an [[Ahriman Lens]]. Then you must zone and wait until JST midnight to try again. |
||
| − | * Optional: Talk to him again after examining the 1st ??? in Wajaom Woodlands and he will tell you that you will need a light crystal to make the Image Recorder work. |
||
| + | *** If you use an [[Aurora Crystal]] instead of a [[Light Crystal]], you will get an alternate cutscene where he appears satisfied, until he notices your name written on the photograph. He will then reject it. |
||
| − | * If you took the wrong picture or used the wrong "Flash," you will need to trade him an [[Ahriman Lens]] and only then. After a failure, zone and talk to Balakaf again and he will mention the [[Ahriman Lens]]. Trade the lens and wait for the next 0:00 JST tally. He will then give you the [[Image Recorder]], and you can try to get the picture, which he wanted before, again. |
||
| + | * If the picture must be taken during a particular weather effect or at a certain time, you will be unable to take the picture until the conditions are met. |
||
| − | * For every new step including both Arrapago Reef pictures a) and b), you have to wait till the next JST midnight tally before you can continue. |
||
[[Image:get-the-picture.00-weather.jpg|thumb|Volcano weather example]] |
[[Image:get-the-picture.00-weather.jpg|thumb|Volcano weather example]] |
||
| − | ;1. |
+ | ;1. [[Wajaom Woodlands/Maps|Wajaom Woodlands]] at F-6. |
:''Balakaf: "First, I want t' see the volcano that can be glimpsed from the Wajaom Woodland. I'll never forget the plumes of smoke billowing from its peak, even though it was a cloudy day when I saw it with me own eyes."'' |
:''Balakaf: "First, I want t' see the volcano that can be glimpsed from the Wajaom Woodland. I'll never forget the plumes of smoke billowing from its peak, even though it was a cloudy day when I saw it with me own eyes."'' |
||
| + | * Take a chocobo out of [[Al Zahbi]], or use [[Olduum Ring]] to teleport to the Leypoint. |
||
| − | * Balakaf really does want just cloudy weather. [[Dawn]]/[[Dusk]] fog does not count. Wind weather does not count. The sky can best be described as just grey, as if it is going to rain or thunder without there actually being a weather effect. This kind of weather is somewhat rare in Wajaom Woodlands and does not happen at any particular time of day. (The screenshot provided was taken at 19:29 game time on Windsday after waiting 2 - 3 game days to pass. There was no weather in effect at the time.) |
||
| + | * '''Weather:''' Cloudy. This occurs when there is no weather effect, and the sky is totally covered by clouds. Avoid foggy weather, which normally occurs at 2:00-7:00. |
||
| − | * When the correct weather appears, trade a [[Light Crystal]] to the ??? (you will not lose your light crystal if you trade when the weather is not correct). You will be given the option of taking a picture from 3 views. Choose the view that is the least obstructed by trees (first one). |
||
| + | * Trade a [[Light Crystal]] to the ???. Choose the first scene. |
||
| − | * Return to Balakaf and he will reward you with 1 [[Imperial Silver Piece]]. He will take back the [[Image Recorder]] until the next JP day. |
||
[[Image:get-the-picture.01-weather.jpg|thumb|Arrapago Reef weather example]] |
[[Image:get-the-picture.01-weather.jpg|thumb|Arrapago Reef weather example]] |
||
| − | ;2. [[Arrapago Reef]] at G-8 (Map 1). |
+ | ;2. & 3. [[Arrapago Reef/Maps|Arrapago Reef]] at G-8 (Map 1). |
:''Balakaf: "Next, I want t' see the "Lovers' Rocks" in Arrapago Reef. Standing in the snow and looking upon those two pillars standing side by side always made me think of my dear wife."'' |
:''Balakaf: "Next, I want t' see the "Lovers' Rocks" in Arrapago Reef. Standing in the snow and looking upon those two pillars standing side by side always made me think of my dear wife."'' |
||
| + | * Teleport to "Arrapago Reef" via [[Atmacite Refiner]] and pick up the nearby [[Lamian Fang Key]] ([[Caedarva Mire/Maps|Map]]), then zone in to [[Arrapago Reef/Maps|Arrapago Reef]]. Use the key on the Iron Gate at (J-10), exit through the northmost gate, and then head west to the ???. |
||
| − | * a) When ice weather appears, trade a [[Light Crystal]] to the ???. You will be given the option of taking a picture from 3 views. Choose the second one. Return to Balakaf and he will tell you that it is rather dark and will give you 1 [[Imperial Silver Piece]]. |
||
| + | ** Alternately, teleport to [[Ilrusi Atoll Staging Point]] ([[Arrapago Reef/Maps#Map_2|Map]]) and enter Map 1 at exit A (J-8). |
||
| − | * b) After the next JST midnight tally, Balakaf give you another chance. Return to the same [[???]] in [[Arrapago Reef]] and when ice weather appears, trade a [[Light Cluster]] to the ??? this time. Choose the second picture again and return to Balakaf, he will reward you with another [[Imperial Silver Piece]]. You have to do both steps a) and b). You can't trade a [[Light Cluster]] on your first try. |
||
| + | * '''Weather:''' Ice. |
||
| + | * Trade a [[Light Crystal]] to the ???. Choose the second scene. |
||
| + | ** Balakaf will tell you that it is too dark, but give you an [[Imperial Silver Piece]] anyways. You do not need to trade him an [[Ahriman Lens]] for this "failure," but you still need to zone, wait until JST midnight, and then talk to him again. |
||
| + | * On the second attempt, trade a [[Light Cluster]] to the ???. Choose the second scene. |
||
[[Image:get-the-picture.02-weather.jpg|thumb|Mt.Zhayolm weather example]] |
[[Image:get-the-picture.02-weather.jpg|thumb|Mt.Zhayolm weather example]] |
||
| − | ; |
+ | ;4. [[Mount Zhayolm/Maps|Mount Zhayolm]] at C-9. |
:''Balakaf: "Next, I want t' see the ruins that can be glimpsed from Mount Zhayolm. I still remember the sight of them bathed in the gentle glow of the evening sun."'' |
:''Balakaf: "Next, I want t' see the ruins that can be glimpsed from Mount Zhayolm. I still remember the sight of them bathed in the gentle glow of the evening sun."'' |
||
| + | * Teleport to the [[Home Point]] in [[Mount Zhayolm]] (D-8). |
||
| − | *Head to (J-7) in [[Mount Zhayolm]] and make sure you have the [[Cast Metal Plate]] ([[key item]]). Open the Gates of Halvung with the [[Cast Metal Plate]] and make your way to (G-7). Take the most north-western tunnel to [[Halvung]] zone. Once in Halvung, head straight, cross a bridge, take your first right, and zone back into Mount Zhayolm (Vozoid Island). |
||
| + | ** To unlock it, travel to [[Nyzul Isle Staging Point]] ([[Nyzul Isle/Maps|Map]]) and take the south exit to the southwest warp at (G-9) (towards Zhayolm Remnants). Take the west warp. Exit to [[Bhaflau Thickets/Maps#Map_2|Bhaflau Thickets (Tandjana Islet)]]. Proceed west then north to enter [[Halvung/Maps#Map_4|Halvung]], then north through there to [[Mount Zhayolm/Maps|Mount Zhayolm]], exit 7. The ??? is on the coast to the west. |
||
| − | *Head to to (C-9; the ??? is located near the cliffs overlooking the ruins. |
||
| + | * '''Time:''' 16:00-18:00. |
||
| − | *Take the picture between 16:00-16:30 with a [[Light Crystal]] and choose picture 3. Return to Balakaf and he will reward you with another [[Imperial Silver Piece]]. |
||
| + | * Trade a [[Light Crystal]] to the ???. Choose the third scene. |
||
| − | *Weather condition: Doesn't matter |
||
| + | [[Image:get-the-picture.03-weather.jpg|thumb|Halvung weather example]] |
||
| − | ; |
+ | ;5. [[Halvung/Maps|Halvung]] at I-8. |
:''Balakaf: "Next, I want t' see the flows of lava seeping from the heights of Halvung. It was quite the spectacle for a young lad traipsing through in the wee hours of the morning."'' |
:''Balakaf: "Next, I want t' see the flows of lava seeping from the heights of Halvung. It was quite the spectacle for a young lad traipsing through in the wee hours of the morning."'' |
||
| − | * |
+ | * Take the secret exit from [[Aht Urhgan Whitegate]] (H-7) to [[Bhaflau Thickets/Maps|Bhaflau Thickets]], and enter [[Halvung/Maps|Halvung]] at (F-8); this is also where the Halvung [[Survival Guide]] is located, which you can use to get here instead. Head southwest until you reach a long canyon. The ??? is in the middle of the bridge. |
| + | * '''Time:''' 3:00-6:00. |
||
| − | *Take the picture between 3:00-6:00 with a [[Light Crystal]] and choose picture 1. Return to Balakaf and he will reward you with another [[Imperial Silver Piece]]. |
||
| + | * Trade a [[Light Crystal]] to the ???. Choose the first scene. |
||
| − | *Weather condition: Doesn't matter |
||
| − | + | [[Image:get-the-picture.04-weather.jpg|thumb|Aydeewa Subterrane weather example]] |
|
| + | ;6. [[Aydeewa Subterrane/Maps#Map_3|Aydeewa Subterrane]] at G-10. |
||
:''Balakaf: "Next, I want t' see the ruins in the Aydeewa Subterrane. The howl of the wind there seemed to speak volumes to me..."'' |
:''Balakaf: "Next, I want t' see the ruins in the Aydeewa Subterrane. The howl of the wind there seemed to speak volumes to me..."'' |
||
| + | * Take a chocobo out of [[Al Zahbi]], or [[Olduum Ring]] to teleport to the Leypoint. Enter [[Aydeewa Subterrane/Maps#Map_3|Aydeewa Subterrane]] via exit 8 (E-10), then head southwest until you reach the ???. |
||
| − | *Enter from [[Wajaom Woodlands]] (E-10) and follow the path until you reach a drop down. Drop down and take the right path, take your next left and you will be in the room where the ??? is located. The [[???]] you need is at the base of the Ruins and not up on the stairs, these are for [[What Friends are For]]. |
||
| + | * '''Weather:''' Wind. |
||
| − | *Take the picture during wind weather with a [[Light Cluster]] and choose picture 3, and return to Balakaf, he will reward you with another [[Imperial Silver Piece]]. |
||
| + | * Trade a [[Light Cluster]] to the ???. Choose the third scene. |
||
| + | [[Image:get-the-picture.05-weather.jpg|thumb|Mamook weather example]] |
||
| − | ; |
+ | ;7. [[Mamook]] at E-8. |
:''Balakaf: "Next, I want t' see the waterfall in Mamook. I was lost for words in its beauty, an opalescent thread reflecting the light of the sun."'' |
:''Balakaf: "Next, I want t' see the waterfall in Mamook. I was lost for words in its beauty, an opalescent thread reflecting the light of the sun."'' |
||
| + | * Teleport to [[Mamool Ja Staging Point]]. Enter [[Mamook/Maps|Mamook]] at (I-9), then go north to the open area. The ??? is on the western side, near the cliff. |
||
| − | *Enter from [[Wajaom Woodlands]] (D-12) and fall down at the first opportunity and hug the left wall. Once you reach the end of the tunnel drop down again and hug right wall, you will come to a ramp. Go up the ramp and continue heading in the same direction, taking available right turn. Eventually you will be lead to the room with the waterfall and the ??? at (F-8) on the ground floor. The upper floor at the bridge is mob free and safe. |
||
| + | * '''Time:''' 7:30-10:30. |
||
| − | *Take the picture at 7:30 - 10:30 with a [[Light Crystal]] and choose picture 3, and return to Balakaf, he will reward you with another [[Imperial Silver Piece]]. |
||
| + | * '''Weather:''' Fair or sunshine. This occurs when there are some or no clouds in the sky. |
||
| − | *Weather Condition: blue sky with some white clouds (cloudfree sky like Altepa Desert isn't needed and seems impossible to get at this place) |
||
| + | * Trade a [[Light Crystal]] to the ???. Choose the third scene. |
||
| − | + | [[Image:get-the-picture.06-weather.jpg|thumb|Caedarva Mire weather example]] |
|
| + | ;8. [[Caedarva Mire]] at E-10. |
||
:''Balakaf: "Next, I want t' see the graveyard in Caedarva Mire. By nightfall, I began t' imagine the tombstones to be monstrous men... That place be more than a mite terrifying."'' |
:''Balakaf: "Next, I want t' see the graveyard in Caedarva Mire. By nightfall, I began t' imagine the tombstones to be monstrous men... That place be more than a mite terrifying."'' |
||
| − | *Take the west exit |
+ | * Take the west exit out of [[Nashmau]] and head northwest to the graveyard, or teleport to the [[Home Point]] in The Arrapago Islands->Caedarva Mire. |
| + | * '''Time:''' 20:00-22:00. |
||
| − | *Take the picture at 20:00 - 22:00 with a [[Light Cluster]] and choose picture 1, and return to Balakaf, he will reward you with another [[Imperial Silver Piece]]. The quest is now completed at your Quest Log. |
||
| + | * Trade a [[Light Cluster]] to the ???. Choose the first scene. |
||
| − | *Weather condition: Doesn't matter |
||
| + | * After returning to Balakaf, you will receive a finishing cutscene, and this will complete the quest. |
||
| − | ; |
+ | ;9. All previous places. |
:''Balakaf: "That reminds me! I dropped a fair sum o' gold on me travels."'' |
:''Balakaf: "That reminds me! I dropped a fair sum o' gold on me travels."'' |
||
| − | *After another |
+ | * After zoning and waiting another JST midnight, talk to Balakaf again. |
| − | *Revisit |
+ | * Revisit each ??? and examine them again until you find an [[Imperial Gold Piece]]. The correct ??? is random. |
| + | ** Recommended order from quickest to slowest: 8, 1, 7, 5, 6, 2/3, 4. |
||
| − | *Trade the Gold Piece to Balakaf and after a small |
+ | * Trade the [[Imperial Gold Piece]] to Balakaf, and after a small cutscene you will get it back. This allows you to flag [[Five Seconds of Fame]]. |
| − | <br> |
||
| ⚫ | |||
| − | ---- |
||
| ⚫ | |||
| − | |||
| ⚫ | |||
| ⚫ | |||
| ⚫ | |||
| ⚫ | |||
| + | {{spoiler2}} |
||
| − | '''Summary:''' |
||
| ⚫ | |||
Latest revision as of 03:13, 16 July 2019
| Start NPC | Balakaf - Aht Urhgan Whitegate (I-5), 2nd Floor |
|---|---|
| Items Needed | Light Cluster x3 Light Crystal x5 |
| Title Granted | Scenic Snapshotter |
| Repeatable | No |
| Reward | 8x Imperial Silver Pieces 1x Imperial Gold Piece |
| ← Previous Quest | Next Quest → |
|---|---|
| None | Five Seconds of Fame |
Walkthrough
- Talk to Balakaf. He will give you the
 Image Recorder and send you to take a picture that fits his description.
- After returning to Balakaf with the correct picture, you will receive an Imperial Silver Piece. Then you must zone and wait until JST midnight to continue.
- If he tells you it is the wrong picture, you must zone, talk to him again, and then trade him an Ahriman Lens. Then you must zone and wait until JST midnight to try again.
- If you use an Aurora Crystal instead of a Light Crystal, you will get an alternate cutscene where he appears satisfied, until he notices your name written on the photograph. He will then reject it.
- If the picture must be taken during a particular weather effect or at a certain time, you will be unable to take the picture until the conditions are met.
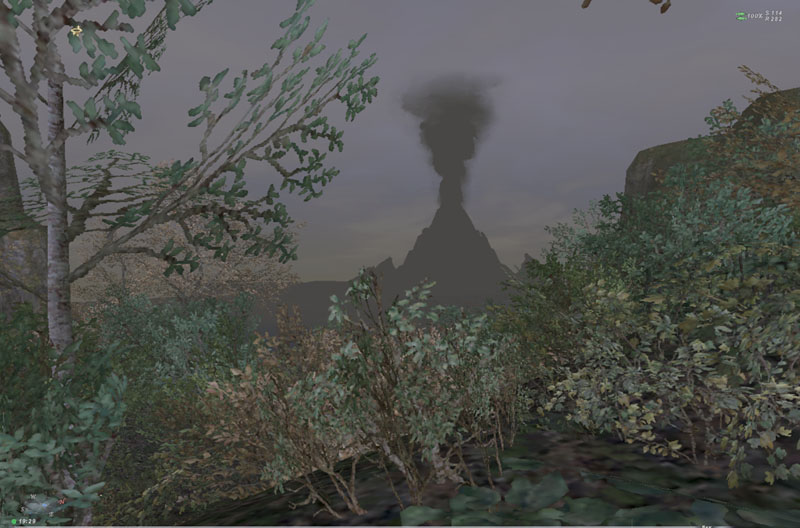
Volcano weather example
- 1. Wajaom Woodlands at F-6.
- Balakaf: "First, I want t' see the volcano that can be glimpsed from the Wajaom Woodland. I'll never forget the plumes of smoke billowing from its peak, even though it was a cloudy day when I saw it with me own eyes."
- Take a chocobo out of Al Zahbi, or use Olduum Ring to teleport to the Leypoint.
- Weather: Cloudy. This occurs when there is no weather effect, and the sky is totally covered by clouds. Avoid foggy weather, which normally occurs at 2:00-7:00.
- Trade a Light Crystal to the ???. Choose the first scene.

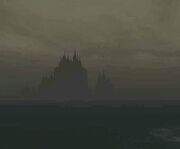
Arrapago Reef weather example
- 2. & 3. Arrapago Reef at G-8 (Map 1).
- Balakaf: "Next, I want t' see the "Lovers' Rocks" in Arrapago Reef. Standing in the snow and looking upon those two pillars standing side by side always made me think of my dear wife."
- Teleport to "Arrapago Reef" via Atmacite Refiner and pick up the nearby Lamian Fang Key (Map), then zone in to Arrapago Reef. Use the key on the Iron Gate at (J-10), exit through the northmost gate, and then head west to the ???.
- Alternately, teleport to Ilrusi Atoll Staging Point (Map) and enter Map 1 at exit A (J-8).
- Weather: Ice.
- Trade a Light Crystal to the ???. Choose the second scene.
- Balakaf will tell you that it is too dark, but give you an Imperial Silver Piece anyways. You do not need to trade him an Ahriman Lens for this "failure," but you still need to zone, wait until JST midnight, and then talk to him again.
- On the second attempt, trade a Light Cluster to the ???. Choose the second scene.

Mt.Zhayolm weather example
- 4. Mount Zhayolm at C-9.
- Balakaf: "Next, I want t' see the ruins that can be glimpsed from Mount Zhayolm. I still remember the sight of them bathed in the gentle glow of the evening sun."
- Teleport to the Home Point in Mount Zhayolm (D-8).
- To unlock it, travel to Nyzul Isle Staging Point (Map) and take the south exit to the southwest warp at (G-9) (towards Zhayolm Remnants). Take the west warp. Exit to Bhaflau Thickets (Tandjana Islet). Proceed west then north to enter Halvung, then north through there to Mount Zhayolm, exit 7. The ??? is on the coast to the west.
- Time: 16:00-18:00.
- Trade a Light Crystal to the ???. Choose the third scene.
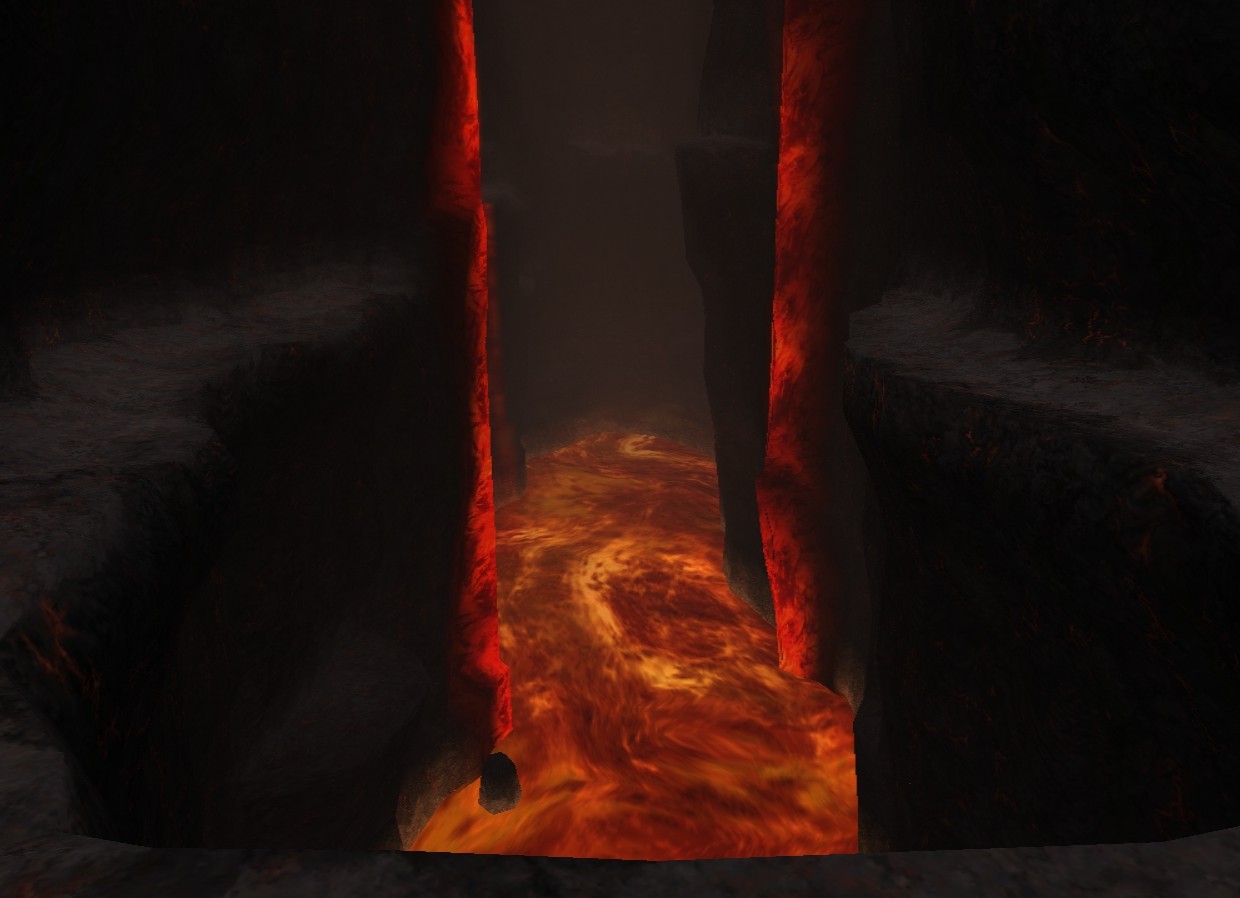
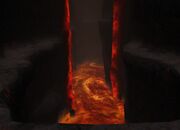
Halvung weather example
- 5. Halvung at I-8.
- Balakaf: "Next, I want t' see the flows of lava seeping from the heights of Halvung. It was quite the spectacle for a young lad traipsing through in the wee hours of the morning."
- Take the secret exit from Aht Urhgan Whitegate (H-7) to Bhaflau Thickets, and enter Halvung at (F-8); this is also where the Halvung Survival Guide is located, which you can use to get here instead. Head southwest until you reach a long canyon. The ??? is in the middle of the bridge.
- Time: 3:00-6:00.
- Trade a Light Crystal to the ???. Choose the first scene.
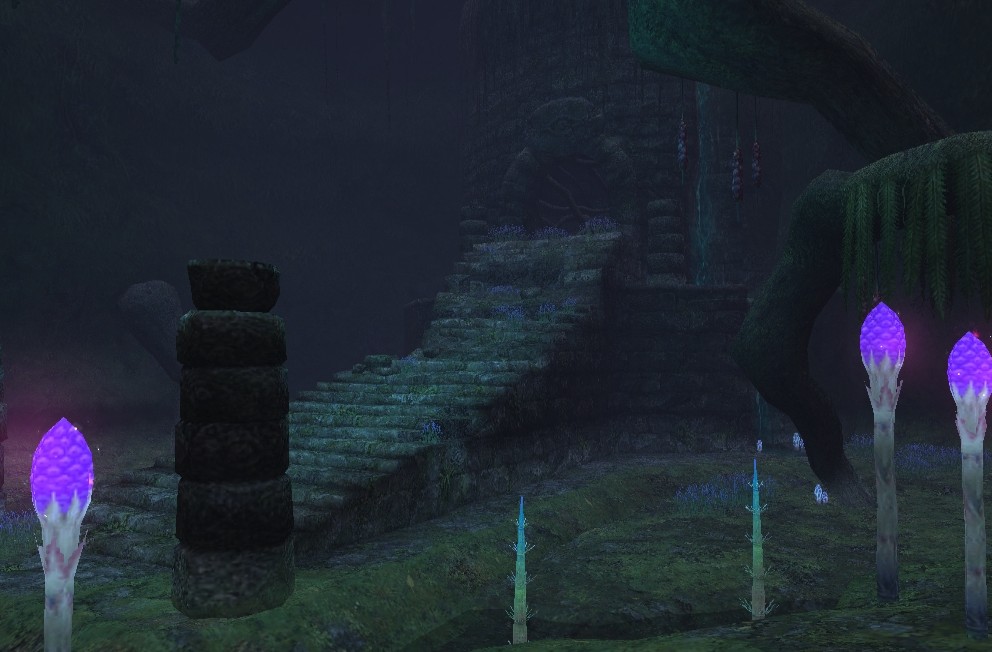
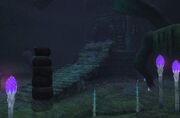
Aydeewa Subterrane weather example
- 6. Aydeewa Subterrane at G-10.
- Balakaf: "Next, I want t' see the ruins in the Aydeewa Subterrane. The howl of the wind there seemed to speak volumes to me..."
- Take a chocobo out of Al Zahbi, or Olduum Ring to teleport to the Leypoint. Enter Aydeewa Subterrane via exit 8 (E-10), then head southwest until you reach the ???.
- Weather: Wind.
- Trade a Light Cluster to the ???. Choose the third scene.
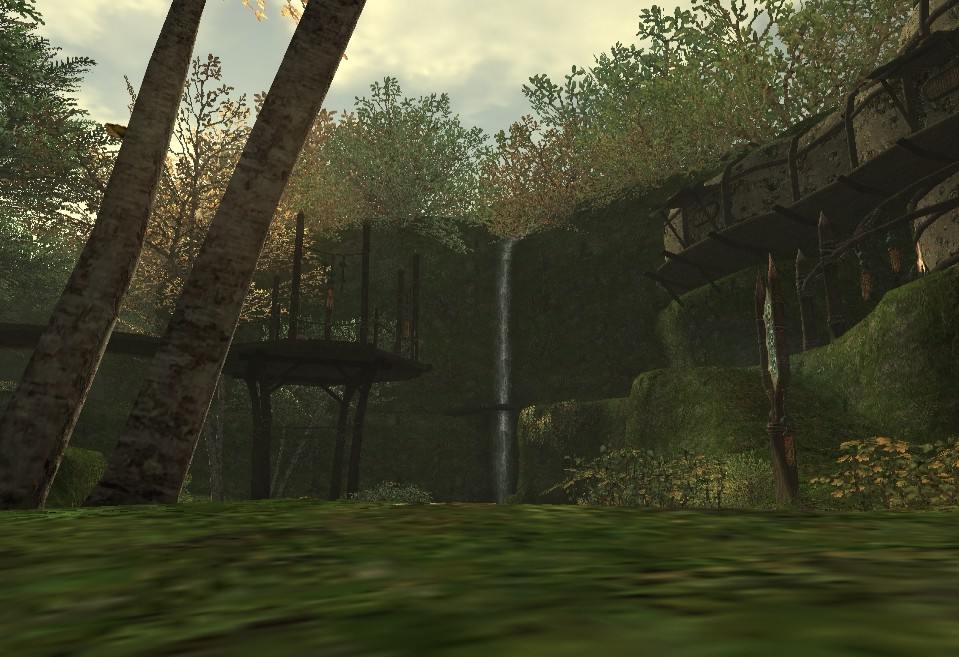
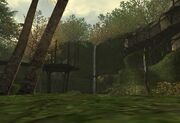
Mamook weather example
- 7. Mamook at E-8.
- Balakaf: "Next, I want t' see the waterfall in Mamook. I was lost for words in its beauty, an opalescent thread reflecting the light of the sun."
- Teleport to Mamool Ja Staging Point. Enter Mamook at (I-9), then go north to the open area. The ??? is on the western side, near the cliff.
- Time: 7:30-10:30.
- Weather: Fair or sunshine. This occurs when there are some or no clouds in the sky.
- Trade a Light Crystal to the ???. Choose the third scene.

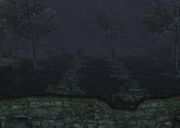
Caedarva Mire weather example
- 8. Caedarva Mire at E-10.
- Balakaf: "Next, I want t' see the graveyard in Caedarva Mire. By nightfall, I began t' imagine the tombstones to be monstrous men... That place be more than a mite terrifying."
- Take the west exit out of Nashmau and head northwest to the graveyard, or teleport to the Home Point in The Arrapago Islands->Caedarva Mire.
- Time: 20:00-22:00.
- Trade a Light Cluster to the ???. Choose the first scene.
- After returning to Balakaf, you will receive a finishing cutscene, and this will complete the quest.
- 9. All previous places.
- Balakaf: "That reminds me! I dropped a fair sum o' gold on me travels."
- After zoning and waiting another JST midnight, talk to Balakaf again.
- Revisit each ??? and examine them again until you find an Imperial Gold Piece. The correct ??? is random.
- Recommended order from quickest to slowest: 8, 1, 7, 5, 6, 2/3, 4.
- Trade the Imperial Gold Piece to Balakaf, and after a small cutscene you will get it back. This allows you to flag Five Seconds of Fame.
Game Description
- Client
- Balakaf (Port Ephramad, Aht Urhgan Whitegate)
- Summary
- Take pictures with Balakaf's "image recorder" at the places he specifies.