| Line 41: | Line 41: | ||
:''You have 30 minutes to defeat the NM, upon which the NM will disappear and you will lose the seals/gil/item traded.'' |
:''You have 30 minutes to defeat the NM, upon which the NM will disappear and you will lose the seals/gil/item traded.'' |
||
| − | *If you leave the battlefield area and do not return within a short time frame, you will |
+ | *If you leave the battlefield area and do not return within a short time frame, you will forfeit the fight; the battlefield will be canceled, your item will be lost, and you will not be able to repeat the event for that day. |
**Beware of employing a kiting strategy against these monsters, should you unintentionally leave the battlefield for too long, the battle will be forfitted. |
**Beware of employing a kiting strategy against these monsters, should you unintentionally leave the battlefield for too long, the battle will be forfitted. |
||
*If you are defeated during the battle, the NM will despawn after 3 minutes of being idle, accompanied by the text: ''"The monster fades before your eyes, a look of disappointment on its face"'' |
*If you are defeated during the battle, the NM will despawn after 3 minutes of being idle, accompanied by the text: ''"The monster fades before your eyes, a look of disappointment on its face"'' |
||
Revision as of 19:51, 27 July 2009
Field Parchments are used to spawn Notorious Monsters (Fields of Valor Notorious Monsters) for Elite Training Regimes offered by Field Manuals in the Fields of Valor event.
To undertake an elite training regime, you must buy the regime key item from a Field Manual using tabs. You can then trade Beastmen's Seals, gil, or certain pieces of equipment to a Field Parchment to spawn an NM. Your reward for defeating the NM depends on what you traded to the Field Parchment.
- You may only initiate an elite training regime by trading to the parchment once per Earth day (after Japanese midnight).
Elite Training Regimes
Name Cost Elite Training: Introduction 100 tabs Elite Training: Chapter 1 150 tabs Elite Training: Chapter 2 200 tabs Elite Training: Chapter 3 250 tabs Elite Training: Chapter 4 300 tabs Elite Training: Chapter 5 350 tabs Elite Training: Chapter 6 400 tabs Elite Training: Chapter 7 450 tabs
- Although you can purchase any chapter from any Field Manual, the Field Parchment in each zone requires a specific chapter (see below).
The Battle
When the NM spawns, you will be placed under the Level Restriction and Confrontation status effects. The result of this is that only members of your party with these status effects may interact with the NM. You can receive no outside help under these status effects, nor can you interact with players or mobs other than the spawned NM. Charmed or summoned pets will be lost, as will NPCs. Party members who have not bought a training chapter may still participate in the battle.
- You have 30 minutes to defeat the NM, upon which the NM will disappear and you will lose the seals/gil/item traded.
- If you leave the battlefield area and do not return within a short time frame, you will forfeit the fight; the battlefield will be canceled, your item will be lost, and you will not be able to repeat the event for that day.
- Beware of employing a kiting strategy against these monsters, should you unintentionally leave the battlefield for too long, the battle will be forfitted.
- If you are defeated during the battle, the NM will despawn after 3 minutes of being idle, accompanied by the text: "The monster fades before your eyes, a look of disappointment on its face"
- The NM will not regenerate its HP in the event of a wipe.
- Experience points will not be lost upon death while under the Confrontation effect.
- Most FoVNMs will have an Enspell effect as well as random job traits and buffs, (Ex. Bard songs and shadows)
- BST can summon a jug pet after the fight starts, but can not charm other mobs.
Rewards
When you defeat an NM, a blue treasure chest will spawn. The character who initiated the battle must open it to receive their reward. The chest will disappear after three minutes or when the battlefield time limit expires. The level restriction status will not wear off until after you open the chest and claim your reward.
The rewards for defeating the spawned NM depend on what you traded to the Field Parchment:
- Beastmen's Seals
- 75 Experience Points for each seal traded.
- Gil
- Twice the amount of gil traded.
- Equipment
- Augments for the piece of equipment traded.
- The following equipment cannot be traded: Exclusive, Rare, Augmented, signed, stackable (arrows, bullets, Holy Ampullas, etc.), Charged (Ecphoria Ring, High Breath Mantle, etc.), nation aketons, grips, Possibly Garrison Equipment (so far tested with a Variable Ring but it could be the ~ stats that prevented the augment so further testing is needed)and items with no level requirement (e.g. fishing rods).
Field Parchment Locations
| Elite Regime | Area | Trade Limits | Spawned Monster |
|---|---|---|---|
|
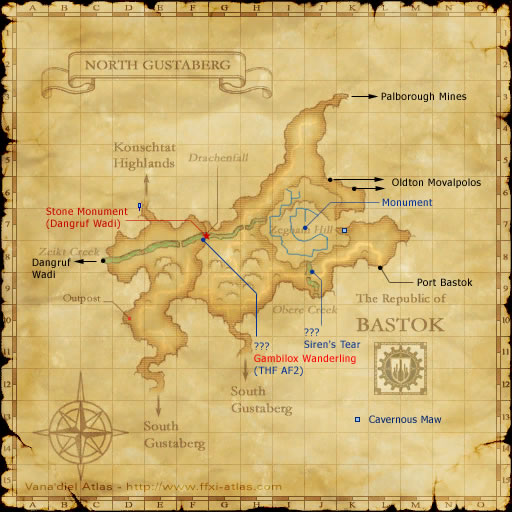
North Gustaberg (J-7) |
Up to 3 Beastmen's Seals |
Deathly Stinger |
| South Gustaberg (E-8) |
Up to 4 Beastmen's Seals |
Grylio | |
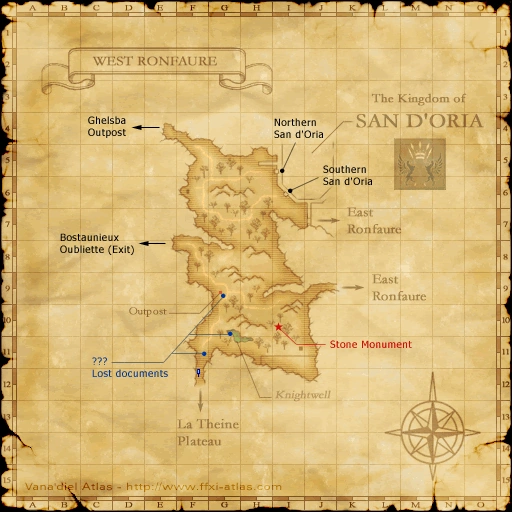
| West Ronfaure (I-9) |
Up to 3 Beastmen's Seals |
Gougetooth Ganzaga | |
| East Ronfaure (I-11) |
Up to 4 Beastmen's Seals |
Gawky Gawain | |
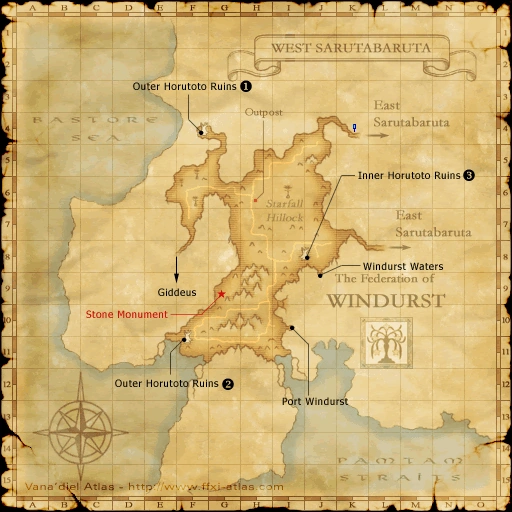
| West Sarutabaruta (J-6) |
Up to 3 Beastmen's Seals |
Bakru | |
| East Sarutabaruta (G/H-5) |
Up to 4 Beastmen's Seals |
Bolster | |
|
La Theine Plateau (I-7) |
Up to 6 Beastmen's Seal |
Zagh |
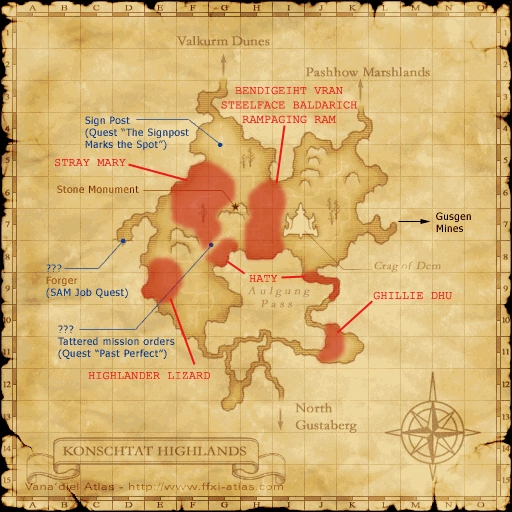
| Konschtat Highlands (F-7) |
Up to 6 Beastmen's Seals |
Thunderhead | |
| Tahrongi Canyon (H-4) |
Up to 6 Beastmen's Seals |
Allocamelus | |
| Buburimu Peninsula (I-6) |
Up to 8 Beastmen's Seals |
Ketos | |
| Valkurm Dunes (E/D-7) |
Up to 8 Beastmen's Seals |
Blue Bascinet | |
|
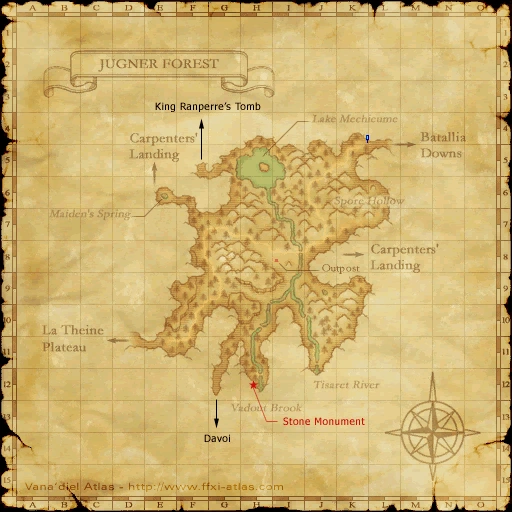
Jugner Forest (H-7) |
Up to 10 Beastmen's Seals |
Kumbaba |
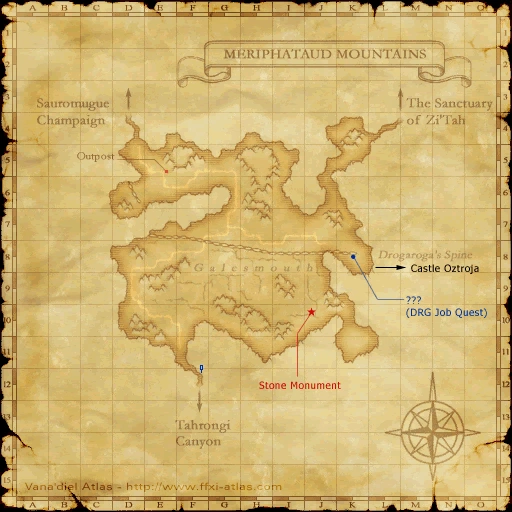
| Meriphataud Mountains (H-7) |
Up to 10 Beastmen's Seals |
Tsaagan | |
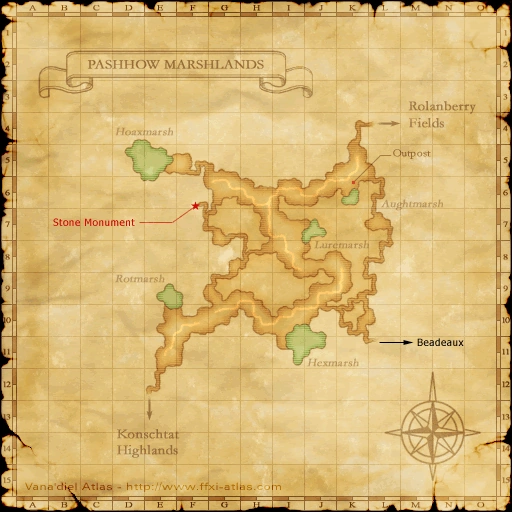
| Pashhow Marshlands (I-6) |
Up to 10 Beastmen's Seals |
Ballistosporer | |
| Qufim Island (F-5) |
Up to 12 Beastmen's Seals |
Malefic Fencer | |
|
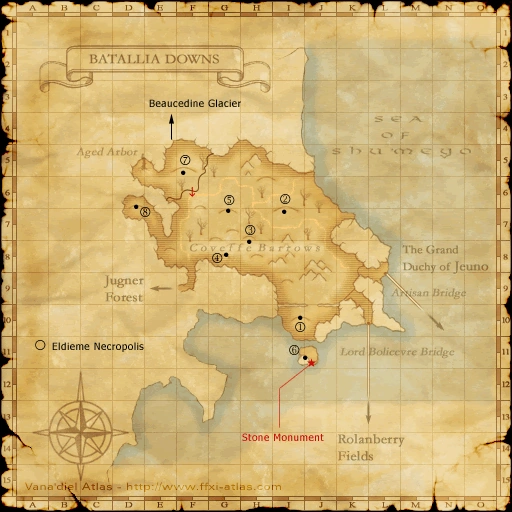
Batallia Downs (H-5) |
Up to 14 Beastmen's Seals |
Lanky Lenglen |
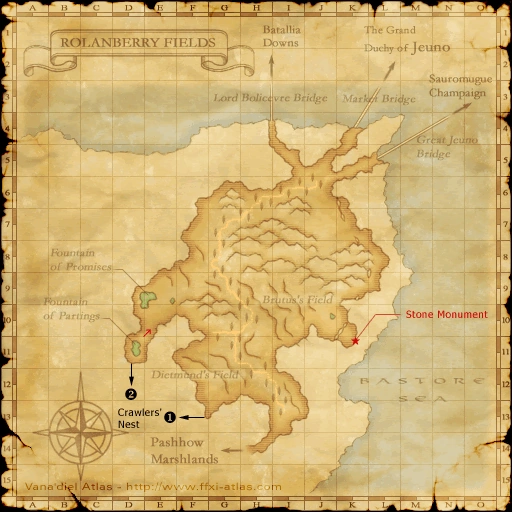
| Rolanberry Fields (G-9/10) |
Up to 14 Beastmen's Seals |
Urayuli | |
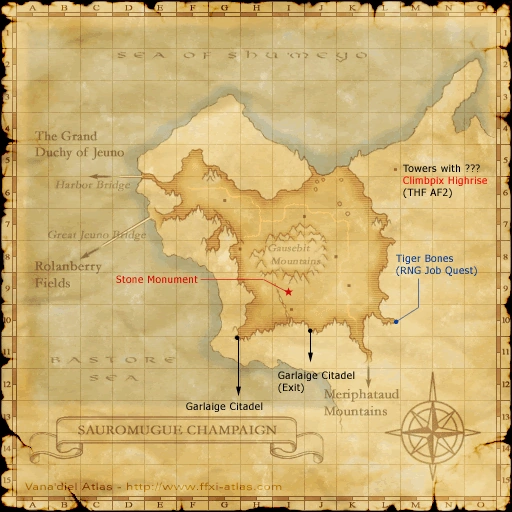
| Sauromugue Champaign (I-7) |
Up to 14 Beastmen's Seals |
Balam-Agab | |
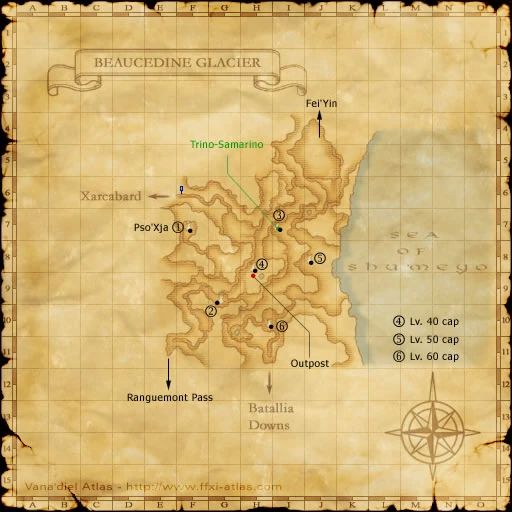
| Beaucedine Glacier (H-7) |
Up to 16 Beastmen's Seals |
Plumbago | |
|
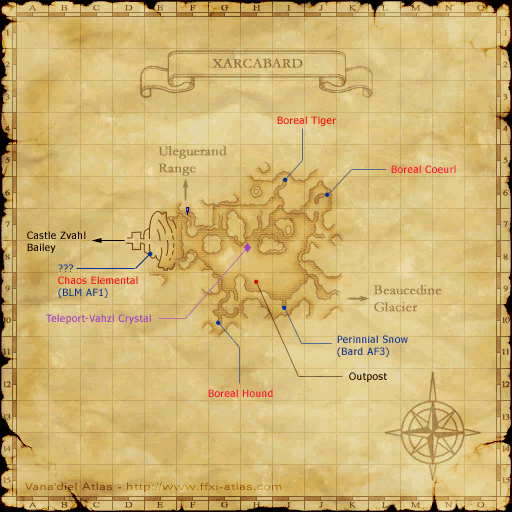
Xarcabard (H-9) |
Up to 18 Beastmen's Seals |
Kulili |
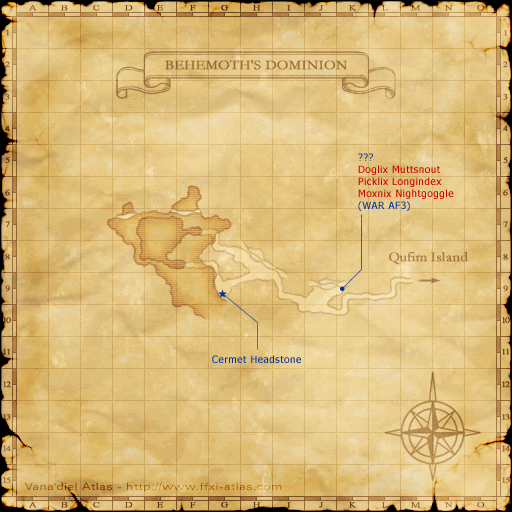
| Behemoth's Dominion (E-8) |
Up to 20 Beastmen's Seals |
Gudanna | |
|
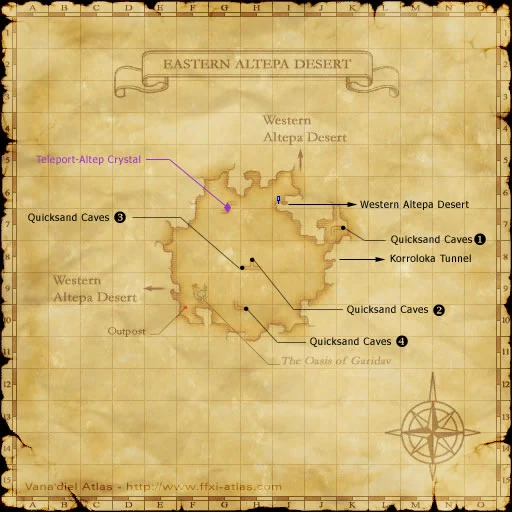
Eastern Altepa Desert (I-10) |
Up to 22 Beastmen's Seals |
Satyral |
| Yuhtunga Jungle (F-10) |
Up to 22 Beastmen's Seals |
Nutcracker | |
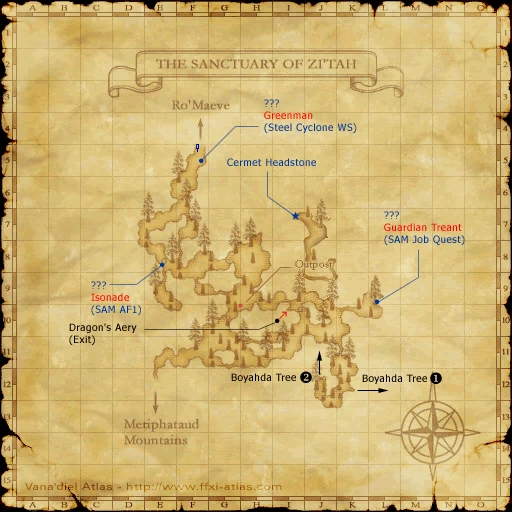
| The Sanctuary of Zi'Tah (G-8) |
Up to 24 Beastmen's Seals |
Ruebezahl | |
|
Western Altepa Desert (I-9) |
Up to 26 Beastmen's Seals |
Monarca de Altepa |
| Yhoator Jungle (F-10) |
Up to 26 Beastmen's Seals |
Kedgebelly Kate | |
| Cape Teriggan (I-8) |
Up to 28 Beastmen's Seals |
Kaneakeluh | |
| Ro'Maeve (N-10) |
Up to 28 Beastmen's Seals |
Jackpot | |
|
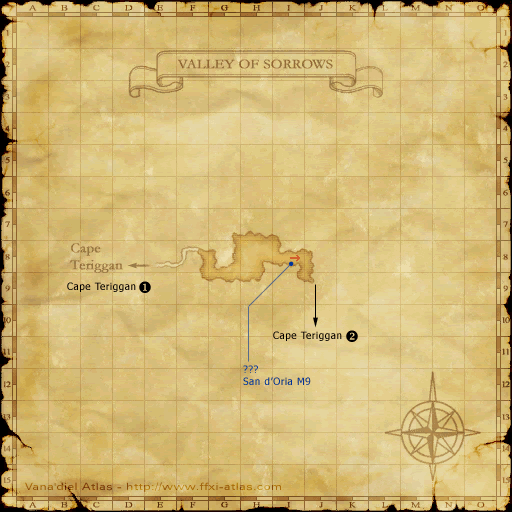
Valley of Sorrows (I-7) |
Up to 30 Beastmen's Seals |
Skahnowa |
| Ru'Aun Gardens (H-9) |
Up to 30 Beastmen's Seals |
Eraser |