mNo edit summary |
m (→Magic: - Repeated type headers for readability) |
||
| Line 417: | Line 417: | ||
| BGCOLOR="#e3e6ff" | [[Luminohelix]] |
| BGCOLOR="#e3e6ff" | [[Luminohelix]] |
||
| BGCOLOR="#e3e6ff" | [[Noctohelix]] |
| BGCOLOR="#e3e6ff" | [[Noctohelix]] |
||
| + | |- align="center" |
||
| + | | width="11.2%" BGCOLOR="#ffdead" | ''' ''' |
||
| + | | width="11.1%" BGCOLOR="#ffdead" | '''Fire''' |
||
| + | | width="11.1%" BGCOLOR="#ffdead" | '''Earth''' |
||
| + | | width="11.1%" BGCOLOR="#ffdead" | '''Water''' |
||
| + | | width="11.1%" BGCOLOR="#ffdead" | '''Wind''' |
||
| + | | width="11.1%" BGCOLOR="#ffdead" | '''Ice''' |
||
| + | | width="11.1%" BGCOLOR="#ffdead" | '''Lightning''' |
||
| + | | width="11.1%" BGCOLOR="#ffdead" | '''Light''' |
||
| + | | width="11.1%" BGCOLOR="#ffdead" | '''Darkness''' |
||
|- align="center" |
|- align="center" |
||
| rowspan=9 BGCOLOR="#e3e6ff" | '''White Magic''' |
| rowspan=9 BGCOLOR="#e3e6ff" | '''White Magic''' |
||
| Line 499: | Line 509: | ||
| BGCOLOR="#e3e6ff" | [[Diaga]] |
| BGCOLOR="#e3e6ff" | [[Diaga]] |
||
| BGCOLOR="#e3e6ff" | |
| BGCOLOR="#e3e6ff" | |
||
| + | |- align="center" |
||
| + | | width="11.2%" BGCOLOR="#ffdead" | ''' ''' |
||
| + | | width="11.1%" BGCOLOR="#ffdead" | '''Fire''' |
||
| + | | width="11.1%" BGCOLOR="#ffdead" | '''Earth''' |
||
| + | | width="11.1%" BGCOLOR="#ffdead" | '''Water''' |
||
| + | | width="11.1%" BGCOLOR="#ffdead" | '''Wind''' |
||
| + | | width="11.1%" BGCOLOR="#ffdead" | '''Ice''' |
||
| + | | width="11.1%" BGCOLOR="#ffdead" | '''Lightning''' |
||
| + | | width="11.1%" BGCOLOR="#ffdead" | '''Light''' |
||
| + | | width="11.1%" BGCOLOR="#ffdead" | '''Darkness''' |
||
|- align="center" |
|- align="center" |
||
| rowspan=5 BGCOLOR="#e3e6ff" | '''Ninjutsu''' |
| rowspan=5 BGCOLOR="#e3e6ff" | '''Ninjutsu''' |
||
| Line 545: | Line 565: | ||
| BGCOLOR="#e3e6ff" | |
| BGCOLOR="#e3e6ff" | |
||
| BGCOLOR="#e3e6ff" | |
| BGCOLOR="#e3e6ff" | |
||
| + | |- align="center" |
||
| + | | width="11.2%" BGCOLOR="#ffdead" | ''' ''' |
||
| + | | width="11.1%" BGCOLOR="#ffdead" | '''Fire''' |
||
| + | | width="11.1%" BGCOLOR="#ffdead" | '''Earth''' |
||
| + | | width="11.1%" BGCOLOR="#ffdead" | '''Water''' |
||
| + | | width="11.1%" BGCOLOR="#ffdead" | '''Wind''' |
||
| + | | width="11.1%" BGCOLOR="#ffdead" | '''Ice''' |
||
| + | | width="11.1%" BGCOLOR="#ffdead" | '''Lightning''' |
||
| + | | width="11.1%" BGCOLOR="#ffdead" | '''Light''' |
||
| + | | width="11.1%" BGCOLOR="#ffdead" | '''Darkness''' |
||
|- align="center" |
|- align="center" |
||
| rowspan=3 BGCOLOR="#e3e6ff" | '''Bard Songs''' |
| rowspan=3 BGCOLOR="#e3e6ff" | '''Bard Songs''' |
||
| Line 573: | Line 603: | ||
| BGCOLOR="#e3e6ff" | |
| BGCOLOR="#e3e6ff" | |
||
| BGCOLOR="#e3e6ff" | |
| BGCOLOR="#e3e6ff" | |
||
| + | |- align="center" |
||
| + | | width="11.2%" BGCOLOR="#ffdead" | ''' ''' |
||
| + | | width="11.1%" BGCOLOR="#ffdead" | '''Fire''' |
||
| + | | width="11.1%" BGCOLOR="#ffdead" | '''Earth''' |
||
| + | | width="11.1%" BGCOLOR="#ffdead" | '''Water''' |
||
| + | | width="11.1%" BGCOLOR="#ffdead" | '''Wind''' |
||
| + | | width="11.1%" BGCOLOR="#ffdead" | '''Ice''' |
||
| + | | width="11.1%" BGCOLOR="#ffdead" | '''Lightning''' |
||
| + | | width="11.1%" BGCOLOR="#ffdead" | '''Light''' |
||
| + | | width="11.1%" BGCOLOR="#ffdead" | '''Darkness''' |
||
|- align="center" |
|- align="center" |
||
| rowspan=5 BGCOLOR="#e3e6ff" | '''Blue Magic''' |
| rowspan=5 BGCOLOR="#e3e6ff" | '''Blue Magic''' |
||
Revision as of 00:16, 6 March 2012
For a list of NM's see Voidwatch Notorious Monsters
Getting Started
Participation Requirements
- Level 75 or above.
- Possession of the following key items:
- Adventurer's Certificate / Stratum Abyssite / Voidstone
- Affiliation to one of the nations in the past. (Completed one of the quest 1's for the WotG Missions: The Fighting Fourth, Steamed Rams, or Snake on the Plains)
First Step
- Obtain a Stratum Abyssite and a Voidstone from a Voidwatch Officer at one of the following locations:
(Stratum abyssite are permanent key items and need only be obtained once.)
| Starting quest/npc | Location | Key Item |
|---|---|---|
| Voidwatch Officer - Windurst | Windurst Waters North (G-5) Windurst Waters (S) (G-5) |
Jade Stratum Abyssite |
| Voidwatch Officer - Bastok | Bastok Markets (D-11) Bastok Markets (S) (G-5) |
Indigo Stratum Abyssite |
| Voidwatch Officer - San d'Oria | Southern San d'Oria (F-9) Southern San d'Oria (S) (L-9) |
Crimson Stratum Abyssite |
| Drafted by the Duchy - Jeuno | Ru'Lude Gardens (H-6) | White Stratum Abyssite |
| Voidwatch Ops: Border Crossing - Outlands | Norg (I-8) | Ashen Stratum Abyssite |
Notorious Monsters and Drops
Visit VwNM's for a complete list and visual guide.
Riftworn Pyxis
There are five lights that enhance the spoils from the Riftworn Pyxis. Their alignment values can be enhanced to produce the following benefits per cell (up to 3 max):
- Blue: Quantity of drops +50% (150% max). (Affected by Cobalt Cell)
- Red: Quality of drops +50% (150% max). (Affected by Rubicund Cell)
- Yellow: Experience Points Gained +25% (75% max). (Affected by Xanthous Cell)
- Green: Cruor Gained +25% (75% max). (Affected by Jade Cell)
- White: Increases chances of Atmacite and Periapt obtainment.
The alignment values for the above can be enhanced via Cells, by triggering the monster’s weakness, Treasure Hunter and by possessing certain alignment-enhancing periapts.
Ascent Items
Trade “ascent items” to a Planar Rift ahead of a battle. Doing so will enhance alignment values for that player only. Up to three of each cell type can be traded to the Planar Rift.
Ascent items can be obtained in the following ways:
- Purchased with Cruor from a Voidwatch Officer or from a Voidwatch Purveyor at the cost of Conquest Points, Imperial Standing or Allied Notes depending on the player’s current location.
- Also can be found in a Treasure Casket.
| Ascent Items | Description | Where to obtain | Cost |
|---|---|---|---|
| Cobalt Cell | Quantity of drops (Blue) | Voidwatch Officer | 3,000 Cruor |
| Voidwatch Purveyor | 2,000 Conquest Points/Imperial Standing/Allied Notes | ||
| Treasure Casket | Brown Chest from various areas with a Grounds Tome. | ||
| Rubicund Cell | Quality of drops (Red) | Voidwatch Officer | 3,000 Cruor |
| Voidwatch Purveyor | 2,000 Conquest Points/Imperial Standing/Allied Notes | ||
| Treasure Casket | Brown Chest from various areas with a Grounds Tome. | ||
| Xanthous Cell | Experience Points (Yellow) | Voidwatch Officer | 3,000 Cruor |
| Voidwatch Purveyor | 3,000 Conquest Points/Imperial Standing/Allied Notes | ||
| Treasure Casket | Brown Chest from various areas with a Grounds Tome. | ||
| Jade Cell | Cruor gained (Green) | Voidwatch Purveyor | 2,000 Conquest Points/Imperial Standing/Allied Notes |
| Treasure Casket | Brown Chest from various areas with a Grounds Tome. |
Voidwatch Weaknesses
At the start of any Vw fight, 9 weakness triggers are chosen randomly, with 6 being normal, 2 being high, and 1 being extremely vunerable. These come in the forms of job/pet abilities, weapon skills, and magic spells and can be triggered at anytime during the fight. Once a trigger has been hit, a new trigger will be chosen of the same type that was hit.
- NOTE: Some monsters are completely immune to certain triggers and this can result in poor lights at the end of the fight.
Striking a VwNM's weaknesses will enhance alignment values for all combatants.
- Alignment values increased via ascent items are reset when the player opens a Riftworn Pyxis.
- Alignment values increased by striking enemy weaknesses are reflected in pyxis content and reset at the end of battle.
- Enhanced values will not benefit combatants who did not expend a Voidstone at the commencement of battle. In this case, the portion of alignment enhanced via ascent items will be carried over.
Job Ability
Pet
Weapon Skill
Magic
|
Battle Information
In order to obtain items you must posses a Voidstone. When gathered at a Planar Rift, everyone in the alliance with a voidstone will lose their stone. Those who do not posses a stone will still receive experience and cruor. You can fight NMs in both the present and the past, depending on which stage you are on.
There is a 30-minute time limit on all battles. Signet and Sigil have no effect and you will receive Voidwatcher status during the battle. Each person who possessed a Voidstone at the start of battle will have their own reward in the chest. To enhance the drops, you can trade Ascent Items before the battle starts (these only affect the individual who made the trade). If you fail to defeat the monster due to everyone dying or to timing out, your Ascent Items will be saved at that Planar Rift. They will also be saved upon zoning and if you go to a different zone and fight/defeat a new Voidwatch Monster. To ensure that the monster is not popped before everyone is ready, any person who checks the Planar Rift will be given a drop-down menu similar to popping Key Item Notorious Monsters in Abyssea. Once popped the monster will automatically engage the person who popped it. Once engaged the monster can give hints to trigger !! weaknesses and can give multiple triggers.
- Be aware that if you stray too far from the location of the Planar Rift during the battle you will be stripped of your Voidwatcher status and be unable to aid your party.
After defeating the monster, a Riftworn Pyxis will appear where the Planar Rift was. Each person must check the Riftworn Pyxis to receive their reward(s). The items are NOT pooled together like a normal, defeated monster and thus items received can only be obtained by each individual. If the Riftworn Pyxis is not checked within a certain amount of time (3min), it will disappear with the treasure still inside.
Rewards
Upon expending a Voidstone, a player will receive items, exp, cruor, and possibly a Atmacite or a Periapt. Below is the base level of xp and cruor per stage and will be multiplied by a players yellow/green spectral alignment at the end of the battle.
Three Nations Region
| Tier | Experience | Cruor | Periapt or Atmacite |
|---|---|---|---|
| Stage I | 5,000 | 5,000 | Periapt |
| Stage II | 5,500 | 5,500 | Periapt |
| Stage III | 6,000 | 6,000 | Atmacite |
| Stage IV | 6,500 | 6,500 | Atmacite |
Jeuno Region
| Tier | Experience | Cruor | Periapt or Atmacite |
|---|---|---|---|
| Stage I | 6,000 | 6,000 | Periapt |
| Stage II | 6,500 | 6,500 | Periapt |
| Stage III | 7,000 | 7,000 | Atmacite & Periapt |
| Stage IV | 6,500 | 6,500 | Periapt |
| Stage V | 7,000 | 7,000 | Periapt |
| Stage VI (S) | 7500 | 7500 | Atmacite |
| Stage VI | 10,000 | 10,000 | Atmacite & Periapt |
Zilart Region
| Tier | Experience | Cruor | Periapt or Atmacite |
|---|---|---|---|
| Stage I | 5,000 | 7,000 | Periapt |
| Stage II | 5,000 | 7,500 | Atmacite |
| Stage III | 5,000 | 8,000 | Atmacite |
-

Rhapsody in Mauve -
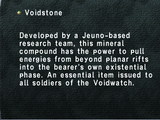
Voidstone -

Vivid Periapt of Exploration -

Indigo Stratum Abyssite -
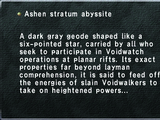
Ashen Stratum Abyssite -

Bismarck -

Indigo Stratum Abyssite IV -
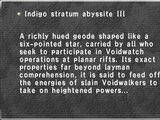
Indigo Stratum Abyssite III
All items (65)


