No edit summary |
m (Fixed menu) |
||
| (38 intermediate revisions by 26 users not shown) | |||
| Line 1: | Line 1: | ||
| + | __NOTOC__[[File:completerelicweapons.jpg|thumb|The completed Relic Weapons. Excluding [[Aegis]]]] |
||
| − | [[Category:Featured Articles]][[Category:Guides]][[Category:Weapons]][[Category:Dynamis]] |
||
| − | [[Image:completerelicweapons.jpg|thumb|The completed Relic Weapons. Excluding [[Aegis]]]] |
||
{| cellspacing="3" width="55%" align="center" |
{| cellspacing="3" width="55%" align="center" |
||
| − | |valign="top" align="center" style="background:#f9f9f9; border: 1px solid #a9a9a9; padding-left:1em;"|'''Table of Contents:'''<br> |
+ | |valign="top" align="center" style="background:#f9f9f9; border: 1px solid #a9a9a9; padding-left:1em;"| '''Table of Contents:'''<br> |
| − | [[#How to Obtain One|How to Obtain]] - [[#The 5 Stages|The 5 Stages |
+ | [[#How to Obtain One|How to Obtain]] - [[#The 5 Stages|The 5 Stages]]<br>[[#How to Upgrade|How to Upgrade]] - [[#Required "Ingredients"| Required "Ingredients"]] |
| + | |} |
||
| − | |}__NOTOC__ |
||
| − | <p align="justify">Relic Weapons are sixteen mysterious, high-damage, low-delay weapons obtained through participating in various runs into [[Dynamis]]. Admittedly, "Relic ''Weapon''" is sort of a catch-all term; a [[Relic Horn]] and a [[Relic Shield]] also exist.</p> |
+ | <p align="justify">'''Relic Weapons''' are sixteen mysterious, high-damage, low-delay weapons obtained through participating in various runs into [[Dynamis]]. Admittedly, "Relic ''Weapon''" is sort of a catch-all term; a [[Relic Horn]] and a [[Relic Shield]] also exist.</p> |
<p align="justify">Given enough time and money, they can be upgraded into forms known to be the most powerful weapons of each type in the game. This upgrade process is most often very lengthy, and extremely expensive for the typical player. It requires a large amount of [[:category:Ancient Currency|Ancient Currency]], various crafted items (some requiring a high-level crafter), and certain [[Rare]]/[[Exclusive|Ex]] items only obtainable in [[Dynamis - Beaucedine|Dynamis: Beaucedine]] and [[Dynamis - Xarcabard|Dynamis: Xarcabard]]. This is such a serious and intense process that we have devoted an entire section below to what it really means to undertake this task.</p> |
<p align="justify">Given enough time and money, they can be upgraded into forms known to be the most powerful weapons of each type in the game. This upgrade process is most often very lengthy, and extremely expensive for the typical player. It requires a large amount of [[:category:Ancient Currency|Ancient Currency]], various crafted items (some requiring a high-level crafter), and certain [[Rare]]/[[Exclusive|Ex]] items only obtainable in [[Dynamis - Beaucedine|Dynamis: Beaucedine]] and [[Dynamis - Xarcabard|Dynamis: Xarcabard]]. This is such a serious and intense process that we have devoted an entire section below to what it really means to undertake this task.</p> |
||
| Line 15: | Line 14: | ||
{| border="0" cellpadding="2" cellspacing="2" width="85%" align="center" |
{| border="0" cellpadding="2" cellspacing="2" width="85%" align="center" |
||
| − | !width="16%" colspan="3 |
+ | !width="16%" colspan="3" BGCOLOR="#66CCFF"| [[Dynamis - Bastok|Dynamis: Bastok]] |
| − | !width="16%" colspan="3 |
+ | !width="16%" colspan="3" BGCOLOR="#D87093"| [[Dynamis - San d'Oria|Dynamis: San d'Oria]] |
|- |
|- |
||
| − | !width="16% |
+ | !width="16%" BGCOLOR="#66CCFF"| Weapon |
| − | !width="17% |
+ | !width="17%" BGCOLOR="#66CCFF"| Type |
| − | !width="17% |
+ | !width="17%" BGCOLOR="#66CCFF"| Jobs |
| − | !width="16% |
+ | !width="16%" BGCOLOR="#D87093"| Weapon |
| − | !width="17% |
+ | !width="17%" BGCOLOR="#D87093"| Type |
| − | !width="17% |
+ | !width="17%" BGCOLOR="#D87093"| Jobs |
|- |
|- |
||
| − | |BGCOLOR="#DDEEFF"| |
+ | |BGCOLOR="#DDEEFF"| [[Relic Blade]] |
| − | |BGCOLOR="#DDEEFF"| |
+ | |BGCOLOR="#DDEEFF"| [[:category:Great Swords|Great Sword]] |
| − | |BGCOLOR="#DDEEFF" align="center"|[[WAR]]/[[PLD]]/[[DRK]] |
+ | |BGCOLOR="#DDEEFF" align="center"| [[WAR]]/[[PLD]]/[[DRK]] |
| − | |BGCOLOR="#FFD4E2"| |
+ | |BGCOLOR="#FFD4E2"| [[Relic Bhuj]] |
| − | |BGCOLOR="#FFD4E2"| |
+ | |BGCOLOR="#FFD4E2"| [[:category:Great Axes|Great Axe]] |
| − | |BGCOLOR="#FFD4E2" align="center"|[[WAR]] |
+ | |BGCOLOR="#FFD4E2" align="center"| [[WAR]] |
|- |
|- |
||
| − | |BGCOLOR="#DDEEFF"| |
+ | |BGCOLOR="#DDEEFF"| [[Relic Scythe]] |
| − | |BGCOLOR="#DDEEFF"| |
+ | |BGCOLOR="#DDEEFF"| [[:category:Scythes|Scythe]] |
| − | |BGCOLOR="#DDEEFF" align="center"|[[DRK]] |
+ | |BGCOLOR="#DDEEFF" align="center"| [[DRK]] |
| − | |BGCOLOR="#FFD4E2"| |
+ | |BGCOLOR="#FFD4E2"| [[Relic Gun]] |
| − | |BGCOLOR="#FFD4E2"| |
+ | |BGCOLOR="#FFD4E2"| [[:category:Marksmanship|Marksmanship]] |
| − | |BGCOLOR="#FFD4E2" align="center"|[[RNG]] |
+ | |BGCOLOR="#FFD4E2" align="center"| [[RNG]] |
|- |
|- |
||
| − | |BGCOLOR="#DDEEFF"| |
+ | |BGCOLOR="#DDEEFF"| [[Relic Axe]] |
| − | |BGCOLOR="#DDEEFF"| |
+ | |BGCOLOR="#DDEEFF"| [[:category:Axes|Axe]] |
| − | |BGCOLOR="#DDEEFF" align="center"|[[BST]] |
+ | |BGCOLOR="#DDEEFF" align="center"| [[BST]] |
| − | |BGCOLOR="#FFD4E2"| |
+ | |BGCOLOR="#FFD4E2"| [[Ihintanto]] |
| − | |BGCOLOR="#FFD4E2"| |
+ | |BGCOLOR="#FFD4E2"| [[:category:Katana|Katana]] |
| − | |BGCOLOR="#FFD4E2" align="center"|[[NIN]] |
+ | |BGCOLOR="#FFD4E2" align="center"| [[NIN]] |
|- |
|- |
||
| − | |BGCOLOR="#DDEEFF"| |
+ | |BGCOLOR="#DDEEFF"| [[Ito]] |
| − | |BGCOLOR="#DDEEFF"| |
+ | |BGCOLOR="#DDEEFF"| [[:category:Great Katana|Great Katana]] |
| − | |BGCOLOR="#DDEEFF" align="center"|[[SAM]] |
+ | |BGCOLOR="#DDEEFF" align="center"| [[SAM]] |
| − | |BGCOLOR="#FFD4E2"| |
+ | |BGCOLOR="#FFD4E2"| [[Relic Lance]] |
| − | |BGCOLOR="#FFD4E2"| |
+ | |BGCOLOR="#FFD4E2"| [[:category:Polearms|Polearm]] |
| − | |BGCOLOR="#FFD4E2" align="center"|[[DRG]] |
+ | |BGCOLOR="#FFD4E2" align="center"| [[DRG]] |
|- |
|- |
||
| − | !width="16%" colspan="3 |
+ | !width="16%" colspan="3" BGCOLOR="#65D43E"| [[Dynamis - Windurst|Dynamis: Windurst]] |
| − | !width="16%" colspan="3 |
+ | !width="16%" colspan="3" BGCOLOR="#F1CC96"| [[Dynamis - Jeuno|Dynamis: Jeuno]] |
|- |
|- |
||
| − | !width="16% |
+ | !width="16%" BGCOLOR="#65D43E"| Weapon |
| − | !width="17% |
+ | !width="17%" BGCOLOR="#65D43E"| Type |
| − | !width="17% |
+ | !width="17%" BGCOLOR="#65D43E"| Jobs |
| − | !width="16% |
+ | !width="16%" BGCOLOR="#F1CC96"| Weapon |
| − | !width="17% |
+ | !width="17%" BGCOLOR="#F1CC96"| Type |
| − | !width="17% |
+ | !width="17%" BGCOLOR="#F1CC96"| Jobs |
|- |
|- |
||
| − | |BGCOLOR="# |
+ | |BGCOLOR="#ddf4d4"| [[Relic Sword]] |
| − | |BGCOLOR="# |
+ | |BGCOLOR="#ddf4d4"| [[:category:Swords|Sword]] |
| − | |BGCOLOR="#DDF4D4" align="center"|[[RDM]]/[[PLD]] |
+ | |BGCOLOR="#DDF4D4" align="center"| [[RDM]]/[[PLD]] |
| − | |BGCOLOR="#FFE8C6"| |
+ | |BGCOLOR="#FFE8C6"| [[Relic Staff]] |
| − | |BGCOLOR="#FFE8C6"| |
+ | |BGCOLOR="#FFE8C6"| [[:category:Staves|Staff]] |
| − | |BGCOLOR="#FFE8C6" align="center"|[[BLM]]/[[SMN]] |
+ | |BGCOLOR="#FFE8C6" align="center"| [[BLM]]/[[SMN]] |
|- |
|- |
||
| − | |BGCOLOR="# |
+ | |BGCOLOR="#ddf4d4"| [[Relic Dagger]] |
| − | |BGCOLOR="# |
+ | |BGCOLOR="#ddf4d4"| [[:category:Daggers|Dagger]] |
| − | |BGCOLOR="#DDF4D4" align="center"|[[RDM]]/[[THF]]/[[BRD]] |
+ | |BGCOLOR="#DDF4D4" align="center"| [[RDM]]/[[THF]]/[[BRD]] |
| − | |BGCOLOR="#FFE8C6"| |
+ | |BGCOLOR="#FFE8C6"| [[Relic Bow]] |
| − | |BGCOLOR="#FFE8C6"| |
+ | |BGCOLOR="#FFE8C6"| [[:category:Archery|Archery]] |
| − | |BGCOLOR="#FFE8C6" align="center"|[[RNG]]/[[SAM]] |
+ | |BGCOLOR="#FFE8C6" align="center"| [[RNG]]/[[SAM]] |
|- |
|- |
||
| − | |BGCOLOR="# |
+ | |BGCOLOR="#ddf4d4"| [[Relic Knuckles]] |
| − | |BGCOLOR="# |
+ | |BGCOLOR="#ddf4d4"| [[:category:Hand-to-Hand|Hand-to-Hand]] |
| − | |BGCOLOR="#DDF4D4" align="center"|[[MNK]] |
+ | |BGCOLOR="#DDF4D4" align="center"| [[MNK]] |
| − | |BGCOLOR="#FFE8C6"| |
+ | |BGCOLOR="#FFE8C6"| [[Relic Horn]] |
| − | |BGCOLOR="#FFE8C6"| |
+ | |BGCOLOR="#FFE8C6"| [[:category:Wind Instruments|Wind Instrument]] |
| − | |BGCOLOR="#FFE8C6" align="center"|[[BRD]] |
+ | |BGCOLOR="#FFE8C6" align="center"| [[BRD]] |
|- |
|- |
||
| − | |BGCOLOR="# |
+ | |BGCOLOR="#ddf4d4"| [[Relic Maul]] |
| − | |BGCOLOR="# |
+ | |BGCOLOR="#ddf4d4"| [[:category:Clubs|Club]] |
| − | |BGCOLOR="#DDF4D4" align="center"|[[WHM]] |
+ | |BGCOLOR="#DDF4D4" align="center"| [[WHM]] |
| − | |BGCOLOR="#FFE8C6"| |
+ | |BGCOLOR="#FFE8C6"| [[Relic Shield]] |
| − | |BGCOLOR="#FFE8C6"| |
+ | |BGCOLOR="#FFE8C6"| [[:category:Shields|Shield]] |
| − | |BGCOLOR="#FFE8C6" align="center"|[[PLD]] |
+ | |BGCOLOR="#FFE8C6" align="center"| [[PLD]] |
|} |
|} |
||
==The 5 Stages== |
==The 5 Stages== |
||
| − | Each base Relic Weapon can be upgraded '''four''' times. Three of these four upgrades are handled by a [[Goblin]] [[NPC]] named [[Switchstix]], who can be found in [[Castle Zvahl Baileys]]. Each of these three upgrades requires that you simultaneously trade him your current-stage Relic Weapon along with whatever materials he asks for. Switchstix will then ask for his commission in [[:category:Ancient Currency|Ancient Currency]]; this is a separate trade, and the upgrade process will not begin until he receives it. Your Relic Weapon and materials cannot be returned once traded. Furthermore, no other upgrades can be performed until the Ancient Currency commission has been traded to Switchstix. Time needed for the upgrade process varies by stage; when the waiting period is over, speak to Switchstix again to obtain your upgraded Relic Weapon. The specifics of this process can be found below. |
+ | Each base Relic Weapon can be upgraded '''four''' times before [[Trial of the Magians]]. Three of these four upgrades are handled by a [[Goblin]] [[NPC]] named [[Switchstix]], who can be found in [[Castle Zvahl Baileys]]. Each of these three upgrades requires that you simultaneously trade him your current-stage Relic Weapon along with whatever materials he asks for. Switchstix will then ask for his commission in [[:category:Ancient Currency|Ancient Currency]]; this is a separate trade, and the upgrade process will not begin until he receives it. Your Relic Weapon and materials cannot be returned once traded. Furthermore, no other upgrades can be performed until the Ancient Currency commission has been traded to Switchstix. Time needed for the upgrade process varies by stage; when the waiting period is over, speak to Switchstix again to obtain your upgraded Relic Weapon. The specifics of this process can be found below. |
All Relic Weapons, in all stages and forms, are Level 75. The stages of each Relic Weapon can be generally described as follows: |
All Relic Weapons, in all stages and forms, are Level 75. The stages of each Relic Weapon can be generally described as follows: |
||
| Line 100: | Line 99: | ||
:;Third Stage: The Dynamis-only stats that appeared during the second stage now become available outside of Dynamis, while stats within Dynamis are nudged slightly further towards their final values. Elemental resistance stats will raise slightly, but remain Dynamis-specific. |
:;Third Stage: The Dynamis-only stats that appeared during the second stage now become available outside of Dynamis, while stats within Dynamis are nudged slightly further towards their final values. Elemental resistance stats will raise slightly, but remain Dynamis-specific. |
||
:;Fourth Stage: The weapon's base stats are now "locked in" for all areas, and are close to their final values (though there are no longer any Dynamis-specific elemental resistance stats). The weapon's Relic [[:category:Weapon Skills|weapon skill]] becomes available at this stage, but only in Dynamis areas. Each weapon skill grants you with a brief [[Additional Effect]] (described by the help text displayed when selecting the weapon skill in the menu) after its use. The duration of this effect varies with TP. |
:;Fourth Stage: The weapon's base stats are now "locked in" for all areas, and are close to their final values (though there are no longer any Dynamis-specific elemental resistance stats). The weapon's Relic [[:category:Weapon Skills|weapon skill]] becomes available at this stage, but only in Dynamis areas. Each weapon skill grants you with a brief [[Additional Effect]] (described by the help text displayed when selecting the weapon skill in the menu) after its use. The duration of this effect varies with TP. |
||
| − | :;Fifth Stage: This is the final stage. Stats are all at full. Additional stats are added. The Relic Weapon Skill is available for all areas. At this stage, the Relic Weapon is complete, and |
+ | :;Fifth Stage: This is the final stage. Stats are all at full. Additional stats are added. The Relic Weapon Skill is available for all areas. At this stage, the Relic Weapon is complete, and can only be upgraded further via [[Trial of the Magians]]. |
==How to Upgrade== |
==How to Upgrade== |
||
Listed below are all the items and [[:category:Ancient Currency|Ancient Currency]] fees necessary to upgrade each stage of each Relic Weapon. All weapons follow the same basic process. There is a certain amount of waiting to do for some steps, and some hardcore [[Category:Dynamis|Dynamis]] farming for others. This is the process, though: |
Listed below are all the items and [[:category:Ancient Currency|Ancient Currency]] fees necessary to upgrade each stage of each Relic Weapon. All weapons follow the same basic process. There is a certain amount of waiting to do for some steps, and some hardcore [[Category:Dynamis|Dynamis]] farming for others. This is the process, though: |
||
| + | ;Stage 1 |
||
| − | ;Stage 1 > Stage 2: '''''Wait Time:''' After 12 Midnight in Japan. (UTC/GMT +9) ''<br>You will need your base Relic Weapon, three specific items (these are crafted items that can typically be obtained from Dynamis, crafted from materials found in Dynamis, or purchased with Ancient Currency), and 3 to 5 100-unit pieces of a specific type of [[:category:Ancient Currency|Ancient Currency]] for the commission. Once you have all the required items, speak to [[Switchstix]] in [[Castle Zvahl Baileys]] at I-8 (where you first enter). Trade him the weapon and the three items. Speak to him again, and he will ask for the payment fee. Trade him the [[:category:Ancient Currency|Ancient Currency]]. After this, wait 1 Earth day (JP midnight) and speak to him again to receive your Stage 2 Relic Weapon. |
||
| + | : Obtain the base Relic weapon from the appropriate initial Dynamis area: [[Dynamis - Bastok|Dynamis: Bastok]], [[Dynamis - San d'Oria|Dynamis: San d'Oria]], [[Dynamis - Windurst|Dynamis: Windurst]], or [[Dynamis - Jeuno|Dynamis: Jeuno]]. |
||
| + | ;Stage 2 |
||
| − | ;Stage 2 > Stage 3: '''''Wait Time:''' 1 Earth-Week''<br>This time, [[Switchstix]] will want your stage 2 Relic Weapon and three different weapons of the same type as the one you are upgrading, as well as an [[:category:Ancient Currency|Ancient Currency]] fee of 12 to 16 100-unit pieces. Gather up all the items, and head out to speak to him again. Trade him the 2nd stage Relic Weapon and the other three weapons. Speak to him again, and he will ask for the payment fee. Trade him the [[:category:Ancient Currency|Ancient Currency]] and wait 1 real-life week. Speak to him again to receive your Stage 3 Relic Weapon. |
||
| + | : '''''Wait Time:''' One day (Vana'diel time) ''<br>You will need your base Relic Weapon, three specific items (these are crafted items that can typically be obtained from Dynamis, crafted from materials found in Dynamis, or purchased with Ancient Currency), and 3 to 5 100-unit pieces of a specific type of [[:category:Ancient Currency|Ancient Currency]] for the commission. Once you have all the required items, speak to [[Switchstix]] in [[Castle Zvahl Baileys]] at I-8 (where you first enter (Survival Manual near by). Trade him the weapon and all three items. Speak to him again, and he will ask for the payment fee. Trade him the [[:category:Ancient Currency|Ancient Currency]]. After this, wait 1 Vana'diel day and speak to him (again) to receive your Stage 2 Relic Weapon. |
||
| − | ;Stage 3 |
+ | ;Stage 3: '''''Wait Time:''' two hours (Earth time)''<br>This time, [[Switchstix]] will want your stage 2 Relic Weapon and three different weapons of the same type as the one you are upgrading, as well as an [[:category:Ancient Currency|Ancient Currency]] fee of 12 to 16 100-unit pieces. Gather up all the items, and head out to speak to him again. Trade him the 2nd stage Relic Weapon and the other three weapons. Speak to him again, and he will ask for the payment fee. Trade him the [[:category:Ancient Currency|Ancient Currency]] and wait 2 Vana'diel days (starting from the next Vana'diel day change). Speak to him again to receive your Stage 3 Relic Weapon. |
| + | ;Stage 4: '''''Wait Time:''' 1 hour (Earth time)''<br>Once you've obtained the appropriate [[Attestations|Attestation]] from the [[:category:Shadows|Shadow]] [[NM]]s in [[Dynamis - Beaucedine|Dynamis: Beaucedine]], head out to see your buddy [[Switchstix]] again. Trade him the 3rd stage Relic Weapon and the [[Attestations|Attestation]]. Speak to him again, and he will ask for the payment fee of somewhere between 60 and 62 100-unit pieces. Trade him the [[:category:Ancient Currency|Ancient Currency]] and wait 1 earth hour. Speak to him again to receive your Stage 4 Relic Weapon. |
||
| − | ;Stage 4 > Stage 5: '''''Wait Time:''' None''<br>'''''Added Bonus:''' 3,000 [[1 Byne Bill]]s, [[Ordelle Bronzepiece|O. Bronzepieces]], or [[Tukuku Whiteshell|T. Whiteshells]]''<br>This last step requires two [[Rare]]/[[Exclusive|Ex]] drops from [[Dynamis - Xarcabard|Dynamis: Xarcabard]]: a [[Necropsyche|Shard of Necropsyche]] and a [[Fragments|Fragment]] (which may prove difficult to obtain) specific to your Relic Weapon, as well as a single 10,000-unit Ancient Currency of a specific type. Once you have all these items, pay a visit to [[Switchstix]] yet again (Note: going to the goblin is optional). Upon talking to him, [[media:Dagger Conversation.jpg|you will get a cutscene in which your Relic Weapon will speak to you]]. Now head out to the appropriate location (which can be found grouped with the ''Items Needed'' in the tables below) for your specific weapon to find a blank ???. Trade your Relic Weapon and the required items (including the [[:category:Ancient Currency|Ancient Currency]]) to the blank ???. After a cutscene, you will receive your 5th stage, and completely upgraded, Relic Weapon! And as an added bonus, you will get back 3,000 of whatever [[:category:Ancient Currency|Ancient Currency]] you had to trade for this final step. |
||
| + | |||
| + | ;Stage 5: '''''Wait Time:''' None''<br>'''''Added Bonus:''' 30 [[100 Byne Bill]]s, [[Montiont Silverpiece|M. Silverpieces]], or [[Lungo-Nango Jadeshell|L. Jadeshells]]''<br>This last step requires two [[Rare]]/[[Exclusive|Ex]] drops from [[Dynamis - Xarcabard|Dynamis: Xarcabard]]: a [[Necropsyche|Shard of Necropsyche]] and a [[Fragments|Fragment]] (which may prove difficult to obtain) specific to your Relic Weapon, as well as a single 10,000-unit Ancient Currency of a specific type. Once you have all these items, pay a visit to [[Switchstix]] yet again (Note: going to the goblin is optional). Upon talking to him, [[media:Dagger Conversation.jpg|you will get a cutscene in which your Relic Weapon will speak to you]]. Now head out to the appropriate location (which can be found grouped with the ''Items Needed'' in the tables below) for your specific weapon to find a '''blank ???'''. Trade your Relic Weapon and the required items (including the [[:category:Ancient Currency|Ancient Currency]]) to the '''blank ???'''. After a cutscene, you will receive your 5th stage, and completely upgraded, Relic Weapon! And as an added bonus, you will get back 3,000 of whatever [[:category:Ancient Currency|Ancient Currency]] you had to trade for this final step. |
||
==Required "Ingredients"== |
==Required "Ingredients"== |
||
| − | <center>[[# |
+ | <center>[[:Category:Relic Weapons#Hand-to-Hand|Hand-to-Hand]] - [[:Category:Relic Weapons#Dagger|Dagger]] - [[:Category:Relic Weapons#Sword|Sword]] - [[:Category:Relic Weapons#Great_Sword|Great Sword]] - [[:Category:Relic Weapons#Axe|Axe]] - [[:Category:Relic Weapons#Great_Axe|Great Axe]] - [[:Category:Relic Weapons#Scythe|Scythe]]<br>[[:Category:Relic Weapons#Polearm|Polearm]] - [[:Category:Relic Weapons#Katana|Katana]] - [[:Category:Relic Weapons#Great_Katana|Great Katana]] - [[:Category:Relic Weapons#Club|Club]] - [[:Category:Relic Weapons#Staff|Staff]] - [[:Category:Relic Weapons#Marksmanship|Marksmanship]] - [[:Category:Relic Weapons#Archery|Archery]] - [[:Category:Relic Weapons#Wind Instrument|Wind Instrument]] - [[:Category:Relic Weapons#Shield|Shield]]</center> |
| + | {| class="compact-list" width="99%" cellspacing="2" cellpadding="2" border="0" |
||
| − | |||
| + | ! width="20%" bgcolor="#66CCFF" | Weapon |
||
| − | {| border="0" cellpadding="2" cellspacing="2" width="100%" align="left" |
||
| − | !width=" |
+ | ! width="24%" bgcolor="#66CCFF" | Upgrade Stage |
| − | !width=" |
+ | ! width="30%" bgcolor="#D87093" | Items Needed |
| − | !width=" |
+ | ! width="25%" bgcolor="#65d43e" | Fee |
| + | |- id="Hand-to-Hand" valign="top" |
||
| − | !width="25%" align="center" BGCOLOR="#65d43e" |Fee |
||
| − | + | | rowspan="5" bgcolor="#DDEEFF" | |
|
| + | ;Hand-to-Hand |
||
| − | |- |
||
| + | :[[MNK]] |
||
| − | |rowspan=5 BGCOLOR="#DDEEFF" | '''Hand to Hand'''<br> [[MNK]] |
||
| + | | bgcolor="#DDEEFF" | |
||
| − | |BGCOLOR="#DDEEFF" valign="top"| '''Stage 1:'''<br> [[Relic Knuckles]] |
||
| + | ;Stage 1: |
||
| − | |BGCOLOR="#ffd4e2" valign="top"| None |
||
| + | :[[Relic Knuckles]] |
||
| − | |BGCOLOR="#ddf4d4"| None |
||
| + | | bgcolor="#ffd4e2" | |
||
| − | |rowspan=5 BGCOLOR="#ffffff" valign="bottom"|<div id="2"> </div> |
||
| + | :None |
||
| − | |- |
||
| + | | bgcolor="#ddf4d4" | |
||
| − | |BGCOLOR="#DDEEFF" valign="top"| '''Stage 2:'''<br> [[Militant Knuckles]] |
||
| + | :None |
||
| − | |BGCOLOR="#ffd4e2" valign="top"| [[Relic Knuckles]]<br> [[Koh-I-Noor]]<br> [[Griffon Leather]]<br> [[Adaman Sheet]] |
||
| + | |- valign="top" |
||
| − | |BGCOLOR="#ddf4d4"|[[One Hundred Byne Bill|100 Byne Bill]] x 4 |
||
| + | | bgcolor="#DDEEFF" | |
||
| − | |- |
||
| + | ;Stage 2: |
||
| − | |BGCOLOR="#DDEEFF" valign="top"| '''Stage 3:'''<br> [[Dynamis Knuckles]] |
||
| + | :[[Militant Knuckles]] |
||
| − | |BGCOLOR="#ffd4e2" valign="top"| [[Militant Knuckles]]<br> [[Bronze Knuckles]]<br> [[Metal Knuckles]]<br> [[Koenigs Knuckles]] |
||
| + | | bgcolor="#ffd4e2" | |
||
| − | |BGCOLOR="#ddf4d4"|[[Montiont Silverpiece|M. Silverpiece]] x 14 |
||
| + | :[[Relic Knuckles]] |
||
| − | |- |
||
| + | :[[Koh-I-Noor]] |
||
| − | |BGCOLOR="#DDEEFF" valign="top"| '''Stage 4:'''<br> [[Caestus]] |
||
| + | :[[Griffon Leather]] |
||
| − | |BGCOLOR="#ffd4e2" valign="top"| [[Dynamis Knuckles]]<br> [[Attestation of Might]] |
||
| + | :[[Adaman Sheet]] |
||
| − | |BGCOLOR="#ddf4d4"|[[Lungo-Nango Jadeshell|L. Jadeshell]] x 61 |
||
| + | | bgcolor="#ddf4d4" | |
||
| − | |- |
||
| + | :[[One Hundred Byne Bill|100 Byne Bill]] x 4 |
||
| − | |BGCOLOR="#DDEEFF" valign="top"| '''Stage 5:'''<br> [[Spharai]] |
||
| + | |- valign="top" |
||
| − | |BGCOLOR="#ffd4e2" valign="top"| [[Caestus]]<br> [[Necropsyche]]<br> [[Mystic Fragment]]<br> ''[[:Image:CastleOztroja5.png|Castle Oztroja]]: Courtyard G/H-5/6'' |
||
| + | | bgcolor="#DDEEFF" | |
||
| − | |BGCOLOR="#ddf4d4"|[[Ten Thousand Byne Bill|10,000 Byne Bill]] x 1 |
||
| + | ;Stage 3: |
||
| − | |- |
||
| + | :[[Dynamis Knuckles]] |
||
| − | !BGCOLOR="#66CCFF" | |
||
| − | + | | bgcolor="#ffd4e2" | |
|
| + | :[[Militant Knuckles]] |
||
| − | !BGCOLOR="#D87093" | |
||
| + | :[[Bronze Knuckles]] |
||
| − | !BGCOLOR="#65d43e" | |
||
| + | :[[Metal Knuckles]] |
||
| − | !BGCOLOR="#ffffff" | |
||
| + | :[[Koenigs Knuckles]] |
||
| − | |- |
||
| + | | bgcolor="#ddf4d4" | |
||
| − | |rowspan=5 BGCOLOR="#DDEEFF" | '''Dagger'''<br> [[RDM]] <br> [[THF]] <br> [[BRD]] |
||
| + | :[[Montiont Silverpiece|M. Silverpiece]] x 14 |
||
| − | |BGCOLOR="#DDEEFF" valign="top"| '''Stage 1:'''<br> [[Relic Dagger]] |
||
| − | | |
+ | |- valign="top" |
| + | | bgcolor="#DDEEFF" | |
||
| − | |BGCOLOR="#ddf4d4"| None |
||
| + | ;Stage 4: |
||
| − | |rowspan=5 BGCOLOR="#ffffff" valign="bottom"|<div id="3"> </div> |
||
| + | :[[Caestus]] |
||
| − | |- |
||
| + | | bgcolor="#ffd4e2" | |
||
| − | |BGCOLOR="#DDEEFF" valign="top"| '''Stage 2:'''<br> [[Malefic Dagger]] |
||
| + | :[[Dynamis Knuckles]] |
||
| − | |BGCOLOR="#ffd4e2" valign="top"| [[Relic Dagger]]<br> [[Cantarella]]<br> [[Orichalcum Ingot]]<br> [[Deodorizer]] |
||
| + | :[[Attestation of Might]] |
||
| − | |BGCOLOR="#ddf4d4"|[[One Hundred Byne Bill|100 Byne Bill]] x 4 |
||
| + | | bgcolor="#ddf4d4" | |
||
| − | |- |
||
| + | :[[Lungo-Nango Jadeshell|L. Jadeshell]] x 61 |
||
| − | |BGCOLOR="#DDEEFF" valign="top"| '''Stage 3:'''<br> [[Dynamis Dagger]] |
||
| + | |- valign="top" |
||
| − | |BGCOLOR="#ffd4e2" valign="top"| [[Malefic Dagger]]<br> [[Brass Dagger]]<br> [[Poison Dagger]]<br> [[Misericorde]] |
||
| + | | bgcolor="#DDEEFF" | |
||
| − | |BGCOLOR="#ddf4d4"|[[Montiont Silverpiece|M. Silverpiece]] x 14 |
||
| + | ;Stage 5: |
||
| − | |- |
||
| + | :[[Spharai]] |
||
| − | |BGCOLOR="#DDEEFF" valign="top"| '''Stage 4:'''<br> [[Batardeau]] |
||
| + | | bgcolor="#ffd4e2" | |
||
| − | |BGCOLOR="#ffd4e2" valign="top"| [[Dynamis Dagger]]<br> [[Attestation of Celerity]] |
||
| + | :[[Caestus]] |
||
| − | |BGCOLOR="#ddf4d4"|[[Lungo-Nango Jadeshell|L. Jadeshell]] x 61 |
||
| + | :[[Necropsyche]] |
||
| − | |- |
||
| + | :[[Mystic Fragment]] |
||
| − | |BGCOLOR="#DDEEFF" valign="top"| '''Stage 5:'''<br> [[Mandau]] |
||
| + | :''{{Location|Castle Oztroja|G-5/H-6|map=Courtyard|map link=Castle Oztroja/Maps#Map 5}} (All the way up where [[Yagudo High Priest]] is)'' |
||
| − | |BGCOLOR="#ffd4e2" valign="top"| [[Batardeau]]<br> [[Necropsyche]]<br> [[Ornate Fragment]]<br> ''[[Sanctuary of Zi'Tah]]: L-10'' |
||
| + | | bgcolor="#ddf4d4" | |
||
| − | |BGCOLOR="#ddf4d4"|[[Ten Thousand Byne Bill|10,000 Byne Bill]] x 1 |
||
| + | :[[Ten Thousand Byne Bill|10,000 Byne Bill]] x 1 |
||
| − | |- |
||
| + | |- valign="top" |
||
| − | !BGCOLOR="#66CCFF" | |
||
| − | ! |
+ | ! bgcolor="#66CCFF" | |
| − | ! |
+ | ! bgcolor="#66CCFF" | |
| − | ! |
+ | ! bgcolor="#D87093" | |
| − | ! |
+ | ! bgcolor="#65d43e" | |
| + | |- id="Dagger" valign="top" |
||
| − | |- |
||
| + | | rowspan="5" bgcolor="#DDEEFF" | |
||
| − | |rowspan=5 BGCOLOR="#DDEEFF" | '''Sword'''<br> [[RDM]] <br> [[PLD]] |
||
| + | ;Dagger |
||
| − | |BGCOLOR="#DDEEFF" valign="top"| '''Stage 1:'''<br> [[Relic Sword]] |
||
| + | :[[RDM]] |
||
| − | |BGCOLOR="#ffd4e2" valign="top"| None |
||
| + | :[[THF]] |
||
| − | |BGCOLOR="#ddf4d4"| None |
||
| + | :[[BRD]] |
||
| − | |rowspan=5 BGCOLOR="#ffffff" valign="bottom"|<div id="4"> </div> |
||
| + | | bgcolor="#DDEEFF" | |
||
| − | |- |
||
| + | ;Stage 1: |
||
| − | |BGCOLOR="#DDEEFF" valign="top"| '''Stage 2:'''<br> [[Glyptic Sword]] |
||
| + | :[[Relic Dagger]] |
||
| − | |BGCOLOR="#ffd4e2" valign="top"| [[Relic Sword]]<br> [[Koh-I-Noor]]<br> [[Orichalcum Chain]]<br> [[Cermet Chunk]] |
||
| + | | bgcolor="#ffd4e2" | |
||
| − | |BGCOLOR="#ddf4d4"|[[Montiont Silverpiece|M. Silverpiece]] x 4 |
||
| + | :None |
||
| − | |- |
||
| + | | bgcolor="#ddf4d4" | |
||
| − | |BGCOLOR="#DDEEFF" valign="top"| '''Stage 3:'''<br> [[Dynamis Sword]] |
||
| + | : None |
||
| − | |BGCOLOR="#ffd4e2" valign="top"| [[Glyptic Sword]]<br> [[Bronze Sword]]<br> [[Mythril Sword]]<br> [[Wing Sword]] |
||
| + | |- valign="top" |
||
| − | |BGCOLOR="#ddf4d4"|[[One Hundred Byne Bill|100 Byne Bill]] x 14 |
||
| + | | bgcolor="#DDEEFF" | |
||
| − | |- |
||
| + | ;Stage 2: |
||
| − | |BGCOLOR="#DDEEFF" valign="top"| '''Stage 4:'''<br> [[Caliburn]] |
||
| + | :[[Malefic Dagger]] |
||
| − | |BGCOLOR="#ffd4e2" valign="top"| [[Dynamis Sword]]<br> [[Attestation of Glory]] |
||
| + | | bgcolor="#ffd4e2" | |
||
| − | |BGCOLOR="#ddf4d4"|[[Lungo-Nango Jadeshell|L. Jadeshell]] x 61 |
||
| + | :[[Relic Dagger]] |
||
| − | |- |
||
| + | :[[Cantarella]] |
||
| − | |BGCOLOR="#DDEEFF" valign="top"| '''Stage 5:'''<br> [[Excalibur]] |
||
| + | :[[Orichalcum Ingot]] |
||
| − | |BGCOLOR="#ffd4e2" valign="top"| [[Caliburn]]<br> [[Necropsyche]]<br> [[Holy Fragment]]<br> ''[[Dragon's Aery]]: Pond G-7'' |
||
| + | :[[Deodorizer]] |
||
| − | |BGCOLOR="#ddf4d4"|[[Ranperre Goldpiece|R. Goldpiece]] x 1 |
||
| + | | bgcolor="#ddf4d4" | |
||
| − | |- |
||
| + | :[[One Hundred Byne Bill|100 Byne Bill]] x 4 |
||
| − | !BGCOLOR="#66CCFF" | |
||
| + | |- valign="top" |
||
| − | !BGCOLOR="#66CCFF" | |
||
| − | + | | bgcolor="#DDEEFF" | |
|
| + | ;Stage 3: |
||
| − | !BGCOLOR="#65d43e" | |
||
| + | :[[Dynamis Dagger]] |
||
| − | !BGCOLOR="#ffffff" | |
||
| + | | bgcolor="#ffd4e2" | |
||
| − | |- |
||
| + | :[[Malefic Dagger]] |
||
| − | |rowspan=5 BGCOLOR="#DDEEFF" | '''Great Sword'''<br> [[WAR]] <br> [[PLD]] <br> [[DRK]] |
||
| + | :[[Brass Dagger]] |
||
| − | |BGCOLOR="#DDEEFF" valign="top"| '''Stage 1:'''<br> [[Relic Blade]] |
||
| + | :[[Poison Dagger]] |
||
| − | |BGCOLOR="#ffd4e2" valign="top"| None |
||
| + | :[[Misericorde]] |
||
| − | |BGCOLOR="#ddf4d4"| None |
||
| + | | bgcolor="#ddf4d4" | |
||
| − | |rowspan=5 BGCOLOR="#ffffff" valign="bottom"|<div id="5"> </div> |
||
| + | :[[Montiont Silverpiece|M. Silverpiece]] x 14 |
||
| − | |- |
||
| + | |- valign="top" |
||
| − | |BGCOLOR="#DDEEFF" valign="top"| '''Stage 2:'''<br> [[Gilded Blade]] |
||
| + | | bgcolor="#DDEEFF" | |
||
| − | |BGCOLOR="#ffd4e2" valign="top"| [[Relic Blade]]<br> [[Griffon Leather]]<br> [[Adaman Ingot]]<br> [[ Platinum Ingot]] |
||
| + | ;Stage 4: |
||
| − | |BGCOLOR="#ddf4d4"|[[Montiont Silverpiece|M. Silverpiece]] x 4 |
||
| + | :[[Batardeau]] |
||
| − | |- |
||
| + | | bgcolor="#ffd4e2" | |
||
| − | |BGCOLOR="#DDEEFF" valign="top"| '''Stage 3:'''<br> [[Dynamis Blade]] |
||
| + | :[[Dynamis Dagger]] |
||
| − | |BGCOLOR="#ffd4e2" valign="top"| [[Gilded Blade]]<br> [[Claymore]]<br> [[Mythril Claymore]]<br> [[Darksteel Claymore]] |
||
| + | :[[Attestation of Celerity]] |
||
| − | |BGCOLOR="#ddf4d4"|[[Lungo-Nango Jadeshell|L. Jadeshell]] x 16 |
||
| + | | bgcolor="#ddf4d4" | |
||
| − | |- |
||
| + | :[[Lungo-Nango Jadeshell|L. Jadeshell]] x 61 |
||
| − | |BGCOLOR="#DDEEFF" valign="top"| '''Stage 4:'''<br> [[Valhalla]] |
||
| + | |- valign="top" |
||
| − | |BGCOLOR="#ffd4e2" valign="top"| [[Dynamis Blade]]<br> [[Attestation of Righteousness]] |
||
| + | | bgcolor="#DDEEFF" | |
||
| − | |BGCOLOR="#ddf4d4"|[[One Hundred Byne Bill|100 Byne Bill]] x 61 |
||
| + | ;Stage 5: |
||
| − | |- |
||
| + | :[[Mandau]] |
||
| − | |BGCOLOR="#DDEEFF" valign="top"| '''Stage 5:'''<br> [[Ragnarok]] |
||
| + | | bgcolor="#ffd4e2" | |
||
| − | |BGCOLOR="#ffd4e2" valign="top"| [[Valhalla]]<br> [[Necropsyche]]<br> [[Intricate Fragment]]<br> ''[[Beaucedine Glacier]]: G-10'' |
||
| + | :[[Batardeau]] |
||
| − | |BGCOLOR="#ddf4d4"|[[Ranperre Goldpiece|R. Goldpiece]] x 1 |
||
| + | :[[Necropsyche]] |
||
| − | |- |
||
| + | :[[Ornate Fragment]] |
||
| − | !width="20%" align="center" valign="center" BGCOLOR="#66CCFF" |Weapon |
||
| + | :''{{Location|The Sanctuary of Zi'Tah|L-10}}'' |
||
| − | !width="24%" align="center" valign="center" BGCOLOR="#66CCFF" |Upgrade Stage |
||
| + | | bgcolor="#ddf4d4" | |
||
| − | !width="30%" align="center" valign="center" BGCOLOR="#D87093" |Items Needed |
||
| + | :[[Ten Thousand Byne Bill|10,000 Byne Bill]] x 1 |
||
| − | !width="25%" align="center" BGCOLOR="#65d43e" |Fee |
||
| + | |- valign="top" |
||
| − | !width="1%" align="center" BGCOLOR="#ffffff" | |
||
| + | ! bgcolor="#66CCFF" | |
||
| − | |- |
||
| + | ! bgcolor="#66CCFF" | |
||
| − | |rowspan=5 BGCOLOR="#DDEEFF" | '''Axe'''<br> [[BST]] |
||
| + | ! bgcolor="#D87093" | |
||
| − | |BGCOLOR="#DDEEFF" valign="top"| '''Stage 1:'''<br> [[Relic Axe]] |
||
| + | ! bgcolor="#65d43e" | |
||
| − | |BGCOLOR="#ffd4e2" valign="top"| None |
||
| + | |- id="Sword" valign="top" |
||
| − | |BGCOLOR="#ddf4d4"| None |
||
| − | |rowspan=5 |
+ | | rowspan="5" bgcolor="#DDEEFF" | |
| + | ;Sword |
||
| − | |- |
||
| + | :[[RDM]] |
||
| − | |BGCOLOR="#DDEEFF" valign="top"| '''Stage 2:'''<br> [[Leonine Axe]] |
||
| + | :[[PLD]] |
||
| − | |BGCOLOR="#ffd4e2" valign="top"| [[Relic Axe]]<br> [[Angel Skin]]<br> [[Chronos Tooth]]<br> [[Feather Collar +1]] |
||
| + | | bgcolor="#DDEEFF" | |
||
| − | |BGCOLOR="#ddf4d4"|[[Lungo-Nango Jadeshell|L. Jadeshell]] x 3 |
||
| + | ;Stage 1: |
||
| − | |- |
||
| + | :[[Relic Sword]] |
||
| − | |BGCOLOR="#DDEEFF" valign="top"| '''Stage 3:'''<br> [[Dynamis Axe]] |
||
| + | | bgcolor="#ffd4e2" | |
||
| − | |BGCOLOR="#ffd4e2" valign="top"| [[Leonine Axe]]<br> [[Tabar]]<br> [[Darksteel Tabar]]<br> [[Tabarzin]] |
||
| + | :None |
||
| − | |BGCOLOR="#ddf4d4"|[[Montiont Silverpiece|M. Silverpiece]] x 14 |
||
| + | | bgcolor="#ddf4d4" | |
||
| − | |- |
||
| + | : None |
||
| − | |BGCOLOR="#DDEEFF" valign="top"| '''Stage 4:'''<br> [[Ogre Killer]] |
||
| + | |- valign="top" |
||
| − | |BGCOLOR="#ffd4e2" valign="top"| [[Dynamis Axe]]<br> [[Attestation of Bravery]] |
||
| + | | bgcolor="#DDEEFF" | |
||
| − | |BGCOLOR="#ddf4d4"|[[One Hundred Byne Bill|100 Byne Bill]] x 60 |
||
| + | ;Stage 2: |
||
| − | |- |
||
| + | :[[Glyptic Sword]] |
||
| − | |BGCOLOR="#DDEEFF" valign="top"| '''Stage 5:'''<br> [[Guttler]] |
||
| + | | bgcolor="#ffd4e2" | |
||
| − | |BGCOLOR="#ffd4e2" valign="top"| [[Ogre Killer]]<br> [[Necropsyche]]<br> [[Runaeic Fragment]]<br> ''[[Western Altepa Desert]]: H-7'' |
||
| + | :[[Relic Sword]] |
||
| − | |BGCOLOR="#ddf4d4"|[[Rimilala Stripeshell|R. Stripeshell]] x 1 |
||
| + | :[[Koh-I-Noor]] |
||
| − | |- |
||
| + | :[[Orichalcum Chain]] |
||
| − | !BGCOLOR="#66CCFF" | |
||
| + | :[[Cermet Chunk]] |
||
| − | !BGCOLOR="#66CCFF" | |
||
| − | + | | bgcolor="#ddf4d4" | |
|
| + | :[[Montiont Silverpiece|M. Silverpiece]] x 4 |
||
| − | !BGCOLOR="#65d43e" | |
||
| + | |- valign="top" |
||
| − | !BGCOLOR="#ffffff" | |
||
| + | | bgcolor="#DDEEFF" | |
||
| − | |- |
||
| + | ;Stage 3: |
||
| − | |rowspan=5 BGCOLOR="#DDEEFF" | '''Great Axe'''<br> [[WAR]] |
||
| + | :[[Dynamis Sword]] |
||
| − | |BGCOLOR="#DDEEFF" valign="top"| '''Stage 1:'''<br> [[Relic Bhuj]] |
||
| − | | |
+ | | bgcolor="#ffd4e2" | |
| + | :[[Glyptic Sword]] |
||
| − | |BGCOLOR="#ddf4d4"| None |
||
| + | :[[Bronze Sword]] |
||
| − | |rowspan=5 BGCOLOR="#ffffff" valign="bottom"|<div id="7"> </div> |
||
| + | :[[Mythril Sword]] |
||
| − | |- |
||
| + | :[[Wing Sword]] |
||
| − | |BGCOLOR="#DDEEFF" valign="top"| '''Stage 2:'''<br> [[Agonal Bhuj]] |
||
| + | | bgcolor="#ddf4d4" | |
||
| − | |BGCOLOR="#ffd4e2" valign="top"| [[Relic Bhuj]]<br> [[Wootz Ingot]]<br> [[Damascus Ingot]]<br> [[Ancient Lumber]] |
||
| − | + | :[[One Hundred Byne Bill|100 Byne Bill]] x 14 |
|
| + | |- valign="top" |
||
| − | |- |
||
| + | | bgcolor="#DDEEFF" | |
||
| − | |BGCOLOR="#DDEEFF" valign="top"| '''Stage 3:'''<br> [[Dynamis Bhuj]] |
||
| + | ;Stage 4: |
||
| − | |BGCOLOR="#ffd4e2" valign="top"| [[Agonal Bhuj]]<br> [[Butterfly Axe]]<br> [[Greataxe]]<br> [[Heavy Darksteel Axe]] |
||
| + | :[[Caliburn]] |
||
| − | |BGCOLOR="#ddf4d4"|[[Lungo-Nango Jadeshell|L. Jadeshell]] x 16 |
||
| + | | bgcolor="#ffd4e2" | |
||
| − | |- |
||
| + | :[[Dynamis Sword]] |
||
| − | |BGCOLOR="#DDEEFF" valign="top"| '''Stage 4:'''<br> [[Abaddon Killer]] |
||
| − | + | :[[Attestation of Glory]] |
|
| − | | |
+ | | bgcolor="#ddf4d4" | |
| + | :[[Lungo-Nango Jadeshell|L. Jadeshell]] x 61 |
||
| − | |- |
||
| + | |- valign="top" |
||
| − | |BGCOLOR="#DDEEFF" valign="top"| '''Stage 5:'''<br> [[Bravura]] |
||
| + | | bgcolor="#DDEEFF" | |
||
| − | |BGCOLOR="#ffd4e2" valign="top"| [[Abaddon Killer]]<br> [[Necropsyche]]<br> [[Seraphic Fragment]]<br> ''[[Ru'Lude Gardens]]: Fountain H-9'' |
||
| + | ;Stage 5: |
||
| − | |BGCOLOR="#ddf4d4"|[[Ten Thousand Byne Bill|10,000 Byne Bill]] x 1 |
||
| + | :[[Excalibur]] |
||
| − | |- |
||
| − | + | | bgcolor="#ffd4e2" | |
|
| + | :[[Caliburn]] |
||
| − | !BGCOLOR="#66CCFF" | |
||
| + | :[[Necropsyche]] |
||
| − | !BGCOLOR="#D87093" | |
||
| + | :[[Holy Fragment]] |
||
| − | !BGCOLOR="#65d43e" | |
||
| + | :''{{Location|Dragon's Aery|G-7}} Pond'' |
||
| − | !BGCOLOR="#ffffff" | |
||
| + | | bgcolor="#ddf4d4" | |
||
| − | |- |
||
| + | :[[Ranperre Goldpiece|R. Goldpiece]] x 1 |
||
| − | |rowspan=5 BGCOLOR="#DDEEFF" | '''Scythe'''<br> [[DRK]] |
||
| + | |- valign="top" |
||
| − | |BGCOLOR="#DDEEFF" valign="top"| '''Stage 1:'''<br> [[Relic Scythe]] |
||
| + | ! bgcolor="#66CCFF" | |
||
| − | |BGCOLOR="#ffd4e2" valign="top"| None |
||
| + | ! bgcolor="#66CCFF" | |
||
| − | |BGCOLOR="#ddf4d4"| None |
||
| + | ! bgcolor="#D87093" | |
||
| − | |rowspan=5 BGCOLOR="#ffffff" valign="bottom"|<div id="8"> </div> |
||
| + | ! bgcolor="#65d43e" | |
||
| − | |- |
||
| + | |- id="Great Sword" valign="top" |
||
| − | |BGCOLOR="#DDEEFF" valign="top"| '''Stage 2:'''<br> [[Memento Scythe]] |
||
| + | | rowspan="5" bgcolor="#DDEEFF" | |
||
| − | |BGCOLOR="#ffd4e2" valign="top"| [[Relic Scythe]]<br> [[Mammoth Tusk]]<br> [[Manticore Leather]]<br> [[Rainbow Obi]] |
||
| + | ;Great Sword |
||
| − | |BGCOLOR="#ddf4d4"|[[Lungo-Nango Jadeshell|L. Jadeshell]] x 5 |
||
| + | :[[WAR]] |
||
| − | |- |
||
| + | :[[PLD]] |
||
| − | |BGCOLOR="#DDEEFF" valign="top"| '''Stage 3:'''<br> [[Dynamis Scythe]] |
||
| + | :[[DRK]] |
||
| − | |BGCOLOR="#ffd4e2" valign="top"| [[Memento Scythe]]<br> [[Scythe]]<br> [[Bone Scythe]]<br> [[Death Scythe]] |
||
| + | | bgcolor="#DDEEFF" | |
||
| − | |BGCOLOR="#ddf4d4"|[[Montiont Silverpiece|M. Silverpiece]] x 16 |
||
| + | ;Stage 1: |
||
| − | |- |
||
| + | :[[Relic Blade]] |
||
| − | |BGCOLOR="#DDEEFF" valign="top"| '''Stage 4:'''<br> [[Bec de Faucon]] |
||
| + | | bgcolor="#ffd4e2" | |
||
| − | |BGCOLOR="#ffd4e2" valign="top"| [[Dynamis Scythe]]<br> [[Attestation of Vigor]] |
||
| + | :None |
||
| − | |BGCOLOR="#ddf4d4"|[[One Hundred Byne Bill|100 Byne Bill]] x 62 |
||
| + | | bgcolor="#ddf4d4" | |
||
| − | |- |
||
| + | : None |
||
| − | |BGCOLOR="#DDEEFF" valign="top"| '''Stage 5:'''<br> [[Apocalypse]] |
||
| + | |- valign="top" |
||
| − | |BGCOLOR="#ffd4e2" valign="top"| [[Bec de Faucon]]<br> [[Necropsyche]]<br> [[Tenebrous Fragment]]<br> ''[[North Gustaberg]]: F-7<br>(via Dangruf Wadi)'' |
||
| + | | bgcolor="#DDEEFF" | |
||
| − | |BGCOLOR="#ddf4d4"|[[Rimilala Stripeshell|R. Stripeshell]] x 1 |
||
| + | ;Stage 2: |
||
| − | |- |
||
| + | :[[Gilded Blade]] |
||
| − | !BGCOLOR="#66CCFF" | |
||
| − | + | | bgcolor="#ffd4e2" | |
|
| + | :[[Relic Blade]] |
||
| − | !BGCOLOR="#D87093" | |
||
| + | :[[Griffon Leather]] |
||
| − | !BGCOLOR="#65d43e" | |
||
| + | :[[Adaman Ingot]] |
||
| − | !BGCOLOR="#ffffff" | |
||
| + | :[[ Platinum Ingot]] |
||
| − | |- |
||
| + | | bgcolor="#ddf4d4" | |
||
| − | |rowspan=5 BGCOLOR="#DDEEFF" | '''Polearm'''<br> [[DRG]] |
||
| + | :[[Montiont Silverpiece|M. Silverpiece]] x 4 |
||
| − | |BGCOLOR="#DDEEFF" valign="top"| '''Stage 1:'''<br> [[Relic Lance]] |
||
| − | | |
+ | |- valign="top" |
| + | | bgcolor="#DDEEFF" | |
||
| − | |BGCOLOR="#ddf4d4"| None |
||
| + | ;Stage 3: |
||
| − | |rowspan=5 BGCOLOR="#ffffff" valign="bottom"|<div id="9"> </div> |
||
| + | :[[Dynamis Blade]] |
||
| − | |- |
||
| + | | bgcolor="#ffd4e2" | |
||
| − | |BGCOLOR="#DDEEFF" valign="top"| '''Stage 2:'''<br> [[Hotspur Lance]] |
||
| + | :[[Gilded Blade]] |
||
| − | |BGCOLOR="#ffd4e2" valign="top"| [[Relic Lance]]<br> [[Lancewood Lumber]]<br> [[Orichalcum Ingot]]<br> [[Arachne Thread]] |
||
| + | :[[Claymore]] |
||
| − | |BGCOLOR="#ddf4d4"|[[Lungo-Nango Jadeshell|L. Jadeshell]] x 4 |
||
| + | :[[Mythril Claymore]] |
||
| − | |- |
||
| + | :[[Darksteel Claymore]] |
||
| − | |BGCOLOR="#DDEEFF" valign="top"| '''Stage 3:'''<br> [[Dynamis Lance]] |
||
| + | | bgcolor="#ddf4d4" | |
||
| − | |BGCOLOR="#ffd4e2" valign="top"| [[Hotspur Lance]]<br> [[Brass Spear]]<br> [[Halberd]]<br> [[Wyvern Spear]] |
||
| + | :[[Lungo-Nango Jadeshell|L. Jadeshell]] x 16 |
||
| − | |BGCOLOR="#ddf4d4"|[[One Hundred Byne Bill|100 Byne Bill]] x 16 |
||
| + | |- valign="top" |
||
| − | |- |
||
| + | | bgcolor="#DDEEFF" | |
||
| − | |BGCOLOR="#DDEEFF" valign="top"| '''Stage 4:'''<br> [[Gae Assail]] |
||
| + | ;Stage 4: |
||
| − | |BGCOLOR="#ffd4e2" valign="top"| [[Dynamis Lance]]<br> [[Attestation of Fortitude]] |
||
| + | :[[Valhalla]] |
||
| − | |BGCOLOR="#ddf4d4"|[[Montiont Silverpiece|M. Silverpiece]] x 61 |
||
| + | | bgcolor="#ffd4e2" | |
||
| − | |- |
||
| + | :[[Dynamis Blade]] |
||
| − | |BGCOLOR="#DDEEFF" valign="top"| '''Stage 5:'''<br> [[Gungnir]] |
||
| + | :[[Attestation of Righteousness]] |
||
| − | |BGCOLOR="#ffd4e2" valign="top"| [[Gae Assail]]<br> [[Necropsyche]]<br> [[Stellar Fragment]]<br> ''[[Ru'Aun Gardens]]: G-6'' |
||
| − | | |
+ | | bgcolor="#ddf4d4" | |
| + | :[[One Hundred Byne Bill|100 Byne Bill]] x 61 |
||
| − | |- |
||
| + | |- valign="top" |
||
| − | !width="20%" align="center" valign="center" BGCOLOR="#66CCFF" |Weapon |
||
| + | | bgcolor="#DDEEFF" | |
||
| − | !width="24%" align="center" valign="center" BGCOLOR="#66CCFF" |Upgrade Stage |
||
| + | ;Stage 5: |
||
| − | !width="30%" align="center" valign="center" BGCOLOR="#D87093" |Items Needed |
||
| + | :[[Ragnarok]] |
||
| − | !width="25%" align="center" BGCOLOR="#65d43e" |Fee |
||
| + | | bgcolor="#ffd4e2" | |
||
| − | !width="1%" align="center" BGCOLOR="#ffffff" | |
||
| + | :[[Valhalla]] |
||
| − | |- |
||
| + | :[[Necropsyche]] |
||
| − | |rowspan=5 BGCOLOR="#DDEEFF" | '''Katana'''<br> [[NIN]] |
||
| + | :[[Intricate Fragment]] |
||
| − | |BGCOLOR="#DDEEFF" valign="top"| '''Stage 1:'''<br> [[Ihintanto]] |
||
| + | :''{{Location|Beaucedine Glacier|G-10}}'' |
||
| − | |BGCOLOR="#ffd4e2" valign="top"| None |
||
| − | | |
+ | | bgcolor="#ddf4d4" | |
| + | :[[Ranperre Goldpiece|R. Goldpiece]] x 1 |
||
| − | |rowspan=5 BGCOLOR="#ffffff" valign="bottom"|<div id="10"> </div> |
||
| + | |- valign="top" |
||
| − | |- |
||
| + | ! width="20%" bgcolor="#66CCFF" | Weapon |
||
| − | |BGCOLOR="#DDEEFF" valign="top"| '''Stage 2:'''<br> [[Mimizuku]] |
||
| + | ! width="24%" bgcolor="#66CCFF" | Upgrade Stage |
||
| − | |BGCOLOR="#ffd4e2" valign="top"| [[Ihintanto]]<br> [[Relic Steel]]<br> [[Tarasque Skin]]<br> [[Twinthread]] |
||
| + | ! width="30%" bgcolor="#D87093" | Items Needed |
||
| − | |BGCOLOR="#ddf4d4"|[[One Hundred Byne Bill|100 Byne Bill]] x 4 |
||
| + | ! width="25%" bgcolor="#65d43e" | Fee |
||
| − | |- |
||
| + | |- id="Axe" valign="top" |
||
| − | |BGCOLOR="#DDEEFF" valign="top"| '''Stage 3:'''<br> [[Rogetsu]] |
||
| + | | rowspan="5" bgcolor="#DDEEFF" | |
||
| − | |BGCOLOR="#ffd4e2" valign="top"| [[Mimizuku]]<br> [[Wakizashi]]<br> [[Kabutowari]]<br> [[Sakurafubuki]] |
||
| + | ;Axe |
||
| − | |BGCOLOR="#ddf4d4"|[[Lungo-Nango Jadeshell|L. Jadeshell]] x 16 |
||
| + | :[[BST]] |
||
| − | |- |
||
| + | | bgcolor="#DDEEFF" | |
||
| − | |BGCOLOR="#DDEEFF" valign="top"| '''Stage 4:'''<br> [[Yoshimitsu]] |
||
| + | ;Stage 1: |
||
| − | |BGCOLOR="#ffd4e2" valign="top"| [[Rogetsu]]<br> [[Attestation of Legerity]] |
||
| + | :[[Relic Axe]] |
||
| − | |BGCOLOR="#ddf4d4"|[[Montiont Silverpiece|M. Silverpiece]] x 61 |
||
| + | | bgcolor="#ffd4e2" | |
||
| − | |- |
||
| + | :None |
||
| − | |BGCOLOR="#DDEEFF" valign="top"| '''Stage 5:'''<br> [[Kikoku]] |
||
| + | | bgcolor="#ddf4d4" | |
||
| − | |BGCOLOR="#ffd4e2" valign="top"| [[Yoshimitsu]]<br> [[Necropsyche]]<br> [[Demoniac Fragment]]<br> ''[[Sea Serpent Grotto]]: C-11 Map 3'' |
||
| + | : None |
||
| − | |BGCOLOR="#ddf4d4"|[[Ten Thousand Byne Bill|10,000 Byne Bill]] x 1 |
||
| + | |- valign="top" |
||
| − | |- |
||
| − | + | | bgcolor="#DDEEFF" | |
|
| + | ;Stage 2: |
||
| − | !BGCOLOR="#66CCFF" | |
||
| + | :[[Leonine Axe]] |
||
| − | !BGCOLOR="#D87093" | |
||
| − | + | | bgcolor="#ffd4e2" | |
|
| + | :[[Relic Axe]] |
||
| − | !BGCOLOR="#ffffff" | |
||
| + | :[[Angel Skin]] |
||
| − | |- |
||
| + | :[[Chronos Tooth]] |
||
| − | |rowspan=5 BGCOLOR="#DDEEFF" | '''Great Katana'''<br> [[SAM]] |
||
| + | :[[Feather Collar +1]] |
||
| − | |BGCOLOR="#DDEEFF" valign="top"| '''Stage 1:'''<br> [[Ito]] |
||
| + | | bgcolor="#ddf4d4" | |
||
| − | |BGCOLOR="#ffd4e2" valign="top"| None |
||
| + | :[[Lungo-Nango Jadeshell|L. Jadeshell]] x 3 |
||
| − | |BGCOLOR="#ddf4d4"| None |
||
| + | |- valign="top" |
||
| − | |rowspan=5 BGCOLOR="#ffffff" valign="bottom"|<div id="11"> </div> |
||
| + | | bgcolor="#DDEEFF" | |
||
| − | |- |
||
| + | ;Stage 3: |
||
| − | |BGCOLOR="#DDEEFF" valign="top"| '''Stage 2:'''<br> [[Hayatemaru]] |
||
| + | :[[Dynamis Axe]] |
||
| − | |BGCOLOR="#ffd4e2" valign="top"| [[Ito]]<br> [[Relic Steel]]<br> [[Siren's Macrame]]<br> [[Tama-Hagane]] |
||
| + | | bgcolor="#ffd4e2" | |
||
| − | |BGCOLOR="#ddf4d4"|[[Montiont Silverpiece|M. Silverpiece]] x 3 |
||
| + | :[[Leonine Axe]] |
||
| − | |- |
||
| + | :[[Tabar]] |
||
| − | |BGCOLOR="#DDEEFF" valign="top"| '''Stage 3:'''<br> [[Oboromaru]] |
||
| + | :[[Darksteel Tabar]] |
||
| − | |BGCOLOR="#ffd4e2" valign="top"| [[Hayatemaru]]<br> [[Tachi]]<br> [[Mikazuki]]<br> [[Kazaridachi]] |
||
| + | :[[Tabarzin]] |
||
| − | |BGCOLOR="#ddf4d4"|[[Lungo-Nango Jadeshell|L. Jadeshell]] x 15 |
||
| + | | bgcolor="#ddf4d4" | |
||
| − | |- |
||
| + | :[[Montiont Silverpiece|M. Silverpiece]] x 14 |
||
| − | |BGCOLOR="#DDEEFF" valign="top"| '''Stage 4:'''<br> [[Totsukanotsurugi]] |
||
| + | |- valign="top" |
||
| − | |BGCOLOR="#ffd4e2" valign="top"| [[Oboromaru]]<br> [[Attestation of Decisiveness]] |
||
| + | | bgcolor="#DDEEFF" | |
||
| − | |BGCOLOR="#ddf4d4"|[[One Hundred Byne Bill|100 Byne Bill]] x 60 |
||
| + | ;Stage 4: |
||
| − | |- |
||
| + | :[[Ogre Killer]] |
||
| − | |BGCOLOR="#DDEEFF" valign="top"| '''Stage 5:'''<br> [[Amanomurakumo]] |
||
| + | | bgcolor="#ffd4e2" | |
||
| − | |BGCOLOR="#ffd4e2" valign="top"| [[Totsukanotsurugi]]<br> [[Necropsyche]]<br> [[Divine Fragment]]<br> ''[[Horlais Peak]]: Hot spring'' |
||
| + | :[[Dynamis Axe]] |
||
| − | |BGCOLOR="#ddf4d4"|[[Ranperre Goldpiece|R. Goldpiece]] x 1 |
||
| + | :[[Attestation of Bravery]] |
||
| − | |- |
||
| − | + | | bgcolor="#ddf4d4" | |
|
| + | :[[One Hundred Byne Bill|100 Byne Bill]] x 60 |
||
| − | !BGCOLOR="#66CCFF" | |
||
| + | |- valign="top" |
||
| − | !BGCOLOR="#D87093" | |
||
| − | + | | bgcolor="#DDEEFF" | |
|
| + | ;Stage 5: |
||
| − | !BGCOLOR="#ffffff" | |
||
| + | :[[Guttler]] |
||
| − | |- |
||
| + | | bgcolor="#ffd4e2" | |
||
| − | |rowspan=5 BGCOLOR="#DDEEFF" | '''Club'''<br> [[WHM]] |
||
| + | :[[Ogre Killer]] |
||
| − | |BGCOLOR="#DDEEFF" valign="top"| '''Stage 1:'''<br> [[Relic Maul]] |
||
| + | :[[Necropsyche]] |
||
| − | |BGCOLOR="#ffd4e2" valign="top"| None |
||
| + | :[[Runaeic Fragment]] |
||
| − | |BGCOLOR="#ddf4d4"| None |
||
| + | :''{{Location|Western Altepa Desert|H-7}}'' |
||
| − | |rowspan=5 BGCOLOR="#ffffff" valign="bottom"|<div id="12"> </div> |
||
| + | | bgcolor="#ddf4d4" | |
||
| − | |- |
||
| + | :[[Rimilala Stripeshell|R. Stripeshell]] x 1 |
||
| − | |BGCOLOR="#DDEEFF" valign="top"| '''Stage 2:'''<br> [[Battering Maul]] |
||
| + | |- valign="top" |
||
| − | |BGCOLOR="#ffd4e2" valign="top"| [[Relic Maul]]<br> [[Wootz Ingot]]<br> [[Platinum Ingot]]<br> [[Rainbow Cloth]] |
||
| + | ! bgcolor="#66CCFF" | |
||
| − | |BGCOLOR="#ddf4d4"|[[Montiont Silverpiece|M. Silverpiece]] x 5 |
||
| + | ! bgcolor="#66CCFF" | |
||
| − | |- |
||
| + | ! bgcolor="#D87093" | |
||
| − | |BGCOLOR="#DDEEFF" valign="top"| '''Stage 3:'''<br> [[Dynamis Maul]] |
||
| + | ! bgcolor="#65d43e" | |
||
| − | |BGCOLOR="#ffd4e2" valign="top"| [[Battering Maul]]<br> [[Warhammer]]<br> [[Holy Maul]]<br> [[Brass Hammer]] |
||
| + | |- id="Great Axe" valign="top" |
||
| − | |BGCOLOR="#ddf4d4"|[[One Hundred Byne Bill|100 Byne Bill]] x 16 |
||
| + | | rowspan="5" bgcolor="#DDEEFF" | |
||
| − | |- |
||
| + | ;Great Axe |
||
| − | |BGCOLOR="#DDEEFF" valign="top"| '''Stage 4:'''<br> [[Gullintani]] |
||
| + | :[[WAR]] |
||
| − | |BGCOLOR="#ffd4e2" valign="top"| [[Dynamis Maul]]<br> [[Attestation of Sacrifice]] |
||
| + | | bgcolor="#DDEEFF" | |
||
| − | |BGCOLOR="#ddf4d4"|[[Lungo-Nango Jadeshell|L. Jadeshell]] x 62 |
||
| + | ;Stage 1: |
||
| − | |- |
||
| + | :[[Relic Bhuj]] |
||
| − | |BGCOLOR="#DDEEFF" valign="top"| '''Stage 5:'''<br> [[Mjollnir]] |
||
| + | | bgcolor="#ffd4e2" | |
||
| − | |BGCOLOR="#ffd4e2" valign="top"| [[Gullintani]]<br> [[Necropsyche]]<br> [[Heavenly Fragment]]<br> ''[[Sanctuary of Zi'Tah]]: H-8'' |
||
| + | :None |
||
| − | |BGCOLOR="#ddf4d4"|[[Ranperre Goldpiece|R. Goldpiece]] x 1 |
||
| + | | bgcolor="#ddf4d4" | |
||
| − | |- |
||
| + | : None |
||
| − | !BGCOLOR="#66CCFF" | |
||
| + | |- valign="top" |
||
| − | !BGCOLOR="#66CCFF" | |
||
| − | + | | bgcolor="#DDEEFF" | |
|
| + | ;Stage 2: |
||
| − | !BGCOLOR="#65d43e" | |
||
| + | :[[Agonal Bhuj]] |
||
| − | !BGCOLOR="#ffffff" | |
||
| + | | bgcolor="#ffd4e2" | |
||
| − | |- |
||
| + | :[[Relic Bhuj]] |
||
| − | |rowspan=5 BGCOLOR="#DDEEFF" | '''Staff'''<br> [[BLM]]<br> [[SMN]] |
||
| + | :[[Wootz Ingot]] |
||
| − | |BGCOLOR="#DDEEFF" valign="top"| '''Stage 1:'''<br> [[Relic Staff]] |
||
| + | :[[Damascus Ingot]] |
||
| − | |BGCOLOR="#ffd4e2" valign="top"| None |
||
| + | :[[Ancient Lumber]] |
||
| − | |BGCOLOR="#ddf4d4"| None |
||
| + | | bgcolor="#ddf4d4" | |
||
| − | |rowspan=5 BGCOLOR="#ffffff" valign="bottom"|<div id="13"> </div> |
||
| + | :[[One Hundred Byne Bill|100 Byne Bill]] x 3 |
||
| − | |- |
||
| + | |- valign="top" |
||
| − | |BGCOLOR="#DDEEFF" valign="top"| '''Stage 2:'''<br> [[Sage's Staff]] |
||
| + | | bgcolor="#DDEEFF" | |
||
| − | |BGCOLOR="#ffd4e2" valign="top"| [[Relic Staff]]<br> [[Lancewood Lumber]]<br> [[Pigeon's Blood Ruby]]<br> [[Urushi]] |
||
| + | ;Stage 3: |
||
| − | |BGCOLOR="#ddf4d4"|[[Lungo-Nango Jadeshell|L. Jadeshell]] x 5 |
||
| + | :[[Dynamis Bhuj]] |
||
| − | |- |
||
| + | | bgcolor="#ffd4e2" | |
||
| − | |BGCOLOR="#DDEEFF" valign="top"| '''Stage 3:'''<br> [[Dynamis Staff]] |
||
| + | :[[Agonal Bhuj]] |
||
| − | |BGCOLOR="#ffd4e2" valign="top"| [[Sage's Staff]]<br> [[Ash Staff]]<br> [[Elm Staff]]<br> [[Mahogany Staff]] |
||
| + | :[[Butterfly Axe]] |
||
| − | |BGCOLOR="#ddf4d4"|[[One Hundred Byne Bill|100 Byne Bill]] x 16 |
||
| + | :[[Greataxe]] |
||
| − | |- |
||
| + | :[[Heavy Darksteel Axe]] |
||
| − | |BGCOLOR="#DDEEFF" valign="top"| '''Stage 4:'''<br> [[Thyrus]] |
||
| + | | bgcolor="#ddf4d4" | |
||
| − | |BGCOLOR="#ffd4e2" valign="top"| [[Dynamis Staff]]<br> [[Attestation of Virtue]] |
||
| + | :[[Lungo-Nango Jadeshell|L. Jadeshell]] x 16 |
||
| − | |BGCOLOR="#ddf4d4"|[[Montiont Silverpiece|M. Silverpiece]] x 62 |
||
| + | |- valign="top" |
||
| − | |- |
||
| + | | bgcolor="#DDEEFF" | |
||
| − | |BGCOLOR="#DDEEFF" valign="top"| '''Stage 5:'''<br> [[Claustrum]] |
||
| + | ;Stage 4: |
||
| − | |BGCOLOR="#ffd4e2" valign="top"| [[Thyrus]]<br> [[Necropsyche]]<br> [[Celestial Fragment]]<br> ''[[Ifrit's Cauldron]]: Crater'' |
||
| + | :[[Abaddon Killer]] |
||
| − | |BGCOLOR="#ddf4d4"|[[Rimilala Stripeshell|R. Stripeshell]] x 1 |
||
| + | | bgcolor="#ffd4e2" | |
||
| − | |- |
||
| + | :[[Dynamis Bhuj]] |
||
| − | !width="20%" align="center" valign="center" BGCOLOR="#66CCFF" |Weapon |
||
| + | :[[Attestation of Force]] |
||
| − | !width="24%" align="center" valign="center" BGCOLOR="#66CCFF" |Upgrade Stage |
||
| + | | bgcolor="#ddf4d4" | |
||
| − | !width="30%" align="center" valign="center" BGCOLOR="#D87093" |Items Needed |
||
| + | :[[Montiont Silverpiece|M. Silverpiece]] x 60 |
||
| − | !width="25%" align="center" BGCOLOR="#65d43e" |Fee |
||
| + | |- valign="top" |
||
| − | !width="1%" align="center" BGCOLOR="#ffffff" | |
||
| + | | bgcolor="#DDEEFF" | |
||
| − | |-/l |
||
| + | ;Stage 5: |
||
| − | |rowspan=5 BGCOLOR="#DDEEFF" | '''Gun'''<br> [[RNG]] |
||
| + | :[[Bravura]] |
||
| − | |BGCOLOR="#DDEEFF" valign="top"| '''Stage 1:'''<br> [[Relic Gun]] |
||
| − | | |
+ | | bgcolor="#ffd4e2" | |
| + | :[[Abaddon Killer]] |
||
| − | |BGCOLOR="#ddf4d4"| None |
||
| + | :[[Necropsyche]] |
||
| − | |rowspan=5 BGCOLOR="#ffffff" valign="bottom"|<div id="14"> </div> |
||
| + | :[[Seraphic Fragment]] |
||
| − | |- |
||
| + | :''{{Location|Ru'Lude Gardens|H-9}} Fountain'' |
||
| − | |BGCOLOR="#DDEEFF" valign="top"| '''Stage 2:'''<br> [[Marksman Gun]] |
||
| + | | bgcolor="#ddf4d4" | |
||
| − | |BGCOLOR="#ffd4e2" valign="top"| [[Relic Gun]]<br> [[Marksman's Oil]]<br> [[Rainbow Cloth]]<br> [[Darksteel Ingot]] |
||
| − | + | :[[Ten Thousand Byne Bill|10,000 Byne Bill]] x 1 |
|
| + | |- valign="top" |
||
| − | |- |
||
| + | ! bgcolor="#66CCFF" | |
||
| − | |BGCOLOR="#DDEEFF" valign="top"| '''Stage 3:'''<br> [[Dynamis Gun]] |
||
| + | ! bgcolor="#66CCFF" | |
||
| − | |BGCOLOR="#ffd4e2" valign="top"| [[Marksman Gun]]<br> [[Arquebus]]<br> [[Hellfire]]<br> [[Pirate's Gun]] |
||
| + | ! bgcolor="#D87093" | |
||
| − | |BGCOLOR="#ddf4d4"|[[Lungo-Nango Jadeshell|L. Jadeshell]] x 15 |
||
| + | ! bgcolor="#65d43e" | |
||
| − | |- |
||
| + | |- id="Scythe" valign="top" |
||
| − | |BGCOLOR="#DDEEFF" valign="top"| '''Stage 4:'''<br> [[Ferdinand]] |
||
| + | | rowspan="5" bgcolor="#DDEEFF" | |
||
| − | |BGCOLOR="#ffd4e2" valign="top"| [[Dynamis Gun]]<br> [[Attestation of Accuracy]] |
||
| + | ;Scythe |
||
| − | |BGCOLOR="#ddf4d4"|[[Montiont Silverpiece|M. Silverpiece]] x 62 |
||
| + | :[[DRK]] |
||
| − | |- |
||
| + | | bgcolor="#DDEEFF" | |
||
| − | |BGCOLOR="#DDEEFF" valign="top"| '''Stage 5:'''<br> [[Annihilator]] |
||
| + | ;Stage 1: |
||
| − | |BGCOLOR="#ffd4e2" valign="top"| [[Ferdinand]]<br> [[Necropsyche]]<br> [[Ethereal Fragment]]<br> ''[[Metalworks]]: Research Institute'' |
||
| + | :[[Relic Scythe]] |
||
| − | |BGCOLOR="#ddf4d4"|[[Ten Thousand Byne Bill|10,000 Byne Bill]] x 1 |
||
| + | | bgcolor="#ffd4e2" | |
||
| − | |- |
||
| + | :None |
||
| − | !BGCOLOR="#66CCFF" | |
||
| − | + | | bgcolor="#ddf4d4" | |
|
| + | : None |
||
| − | !BGCOLOR="#D87093" | |
||
| + | |- valign="top" |
||
| − | !BGCOLOR="#65d43e" | |
||
| − | + | | bgcolor="#DDEEFF" | |
|
| + | ;Stage 2: |
||
| − | |- |
||
| + | :[[Memento Scythe]] |
||
| − | |rowspan=5 BGCOLOR="#DDEEFF" | '''Bow'''<br> [[RNG]]<br> [[SAM]] |
||
| + | | bgcolor="#ffd4e2" | |
||
| − | |BGCOLOR="#DDEEFF" valign="top"| '''Stage 1:'''<br> [[Relic Bow]] |
||
| + | :[[Relic Scythe]] |
||
| − | |BGCOLOR="#ffd4e2" valign="top"| None |
||
| + | :[[Mammoth Tusk]] |
||
| − | |BGCOLOR="#ddf4d4"| None |
||
| + | :[[Manticore Leather]] |
||
| − | |rowspan=5 BGCOLOR="#ffffff" valign="bottom"|<div id="15"> </div> |
||
| + | :[[Rainbow Obi]] |
||
| − | |- |
||
| + | | bgcolor="#ddf4d4" | |
||
| − | |BGCOLOR="#DDEEFF" valign="top"| '''Stage 2:'''<br> [[Wolver Bow]] |
||
| + | :[[Lungo-Nango Jadeshell|L. Jadeshell]] x 5 |
||
| − | |BGCOLOR="#ffd4e2" valign="top"| [[Relic Bow]]<br> [[Behemoth Horn]]<br> [[Lancewood Lumber]]<br> [[Carbon Fiber]] |
||
| + | |- valign="top" |
||
| − | |BGCOLOR="#ddf4d4"|[[Montiont Silverpiece|M. Silverpiece]] x 4 |
||
| + | | bgcolor="#DDEEFF" | |
||
| − | |- |
||
| + | ;Stage 3: |
||
| − | |BGCOLOR="#DDEEFF" valign="top"| '''Stage 3:'''<br> [[Dynamis Bow]] |
||
| + | :[[Dynamis Scythe]] |
||
| − | |BGCOLOR="#ffd4e2" valign="top"| [[Wolver Bow]]<br> [[Power Bow]]<br> [[War Bow]]<br> [[Shigeto Bow]] |
||
| + | | bgcolor="#ffd4e2" | |
||
| − | |BGCOLOR="#ddf4d4"|[[Montiont Silverpiece|M. Silverpiece]] x 15 |
||
| + | :[[Memento Scythe]] |
||
| − | |- |
||
| + | :[[Scythe]] |
||
| − | |BGCOLOR="#DDEEFF" valign="top"| '''Stage 4:'''<br> [[Futatokoroto]] |
||
| + | :[[Bone Scythe]] |
||
| − | |BGCOLOR="#ffd4e2" valign="top"| [[Dynamis Bow]]<br> [[Attestation of Transcendence]] |
||
| + | :[[Death Scythe]] |
||
| − | |BGCOLOR="#ddf4d4"|[[Lungo-Nango Jadeshell|L. Jadeshell]] x 61 |
||
| + | | bgcolor="#ddf4d4" | |
||
| − | |- |
||
| + | :[[Montiont Silverpiece|M. Silverpiece]] x 16 |
||
| − | |BGCOLOR="#DDEEFF" valign="top"| '''Stage 5:'''<br> [[Yoichinoyumi]] |
||
| + | |- valign="top" |
||
| − | |BGCOLOR="#ffd4e2" valign="top"| [[Futatokoroto]]<br> [[Necropsyche]]<br> [[Snarled Fragment]]<br> ''[[Cape Teriggan]]: Seashore'' |
||
| + | | bgcolor="#DDEEFF" | |
||
| − | |BGCOLOR="#ddf4d4"|[[Ranperre Goldpiece|R. Goldpiece]] x 1 |
||
| + | ;Stage 4: |
||
| − | |- |
||
| + | :[[Bec de Faucon]] |
||
| − | !BGCOLOR="#66CCFF" | |
||
| − | + | | bgcolor="#ffd4e2" | |
|
| + | :[[Dynamis Scythe]] |
||
| − | !BGCOLOR="#D87093" | |
||
| + | :[[Attestation of Vigor]] |
||
| − | !BGCOLOR="#65d43e" | |
||
| − | + | | bgcolor="#ddf4d4" | |
|
| + | :[[One Hundred Byne Bill|100 Byne Bill]] x 62 |
||
| − | |- |
||
| + | |- valign="top" |
||
| − | |rowspan=5 BGCOLOR="#DDEEFF" | '''Horn'''<br> [[BRD]] |
||
| + | | bgcolor="#DDEEFF" | |
||
| − | |BGCOLOR="#DDEEFF" valign="top"| '''Stage 1:'''<br> [[Relic Horn]] |
||
| + | ;Stage 5: |
||
| − | |BGCOLOR="#ffd4e2" valign="top"| None |
||
| + | :[[Apocalypse]] |
||
| − | |BGCOLOR="#ddf4d4"| None |
||
| + | | bgcolor="#ffd4e2" | |
||
| − | |rowspan=5 BGCOLOR="#ffffff" valign="bottom"|<div id="16"> </div> |
||
| + | :[[Bec de Faucon]] |
||
| − | |- |
||
| + | :[[Necropsyche]] |
||
| − | |BGCOLOR="#DDEEFF" valign="top"| '''Stage 2:'''<br> [[Pyrrhic Horn]] |
||
| + | :[[Tenebrous Fragment]] |
||
| − | |BGCOLOR="#ffd4e2" valign="top"| [[Relic Horn]]<br> [[Mammoth Tusk]]<br> [[Chronos Tooth]]<br> [[Swordbelt +1]] |
||
| + | :''{{Location|North Gustaberg|F-7}} via Dangruf Wadi'' |
||
| − | |BGCOLOR="#ddf4d4"|[[Lungo-Nango Jadeshell|L. Jadeshell]] x 3 |
||
| + | | bgcolor="#ddf4d4" | |
||
| − | |- |
||
| + | :[[Rimilala Stripeshell|R. Stripeshell]] x 1 |
||
| − | |BGCOLOR="#DDEEFF" valign="top"| '''Stage 3:'''<br> [[Dynamis Horn]] |
||
| + | |- valign="top" |
||
| − | |BGCOLOR="#ffd4e2" valign="top"| [[Pyrrhic Horn]]<br> [[Horn]]<br> [[Gemshorn]]<br> [[Shofar]] |
||
| + | ! bgcolor="#66CCFF" | |
||
| − | |BGCOLOR="#ddf4d4"|[[One Hundred Byne Bill|100 Byne Bill]] x 14 |
||
| + | ! bgcolor="#66CCFF" | |
||
| − | |- |
||
| + | ! bgcolor="#D87093" | |
||
| − | |BGCOLOR="#DDEEFF" valign="top"| '''Stage 4:'''<br> [[Millennium Horn]] |
||
| + | ! bgcolor="#65d43e" | |
||
| − | |BGCOLOR="#ffd4e2" valign="top"| [[Dynamis Horn]]<br> [[Attestation of Harmony]] |
||
| + | |- id="Polearm" valign="top" |
||
| − | |BGCOLOR="#ddf4d4"|[[Montiont Silverpiece|M. Silverpiece]] x 60 |
||
| + | | rowspan="5" bgcolor="#DDEEFF" | |
||
| − | |- |
||
| + | ;Polearm |
||
| − | |BGCOLOR="#DDEEFF" valign="top"| '''Stage 5:'''<br> [[Gjallarhorn]] |
||
| + | :[[DRG]] |
||
| − | |BGCOLOR="#ffd4e2" valign="top"| [[Millennium Horn]]<br> [[Necropsyche]]<br> [[Mysterial Fragment]]<br> ''[[Valley of Sorrows]]: North side hole'' |
||
| + | | bgcolor="#DDEEFF" | |
||
| − | |BGCOLOR="#ddf4d4"|[[Rimilala Stripeshell|R. Stripeshell]] x 1 |
||
| + | ;Stage 1: |
||
| − | |- |
||
| + | :[[Relic Lance]] |
||
| − | !BGCOLOR="#66CCFF" | |
||
| − | + | | bgcolor="#ffd4e2" | |
|
| + | :None |
||
| − | !BGCOLOR="#D87093" | |
||
| − | + | | bgcolor="#ddf4d4" | |
|
| + | : None |
||
| − | !BGCOLOR="#ffffff" | |
||
| + | |- valign="top" |
||
| − | |- |
||
| + | | bgcolor="#DDEEFF" | |
||
| − | |rowspan=5 BGCOLOR="#DDEEFF" | '''Shield'''<br> [[PLD]] |
||
| + | ;Stage 2: |
||
| − | |BGCOLOR="#DDEEFF" valign="top"| '''Stage 1:'''<br> [[Relic Shield]] |
||
| + | :[[Hotspur Lance]] |
||
| − | |BGCOLOR="#ffd4e2" valign="top"| None |
||
| + | | bgcolor="#ffd4e2" | |
||
| − | |BGCOLOR="#ddf4d4"| None |
||
| + | :[[Relic Lance]] |
||
| − | |- |
||
| + | :[[Lancewood Lumber]] |
||
| − | |BGCOLOR="#DDEEFF" valign="top"| '''Stage 2:'''<br> [[Bulwark Shield]] |
||
| + | :[[Orichalcum Ingot]] |
||
| − | |BGCOLOR="#ffd4e2" valign="top"| [[Relic Shield]]<br> [[Amaltheia Leather]]<br> [[Orichalcum Sheet]]<br> [[Ancient Lumber]] |
||
| + | :[[Arachne Thread]] |
||
| − | |BGCOLOR="#ddf4d4"|[[One Hundred Byne Bill|100 Byne Bill]] x 1<br>[[Montiont Silverpiece|M. Silverpiece]] x 1<br>[[Lungo-Nango Jadeshell|L. Jadeshell]] x 1 |
||
| + | | bgcolor="#ddf4d4" | |
||
| − | |- |
||
| + | :[[Lungo-Nango Jadeshell|L. Jadeshell]] x 4 |
||
| − | |BGCOLOR="#DDEEFF" valign="top"| '''Stage 3:'''<br> [[Dynamis Shield]] |
||
| + | |- valign="top" |
||
| − | |BGCOLOR="#ffd4e2" valign="top"| [[Bulwark Shield]]<br> [[Buckler]]<br> [[Round Shield]]<br> [[Koenig Shield]] |
||
| + | | bgcolor="#DDEEFF" | |
||
| − | |BGCOLOR="#ddf4d4"|[[One Hundred Byne Bill|100 Byne Bill]] x 4<br>[[Montiont Silverpiece|M. Silverpiece]] x 4<br>[[Lungo-Nango Jadeshell|L. Jadeshell]] x 4 |
||
| + | ;Stage 3: |
||
| − | |- |
||
| + | :[[Dynamis Lance]] |
||
| − | |BGCOLOR="#DDEEFF" valign="top"| '''Stage 4:'''<br> [[Ancile]] |
||
| + | | bgcolor="#ffd4e2" | |
||
| − | |BGCOLOR="#ffd4e2" valign="top"| [[Dynamis Shield]]<br> [[Attestation of Invulnerability]] |
||
| + | :[[Hotspur Lance]] |
||
| − | |BGCOLOR="#ddf4d4"|[[One Hundred Byne Bill|100 Byne Bill]] x 20<br>[[Montiont Silverpiece|M. Silverpiece]] x 20<br>[[Lungo-Nango Jadeshell|L. Jadeshell]] x 20 |
||
| + | :[[Brass Spear]] |
||
| − | |- |
||
| + | :[[Halberd]] |
||
| − | |BGCOLOR="#DDEEFF" valign="top"| '''Stage 5:'''<br> [[Aegis]] |
||
| + | :[[Wyvern Spear]] |
||
| − | |BGCOLOR="#ffd4e2" valign="top"| [[Ancile]]<br> [[Necropsyche]]<br> [[Supernal Fragment]]<br> ''[[Carpenters' Landing]]: H-10 |
||
| − | | |
+ | | bgcolor="#ddf4d4" | |
| + | :[[One Hundred Byne Bill|100 Byne Bill]] x 16 |
||
| − | |- |
||
| + | |- valign="top" |
||
| − | !width="20%" align="center" valign="center" BGCOLOR="#66CCFF" |Weapon |
||
| + | | bgcolor="#DDEEFF" | |
||
| − | !width="24%" align="center" valign="center" BGCOLOR="#66CCFF" |Upgrade Stage |
||
| + | ;Stage 4: |
||
| − | !width="30%" align="center" valign="center" BGCOLOR="#D87093" |Items Needed |
||
| + | :[[Gae Assail]] |
||
| − | !width="25%" align="center" BGCOLOR="#65d43e" |Fee |
||
| + | | bgcolor="#ffd4e2" | |
||
| − | !width="1%" align="center" BGCOLOR="#ffffff" | |
||
| + | :[[Dynamis Lance]] |
||
| + | :[[Attestation of Fortitude]] |
||
| + | | bgcolor="#ddf4d4" | |
||
| + | :[[Montiont Silverpiece|M. Silverpiece]] x 61 |
||
| + | |- valign="top" |
||
| + | | bgcolor="#DDEEFF" | |
||
| + | ;Stage 5: |
||
| + | :[[Gungnir]] |
||
| + | | bgcolor="#ffd4e2" | |
||
| + | :[[Gae Assail]] |
||
| + | :[[Necropsyche]] |
||
| + | :[[Stellar Fragment]] |
||
| + | :''{{Location|Ru'Aun Gardens|G-6}}'' |
||
| + | | bgcolor="#ddf4d4" | |
||
| + | :[[Rimilala Stripeshell|R. Stripeshell]] x 1 |
||
| + | |- valign="top" |
||
| + | ! width="20%" bgcolor="#66CCFF" | Weapon |
||
| + | ! width="24%" bgcolor="#66CCFF" | Upgrade Stage |
||
| + | ! width="30%" bgcolor="#D87093" | Items Needed |
||
| + | ! width="25%" bgcolor="#65d43e" | Fee |
||
| + | |- id="Katana" valign="top" |
||
| + | | rowspan="5" bgcolor="#DDEEFF" | |
||
| + | ;Katana |
||
| + | :[[NIN]] |
||
| + | | bgcolor="#DDEEFF" | |
||
| + | ;Stage 1: |
||
| + | :[[Ihintanto]] |
||
| + | | bgcolor="#ffd4e2" | |
||
| + | :None |
||
| + | | bgcolor="#ddf4d4" | |
||
| + | : None |
||
| + | |- valign="top" |
||
| + | | bgcolor="#DDEEFF" | |
||
| + | ;Stage 2: |
||
| + | :[[Mimizuku]] |
||
| + | | bgcolor="#ffd4e2" | |
||
| + | :[[Ihintanto]] |
||
| + | :[[Relic Steel]] |
||
| + | :[[Tarasque Skin]] |
||
| + | :[[Twinthread]] |
||
| + | | bgcolor="#ddf4d4" | |
||
| + | :[[One Hundred Byne Bill|100 Byne Bill]] x 4 |
||
| + | |- valign="top" |
||
| + | | bgcolor="#DDEEFF" | |
||
| + | ;Stage 3: |
||
| + | :[[Rogetsu]] |
||
| + | | bgcolor="#ffd4e2" | |
||
| + | :[[Mimizuku]] |
||
| + | :[[Wakizashi]] |
||
| + | :[[Kabutowari]] |
||
| + | :[[Sakurafubuki]] |
||
| + | | bgcolor="#ddf4d4" | |
||
| + | :[[Lungo-Nango Jadeshell|L. Jadeshell]] x 16 |
||
| + | |- valign="top" |
||
| + | | bgcolor="#DDEEFF" | |
||
| + | ;Stage 4: |
||
| + | :[[Yoshimitsu]] |
||
| + | | bgcolor="#ffd4e2" | |
||
| + | :[[Rogetsu]] |
||
| + | :[[Attestation of Legerity]] |
||
| + | | bgcolor="#ddf4d4" | |
||
| + | :[[Montiont Silverpiece|M. Silverpiece]] x 61 |
||
| + | |- valign="top" |
||
| + | | bgcolor="#DDEEFF" | |
||
| + | ;Stage 5: |
||
| + | :[[Kikoku]] |
||
| + | | bgcolor="#ffd4e2" | |
||
| + | :[[Yoshimitsu]] |
||
| + | :[[Necropsyche]] |
||
| + | :[[Demoniac Fragment]] |
||
| + | :''{{Location|Sea Serpent Grotto|map=Map 3|C-10}}'' |
||
| + | | bgcolor="#ddf4d4" | |
||
| + | :[[Ten Thousand Byne Bill|10,000 Byne Bill]] x 1 |
||
| + | |- valign="top" |
||
| + | ! bgcolor="#66CCFF" | |
||
| + | ! bgcolor="#66CCFF" | |
||
| + | ! bgcolor="#D87093" | |
||
| + | ! bgcolor="#65d43e" | |
||
| + | |- id="Great Katana" valign="top" |
||
| + | | rowspan="5" bgcolor="#DDEEFF" | |
||
| + | ;Great Katana |
||
| + | :[[SAM]] |
||
| + | | bgcolor="#DDEEFF" | |
||
| + | ;Stage 1: |
||
| + | :[[Ito]] |
||
| + | | bgcolor="#ffd4e2" | |
||
| + | :None |
||
| + | | bgcolor="#ddf4d4" | |
||
| + | : None |
||
| + | |- valign="top" |
||
| + | | bgcolor="#DDEEFF" | |
||
| + | ;Stage 2: |
||
| + | :[[Hayatemaru]] |
||
| + | | bgcolor="#ffd4e2" | |
||
| + | :[[Ito]] |
||
| + | :[[Relic Steel]] |
||
| + | :[[Siren's Macrame]] |
||
| + | :[[Tama-Hagane]] |
||
| + | | bgcolor="#ddf4d4" | |
||
| + | :[[Montiont Silverpiece|M. Silverpiece]] x 3 |
||
| + | |- valign="top" |
||
| + | | bgcolor="#DDEEFF" | |
||
| + | ;Stage 3: |
||
| + | :[[Oboromaru]] |
||
| + | | bgcolor="#ffd4e2" | |
||
| + | :[[Hayatemaru]] |
||
| + | :[[Tachi]] |
||
| + | :[[Mikazuki]] |
||
| + | :[[Kazaridachi]] |
||
| + | | bgcolor="#ddf4d4" | |
||
| + | :[[Lungo-Nango Jadeshell|L. Jadeshell]] x 15 |
||
| + | |- valign="top" |
||
| + | | bgcolor="#DDEEFF" | |
||
| + | ;Stage 4: |
||
| + | :[[Totsukanotsurugi]] |
||
| + | | bgcolor="#ffd4e2" | |
||
| + | :[[Oboromaru]] |
||
| + | :[[Attestation of Decisiveness]] |
||
| + | | bgcolor="#ddf4d4" | |
||
| + | :[[One Hundred Byne Bill|100 Byne Bill]] x 60 |
||
| + | |- valign="top" |
||
| + | | bgcolor="#DDEEFF" | |
||
| + | ;Stage 5: |
||
| + | :[[Amanomurakumo]] |
||
| + | | bgcolor="#ffd4e2" | |
||
| + | :[[Totsukanotsurugi]] |
||
| + | :[[Necropsyche]] |
||
| + | :[[Divine Fragment]] |
||
| + | :''{{Location|Yughott Grotto|Horlais Peak(Hot Spring)}}'' |
||
| + | | bgcolor="#ddf4d4" | |
||
| + | :[[Ranperre Goldpiece|R. Goldpiece]] x 1 |
||
| + | |- valign="top" |
||
| + | ! bgcolor="#66CCFF" | |
||
| + | ! bgcolor="#66CCFF" | |
||
| + | ! bgcolor="#D87093" | |
||
| + | ! bgcolor="#65d43e" | |
||
| + | |- id="Club" valign="top" |
||
| + | | rowspan="5" bgcolor="#DDEEFF" | |
||
| + | ;Club |
||
| + | :[[WHM]] |
||
| + | | bgcolor="#DDEEFF" | |
||
| + | ;Stage 1: |
||
| + | :[[Relic Maul]] |
||
| + | | bgcolor="#ffd4e2" | |
||
| + | :None |
||
| + | | bgcolor="#ddf4d4" | |
||
| + | : None |
||
| + | |- valign="top" |
||
| + | | bgcolor="#DDEEFF" | |
||
| + | ;Stage 2: |
||
| + | :[[Battering Maul]] |
||
| + | | bgcolor="#ffd4e2" | |
||
| + | :[[Relic Maul]] |
||
| + | :[[Wootz Ingot]] |
||
| + | :[[Platinum Ingot]] |
||
| + | :[[Rainbow Cloth]] |
||
| + | | bgcolor="#ddf4d4" | |
||
| + | :[[Montiont Silverpiece|M. Silverpiece]] x 5 |
||
| + | |- valign="top" |
||
| + | | bgcolor="#DDEEFF" | |
||
| + | ;Stage 3: |
||
| + | :[[Dynamis Maul]] |
||
| + | | bgcolor="#ffd4e2" | |
||
| + | :[[Battering Maul]] |
||
| + | :[[Warhammer]] |
||
| + | :[[Holy Maul]] |
||
| + | :[[Brass Hammer]] |
||
| + | | bgcolor="#ddf4d4" | |
||
| + | :[[One Hundred Byne Bill|100 Byne Bill]] x 16 |
||
| + | |- valign="top" |
||
| + | | bgcolor="#DDEEFF" | |
||
| + | ;Stage 4: |
||
| + | :[[Gullintani]] |
||
| + | | bgcolor="#ffd4e2" | |
||
| + | :[[Dynamis Maul]] |
||
| + | :[[Attestation of Sacrifice]] |
||
| + | | bgcolor="#ddf4d4" | |
||
| + | :[[Lungo-Nango Jadeshell|L. Jadeshell]] x 62 |
||
| + | |- valign="top" |
||
| + | | bgcolor="#DDEEFF" | |
||
| + | ;Stage 5: |
||
| + | :[[Mjollnir]] |
||
| + | | bgcolor="#ffd4e2" | |
||
| + | :[[Gullintani]] |
||
| + | :[[Necropsyche]] |
||
| + | :[[Heavenly Fragment]] |
||
| + | :''{{Location|The Sanctuary of Zi'Tah|H-8}}'' |
||
| + | | bgcolor="#ddf4d4" | |
||
| + | :[[Ranperre Goldpiece|R. Goldpiece]] x 1 |
||
| + | |- valign="top" |
||
| + | ! bgcolor="#66CCFF" | |
||
| + | ! bgcolor="#66CCFF" | |
||
| + | ! bgcolor="#D87093" | |
||
| + | ! bgcolor="#65d43e" | |
||
| + | |- id="Staff" valign="top" |
||
| + | | rowspan="5" bgcolor="#DDEEFF" | |
||
| + | ;Staff |
||
| + | :[[BLM]] |
||
| + | :[[SMN]] |
||
| + | | bgcolor="#DDEEFF" | |
||
| + | ;Stage 1: |
||
| + | :[[Relic Staff]] |
||
| + | | bgcolor="#ffd4e2" | |
||
| + | :None |
||
| + | | bgcolor="#ddf4d4" | |
||
| + | : None |
||
| + | |- valign="top" |
||
| + | | bgcolor="#DDEEFF" | |
||
| + | ;Stage 2: |
||
| + | :[[Sage's Staff]] |
||
| + | | bgcolor="#ffd4e2" | |
||
| + | :[[Relic Staff]] |
||
| + | :[[Lancewood Lumber]] |
||
| + | :[[Pigeon's Blood Ruby]] |
||
| + | :[[Urushi]] |
||
| + | | bgcolor="#ddf4d4" | |
||
| + | :[[Lungo-Nango Jadeshell|L. Jadeshell]] x 5 |
||
| + | |- valign="top" |
||
| + | | bgcolor="#DDEEFF" | |
||
| + | ;Stage 3: |
||
| + | :[[Dynamis Staff]] |
||
| + | | bgcolor="#ffd4e2" | |
||
| + | :[[Sage's Staff]] |
||
| + | :[[Ash Staff]] |
||
| + | :[[Elm Staff]] |
||
| + | :[[Mahogany Staff]] |
||
| + | | bgcolor="#ddf4d4" | |
||
| + | :[[One Hundred Byne Bill|100 Byne Bill]] x 16 |
||
| + | |- valign="top" |
||
| + | | bgcolor="#DDEEFF" | |
||
| + | ;Stage 4: |
||
| + | :[[Thyrus]] |
||
| + | | bgcolor="#ffd4e2" | |
||
| + | :[[Dynamis Staff]] |
||
| + | :[[Attestation of Virtue]] |
||
| + | | bgcolor="#ddf4d4" | |
||
| + | :[[Montiont Silverpiece|M. Silverpiece]] x 62 |
||
| + | |- valign="top" |
||
| + | | bgcolor="#DDEEFF" | |
||
| + | ;Stage 5: |
||
| + | :[[Claustrum]] |
||
| + | | bgcolor="#ffd4e2" | |
||
| + | :[[Thyrus]] |
||
| + | :[[Necropsyche]] |
||
| + | :[[Celestial Fragment]] |
||
| + | :''{{Location|Ifrit's Cauldron|map=Map 7|H-7}} Crater'' |
||
| + | | bgcolor="#ddf4d4" | |
||
| + | :[[Rimilala Stripeshell|R. Stripeshell]] x 1 |
||
| + | |- valign="top" |
||
| + | ! width="20%" bgcolor="#66CCFF" | Weapon |
||
| + | ! width="24%" bgcolor="#66CCFF" | Upgrade Stage |
||
| + | ! width="30%" bgcolor="#D87093" | Items Needed |
||
| + | ! width="25%" bgcolor="#65d43e" | Fee |
||
| + | |- id="Marksmanship" valign="top" |
||
| + | | rowspan="5" bgcolor="#DDEEFF" | |
||
| + | ;Marksmanship |
||
| + | :[[RNG]] |
||
| + | | bgcolor="#DDEEFF" | |
||
| + | ;Stage 1: |
||
| + | :[[Relic Gun]] |
||
| + | | bgcolor="#ffd4e2" | |
||
| + | :None |
||
| + | | bgcolor="#ddf4d4" | |
||
| + | : None |
||
| + | |- valign="top" |
||
| + | | bgcolor="#DDEEFF" | |
||
| + | ;Stage 2: |
||
| + | :[[Marksman Gun]] |
||
| + | | bgcolor="#ffd4e2" | |
||
| + | :[[Relic Gun]] |
||
| + | :[[Marksman's Oil]] |
||
| + | :[[Rainbow Cloth]] |
||
| + | :[[Darksteel Ingot]] |
||
| + | | bgcolor="#ddf4d4" | |
||
| + | :[[One Hundred Byne Bill|100 Byne Bill]] x 5 |
||
| + | |- valign="top" |
||
| + | | bgcolor="#DDEEFF" | |
||
| + | ;Stage 3: |
||
| + | :[[Dynamis Gun]] |
||
| + | | bgcolor="#ffd4e2" | |
||
| + | :[[Marksman Gun]] |
||
| + | :[[Arquebus]] |
||
| + | :[[Hellfire]] |
||
| + | :[[Pirate's Gun]] |
||
| + | | bgcolor="#ddf4d4" | |
||
| + | :[[Lungo-Nango Jadeshell|L. Jadeshell]] x 15 |
||
| + | |- valign="top" |
||
| + | | bgcolor="#DDEEFF" | |
||
| + | ;Stage 4: |
||
| + | :[[Ferdinand]] |
||
| + | | bgcolor="#ffd4e2" | |
||
| + | :[[Dynamis Gun]] |
||
| + | :[[Attestation of Accuracy]] |
||
| + | | bgcolor="#ddf4d4" | |
||
| + | :[[Montiont Silverpiece|M. Silverpiece]] x 62 |
||
| + | |- valign="top" |
||
| + | | bgcolor="#DDEEFF" | |
||
| + | ;Stage 5: |
||
| + | :[[Annihilator]] |
||
| + | | bgcolor="#ffd4e2" | |
||
| + | :[[Ferdinand]] |
||
| + | :[[Necropsyche]] |
||
| + | :[[Ethereal Fragment]] |
||
| + | :''{{Location|Metalworks}}'' - [[Gunpowder Room]] |
||
| + | | bgcolor="#ddf4d4" | |
||
| + | :[[Ten Thousand Byne Bill|10,000 Byne Bill]] x 1 |
||
| + | |- valign="top" |
||
| + | ! bgcolor="#66CCFF" | |
||
| + | ! bgcolor="#66CCFF" | |
||
| + | ! bgcolor="#D87093" | |
||
| + | ! bgcolor="#65d43e" | |
||
| + | |- id="Archery" valign="top" |
||
| + | | rowspan="5" bgcolor="#DDEEFF" | |
||
| + | ;Archery |
||
| + | :[[RNG]] |
||
| + | :[[SAM]] |
||
| + | | bgcolor="#DDEEFF" | |
||
| + | ;Stage 1: |
||
| + | :[[Relic Bow]] |
||
| + | | bgcolor="#ffd4e2" | |
||
| + | :None |
||
| + | | bgcolor="#ddf4d4" | |
||
| + | : None |
||
| + | |- valign="top" |
||
| + | | bgcolor="#DDEEFF" | |
||
| + | ;Stage 2: |
||
| + | :[[Wolver Bow]] |
||
| + | | bgcolor="#ffd4e2" | |
||
| + | :[[Relic Bow]] |
||
| + | :[[Behemoth Horn]] |
||
| + | :[[Lancewood Lumber]] |
||
| + | :[[Carbon Fiber]] |
||
| + | | bgcolor="#ddf4d4" | |
||
| + | :[[Montiont Silverpiece|M. Silverpiece]] x 4 |
||
| + | |- valign="top" |
||
| + | | bgcolor="#DDEEFF" | |
||
| + | ;Stage 3: |
||
| + | :[[Dynamis Bow]] |
||
| + | | bgcolor="#ffd4e2" | |
||
| + | :[[Wolver Bow]] |
||
| + | :[[Power Bow]] |
||
| + | :[[War Bow]] |
||
| + | :[[Shigeto Bow]] |
||
| + | | bgcolor="#ddf4d4" | |
||
| + | :[[Montiont Silverpiece|M. Silverpiece]] x 15 |
||
| + | |- valign="top" |
||
| + | | bgcolor="#DDEEFF" | |
||
| + | ;Stage 4: |
||
| + | :[[Futatokoroto]] |
||
| + | | bgcolor="#ffd4e2" | |
||
| + | :[[Dynamis Bow]] |
||
| + | :[[Attestation of Transcendence]] |
||
| + | | bgcolor="#ddf4d4" | |
||
| + | :[[Lungo-Nango Jadeshell|L. Jadeshell]] x 61 |
||
| + | |- valign="top" |
||
| + | | bgcolor="#DDEEFF" | |
||
| + | ;Stage 5: |
||
| + | :[[Yoichinoyumi]] |
||
| + | | bgcolor="#ffd4e2" | |
||
| + | :[[Futatokoroto]] |
||
| + | :[[Necropsyche]] |
||
| + | :[[Snarled Fragment]] |
||
| + | :''{{Location|Cape Teriggan|H-9}} Seashore'' |
||
| + | | bgcolor="#ddf4d4" | |
||
| + | :[[Ranperre Goldpiece|R. Goldpiece]] x 1 |
||
| + | |- valign="top" |
||
| + | ! bgcolor="#66CCFF" | |
||
| + | ! bgcolor="#66CCFF" | |
||
| + | ! bgcolor="#D87093" | |
||
| + | ! bgcolor="#65d43e" | |
||
| + | |- id="Wind Instrument" valign="top" |
||
| + | | rowspan="5" bgcolor="#DDEEFF" | |
||
| + | ;Wind Instrument |
||
| + | :[[BRD]] |
||
| + | | bgcolor="#DDEEFF" | |
||
| + | ;Stage 1: |
||
| + | :[[Relic Horn]] |
||
| + | | bgcolor="#ffd4e2" | |
||
| + | :None |
||
| + | | bgcolor="#ddf4d4" | |
||
| + | : None |
||
| + | |- valign="top" |
||
| + | | bgcolor="#DDEEFF" | |
||
| + | ;Stage 2: |
||
| + | :[[Pyrrhic Horn]] |
||
| + | | bgcolor="#ffd4e2" | |
||
| + | :[[Relic Horn]] |
||
| + | :[[Mammoth Tusk]] |
||
| + | :[[Chronos Tooth]] |
||
| + | :[[Swordbelt +1]] |
||
| + | | bgcolor="#ddf4d4" | |
||
| + | :[[Lungo-Nango Jadeshell|L. Jadeshell]] x 3 |
||
| + | |- valign="top" |
||
| + | | bgcolor="#DDEEFF" | |
||
| + | ;Stage 3: |
||
| + | :[[Dynamis Horn]] |
||
| + | | bgcolor="#ffd4e2" | |
||
| + | :[[Pyrrhic Horn]] |
||
| + | :[[Horn]] |
||
| + | :[[Gemshorn]] |
||
| + | :[[Shofar]] |
||
| + | | bgcolor="#ddf4d4" | |
||
| + | :[[One Hundred Byne Bill|100 Byne Bill]] x 14 |
||
| + | |- valign="top" |
||
| + | | bgcolor="#DDEEFF" | |
||
| + | ;Stage 4: |
||
| + | :[[Millennium Horn]] |
||
| + | | bgcolor="#ffd4e2" | |
||
| + | :[[Dynamis Horn]] |
||
| + | :[[Attestation of Harmony]] |
||
| + | | bgcolor="#ddf4d4" | |
||
| + | :[[Montiont Silverpiece|M. Silverpiece]] x 60 |
||
| + | |- valign="top" |
||
| + | | bgcolor="#DDEEFF" | |
||
| + | ;Stage 5: |
||
| + | :[[Gjallarhorn]] |
||
| + | | bgcolor="#ffd4e2" | |
||
| + | :[[Millennium Horn]] |
||
| + | :[[Necropsyche]] |
||
| + | :[[Mysterial Fragment]] |
||
| + | :''{{Location|Valley of Sorrows|H-7}} Cave in wall'' |
||
| + | | bgcolor="#ddf4d4" | |
||
| + | :[[Rimilala Stripeshell|R. Stripeshell]] x 1 |
||
| + | |- valign="top" |
||
| + | ! bgcolor="#66CCFF" | |
||
| + | ! bgcolor="#66CCFF" | |
||
| + | ! bgcolor="#D87093" | |
||
| + | ! bgcolor="#65d43e" | |
||
| + | |- id="Shield" valign="top" |
||
| + | | rowspan="5" bgcolor="#DDEEFF" | |
||
| + | ;Shield |
||
| + | :[[PLD]] |
||
| + | | bgcolor="#DDEEFF" | |
||
| + | ;Stage 1: |
||
| + | :[[Relic Shield]] |
||
| + | | bgcolor="#ffd4e2" | |
||
| + | :None |
||
| + | | bgcolor="#ddf4d4" | |
||
| + | : None |
||
| + | |- valign="top" |
||
| + | | bgcolor="#DDEEFF" | |
||
| + | ;Stage 2: |
||
| + | :[[Bulwark Shield]] |
||
| + | | bgcolor="#ffd4e2" | |
||
| + | :[[Relic Shield]] |
||
| + | :[[Amaltheia Leather]] |
||
| + | :[[Orichalcum Sheet]] |
||
| + | :[[Ancient Lumber]] |
||
| + | | bgcolor="#ddf4d4" | |
||
| + | :[[One Hundred Byne Bill|100 Byne Bill]] x 1 |
||
| + | :[[Montiont Silverpiece|M. Silverpiece]] x 1 |
||
| + | :[[Lungo-Nango Jadeshell|L. Jadeshell]] x 1 |
||
| + | |- valign="top" |
||
| + | | bgcolor="#DDEEFF" | |
||
| + | ;Stage 3: |
||
| + | :[[Dynamis Shield]] |
||
| + | | bgcolor="#ffd4e2" | |
||
| + | :[[Bulwark Shield]] |
||
| + | :[[Buckler]] |
||
| + | :[[Round Shield]] |
||
| + | :[[Koenig Shield]] |
||
| + | | bgcolor="#ddf4d4" | |
||
| + | :[[One Hundred Byne Bill|100 Byne Bill]] x 4 |
||
| + | :[[Montiont Silverpiece|M. Silverpiece]] x 4 |
||
| + | :[[Lungo-Nango Jadeshell|L. Jadeshell]] x 4 |
||
| + | |- valign="top" |
||
| + | | bgcolor="#DDEEFF" | |
||
| + | ;Stage 4: |
||
| + | :[[Ancile]] |
||
| + | | bgcolor="#ffd4e2" | |
||
| + | :[[Dynamis Shield]] |
||
| + | :[[Attestation of Invulnerability]] |
||
| + | | bgcolor="#ddf4d4" | |
||
| + | :[[One Hundred Byne Bill|100 Byne Bill]] x 20 |
||
| + | :[[Montiont Silverpiece|M. Silverpiece]] x 20 |
||
| + | :[[Lungo-Nango Jadeshell|L. Jadeshell]] x 20 |
||
| + | |- valign="top" |
||
| + | | bgcolor="#DDEEFF" | |
||
| + | ;Stage 5: |
||
| + | :[[Aegis]] |
||
| + | | bgcolor="#ffd4e2" | |
||
| + | :[[Ancile]] |
||
| + | :[[Necropsyche]] |
||
| + | :[[Supernal Fragment]] |
||
| + | :''{{Location|Carpenters' Landing|H-10}}'' |
||
| + | | bgcolor="#ddf4d4" | |
||
| + | :[[Ranperre Goldpiece|R. Goldpiece]] x 1 |
||
|} |
|} |
||
<br clear="all" /> |
<br clear="all" /> |
||
| − | == See Also == |
||
| + | ==See Also== |
||
*[http://www.ffxiah.com/relic_calc.php Calculator: How long will it take me? ] |
*[http://www.ffxiah.com/relic_calc.php Calculator: How long will it take me? ] |
||
*[http://www.ffxiah.com/relics.php FFXIAH.com] keeps track of known relic holders through the community forums and the FFXI Linkshell Community site. |
*[http://www.ffxiah.com/relics.php FFXIAH.com] keeps track of known relic holders through the community forums and the FFXI Linkshell Community site. |
||
{{Dynamis Notes}} |
{{Dynamis Notes}} |
||
| + | [[Category:Weapons]][[Category:Dynamis]][[de:Kategorie:Reliktwaffen]] |
||
Revision as of 19:01, 2 June 2021
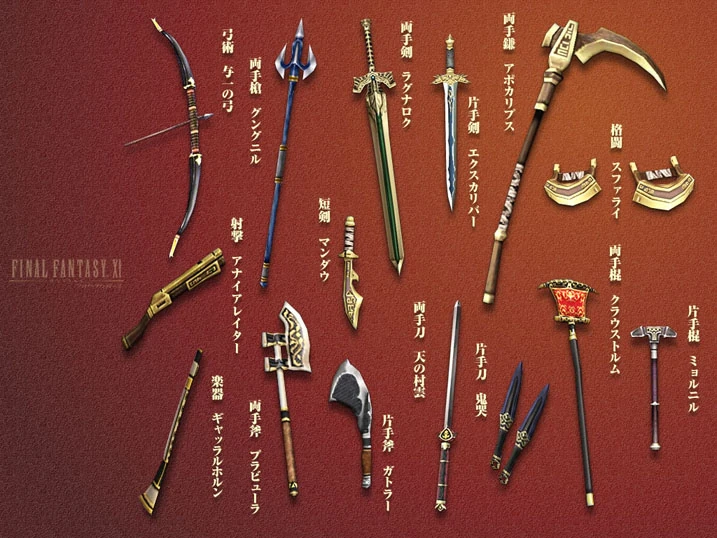
The completed Relic Weapons. Excluding Aegis
| Table of Contents: How to Obtain - The 5 Stages |
Relic Weapons are sixteen mysterious, high-damage, low-delay weapons obtained through participating in various runs into Dynamis. Admittedly, "Relic Weapon" is sort of a catch-all term; a Relic Horn and a Relic Shield also exist.
Given enough time and money, they can be upgraded into forms known to be the most powerful weapons of each type in the game. This upgrade process is most often very lengthy, and extremely expensive for the typical player. It requires a large amount of Ancient Currency, various crafted items (some requiring a high-level crafter), and certain Rare/Ex items only obtainable in Dynamis: Beaucedine and Dynamis: Xarcabard. This is such a serious and intense process that we have devoted an entire section below to what it really means to undertake this task.
Most base Relic Weapons are prefixed with the name "Relic", and are dropped by mobs in one of the four initially available Dynamis areas: Dynamis: Bastok, Dynamis: San d'Oria, Dynamis: Windurst, and Dynamis: Jeuno. Like most items in Dynamis (including Relic Armor), the Relic Weapons can drop from any mob at any time. They do not necessarily drop from mobs with the corresponding job type.
How to Obtain One
Each of the four initial areas has four base Relic Weapons that may only be dropped in that respective area:
| Dynamis: Bastok | Dynamis: San d'Oria | ||||
|---|---|---|---|---|---|
| Weapon | Type | Jobs | Weapon | Type | Jobs |
| Relic Blade | Great Sword | WAR/PLD/DRK | Relic Bhuj | Great Axe | WAR |
| Relic Scythe | Scythe | DRK | Relic Gun | Marksmanship | RNG |
| Relic Axe | Axe | BST | Ihintanto | Katana | NIN |
| Ito | Great Katana | SAM | Relic Lance | Polearm | DRG |
| Dynamis: Windurst | Dynamis: Jeuno | ||||
| Weapon | Type | Jobs | Weapon | Type | Jobs |
| Relic Sword | Sword | RDM/PLD | Relic Staff | Staff | BLM/SMN |
| Relic Dagger | Dagger | RDM/THF/BRD | Relic Bow | Archery | RNG/SAM |
| Relic Knuckles | Hand-to-Hand | MNK | Relic Horn | Wind Instrument | BRD |
| Relic Maul | Club | WHM | Relic Shield | Shield | PLD |
The 5 Stages
Each base Relic Weapon can be upgraded four times before Trial of the Magians. Three of these four upgrades are handled by a Goblin NPC named Switchstix, who can be found in Castle Zvahl Baileys. Each of these three upgrades requires that you simultaneously trade him your current-stage Relic Weapon along with whatever materials he asks for. Switchstix will then ask for his commission in Ancient Currency; this is a separate trade, and the upgrade process will not begin until he receives it. Your Relic Weapon and materials cannot be returned once traded. Furthermore, no other upgrades can be performed until the Ancient Currency commission has been traded to Switchstix. Time needed for the upgrade process varies by stage; when the waiting period is over, speak to Switchstix again to obtain your upgraded Relic Weapon. The specifics of this process can be found below.
All Relic Weapons, in all stages and forms, are Level 75. The stages of each Relic Weapon can be generally described as follows:
- First Stage
- This is the "Base" weapon, how it is when you first obtain it. When in this stage, the weapon is nothing more than a display piece, and has little to no practical value. Most base Relic Weapons are 1 Damage and 999 Delay; the Relic Shield has 1 Defense; and the Relic Horn has no effect on songs.
- Second Stage
- A portion of the "actual" stats for the weapon become available, but only when used in Dynamis. Most second-stage weapons also obtain a Dynamis-specific elemental resistance stat.
- Third Stage
- The Dynamis-only stats that appeared during the second stage now become available outside of Dynamis, while stats within Dynamis are nudged slightly further towards their final values. Elemental resistance stats will raise slightly, but remain Dynamis-specific.
- Fourth Stage
- The weapon's base stats are now "locked in" for all areas, and are close to their final values (though there are no longer any Dynamis-specific elemental resistance stats). The weapon's Relic weapon skill becomes available at this stage, but only in Dynamis areas. Each weapon skill grants you with a brief Additional Effect (described by the help text displayed when selecting the weapon skill in the menu) after its use. The duration of this effect varies with TP.
- Fifth Stage
- This is the final stage. Stats are all at full. Additional stats are added. The Relic Weapon Skill is available for all areas. At this stage, the Relic Weapon is complete, and can only be upgraded further via Trial of the Magians.
How to Upgrade
Listed below are all the items and Ancient Currency fees necessary to upgrade each stage of each Relic Weapon. All weapons follow the same basic process. There is a certain amount of waiting to do for some steps, and some hardcore farming for others. This is the process, though:
- Stage 1
- Obtain the base Relic weapon from the appropriate initial Dynamis area: Dynamis: Bastok, Dynamis: San d'Oria, Dynamis: Windurst, or Dynamis: Jeuno.
- Stage 2
- Wait Time: One day (Vana'diel time)
You will need your base Relic Weapon, three specific items (these are crafted items that can typically be obtained from Dynamis, crafted from materials found in Dynamis, or purchased with Ancient Currency), and 3 to 5 100-unit pieces of a specific type of Ancient Currency for the commission. Once you have all the required items, speak to Switchstix in Castle Zvahl Baileys at I-8 (where you first enter (Survival Manual near by). Trade him the weapon and all three items. Speak to him again, and he will ask for the payment fee. Trade him the Ancient Currency. After this, wait 1 Vana'diel day and speak to him (again) to receive your Stage 2 Relic Weapon.
- Stage 3
- Wait Time: two hours (Earth time)
This time, Switchstix will want your stage 2 Relic Weapon and three different weapons of the same type as the one you are upgrading, as well as an Ancient Currency fee of 12 to 16 100-unit pieces. Gather up all the items, and head out to speak to him again. Trade him the 2nd stage Relic Weapon and the other three weapons. Speak to him again, and he will ask for the payment fee. Trade him the Ancient Currency and wait 2 Vana'diel days (starting from the next Vana'diel day change). Speak to him again to receive your Stage 3 Relic Weapon.
- Stage 4
- Wait Time: 1 hour (Earth time)
Once you've obtained the appropriate Attestation from the Shadow NMs in Dynamis: Beaucedine, head out to see your buddy Switchstix again. Trade him the 3rd stage Relic Weapon and the Attestation. Speak to him again, and he will ask for the payment fee of somewhere between 60 and 62 100-unit pieces. Trade him the Ancient Currency and wait 1 earth hour. Speak to him again to receive your Stage 4 Relic Weapon.
- Stage 5
- Wait Time: None
Added Bonus: 30 100 Byne Bills, M. Silverpieces, or L. Jadeshells
This last step requires two Rare/Ex drops from Dynamis: Xarcabard: a Shard of Necropsyche and a Fragment (which may prove difficult to obtain) specific to your Relic Weapon, as well as a single 10,000-unit Ancient Currency of a specific type. Once you have all these items, pay a visit to Switchstix yet again (Note: going to the goblin is optional). Upon talking to him, you will get a cutscene in which your Relic Weapon will speak to you. Now head out to the appropriate location (which can be found grouped with the Items Needed in the tables below) for your specific weapon to find a blank ???. Trade your Relic Weapon and the required items (including the Ancient Currency) to the blank ???. After a cutscene, you will receive your 5th stage, and completely upgraded, Relic Weapon! And as an added bonus, you will get back 3,000 of whatever Ancient Currency you had to trade for this final step.
Required "Ingredients"
Polearm - Katana - Great Katana - Club - Staff - Marksmanship - Archery - Wind Instrument - Shield
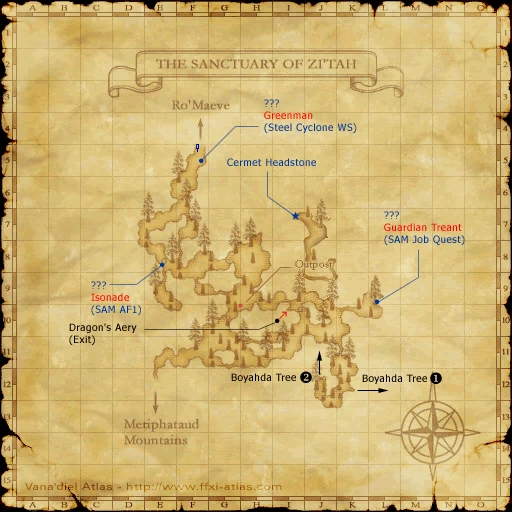
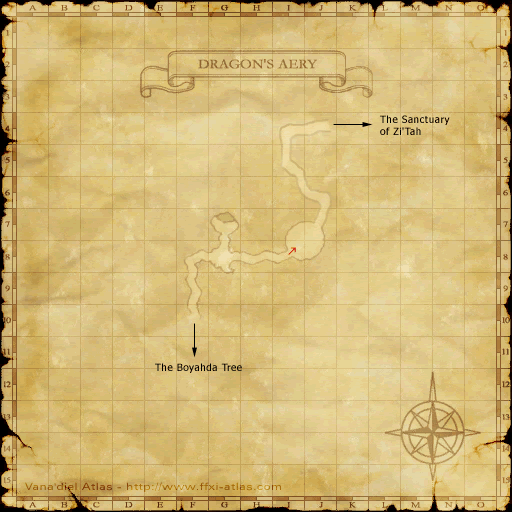
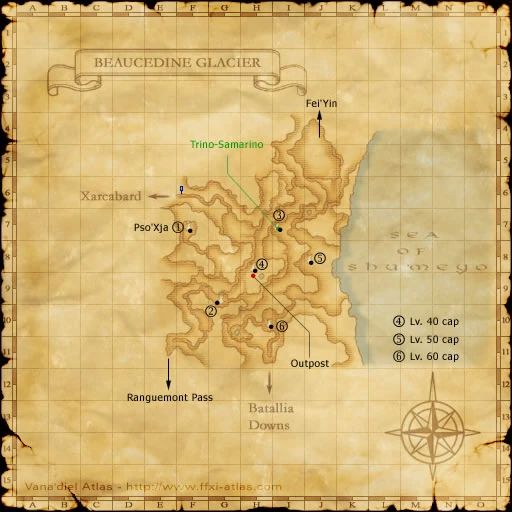
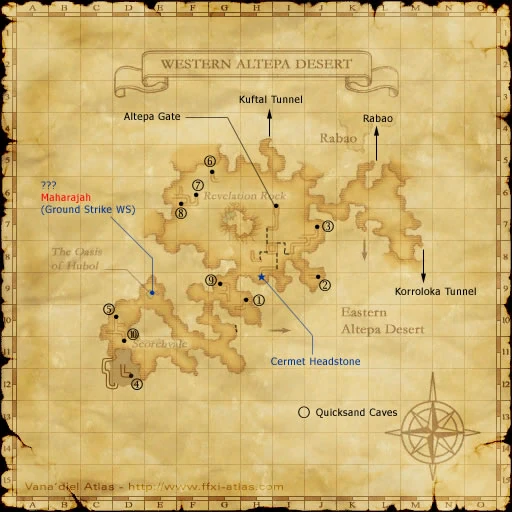
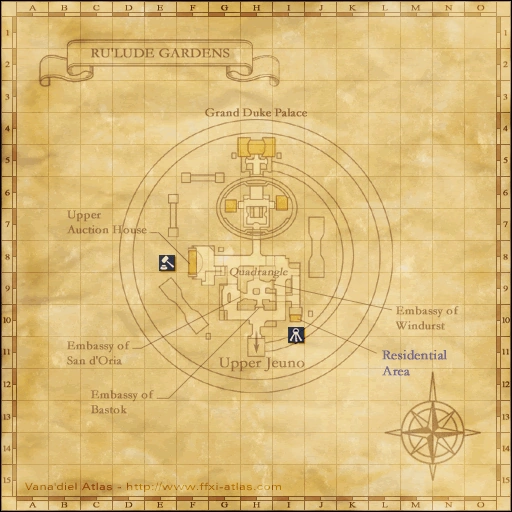
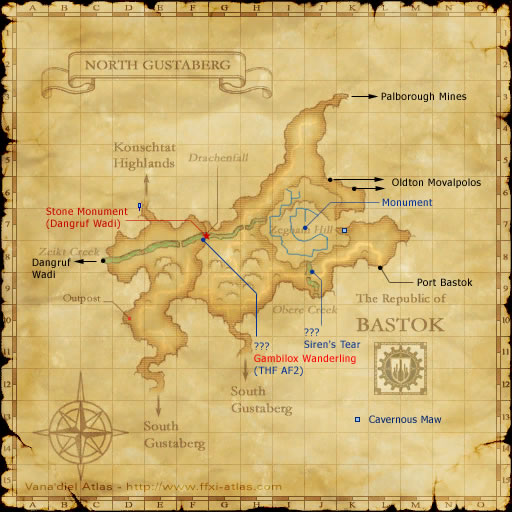
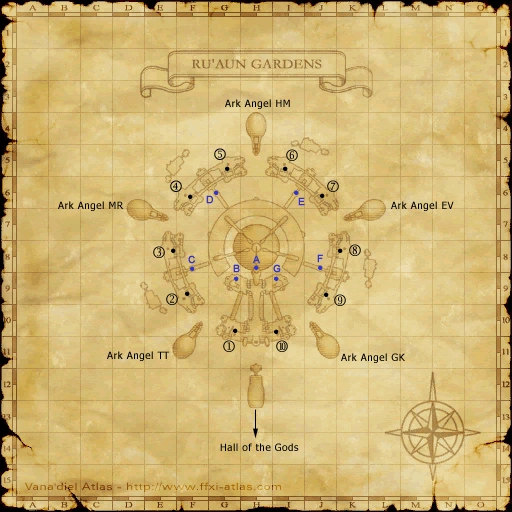
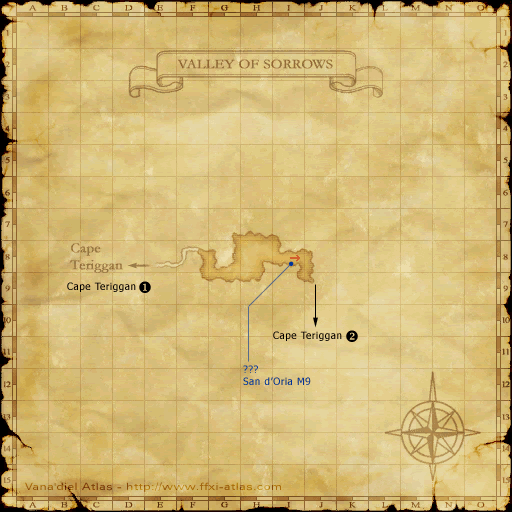
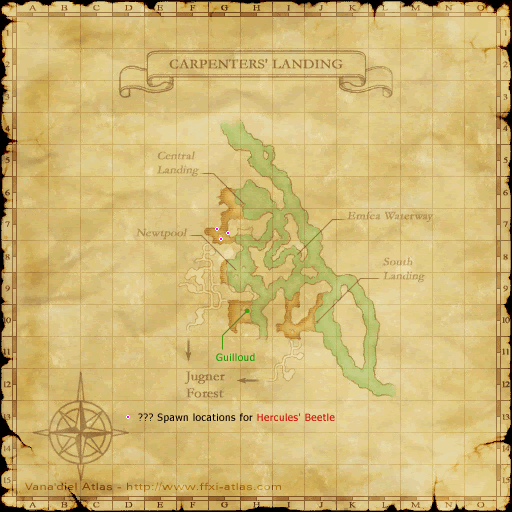
See Also
- Calculator: How long will it take me?
- FFXIAH.com keeps track of known relic holders through the community forums and the FFXI Linkshell Community site.
| Dynamis | |
|---|---|
| Original Areas | |
| Dreamworld Areas | |
| Bosses | |
| Time Extension Monsters | |
| Rewards | |
| Other | |
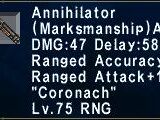


All items (217)
-
Abaddon Killer
-
Aegis
-
Aegis (80)
-
Aegis (85)

-
Aegis (90)
-
Aegis (95)
-
Aegis (99)
-
Aegis (99-2)

-
Agonal Bhuj
-
Amanomurakumo
-
Amanomurakumo (119)

-
Amanomurakumo (119-2)

-
Amanomurakumo (119-3)
-
Amanomurakumo (80)
-
Amanomurakumo (85)
-
Amanomurakumo (90)
-
Amanomurakumo (95)
-
Amanomurakumo (99)
-
Amanomurakumo (99-2)

-
Ancile
-
Annihilator

-
Annihilator (119)

-
Annihilator (119-2)

-
Annihilator (119-3)

-
Annihilator (119-4)
-
Annihilator (80)
-
Annihilator (85)
-
Annihilator (90)
-
Annihilator (95)
-
Annihilator (99)
-
Annihilator (99-2)
-
Apocalypse
-
Apocalypse (119)

-
Apocalypse (119-2)

-
Apocalypse (80)
-
Apocalypse (85)
-
Apocalypse (90)
-
Apocalypse (95)
-
Apocalypse (99)
-
Apocalypse (99-2)


-
Gae Assail
-
Gilded Blade
-
Gjallarhorn

-
Gjallarhorn (80)
-
Gjallarhorn (85)
-
Gjallarhorn (90)
-
Gjallarhorn (95)
-
Gjallarhorn (99)
-
Gjallarhorn (99-2)
-
Glyptic Sword
-
Gullintani
-
Gungnir (119-3)

-
Gungnir (80)
-
Gungnir (85)
-
Gungnir (90)
-
Gungnir (95)
-
Gungnir (99)
-
Gungnir (99-2)

-
Guttler
-
Guttler (119)

-
Guttler (119-2)

-
Guttler (119-3)

-
Guttler (80)
-
Guttler (85)
-
Guttler (90)
-
Guttler (95)
-
Guttler (99)
-
Guttler (99-2)


-
Malefic Dagger
-
Mandau
-
Mandau (119)

-
Mandau (119-2)

-
Mandau (119-3)

-
Mandau (80)
-
Mandau (85)
-
Mandau (90)
-
Mandau (95)
-
Mandau (99)
-
Mandau (99-2)

-
Marksman Gun
-
Memento Scythe
-
Militant Knuckles
-
Millennium Horn
-
Mimizuku
-
Mjollnir
-
Mjollnir (119)

-
Mjollnir (119-2)

-
Mjollnir (119-3)
-
Mjollnir (80)
-
Mjollnir (85)
-
Mjollnir (90)
-
Mjollnir (95)
-
Mjollnir (99)
-
Mjollnir (99-2)

-
Ragnarok
-
Ragnarok (119)

-
Ragnarok (119-2)

-
Ragnarok (119-3)

-
Ragnarok (80)
-
Ragnarok (85)

-
Ragnarok (90)
-
Ragnarok (95)
-
Ragnarok (99)
-
Ragnarok (99-2)
-
Relic Axe
-
Relic Bhuj
-
Relic Blade
-
Relic Bow
-
Relic Dagger
-
Relic Gun
-
Relic Horn
-
Relic Knuckles
-
Relic Lance
-
Relic Maul
-
Relic Scythe
-
Relic Shield

-
Relic Staff
-
Switchstix

-
Lungo-Nango Jadeshell
-
Rogetsu


