m (→Puppetmaster) |
m (→Dancer: table formatting; removed extranneous blank column) Tags: Visual edit apiedit |
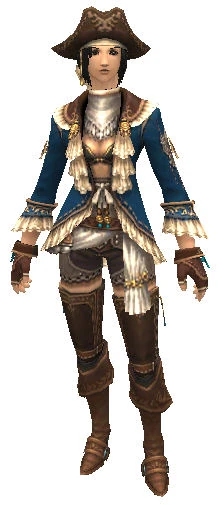
||
| (41 intermediate revisions by 22 users not shown) | |||
| Line 1: | Line 1: | ||
| − | [[Category:Armor]][[Category:Dynamis]] |
+ | [[Category:Armor]][[Category:Dynamis]][[de:Kategorie:Reliktrüstung]] |
{| border="0" cellpadding="5" cellspacing="0" align="center" width="100%" |
{| border="0" cellpadding="5" cellspacing="0" align="center" width="100%" |
||
| Line 5: | Line 5: | ||
__TOC__ |
__TOC__ |
||
| width="80%" valign="top" | |
| width="80%" valign="top" | |
||
| − | '''Relic Armor''' |
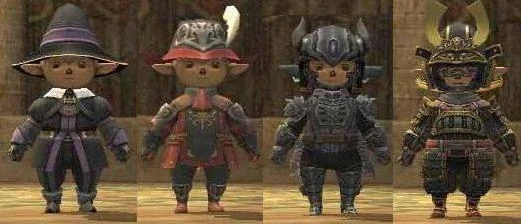
+ | '''Relic Armor''' is the second set of [[:Category:Artifact Armor|Artifact Armor]]. Relic Armor and [[:Category:Relic Weapons|Relic Weapons]] may only be found in [[:Category:Dynamis|Dynamis]] areas. The first piece of armor for each job is available at level 71, and each piece is both [[Rare]] and [[Exclusive]]. |
| Line 11: | Line 11: | ||
| − | [[ |
+ | [[File:Af2taru.1.JPG|Tarutarus in Relic Armor]] |
|} |
|} |
||
== Relic Armor by Job == |
== Relic Armor by Job == |
||
| − | === Bard === |
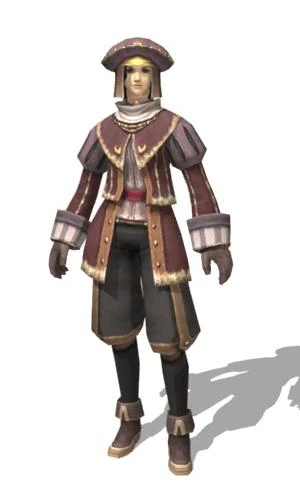
+ | === [[Bard]] === |
{| border="0" cellpadding="5" cellspacing="2" align="center" width="100%" |
{| border="0" cellpadding="5" cellspacing="2" align="center" width="100%" |
||
| valign="top" | |
| valign="top" | |
||
| − | [[ |
+ | [[File:RelicBard.jpg|100px|Bard Relic Armor]] |
| valign="top" | |
| valign="top" | |
||
{| class="sortable" border="0" cellpadding="2" cellspacing="2" width="100%" |
{| class="sortable" border="0" cellpadding="2" cellspacing="2" width="100%" |
||
| Line 62: | Line 62: | ||
|[[Dynamis - Buburimu]] |
|[[Dynamis - Buburimu]] |
||
|-class="sortbottom" |
|-class="sortbottom" |
||
| − | |align="left" colspan="5"|[[Bard' |
+ | |align="left" colspan="5"|[[Bard's Attire Set|View the set statistics]] |
|- |
|- |
||
|} |
|} |
||
|} |
|} |
||
| − | === Beastmaster === |
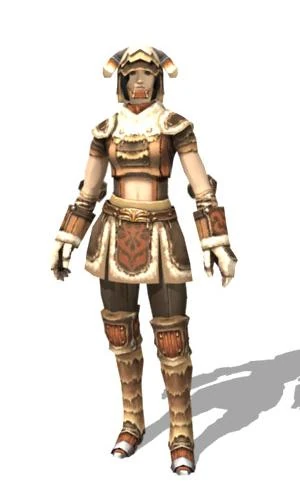
+ | === [[Beastmaster]] === |
{| border="0" cellpadding="5" cellspacing="2" align="center" width="100%" |
{| border="0" cellpadding="5" cellspacing="2" align="center" width="100%" |
||
| valign="top" | |
| valign="top" | |
||
| − | [[ |
+ | [[File:RelicBeast.jpg|100px|Beastmaster Relic Armor]] |
| valign="top" | |
| valign="top" | |
||
{| class="sortable" border="0" cellpadding="2" cellspacing="2" width="100%" |
{| class="sortable" border="0" cellpadding="2" cellspacing="2" width="100%" |
||
| Line 114: | Line 114: | ||
|[[Dynamis - Qufim]] |
|[[Dynamis - Qufim]] |
||
|-class="sortbottom" |
|-class="sortbottom" |
||
| − | |align="left" colspan="5"|[[ |
+ | |align="left" colspan="5"|[[Monster Armor Set|View the set statistics]] |
|- |
|- |
||
|} |
|} |
||
|} |
|} |
||
| − | === Black Mage === |
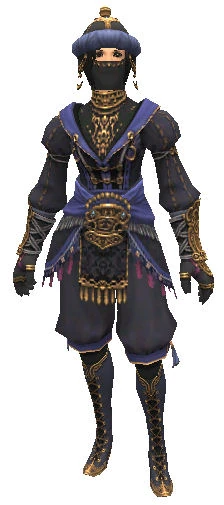
+ | === [[Black Mage]] === |
{| border="0" cellpadding="5" cellspacing="2" align="center" width="100%" |
{| border="0" cellpadding="5" cellspacing="2" align="center" width="100%" |
||
| valign="top" | |
| valign="top" | |
||
| − | [[ |
+ | [[File:RelicBLM.jpg|100px|Black Mage Relic Armor]] |
| valign="top" | |
| valign="top" | |
||
{| class="sortable" border="0" cellpadding="2" cellspacing="2" width="100%" |
{| class="sortable" border="0" cellpadding="2" cellspacing="2" width="100%" |
||
| Line 166: | Line 166: | ||
|[[Dynamis - Buburimu]] |
|[[Dynamis - Buburimu]] |
||
|-class="sortbottom" |
|-class="sortbottom" |
||
| − | |align="left" colspan="5"|[[Sorcerer' |
+ | |align="left" colspan="5"|[[Sorcerer's Attire Set|View the set statistics]] |
|- |
|- |
||
|} |
|} |
||
|} |
|} |
||
| − | === Blue Mage === |
+ | === [[Blue Mage]] === |
{| border="0" cellpadding="5" cellspacing="2" align="center" width="100%" |
{| border="0" cellpadding="5" cellspacing="2" align="center" width="100%" |
||
| valign="top" | |
| valign="top" | |
||
| − | [[ |
+ | [[File:RelicBLU.jpg|100px|Blue Mage Relic Armor]] |
| valign="top" | |
| valign="top" | |
||
{| class="sortable" border="0" cellpadding="2" cellspacing="2" width="100%" |
{| class="sortable" border="0" cellpadding="2" cellspacing="2" width="100%" |
||
| Line 197: | Line 197: | ||
|align="center" bgcolor="#DDEEFF" |73 |
|align="center" bgcolor="#DDEEFF" |73 |
||
|bgcolor="#D0E0FF" |[[Mirage Bazubands]] |
|bgcolor="#D0E0FF" |[[Mirage Bazubands]] |
||
| − | |[[Dynamis - Qufim]] |
||
|[[Dynamis - San d'Oria]] |
|[[Dynamis - San d'Oria]] |
||
| + | |[[Dynamis - Qufim]] |
||
|- bgcolor="#EEEEFF" |
|- bgcolor="#EEEEFF" |
||
|align="center" bgcolor="#DDEEFF" |Legs |
|align="center" bgcolor="#DDEEFF" |Legs |
||
| Line 215: | Line 215: | ||
|align="center" bgcolor="#DDEEFF" |70 |
|align="center" bgcolor="#DDEEFF" |70 |
||
|bgcolor="#D0E0FF" |[[Mirage Mantle]] |
|bgcolor="#D0E0FF" |[[Mirage Mantle]] |
||
| + | |[[Dynamis - Buburimu]] |
||
| − | |??? |
||
| + | |[[Dynamis - Valkurm]] |
||
|-class="sortbottom" |
|-class="sortbottom" |
||
| − | |align="left" colspan="5"|[[ |
+ | |align="left" colspan="5"|[[Mirage Attire Set|View the set statistics]] |
|- |
|- |
||
|} |
|} |
||
|} |
|} |
||
| − | === Corsair === |
+ | === [[Corsair]] === |
{| border="0" cellpadding="5" cellspacing="2" align="center" width="100%" |
{| border="0" cellpadding="5" cellspacing="2" align="center" width="100%" |
||
| valign="top" | |
| valign="top" | |
||
| − | [[ |
+ | [[File:RelicCOR.jpg|100px|Corsair Relic Armor]] |
| valign="top" | |
| valign="top" | |
||
{| class="sortable" border="0" cellpadding="2" cellspacing="2" width="100%" |
{| class="sortable" border="0" cellpadding="2" cellspacing="2" width="100%" |
||
| Line 237: | Line 238: | ||
|bgcolor="#D0E0FF" |[[Commodore Tricorne]] |
|bgcolor="#D0E0FF" |[[Commodore Tricorne]] |
||
|[[Dynamis - Xarcabard]] |
|[[Dynamis - Xarcabard]] |
||
| + | |[[Dynamis - Tavnazia]] |
||
| + | | |
||
|- bgcolor="#EEEEFF" |
|- bgcolor="#EEEEFF" |
||
|align="center" bgcolor="#DDEEFF" |Body |
|align="center" bgcolor="#DDEEFF" |Body |
||
| Line 242: | Line 245: | ||
|bgcolor="#D0E0FF" |[[Commodore Frac]] |
|bgcolor="#D0E0FF" |[[Commodore Frac]] |
||
|[[Dynamis - Beaucedine]] |
|[[Dynamis - Beaucedine]] |
||
| + | |[[Dynamis - Tavnazia]] |
||
| + | | |
||
|- bgcolor="#EEEEFF" |
|- bgcolor="#EEEEFF" |
||
|align="center" bgcolor="#DDEEFF" |Hands |
|align="center" bgcolor="#DDEEFF" |Hands |
||
| Line 247: | Line 252: | ||
|bgcolor="#D0E0FF" |[[Commodore Gants]] |
|bgcolor="#D0E0FF" |[[Commodore Gants]] |
||
|[[Dynamis - Jeuno]] |
|[[Dynamis - Jeuno]] |
||
| + | |[[Dynamis - Buburimu]] |
||
|- bgcolor="#EEEEFF" |
|- bgcolor="#EEEEFF" |
||
|align="center" bgcolor="#DDEEFF" |Legs |
|align="center" bgcolor="#DDEEFF" |Legs |
||
|align="center" bgcolor="#DDEEFF" |71 |
|align="center" bgcolor="#DDEEFF" |71 |
||
| − | |bgcolor="#D0E0FF" |[[Commodore |
+ | |bgcolor="#D0E0FF" |[[Commodore Culottes]] |
| + | |[[Dynamis - San d'Oria]] |
||
| − | |??? |
||
| + | |[[Dynamis - Valkurm]] |
||
|- bgcolor="#EEEEFF" |
|- bgcolor="#EEEEFF" |
||
|align="center" bgcolor="#DDEEFF" |Feet |
|align="center" bgcolor="#DDEEFF" |Feet |
||
| Line 257: | Line 264: | ||
|bgcolor="#D0E0FF" |[[Commodore Bottes]] |
|bgcolor="#D0E0FF" |[[Commodore Bottes]] |
||
|[[Dynamis - Bastok]] |
|[[Dynamis - Bastok]] |
||
| + | |[[Dynamis - Qufim]] |
||
| + | | |
||
|- bgcolor="#EEEEFF" |
|- bgcolor="#EEEEFF" |
||
| − | |align="center" bgcolor="#DDEEFF" | |
+ | |align="center" bgcolor="#DDEEFF" |Waist |
|align="center" bgcolor="#DDEEFF" |70 |
|align="center" bgcolor="#DDEEFF" |70 |
||
|bgcolor="#D0E0FF" |[[Commodore Belt]] |
|bgcolor="#D0E0FF" |[[Commodore Belt]] |
||
| + | |[[Dynamis - Qufim]] |
||
| − | |??? |
||
| + | | |
||
| + | |-class="sortbottom" |
||
| + | |align="left" colspan="5"|[[Commodore Attire Set|View the set statistics]] |
||
| + | |- |
||
| + | |} |
||
| + | |} |
||
| + | |||
| + | === [[Dancer]] === |
||
| + | {| border="0" cellpadding="5" cellspacing="2" align="center" width="100%" |
||
| + | | valign="top" | |
||
| + | [[File:DNC_Relic_HumeF.jpg|100px|Dancer Relic Armor]] |
||
| + | | valign="top" | |
||
| + | {| class="sortable" border="0" cellpadding="2" cellspacing="2" width="100%" |
||
| + | !width="15%" align="center" bgcolor="#66CCFF" |Item Slot |
||
| + | !width="10%" align="center" bgcolor="#66CCFF" |Level |
||
| + | !width="25%" align="left" bgcolor="#88E0FF" class="unsortable"|Relic |
||
| + | !width="50%" align="left" bgcolor="#CCAAFF" colspan="2" class="unsortable"|Drop Area |
||
| + | |- bgcolor="#EEEEFF" |
||
| + | |align="center" bgcolor="#DDEEFF" |Head |
||
| + | |align="center" bgcolor="#DDEEFF" |72 |
||
| + | |bgcolor="#D0E0FF" |[[Etoile Tiara]] |
||
| + | |[[Dynamis - Bastok]] |
||
| + | |[[Dynamis - Buburimu]] |
||
| + | |- bgcolor="#EEEEFF" |
||
| + | |align="center" bgcolor="#DDEEFF" |Body |
||
| + | |align="center" bgcolor="#DDEEFF" |75 |
||
| + | |bgcolor="#D0E0FF" |[[Etoile Casaque]] |
||
| + | |[[Dynamis - Xarcabard]] |
||
| + | |[[Dynamis - Tavnazia]] |
||
| + | |- bgcolor="#EEEEFF" |
||
| + | |align="center" bgcolor="#DDEEFF" |Hands |
||
| + | |align="center" bgcolor="#DDEEFF" |71 |
||
| + | |bgcolor="#D0E0FF" |[[Etoile Bangles]] |
||
| + | |[[Dynamis - Windurst]] |
||
| + | |[[Dynamis - Valkurm]] |
||
| + | |- bgcolor="#EEEEFF" |
||
| + | |align="center" bgcolor="#DDEEFF" |Legs |
||
| + | |align="center" bgcolor="#DDEEFF" |74 |
||
| + | |bgcolor="#D0E0FF" |[[Etoile Tights]] |
||
| + | |[[Dynamis - Beaucedine]] |
||
| + | |[[Dynamis - Tavnazia]] |
||
| + | |- bgcolor="#EEEEFF" |
||
| + | |align="center" bgcolor="#DDEEFF" |Feet |
||
| + | |align="center" bgcolor="#DDEEFF" |73 |
||
| + | |bgcolor="#D0E0FF" |[[Etoile Shoes]] |
||
| + | |[[Dynamis - Jeuno]] |
||
| + | |[[Dynamis - Qufim]] |
||
| + | |- bgcolor="#EEEEFF" |
||
| + | |align="center" bgcolor="#DDEEFF" |Back |
||
| + | |align="center" bgcolor="#DDEEFF" |70 |
||
| + | |bgcolor="#D0E0FF" |[[Etoile Cape]] |
||
| + | |[[Dynamis - Valkurm]] |
||
| + | | |
||
|-class="sortbottom" |
|-class="sortbottom" |
||
| − | |align="left" colspan="5"|[[ |
+ | |align="left" colspan="5"|[[Etoile Attire Set|View the set statistics]] |
|- |
|- |
||
|} |
|} |
||
|} |
|} |
||
| − | === Dark Knight === |
+ | === [[Dark Knight]] === |
{| border="0" cellpadding="5" cellspacing="2" align="center" width="100%" |
{| border="0" cellpadding="5" cellspacing="2" align="center" width="100%" |
||
| valign="top" | |
| valign="top" | |
||
| − | [[ |
+ | [[File:RelicDRK.jpg|100px|Dark Knight Relic Armor]] |
| valign="top" | |
| valign="top" | |
||
{| class="sortable" border="0" cellpadding="2" cellspacing="2" width="100%" |
{| class="sortable" border="0" cellpadding="2" cellspacing="2" width="100%" |
||
| Line 315: | Line 377: | ||
|[[Dynamis - Buburimu]] |
|[[Dynamis - Buburimu]] |
||
|-class="sortbottom" |
|-class="sortbottom" |
||
| − | |align="left" colspan="5"|[[ |
+ | |align="left" colspan="5"|[[Abyss Armor Set|View the set statistics]] |
|- |
|- |
||
|} |
|} |
||
|} |
|} |
||
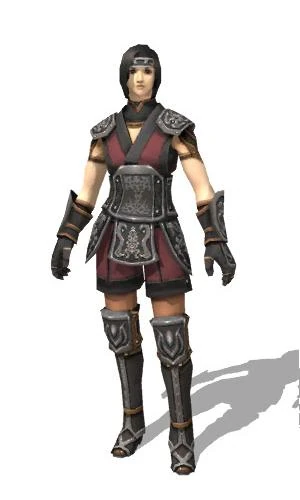
| − | === Dragoon === |
+ | === [[Dragoon]] === |
{| border="0" cellpadding="5" cellspacing="2" align="center" width="100%" |
{| border="0" cellpadding="5" cellspacing="2" align="center" width="100%" |
||
| valign="top" | |
| valign="top" | |
||
| − | [[ |
+ | [[File:RelicDRG.jpg|100px|Dragoon Relic Armor]] |
| valign="top" | |
| valign="top" | |
||
{| class="sortable" border="0" cellpadding="2" cellspacing="2" width="100%" |
{| class="sortable" border="0" cellpadding="2" cellspacing="2" width="100%" |
||
| Line 367: | Line 429: | ||
|[[Dynamis - Qufim]] |
|[[Dynamis - Qufim]] |
||
|-class="sortbottom" |
|-class="sortbottom" |
||
| − | |align="left" colspan="5"|[[ |
+ | |align="left" colspan="5"|[[Wyrm Armor Set|View the set statistics]] |
|- |
|- |
||
|} |
|} |
||
|} |
|} |
||
| − | === Monk === |
+ | === [[Monk]] === |
{| border="0" cellpadding="5" cellspacing="2" align="center" width="100%" |
{| border="0" cellpadding="5" cellspacing="2" align="center" width="100%" |
||
| valign="top" | |
| valign="top" | |
||
| − | [[ |
+ | [[File:RelicMNK.jpg|100px|Monk Relic Armor]] |
| valign="top" | |
| valign="top" | |
||
{| class="sortable" border="0" cellpadding="2" cellspacing="2" width="100%" |
{| class="sortable" border="0" cellpadding="2" cellspacing="2" width="100%" |
||
| Line 419: | Line 481: | ||
|[[Dynamis - Buburimu]] |
|[[Dynamis - Buburimu]] |
||
|-class="sortbottom" |
|-class="sortbottom" |
||
| − | |align="left" colspan="5"|[[ |
+ | |align="left" colspan="5"|[[Melee Attire Set|View the set statistics]] |
|- |
|- |
||
|} |
|} |
||
|} |
|} |
||
| − | === Ninja === |
+ | === [[Ninja]] === |
{| border="0" cellpadding="5" cellspacing="2" align="center" width="100%" |
{| border="0" cellpadding="5" cellspacing="2" align="center" width="100%" |
||
| valign="top" | |
| valign="top" | |
||
| − | [[ |
+ | [[File:RelicNIN.jpg|100px|Ninja Relic Armor]] |
| valign="top" | |
| valign="top" | |
||
{| class="sortable" border="0" cellpadding="2" cellspacing="2" width="100%" |
{| class="sortable" border="0" cellpadding="2" cellspacing="2" width="100%" |
||
| Line 471: | Line 533: | ||
|[[Dynamis - Buburimu]] |
|[[Dynamis - Buburimu]] |
||
|-class="sortbottom" |
|-class="sortbottom" |
||
| − | |align="left" colspan="5"|[[ |
+ | |align="left" colspan="5"|[[Koga Garb Set|View the set statistics]] |
|- |
|- |
||
|} |
|} |
||
|} |
|} |
||
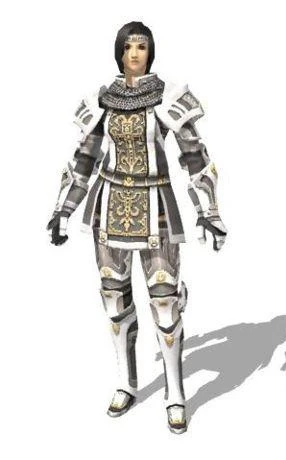
| − | === Paladin === |
+ | === [[Paladin]] === |
{| border="0" cellpadding="5" cellspacing="2" align="center" width="100%" |
{| border="0" cellpadding="5" cellspacing="2" align="center" width="100%" |
||
| valign="top" | |
| valign="top" | |
||
| − | [[ |
+ | [[File:RelicPLD.jpg|100px|Paladin Relic Armor]] |
| valign="top" | |
| valign="top" | |
||
{| class="sortable" border="0" cellpadding="2" cellspacing="2" width="100%" |
{| class="sortable" border="0" cellpadding="2" cellspacing="2" width="100%" |
||
| Line 523: | Line 585: | ||
|[[Dynamis - Buburimu]] |
|[[Dynamis - Buburimu]] |
||
|-class="sortbottom" |
|-class="sortbottom" |
||
| − | |align="left" colspan="5"|[[ |
+ | |align="left" colspan="5"|[[Valor Armor Set|View the set statistics]] |
|- |
|- |
||
|} |
|} |
||
|} |
|} |
||
| − | === Puppetmaster === |
+ | === [[Puppetmaster]] === |
{| border="0" cellpadding="5" cellspacing="2" align="center" width="100%" |
{| border="0" cellpadding="5" cellspacing="2" align="center" width="100%" |
||
| valign="top" | |
| valign="top" | |
||
| − | [[ |
+ | [[File:RelicPUP.jpg|100px|Puppetmaster Relic Armor]] |
| valign="top" | |
| valign="top" | |
||
{| class="sortable" border="0" cellpadding="2" cellspacing="2" width="100%" |
{| class="sortable" border="0" cellpadding="2" cellspacing="2" width="100%" |
||
| Line 542: | Line 604: | ||
|align="center" bgcolor="#DDEEFF" |75 |
|align="center" bgcolor="#DDEEFF" |75 |
||
|bgcolor="#D0E0FF" |[[Pantin Taj]] |
|bgcolor="#D0E0FF" |[[Pantin Taj]] |
||
| + | |[[Dynamis - Xarcabard]] |
||
|[[Dynamis - Tavnazia]] |
|[[Dynamis - Tavnazia]] |
||
|- bgcolor="#EEEEFF" |
|- bgcolor="#EEEEFF" |
||
| Line 548: | Line 611: | ||
|bgcolor="#D0E0FF" |[[Pantin Tobe]] |
|bgcolor="#D0E0FF" |[[Pantin Tobe]] |
||
|[[Dynamis - Beaucedine]] |
|[[Dynamis - Beaucedine]] |
||
| + | |[[Dynamis - Tavnazia]] |
||
|- bgcolor="#EEEEFF" |
|- bgcolor="#EEEEFF" |
||
|align="center" bgcolor="#DDEEFF" |Hands |
|align="center" bgcolor="#DDEEFF" |Hands |
||
| Line 564: | Line 628: | ||
|align="center" bgcolor="#DDEEFF" |72 |
|align="center" bgcolor="#DDEEFF" |72 |
||
|bgcolor="#D0E0FF" |[[Pantin Babouches]] |
|bgcolor="#D0E0FF" |[[Pantin Babouches]] |
||
| + | |[[Dynamis - San d'Oria]] |
||
| − | |??? |
||
| + | |[[Dynamis - Buburimu]] |
||
|- bgcolor="#EEEEFF" |
|- bgcolor="#EEEEFF" |
||
|align="center" bgcolor="#DDEEFF" |Back |
|align="center" bgcolor="#DDEEFF" |Back |
||
|align="center" bgcolor="#DDEEFF" |70 |
|align="center" bgcolor="#DDEEFF" |70 |
||
|bgcolor="#D0E0FF" |[[Pantin Cape]] |
|bgcolor="#D0E0FF" |[[Pantin Cape]] |
||
| + | |[[Dynamis - Buburimu]] |
||
| − | |??? |
||
| + | |[[Dynamis - Qufim]] |
||
|-class="sortbottom" |
|-class="sortbottom" |
||
| − | |align="left" colspan="5"|[[ |
+ | |align="left" colspan="5"|[[Pantin Attire Set|View the set statistics]] |
|- |
|- |
||
|} |
|} |
||
|} |
|} |
||
| − | === Ranger === |
+ | === [[Ranger]] === |
{| border="0" cellpadding="5" cellspacing="2" align="center" width="100%" |
{| border="0" cellpadding="5" cellspacing="2" align="center" width="100%" |
||
| valign="top" | |
| valign="top" | |
||
| − | [[ |
+ | [[File:RelicRNG.jpg|100px|Ranger Relic Armor]] |
| valign="top" | |
| valign="top" | |
||
{| class="sortable" border="0" cellpadding="2" cellspacing="2" width="100%" |
{| class="sortable" border="0" cellpadding="2" cellspacing="2" width="100%" |
||
| Line 623: | Line 689: | ||
|[[Dynamis - Qufim]] |
|[[Dynamis - Qufim]] |
||
|-class="sortbottom" |
|-class="sortbottom" |
||
| − | |align="left" colspan="5"|[[Scout' |
+ | |align="left" colspan="5"|[[Scout's Attire Set|View the set statistics]] |
|- |
|- |
||
|} |
|} |
||
|} |
|} |
||
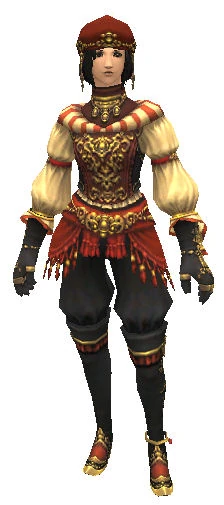
| − | === Red Mage === |
+ | === [[Red Mage]] === |
{| border="0" cellpadding="5" cellspacing="2" align="center" width="100%" |
{| border="0" cellpadding="5" cellspacing="2" align="center" width="100%" |
||
| valign="top" | |
| valign="top" | |
||
| − | [[ |
+ | [[File:RelicRDM.jpg|100px|Red Mage Relic Armor]] |
| valign="top" | |
| valign="top" | |
||
{| class="sortable" border="0" cellpadding="2" cellspacing="2" width="100%" |
{| class="sortable" border="0" cellpadding="2" cellspacing="2" width="100%" |
||
| Line 675: | Line 741: | ||
|[[Dynamis - Qufim]] |
|[[Dynamis - Qufim]] |
||
|-class="sortbottom" |
|-class="sortbottom" |
||
| − | |align="left" colspan="5"|[[Duelist' |
+ | |align="left" colspan="5"|[[Duelist's Armor Set|View the set statistics]] |
|- |
|- |
||
|} |
|} |
||
|} |
|} |
||
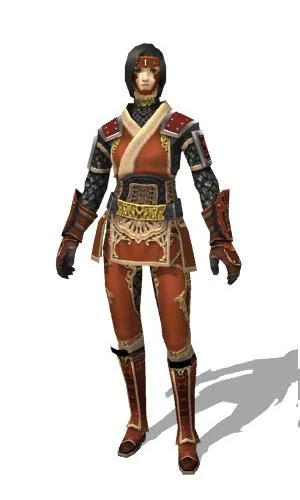
| − | === Samurai === |
+ | === [[Samurai]] === |
{| border="0" cellpadding="5" cellspacing="2" align="center" width="100%" |
{| border="0" cellpadding="5" cellspacing="2" align="center" width="100%" |
||
| valign="top" | |
| valign="top" | |
||
| − | [[ |
+ | [[File:RelicSAM.jpg|100px|Samurai Relic Armor]] |
| valign="top" | |
| valign="top" | |
||
{| class="sortable" border="0" cellpadding="2" cellspacing="2" width="100%" |
{| class="sortable" border="0" cellpadding="2" cellspacing="2" width="100%" |
||
| Line 727: | Line 793: | ||
|[[Dynamis - Qufim]] |
|[[Dynamis - Qufim]] |
||
|-class="sortbottom" |
|-class="sortbottom" |
||
| − | |align="left" colspan="5"|[[ |
+ | |align="left" colspan="5"|[[Saotome Armor Set|View the set statistics]] |
|- |
|- |
||
|} |
|} |
||
|} |
|} |
||
| − | === |
+ | === [[Scholar]] === |
{| border="0" cellpadding="5" cellspacing="2" align="center" width="100%" |
{| border="0" cellpadding="5" cellspacing="2" align="center" width="100%" |
||
| valign="top" | |
| valign="top" | |
||
| − | [[ |
+ | [[File:SCH_Relic_HumeF.jpg|100px|Scholar Relic Armor]] |
| + | | valign="top" | |
||
| + | {| class="sortable" border="0" cellpadding="2" cellspacing="2" width="100%" |
||
| + | !width="15%" align="center" bgcolor="#66CCFF" |Item Slot |
||
| + | !width="10%" align="center" bgcolor="#66CCFF" |Level |
||
| + | !width="25%" align="left" bgcolor="#88E0FF" class="unsortable"|Relic |
||
| + | !width="50%" align="left" bgcolor="#CCAAFF" colspan="2" class="unsortable"|Drop Area |
||
| + | |- bgcolor="#EEEEFF" |
||
| + | |align="center" bgcolor="#DDEEFF" |Head |
||
| + | |align="center" bgcolor="#DDEEFF" |75 |
||
| + | |bgcolor="#D0E0FF" |[[Argute Mortarboard]] |
||
| + | |[[Dynamis - Xarcabard]] |
||
| + | |[[Dynamis - Tavnazia]] |
||
| + | | |
||
| + | |- bgcolor="#EEEEFF" |
||
| + | |align="center" bgcolor="#DDEEFF" |Body |
||
| + | |align="center" bgcolor="#DDEEFF" |74 |
||
| + | |bgcolor="#D0E0FF" |[[Argute Gown]] |
||
| + | |[[Dynamis - Beaucedine]] |
||
| + | |[[Dynamis - Tavnazia]] |
||
| + | | |
||
| + | |- bgcolor="#EEEEFF" |
||
| + | |align="center" bgcolor="#DDEEFF" |Hands |
||
| + | |align="center" bgcolor="#DDEEFF" |71 |
||
| + | |bgcolor="#D0E0FF" |[[Argute Bracers]] |
||
| + | |[[Dynamis - San d'Oria]] |
||
| + | |[[Dynamis - Valkurm]] |
||
| + | | |
||
| + | |- bgcolor="#EEEEFF" |
||
| + | |align="center" bgcolor="#DDEEFF" |Legs |
||
| + | |align="center" bgcolor="#DDEEFF" |73 |
||
| + | |bgcolor="#D0E0FF" |[[Argute Pants]] |
||
| + | |[[Dynamis - Bastok]] |
||
| + | |[[Dynamis - Qufim]] |
||
| + | | |
||
| + | |- bgcolor="#EEEEFF" |
||
| + | |align="center" bgcolor="#DDEEFF" |Feet |
||
| + | |align="center" bgcolor="#DDEEFF" |72 |
||
| + | |bgcolor="#D0E0FF" |[[Argute Loafers]] |
||
| + | |[[Dynamis - Windurst]] |
||
| + | |[[Dynamis - Buburimu]] |
||
| + | | |
||
| + | |- bgcolor="#EEEEFF" |
||
| + | |align="center" bgcolor="#DDEEFF" |Waist |
||
| + | |align="center" bgcolor="#DDEEFF" |70 |
||
| + | |bgcolor="#D0E0FF" |[[Argute Belt]] |
||
| + | |[[Dynamis - Qufim]] |
||
| + | | |
||
| + | |-class="sortbottom" |
||
| + | |align="left" colspan="5"|[[Argute Attire Set|View the set statistics]] |
||
| + | |- |
||
| + | |} |
||
| + | |} |
||
| + | |||
| + | === [[Summoner]] === |
||
| + | {| border="0" cellpadding="5" cellspacing="2" align="center" width="100%" |
||
| + | | valign="top" | |
||
| + | [[File:RelicSMN.jpg|100px|Summoner Relic Armor]] |
||
| valign="top" | |
| valign="top" | |
||
{| class="sortable" border="0" cellpadding="2" cellspacing="2" width="100%" |
{| class="sortable" border="0" cellpadding="2" cellspacing="2" width="100%" |
||
| Line 779: | Line 902: | ||
|[[Dynamis - Qufim]] |
|[[Dynamis - Qufim]] |
||
|-class="sortbottom" |
|-class="sortbottom" |
||
| − | |align="left" colspan="5"|[[Summoner' |
+ | |align="left" colspan="5"|[[Summoner's Attire Set|View the set statistics]] |
|- |
|- |
||
|} |
|} |
||
|} |
|} |
||
| − | === Thief === |
+ | === [[Thief]] === |
{| border="0" cellpadding="5" cellspacing="2" align="center" width="100%" |
{| border="0" cellpadding="5" cellspacing="2" align="center" width="100%" |
||
| valign="top" | |
| valign="top" | |
||
| − | [[ |
+ | [[File:RelicTHF.jpg|100px|Thief Relic Armor]] |
| valign="top" | |
| valign="top" | |
||
{| class="sortable" border="0" cellpadding="2" cellspacing="2" width="100%" |
{| class="sortable" border="0" cellpadding="2" cellspacing="2" width="100%" |
||
| Line 815: | Line 938: | ||
|align="center" bgcolor="#DDEEFF" |Legs |
|align="center" bgcolor="#DDEEFF" |Legs |
||
|align="center" bgcolor="#DDEEFF" |74 |
|align="center" bgcolor="#DDEEFF" |74 |
||
| − | |bgcolor="#D0E0FF" |[[Assassin's |
+ | |bgcolor="#D0E0FF" |[[Assassin's Culottes]] |
|[[Dynamis - Beaucedine]] |
|[[Dynamis - Beaucedine]] |
||
|[[Dynamis - Tavnazia]] |
|[[Dynamis - Tavnazia]] |
||
| Line 831: | Line 954: | ||
|[[Dynamis - Qufim]] |
|[[Dynamis - Qufim]] |
||
|-class="sortbottom" |
|-class="sortbottom" |
||
| − | |align="left" colspan="5"|[[Assassin' |
+ | |align="left" colspan="5"|[[Assassin's Attire Set|View the set statistics]] |
|- |
|- |
||
|} |
|} |
||
|} |
|} |
||
| − | === Warrior === |
+ | === [[Warrior]] === |
{| border="0" cellpadding="5" cellspacing="2" align="center" width="100%" |
{| border="0" cellpadding="5" cellspacing="2" align="center" width="100%" |
||
| valign="top" | |
| valign="top" | |
||
| − | [[ |
+ | [[File:RelicWAR.jpg|100px|Warrior Relic Armor]] |
| valign="top" | |
| valign="top" | |
||
{| class="sortable" border="0" cellpadding="2" cellspacing="2" width="100%" |
{| class="sortable" border="0" cellpadding="2" cellspacing="2" width="100%" |
||
| Line 883: | Line 1,006: | ||
|[[Dynamis - Buburimu]] |
|[[Dynamis - Buburimu]] |
||
|-class="sortbottom" |
|-class="sortbottom" |
||
| − | |align="left" colspan="5"|[[Warrior' |
+ | |align="left" colspan="5"|[[Warrior's Armor Set|View the set statistics]] |
|- |
|- |
||
|} |
|} |
||
|} |
|} |
||
| − | === White Mage === |
+ | === [[White Mage]] === |
{| border="0" cellpadding="5" cellspacing="2" align="center" width="100%" |
{| border="0" cellpadding="5" cellspacing="2" align="center" width="100%" |
||
| valign="top" | |
| valign="top" | |
||
| − | [[ |
+ | [[File:RelicWHM.jpg|100px|White Mage Relic Armor]] |
| valign="top" | |
| valign="top" | |
||
{| class="sortable" border="0" cellpadding="2" cellspacing="2" width="100%" |
{| class="sortable" border="0" cellpadding="2" cellspacing="2" width="100%" |
||
| Line 935: | Line 1,058: | ||
|[[Dynamis - Qufim]] |
|[[Dynamis - Qufim]] |
||
|-class="sortbottom" |
|-class="sortbottom" |
||
| − | |align="left" colspan="5"|[[Cleric' |
+ | |align="left" colspan="5"|[[Cleric's Attire Set|View the set statistics]] |
|- |
|- |
||
|} |
|} |
||
|} |
|} |
||
| − | == Relic Armor by |
+ | == Relic Armor by Zone == |
| − | {| border="0" cellpadding="2" cellspacing=" |
+ | {| border="0" cellpadding="2" cellspacing="1" width="100%" |
|- BGCOLOR="#66CCFF" |
|- BGCOLOR="#66CCFF" |
||
| − | !width=" |
+ | !width="10%" BGCOLOR="#CCAAFF" |Zone |
| − | !width=" |
+ | !width="18%" |Bard |
| − | !width=" |
+ | !width="18%" |Beastmaster |
| − | !width=" |
+ | !width="18%" |Black Mage |
| − | !width=" |
+ | !width="18%" |Blue Mage |
| − | !width=" |
+ | !width="18%" |Corsair |
|- BGCOLOR="#DDEEFF" align="center" |
|- BGCOLOR="#DDEEFF" align="center" |
||
|BGCOLOR="#EEEEFF" align="left"| |
|BGCOLOR="#EEEEFF" align="left"| |
||
| − | + | [[Dynamis - Windurst|Windurst]] |
|
| |
| |
||
|''Head''<br>[[Monster Helm]] |
|''Head''<br>[[Monster Helm]] |
||
|''Hands''<br>[[Sorcerer's Gloves]] |
|''Hands''<br>[[Sorcerer's Gloves]] |
||
| − | |'' |
+ | |''Feet''<br>[[Mirage Charuqs]] |
| |
| |
||
|- BGCOLOR="#DDEEFF" align="center" |
|- BGCOLOR="#DDEEFF" align="center" |
||
|BGCOLOR="#EEEEFF" align="left"| |
|BGCOLOR="#EEEEFF" align="left"| |
||
| − | + | [[Dynamis - San d'Oria|San d'Oria]] |
|
|''Head''<br>[[Bard's Roundlet]] |
|''Head''<br>[[Bard's Roundlet]] |
||
|''Legs''<br>[[Monster Trousers]] |
|''Legs''<br>[[Monster Trousers]] |
||
| |
| |
||
| + | |''Hands''<br>[[Mirage Bazubands]] |
||
| − | | |
||
| − | |'' |
+ | |''Legs''<br>[[Commodore Culottes]] |
|- BGCOLOR="#DDEEFF" align="center" |
|- BGCOLOR="#DDEEFF" align="center" |
||
|BGCOLOR="#EEEEFF" align="left"| |
|BGCOLOR="#EEEEFF" align="left"| |
||
| − | + | [[Dynamis - Bastok|Bastok]] |
|
|''Hands''<br>[[Bard's Cuffs]] |
|''Hands''<br>[[Bard's Cuffs]] |
||
|''Body''<br>[[Monster Jackcoat]] |
|''Body''<br>[[Monster Jackcoat]] |
||
|''Legs''<br>[[Sorcerer's Tonban]] |
|''Legs''<br>[[Sorcerer's Tonban]] |
||
| − | |'' |
+ | |''Legs''<br>[[Mirage Shalwar]] |
| − | |'' |
+ | |''Feet''<br>[[Commodore Bottes]] |
|- BGCOLOR="#DDEEFF" align="center" |
|- BGCOLOR="#DDEEFF" align="center" |
||
|BGCOLOR="#EEEEFF" align="left"| |
|BGCOLOR="#EEEEFF" align="left"| |
||
| − | + | [[Dynamis - Jeuno|Jeuno]] |
|
|''Feet''<br>[[Bard's Slippers]] |
|''Feet''<br>[[Bard's Slippers]] |
||
| |
| |
||
|''Feet''<br>[[Sorcerer's Sabots]] |
|''Feet''<br>[[Sorcerer's Sabots]] |
||
| + | | |
||
| − | |''Legs''<br>[[Abyss Flanchard]] |
||
| − | |''Hands''<br>[[ |
+ | |''Hands''<br>[[Commodore Gants]] |
|- BGCOLOR="#DDEEFF" align="center" |
|- BGCOLOR="#DDEEFF" align="center" |
||
|BGCOLOR="#EEEEFF" align="left"| |
|BGCOLOR="#EEEEFF" align="left"| |
||
| − | + | [[Dynamis - Beaucedine|Beaucedine]] |
|
|''Body''<br>[[Bard's Justaucorps]] |
|''Body''<br>[[Bard's Justaucorps]] |
||
|''Feet''<br>[[Monster Gaiters]] |
|''Feet''<br>[[Monster Gaiters]] |
||
|''Body''<br>[[Sorcerer's Coat]] |
|''Body''<br>[[Sorcerer's Coat]] |
||
| − | |''Body''<br>[[ |
+ | |''Body''<br>[[Mirage Jubbah]] |
| − | |''Body''<br>[[ |
+ | |''Body''<br>[[Commodore Frac]] |
|- BGCOLOR="#DDEEFF" align="center" |
|- BGCOLOR="#DDEEFF" align="center" |
||
|BGCOLOR="#EEEEFF" align="left"| |
|BGCOLOR="#EEEEFF" align="left"| |
||
| − | + | [[Dynamis - Xarcabard|Xarcabard]] |
|
|''Legs''<br>[[Bard's Cannions]] |
|''Legs''<br>[[Bard's Cannions]] |
||
|''Hands''<br>[[Monster Gloves]] |
|''Hands''<br>[[Monster Gloves]] |
||
|''Head''<br>[[Sorcerer's Petasos]] |
|''Head''<br>[[Sorcerer's Petasos]] |
||
| − | |''Head''<br>[[ |
+ | |''Head''<br>[[Mirage Keffiyeh]] |
| − | |''Head''<br>[[ |
+ | |''Head''<br>[[Commodore Tricorne]] |
|- BGCOLOR="#66CCFF" |
|- BGCOLOR="#66CCFF" |
||
! BGCOLOR="#CCAAFF" | !! !! !! !! !! |
! BGCOLOR="#CCAAFF" | !! !! !! !! !! |
||
|- BGCOLOR="#DDEEFF" align="center" |
|- BGCOLOR="#DDEEFF" align="center" |
||
|BGCOLOR="#EEEEFF" align="left"| |
|BGCOLOR="#EEEEFF" align="left"| |
||
| − | + | [[Dynamis - Valkurm|Valkurm]] |
|
|''Feet''<br>[[Bard's Slippers]] |
|''Feet''<br>[[Bard's Slippers]] |
||
|''Head''<br>[[Monster Helm]] |
|''Head''<br>[[Monster Helm]] |
||
|''Feet''<br>[[Sorcerer's Sabots]] |
|''Feet''<br>[[Sorcerer's Sabots]] |
||
| − | |''Feet''<br>[[ |
+ | |''Feet''<br>[[Mirage Charuqs]] |
| − | |''Legs''<br>[[ |
+ | |''Legs''<br>[[Commodore Culottes]] |
|- BGCOLOR="#DDEEFF" align="center" |
|- BGCOLOR="#DDEEFF" align="center" |
||
|BGCOLOR="#EEEEFF" align="left"| |
|BGCOLOR="#EEEEFF" align="left"| |
||
| − | + | [[Dynamis - Buburimu|Buburimu]] |
|
|''Head''<br>[[Bard's Roundlet]] |
|''Head''<br>[[Bard's Roundlet]] |
||
|''Body''<br>[[Monster Jackcoat]] |
|''Body''<br>[[Monster Jackcoat]] |
||
|''Hands''<br>[[Sorcerer's Gloves]] |
|''Hands''<br>[[Sorcerer's Gloves]] |
||
| − | |'' |
+ | |''Legs''<br>[[Mirage Shalwar]] |
| − | |''Feet''<br>[[ |
+ | |''Feet''<br>[[Commodore Gants]] |
|- BGCOLOR="#DDEEFF" align="center" |
|- BGCOLOR="#DDEEFF" align="center" |
||
|BGCOLOR="#EEEEFF" align="left"| |
|BGCOLOR="#EEEEFF" align="left"| |
||
| − | + | [[Dynamis - Qufim|Qufim]] |
|
|''Hands''<br>[[Bard's Cuffs]] |
|''Hands''<br>[[Bard's Cuffs]] |
||
|''Legs''<br>[[Monster Trousers]] |
|''Legs''<br>[[Monster Trousers]] |
||
|''Legs''<br>[[Sorcerer's Tonban]] |
|''Legs''<br>[[Sorcerer's Tonban]] |
||
| − | |'' |
+ | |''Hands''<br>[[Mirage Bazubands]] |
| − | |'' |
+ | |''Feet''<br>[[Commodore Bottes]] |
|- BGCOLOR="#DDEEFF" align="center" |
|- BGCOLOR="#DDEEFF" align="center" |
||
|BGCOLOR="#EEEEFF" align="left"| |
|BGCOLOR="#EEEEFF" align="left"| |
||
| − | + | [[Dynamis - Tavnazia|Tavnazia]]<br> |
|
| + | (Hydras) |
||
|''Body''<br>[[Bard's Justaucorps]] |
|''Body''<br>[[Bard's Justaucorps]] |
||
| + | |''Hands''<br>[[Monster Gloves]] |
||
| − | |||
| − | ''Legs''<br>[[Bard's Cannions]] |
||
| − | |''Feet''<br>[[Monster Gaiters]] |
||
| − | |||
| − | ''Hands''<br>[[Monster Gloves]] |
||
|''Body''<br>[[Sorcerer's Coat]] |
|''Body''<br>[[Sorcerer's Coat]] |
||
| + | |''Body''<br>[[Mirage Jubbah]] |
||
| − | |||
| − | '' |
+ | |''Body''<br>[[Commodore Frac]] |
| + | |- BGCOLOR="#DDEEFF" align="center" |
||
| + | |BGCOLOR="#EEEEFF" align="left"| |
||
| + | [[Dynamis - Tavnazia|Tavnazia]]<br> |
||
| + | (Kindred) |
||
| + | |''Legs''<br>[[Bard's Cannions]] |
||
| + | |''Feet''<br>[[Monster Gaiters]] |
||
| + | |''Head''<br>[[Sorcerer's Petasos]] |
||
| + | |''Head''<br>[[Mirage Keffiyeh]] |
||
| + | |''Head''<br>[[Commodore Tricorne]] |
||
| + | |- BGCOLOR="#66CCFF" |
||
| + | ! BGCOLOR="#CCAAFF" | Zone !! Dancer !! Dark Knight !! Dragoon !! Monk !! Ninja |
||
| + | |- BGCOLOR="#DDEEFF" align="center" |
||
| + | |BGCOLOR="#EEEEFF" align="left"| |
||
| + | [[Dynamis - Windurst|Windurst]] |
||
| + | |''Hands''<br>[[Etoile Bangles]] |
||
| + | |''Hands''<br>[[Abyss Gauntlets]] |
||
| + | | |
||
| + | | |
||
| + | |''Head''<br>[[Koga Hatsuburi]] |
||
| + | |- BGCOLOR="#DDEEFF" align="center" |
||
| + | |BGCOLOR="#EEEEFF" align="left"| |
||
| + | [[Dynamis - San d'Oria|San d'Oria]] |
||
| + | | |
||
| + | | |
||
| + | |''Feet''<br>[[Wyrm Greaves]] |
||
| + | |''Legs''<br>[[Melee Hose]] |
||
| + | |''Legs''<br>[[Koga Hakama]] |
||
| + | |- BGCOLOR="#DDEEFF" align="center" |
||
| + | |BGCOLOR="#EEEEFF" align="left"| |
||
| + | [[Dynamis - Bastok|Bastok]] |
||
| + | |''Head''<br>[[Etoile Tiara]] |
||
| + | |''Feet''<br>[[Abyss Sollerets]] |
||
| + | |''Legs''<br>[[Wyrm Brais]] |
||
| + | |''Feet''<br>[[Melee Gaiters]] |
||
| + | | |
||
| + | |- BGCOLOR="#DDEEFF" align="center" |
||
| + | |BGCOLOR="#EEEEFF" align="left"| |
||
| + | [[Dynamis - Jeuno|Jeuno]] |
||
| + | |''Feet''<br>[[Etoile Shoes]] |
||
| + | |''Legs''<br>[[Abyss Flanchard]] |
||
| + | |''Hands''<br>[[Wyrm Finger Gauntlets]] |
||
| + | |''Hands''<br>[[Melee Gloves]] |
||
| + | |''Feet''<br>[[Koga Kyahan]] |
||
| + | |- BGCOLOR="#DDEEFF" align="center" |
||
| + | |BGCOLOR="#EEEEFF" align="left"| |
||
| + | [[Dynamis - Beaucedine|Beaucedine]] |
||
| + | |''Legs''<br>[[Etoile Tights]] |
||
|''Body''<br>[[Abyss Cuirass]] |
|''Body''<br>[[Abyss Cuirass]] |
||
| − | |||
| − | ''Head''<br>[[Abyss Burgeonet]] |
||
|''Body''<br>[[Wyrm Mail]] |
|''Body''<br>[[Wyrm Mail]] |
||
| + | |''Body''<br>[[Melee Cyclas]] |
||
| − | |||
| − | '' |
+ | |''Body''<br>[[Koga Chainmail]] |
| + | |- BGCOLOR="#DDEEFF" align="center" |
||
| + | |BGCOLOR="#EEEEFF" align="left"| |
||
| + | [[Dynamis - Xarcabard|Xarcabard]] |
||
| + | |''Body''<br>[[Etoile Casaque]] |
||
| + | |''Head''<br>[[Abyss Burgeonet]] |
||
| + | |''Head''<br>[[Wyrm Armet]] |
||
| + | |''Head''<br>[[Melee Crown]] |
||
| + | |''Hands''<br>[[Koga Tekko]] |
||
|- BGCOLOR="#66CCFF" |
|- BGCOLOR="#66CCFF" |
||
| − | ! BGCOLOR="#CCAAFF" | |
+ | ! BGCOLOR="#CCAAFF" | !! !! !! !! !! |
|- BGCOLOR="#DDEEFF" align="center" |
|- BGCOLOR="#DDEEFF" align="center" |
||
|BGCOLOR="#EEEEFF" align="left"| |
|BGCOLOR="#EEEEFF" align="left"| |
||
| − | + | [[Dynamis - Valkurm|Valkurm]] |
|
| + | |''Hands''<br>[[Etoile Bangles]] |
||
| − | | |
||
| + | |''Feet''<br>[[Abyss Sollerets]] |
||
| + | |''Legs''<br>[[Wyrm Brais]] |
||
| + | |''Feet''<br>[[Melee Gaiters]] |
||
| + | |''Feet''<br>[[Koga Kyahan]] |
||
| + | |- BGCOLOR="#DDEEFF" align="center" |
||
| + | |BGCOLOR="#EEEEFF" align="left"| |
||
| + | [[Dynamis - Buburimu|Buburimu]] |
||
| + | |''Head''<br>[[Etoile Tiara]] |
||
| + | |''Hands''<br>[[Abyss Gauntlets]] |
||
| + | |''Feet''<br>[[Wyrm Greaves]] |
||
| + | |''Legs''<br>[[Melee Hose]] |
||
| + | |''Legs''<br>[[Koga Hakama]] |
||
| + | |- BGCOLOR="#DDEEFF" align="center" |
||
| + | |BGCOLOR="#EEEEFF" align="left"| |
||
| + | [[Dynamis - Qufim|Qufim]] |
||
| + | |''Feet''<br>[[Etoile Shoes]] |
||
| + | |''Legs''<br>[[Abyss Flanchard]] |
||
| + | |''Hands''<br>[[Wyrm Finger Gauntlets]] |
||
| + | |''Hands''<br>[[Melee Gloves]] |
||
|''Head''<br>[[Koga Hatsuburi]] |
|''Head''<br>[[Koga Hatsuburi]] |
||
| + | |- BGCOLOR="#DDEEFF" align="center" |
||
| + | |BGCOLOR="#EEEEFF" align="left"| |
||
| + | [[Dynamis - Tavnazia|Tavnazia]]<br> |
||
| + | (Hydras) |
||
| + | |''Legs''<br>[[Etoile Tights]] |
||
| + | |''Body''<br>[[Abyss Cuirass]] |
||
| + | |''Body''<br>[[Wyrm Mail]] |
||
| + | |''Body''<br>[[Melee Cyclas]] |
||
| + | |''Body''<br>[[Koga Chainmail]] |
||
| + | |- BGCOLOR="#DDEEFF" align="center" |
||
| + | |BGCOLOR="#EEEEFF" align="left"| |
||
| + | [[Dynamis - Tavnazia|Tavnazia]]<br> |
||
| + | (Kindred) |
||
| + | |''Body''<br>[[Etoile Casaque]] |
||
| + | |''Head''<br>[[Abyss Burgeonet]] |
||
| + | |''Head''<br>[[Wyrm Armet]] |
||
| + | |''Head''<br>[[Melee Crown]] |
||
| + | |''Hands''<br>[[Koga Tekko]] |
||
| + | |- BGCOLOR="#66CCFF" |
||
| + | ! BGCOLOR="#CCAAFF" | Zone !! Paladin !! Puppetmaster !! Ranger !! Red Mage !! Samurai |
||
| + | |- BGCOLOR="#DDEEFF" align="center" |
||
| + | |BGCOLOR="#EEEEFF" align="left"| |
||
| + | [[Dynamis - Windurst|Windurst]] |
||
|''Feet''<br>[[Valor Leggings]] |
|''Feet''<br>[[Valor Leggings]] |
||
| + | |''Hands''<br>[[Pantin Dastanas]] |
||
|''Hands''<br>[[Scout's Bracers]] |
|''Hands''<br>[[Scout's Bracers]] |
||
| |
| |
||
| + | |''Legs''<br>[[Saotome Haidate]] |
||
|- BGCOLOR="#DDEEFF" align="center" |
|- BGCOLOR="#DDEEFF" align="center" |
||
|BGCOLOR="#EEEEFF" align="left"| |
|BGCOLOR="#EEEEFF" align="left"| |
||
| − | + | [[Dynamis - San d'Oria|San d'Oria]] |
|
| − | |''Legs''<br>[[Melee Hose]] |
||
| − | |''Legs''<br>[[Koga Hakama]] |
||
|''Hands''<br>[[Valor Gauntlets]] |
|''Hands''<br>[[Valor Gauntlets]] |
||
| + | |''Feet''<br>[[Pantin Babouches]] |
||
|''Legs''<br>[[Scout's Braccae]] |
|''Legs''<br>[[Scout's Braccae]] |
||
|''Feet''<br>[[Duelist's Boots]] |
|''Feet''<br>[[Duelist's Boots]] |
||
| + | | |
||
|- BGCOLOR="#DDEEFF" align="center" |
|- BGCOLOR="#DDEEFF" align="center" |
||
|BGCOLOR="#EEEEFF" align="left"| |
|BGCOLOR="#EEEEFF" align="left"| |
||
| − | + | [[Dynamis - Bastok|Bastok]] |
|
| − | |''Feet''<br>[[Melee Gaiters]] |
||
| − | | |
||
|''Head''<br>[[Valor Coronet]] |
|''Head''<br>[[Valor Coronet]] |
||
| + | | |
||
| |
| |
||
|''Hands''<br>[[Duelist's Gloves]] |
|''Hands''<br>[[Duelist's Gloves]] |
||
| + | |''Hands''<br>[[Saotome Kote]] |
||
|- BGCOLOR="#DDEEFF" align="center" |
|- BGCOLOR="#DDEEFF" align="center" |
||
|BGCOLOR="#EEEEFF" align="left"| |
|BGCOLOR="#EEEEFF" align="left"| |
||
| − | + | [[Dynamis - Jeuno|Jeuno]] |
|
| − | |''Hands''<br>[[Melee Gloves]] |
||
| − | |''Feet''<br>[[Koga Kyahan]] |
||
| |
| |
||
| + | |''Legs''<br>[[Pantin Churidars]] |
||
|''Head''<br>[[Scout's Beret]] |
|''Head''<br>[[Scout's Beret]] |
||
|''Legs''<br>[[Duelist's Tights]] |
|''Legs''<br>[[Duelist's Tights]] |
||
| + | |''Feet''<br>[[Saotome Sune-Ate]] |
||
|- BGCOLOR="#DDEEFF" align="center" |
|- BGCOLOR="#DDEEFF" align="center" |
||
|BGCOLOR="#EEEEFF" align="left"| |
|BGCOLOR="#EEEEFF" align="left"| |
||
| − | + | [[Dynamis - Beaucedine|Beaucedine]] |
|
| − | |''Body''<br>[[Melee Cyclas]] |
||
| − | |''Body''<br>[[Koga Chainmail]] |
||
|''Legs''<br>[[Valor Breeches]] |
|''Legs''<br>[[Valor Breeches]] |
||
| + | |''Body''<br>[[Pantin Tobe]] |
||
|''Feet''<br>[[Scout's Socks]] |
|''Feet''<br>[[Scout's Socks]] |
||
|''Body''<br>[[Duelist's Tabard]] |
|''Body''<br>[[Duelist's Tabard]] |
||
| + | |''Body''<br>[[Saotome Domaru]] |
||
|- BGCOLOR="#DDEEFF" align="center" |
|- BGCOLOR="#DDEEFF" align="center" |
||
|BGCOLOR="#EEEEFF" align="left"| |
|BGCOLOR="#EEEEFF" align="left"| |
||
| − | + | [[Dynamis - Xarcabard|Xarcabard]] |
|
| − | |''Head''<br>[[Melee Crown]] |
||
| − | |''Hands''<br>[[Koga Tekko]] |
||
|''Body''<br>[[Valor Surcoat]] |
|''Body''<br>[[Valor Surcoat]] |
||
| + | |''Head''<br>[[Pantin Taj]] |
||
|''Body''<br>[[Scout's Jerkin]] |
|''Body''<br>[[Scout's Jerkin]] |
||
|''Head''<br>[[Duelist's Chapeau]] |
|''Head''<br>[[Duelist's Chapeau]] |
||
| + | |''Head''<br>[[Saotome Kabuto]] |
||
|- BGCOLOR="#66CCFF" |
|- BGCOLOR="#66CCFF" |
||
! BGCOLOR="#CCAAFF" | !! !! !! !! !! |
! BGCOLOR="#CCAAFF" | !! !! !! !! !! |
||
|- BGCOLOR="#DDEEFF" align="center" |
|- BGCOLOR="#DDEEFF" align="center" |
||
|BGCOLOR="#EEEEFF" align="left"| |
|BGCOLOR="#EEEEFF" align="left"| |
||
| − | + | [[Dynamis - Valkurm|Valkurm]] |
|
| − | |''Feet''<br>[[Melee Gaiters]] |
||
| − | |''Feet''<br>[[Koga Kyahan]] |
||
|''Feet''<br>[[Valor Leggings]] |
|''Feet''<br>[[Valor Leggings]] |
||
| + | |''Legs''<br>[[Pantin Churidars]] |
||
|''Hands''<br>[[Scout's Bracers]] |
|''Hands''<br>[[Scout's Bracers]] |
||
|''Feet''<br>[[Duelist's Boots]] |
|''Feet''<br>[[Duelist's Boots]] |
||
| + | |''Feet''<br>[[Saotome Sune-Ate]] |
||
|- BGCOLOR="#DDEEFF" align="center" |
|- BGCOLOR="#DDEEFF" align="center" |
||
|BGCOLOR="#EEEEFF" align="left"| |
|BGCOLOR="#EEEEFF" align="left"| |
||
| − | + | [[Dynamis - Buburimu|Buburimu]] |
|
| − | |''Legs''<br>[[Melee Hose]] |
||
| − | |''Legs''<br>[[Koga Hakama]] |
||
|''Hands''<br>[[Valor Gauntlets]] |
|''Hands''<br>[[Valor Gauntlets]] |
||
| + | |''Feet''<br>[[Pantin Babouches]] |
||
|''Legs''<br>[[Scout's Braccae]] |
|''Legs''<br>[[Scout's Braccae]] |
||
|''Hands''<br>[[Duelist's Gloves]] |
|''Hands''<br>[[Duelist's Gloves]] |
||
| + | |''Legs''<br>[[Saotome Haidate]] |
||
|- BGCOLOR="#DDEEFF" align="center" |
|- BGCOLOR="#DDEEFF" align="center" |
||
|BGCOLOR="#EEEEFF" align="left"| |
|BGCOLOR="#EEEEFF" align="left"| |
||
| − | + | [[Dynamis - Qufim|Qufim]] |
|
| − | |''Hands''<br>[[Melee Gloves]] |
||
| − | |''Head''<br>[[Koga Hatsuburi]] |
||
|''Head''<br>[[Valor Coronet]] |
|''Head''<br>[[Valor Coronet]] |
||
| + | |''Hands''<br>[[Pantin Dastanas]] |
||
|''Head''<br>[[Scout's Beret]] |
|''Head''<br>[[Scout's Beret]] |
||
|''Legs''<br>[[Duelist's Tights]] |
|''Legs''<br>[[Duelist's Tights]] |
||
| + | |''Hands''<br>[[Saotome Kote]] |
||
|- BGCOLOR="#DDEEFF" align="center" |
|- BGCOLOR="#DDEEFF" align="center" |
||
|BGCOLOR="#EEEEFF" align="left"| |
|BGCOLOR="#EEEEFF" align="left"| |
||
| − | + | [[Dynamis - Tavnazia|Tavnazia]]<br> |
|
| + | (Hydras) |
||
| − | |''Body''<br>[[Melee Cyclas]] |
||
| − | |||
| − | ''Head''<br>[[Melee Crown]] |
||
| − | |''Body''<br>[[Koga Chainmail]] |
||
| − | |||
| − | ''Hands''<br>[[Koga Tekko]] |
||
|''Legs''<br>[[Valor Breeches]] |
|''Legs''<br>[[Valor Breeches]] |
||
| + | |''Body''<br>[[Pantin Tobe]] |
||
| − | |||
| − | ''Body''<br>[[Valor Surcoat]] |
||
|''Feet''<br>[[Scout's Socks]] |
|''Feet''<br>[[Scout's Socks]] |
||
| − | |||
| − | ''Body''<br>[[Scout's Jerkin]] |
||
|''Body''<br>[[Duelist's Tabard]] |
|''Body''<br>[[Duelist's Tabard]] |
||
| + | |''Body''<br>[[Saotome Domaru]] |
||
| − | |||
| + | |- BGCOLOR="#DDEEFF" align="center" |
||
| − | ''Head''<br>[[Duelist's Chapeau]] |
||
| + | |BGCOLOR="#EEEEFF" align="left"| |
||
| + | [[Dynamis - Tavnazia|Tavnazia]]<br> |
||
| + | (Kindred) |
||
| + | |''Body''<br>[[Valor Surcoat]] |
||
| + | |''Head''<br>[[Pantin Taj]] |
||
| + | |''Body''<br>[[Scout's Jerkin]] |
||
| + | |''Head''<br>[[Duelist's Chapeau]] |
||
| + | |''Head''<br>[[Saotome Kabuto]] |
||
|- BGCOLOR="#66CCFF" |
|- BGCOLOR="#66CCFF" |
||
| − | ! BGCOLOR="#CCAAFF" | Zone !! |
+ | ! BGCOLOR="#CCAAFF" | Zone !! Scholar !! Summoner !! Thief !! Warrior !! White Mage |
|- BGCOLOR="#DDEEFF" align="center" |
|- BGCOLOR="#DDEEFF" align="center" |
||
|BGCOLOR="#EEEEFF" align="left"| |
|BGCOLOR="#EEEEFF" align="left"| |
||
| − | + | [[Dynamis - Windurst|Windurst]] |
|
| − | |'' |
+ | |''Hands''<br>[[Argute Loafers]] |
|''Legs''<br>[[Summoner's Spats]] |
|''Legs''<br>[[Summoner's Spats]] |
||
|''Head''<br>[[Assassin's Bonnet]] |
|''Head''<br>[[Assassin's Bonnet]] |
||
| Line 1,147: | Line 1,364: | ||
|- BGCOLOR="#DDEEFF" align="center" |
|- BGCOLOR="#DDEEFF" align="center" |
||
|BGCOLOR="#EEEEFF" align="left"| |
|BGCOLOR="#EEEEFF" align="left"| |
||
| − | + | [[Dynamis - San d'Oria|San d'Oria]] |
|
| + | |''Hands''<br>[[Argute Bracers]] |
||
| − | | |
||
|''Feet''<br>[[Summoner's Pigaches]] |
|''Feet''<br>[[Summoner's Pigaches]] |
||
| |
| |
||
| Line 1,155: | Line 1,372: | ||
|- BGCOLOR="#DDEEFF" align="center" |
|- BGCOLOR="#DDEEFF" align="center" |
||
|BGCOLOR="#EEEEFF" align="left"| |
|BGCOLOR="#EEEEFF" align="left"| |
||
| − | + | [[Dynamis - Bastok|Bastok]] |
|
| − | |'' |
+ | |''Legs''<br>[[Argute Pants]] |
|''Hands''<br>[[Summoner's Bracers]] |
|''Hands''<br>[[Summoner's Bracers]] |
||
|''Body''<br>[[Assassin's Vest]] |
|''Body''<br>[[Assassin's Vest]] |
||
| Line 1,163: | Line 1,380: | ||
|- BGCOLOR="#DDEEFF" align="center" |
|- BGCOLOR="#DDEEFF" align="center" |
||
|BGCOLOR="#EEEEFF" align="left"| |
|BGCOLOR="#EEEEFF" align="left"| |
||
| − | + | [[Dynamis - Jeuno|Jeuno]] |
|
| + | | |
||
| − | |''Feet''<br>[[Saotome Sune-Ate]] |
||
| |
| |
||
|''Feet''<br>[[Assassin's Poulaines]] |
|''Feet''<br>[[Assassin's Poulaines]] |
||
| Line 1,171: | Line 1,388: | ||
|- BGCOLOR="#DDEEFF" align="center" |
|- BGCOLOR="#DDEEFF" align="center" |
||
|BGCOLOR="#EEEEFF" align="left"| |
|BGCOLOR="#EEEEFF" align="left"| |
||
| − | + | [[Dynamis - Beaucedine|Beaucedine]] |
|
| − | |''Body''<br>[[ |
+ | |''Body''<br>[[Argute Gown]] |
|''Body''<br>[[Summoner's Doublet]] |
|''Body''<br>[[Summoner's Doublet]] |
||
| − | |''Legs''<br>[[Assassin's |
+ | |''Legs''<br>[[Assassin's Culottes]] |
|''Legs''<br>[[Warrior's Cuisses]] |
|''Legs''<br>[[Warrior's Cuisses]] |
||
|''Body''<br>[[Cleric's Briault]] |
|''Body''<br>[[Cleric's Briault]] |
||
|- BGCOLOR="#DDEEFF" align="center" |
|- BGCOLOR="#DDEEFF" align="center" |
||
|BGCOLOR="#EEEEFF" align="left"| |
|BGCOLOR="#EEEEFF" align="left"| |
||
| − | + | [[Dynamis - Xarcabard|Xarcabard]] |
|
| − | |''Head''<br>[[ |
+ | |''Head''<br>[[Argute Mortarboard]] |
|''Head''<br>[[Summoner's Horn]] |
|''Head''<br>[[Summoner's Horn]] |
||
|''Hands''<br>[[Assassin's Armlets]] |
|''Hands''<br>[[Assassin's Armlets]] |
||
| Line 1,189: | Line 1,406: | ||
|- BGCOLOR="#DDEEFF" align="center" |
|- BGCOLOR="#DDEEFF" align="center" |
||
|BGCOLOR="#EEEEFF" align="left"| |
|BGCOLOR="#EEEEFF" align="left"| |
||
| − | + | [[Dynamis - Valkurm|Valkurm]] |
|
| − | |'' |
+ | |''Hands''<br>[[Argute Bracers]] |
|''Legs''<br>[[Summoner's Spats]] |
|''Legs''<br>[[Summoner's Spats]] |
||
|''Head''<br>[[Assassin's Bonnet]] |
|''Head''<br>[[Assassin's Bonnet]] |
||
| Line 1,197: | Line 1,414: | ||
|- BGCOLOR="#DDEEFF" align="center" |
|- BGCOLOR="#DDEEFF" align="center" |
||
|BGCOLOR="#EEEEFF" align="left"| |
|BGCOLOR="#EEEEFF" align="left"| |
||
| − | + | [[Dynamis - Buburimu|Buburimu]] |
|
| − | |'' |
+ | |''Feet''<br>[[Argute Loafers]] |
|''Hands''<br>[[Summoner's Bracers]] |
|''Hands''<br>[[Summoner's Bracers]] |
||
|''Body''<br>[[Assassin's Vest]] |
|''Body''<br>[[Assassin's Vest]] |
||
| Line 1,205: | Line 1,422: | ||
|- BGCOLOR="#DDEEFF" align="center" |
|- BGCOLOR="#DDEEFF" align="center" |
||
|BGCOLOR="#EEEEFF" align="left"| |
|BGCOLOR="#EEEEFF" align="left"| |
||
| − | + | [[Dynamis - Qufim|Qufim]] |
|
| − | |'' |
+ | |''Legs''<br>[[Argute Pants]] |
|''Feet''<br>[[Summoner's Pigaches]] |
|''Feet''<br>[[Summoner's Pigaches]] |
||
|''Feet''<br>[[Assassin's Poulaines]] |
|''Feet''<br>[[Assassin's Poulaines]] |
||
| Line 1,213: | Line 1,430: | ||
|- BGCOLOR="#DDEEFF" align="center" |
|- BGCOLOR="#DDEEFF" align="center" |
||
|BGCOLOR="#EEEEFF" align="left"| |
|BGCOLOR="#EEEEFF" align="left"| |
||
| − | + | [[Dynamis - Tavnazia|Tavnazia]]<br> |
|
| + | (Hydras) |
||
| − | |''Body''<br>[[Saotome Domaru]] |
||
| + | |''Body''<br>[[Argute Gown]] |
||
| − | |||
| − | ''Head''<br>[[Saotome Kabuto]] |
||
|''Body''<br>[[Summoner's Doublet]] |
|''Body''<br>[[Summoner's Doublet]] |
||
| + | |''Legs''<br>[[Assassin's Culottes]] |
||
| − | |||
| − | ''Head''<br>[[Summoner's Horn]] |
||
| − | |''Legs''<br>[[Assassin's Culotte]] |
||
| − | |||
| − | ''Hands''<br>[[Assassin's Armlets]] |
||
|''Legs''<br>[[Warrior's Cuisses]] |
|''Legs''<br>[[Warrior's Cuisses]] |
||
| − | |||
| − | ''Body''<br>[[Warrior's Lorica]] |
||
|''Body''<br>[[Cleric's Briault]] |
|''Body''<br>[[Cleric's Briault]] |
||
| + | |- BGCOLOR="#DDEEFF" align="center" |
||
| − | |||
| + | |BGCOLOR="#EEEEFF" align="left"| |
||
| − | ''Hands''<br>[[Cleric's Mitts]] |
||
| + | [[Dynamis - Tavnazia|Tavnazia]]<br> |
||
| + | (Kindred) |
||
| + | |''Head''<br>[[Argute Mortarboard]] |
||
| + | |''Head''<br>[[Summoner's Horn]] |
||
| + | |''Hands''<br>[[Assassin's Armlets]] |
||
| + | |''Body''<br>[[Warrior's Lorica]] |
||
| + | |''Hands''<br>[[Cleric's Mitts]] |
||
|} |
|} |
||
== Relic Armor +1 == |
== Relic Armor +1 == |
||
| − | :To upgrade your Relic Armor to Relic Armor +1, talk to [[Sagheera]] in [[Port Jeuno]] (J-8) near the Windurst Dock. She will offer to repair your worn Relic Armor and make it all shiny and new. To do so, you will need to bring her your relic armor, a ragged version of your armor and a crafting item. In addition, she will charge you a fee for her services in [[Ancient Currency|ancient currency]]. |
+ | :To upgrade your Relic Armor to [[Relic Armor +1]], talk to [[Sagheera]] in [[Port Jeuno]] (J-8) near the [[Windurst]] Dock. She will offer to repair your worn Relic Armor and make it all shiny and new. To do so, you will need to bring her your relic armor, a ragged version of your armor and a crafting item. In addition, she will charge you a fee for her services in [[Ancient Currency|ancient currency]]. |
:For more information regarding the [[:Category:Relic Armor +1|Relic Armor +1]] set, including how to upgrade the Relic Armor, please see [[:Category:Relic Armor +1|Category:Relic Armor +1]] |
:For more information regarding the [[:Category:Relic Armor +1|Relic Armor +1]] set, including how to upgrade the Relic Armor, please see [[:Category:Relic Armor +1|Category:Relic Armor +1]] |
||
| − | == |
+ | == Relic Armor +2 and Augments == |
| + | :To upgrade your Relic Armor to [[Relic Armor +2]], trade the normal quality armor to the [[Magian Moogle (blue)]] in [[Ru'Lude Gardens]]. You will need to gather the requested items, found only in Dynamis zones. |
||
| − | In addition to sets of armor which can be found in all areas of [[Dynamis]], each job has a Level 70 [[Relic Accessory]] (either a [[Waist]] item or [[Back]] item) which can be found in the Dreamworld [[Dynamis]] areas which were added in the [[2005 - (12/13/2005) Update Details|December 13th, 2005 Version Update]]. Each of these items can be found in two of the three starting Dreamworld Dynamis areas ([[Dynamis - Qufim]], [[Dynamis - Valkurm]], and [[Dynamis - Buburimu]]). For more details on these items see also the [[Relic_Accessory|Relic Accessories]] page. |
||
| + | :For more information regarding the [[Category:Relic Armor +2|Relic Armor +2]] set, including details on all upgrade quests, please see [[Category:Relic Armor +2]] |
||
| − | {| border="0" cellpadding="2" cellspacing="2" width="100%" |
||
| + | |||
| + | == [[Relic Accessory|Relic Accessories]] == |
||
| + | In addition to sets of armor which can be found in all areas of [[Dynamis]], each job has a Level 70 [[Relic Accessory]] (either a [[Waist]] item or [[Back]] item) which can be found in the Dreamworld [[Dynamis]] areas which were added in the [[2005 - (12/13/2005) Update Details|December 13th, 2005 Version Update]]. Each of these items can be found in two of the three starting Dreamworld [[Dynamis]] areas ([[Dynamis - Qufim]], [[Dynamis - Valkurm]], and [[Dynamis - Buburimu]]). For more details on these items see also the [[Relic Accessory|Relic Accessories]] page. |
||
| + | |||
| + | No accessories drop in [[Dynamis - Tavnazia]]. |
||
| + | |||
| + | Unlike Relic Armor pieces named above, all Relic Accessories can be sent to other characters on the same account as the character who acquired the piece in one of the three Dreamworld [[Dynamis]] areas ([[Dynamis - Qufim]], [[Dynamis - Valkurm]], and [[Dynamis - Buburimu]]). They are all marked as [[Rare]]/[[Exclusive]], and cannot be traded, bazaared or placed on the [[Auction House]]. |
||
| + | |||
| + | {| border="0" cellpadding="2" cellspacing="1" width="100%" |
||
|- bgcolor="#66CCFF" |
|- bgcolor="#66CCFF" |
||
| − | !width=" |
+ | !width="10%" BGCOLOR="#CCAAFF" |Zone |
| − | !width=" |
+ | !width="18%" |Bard |
| − | !width=" |
+ | !width="18%" |Beastmaster |
| − | !width=" |
+ | !width="18%" |Black Mage |
| − | !width=" |
+ | !width="18%" |Blue Mage |
| − | !width=" |
+ | !width="18%" |Corsair |
|- BGCOLOR="#DDEEFF" align="center" |
|- BGCOLOR="#DDEEFF" align="center" |
||
|BGCOLOR="#EEEEFF" align="left"| |
|BGCOLOR="#EEEEFF" align="left"| |
||
| − | + | [[Dynamis - Valkurm|Valkurm]] |
|
|[[Bard's Cape]] |
|[[Bard's Cape]] |
||
|[[Monster Belt]] |
|[[Monster Belt]] |
||
|[[Sorcerer's Belt]] |
|[[Sorcerer's Belt]] |
||
| + | |[[Mirage Mantle]] |
||
| − | | |
||
| + | |[[Commodore Belt]] |
||
| − | | |
||
|- BGCOLOR="#DDEEFF" align="center" |
|- BGCOLOR="#DDEEFF" align="center" |
||
|BGCOLOR="#EEEEFF" align="left"| |
|BGCOLOR="#EEEEFF" align="left"| |
||
| − | + | [[Dynamis - Buburimu|Buburimu]] |
|
|[[Bard's Cape]] |
|[[Bard's Cape]] |
||
| |
| |
||
|[[Sorcerer's Belt]] |
|[[Sorcerer's Belt]] |
||
| − | |[[ |
+ | |[[Mirage Mantle]] |
| + | | |
||
| − | |[[Wyrm Belt]] |
||
|- BGCOLOR="#DDEEFF" align="center" |
|- BGCOLOR="#DDEEFF" align="center" |
||
|BGCOLOR="#EEEEFF" align="left"| |
|BGCOLOR="#EEEEFF" align="left"| |
||
| − | + | [[Dynamis - Qufim|Qufim]] |
|
| |
| |
||
|[[Monster Belt]] |
|[[Monster Belt]] |
||
| |
| |
||
| + | | |
||
| − | |[[Abyss Cape]] |
||
| − | |[[ |
+ | |[[Commodore Belt]] |
| + | |- |
||
| + | |- bgcolor="#66CCFF" |
||
| + | !width="10%" BGCOLOR="#CCAAFF" |Zone !! Dancer !! Dark Knight !! Dragoon !! Monk !! Ninja |
||
|- BGCOLOR="#DDEEFF" align="center" |
|- BGCOLOR="#DDEEFF" align="center" |
||
|BGCOLOR="#EEEEFF" align="left"| |
|BGCOLOR="#EEEEFF" align="left"| |
||
| − | + | [[Dynamis - Valkurm|Valkurm]] |
|
| + | |[[Etoile Cape]] |
||
| |
| |
||
| |
| |
||
| |
| |
||
| + | |[[Koga Sarashi]] |
||
| + | |- BGCOLOR="#DDEEFF" align="center" |
||
| + | |BGCOLOR="#EEEEFF" align="left"| |
||
| + | [[Dynamis - Buburimu|Buburimu]] |
||
| |
| |
||
| + | |[[Abyss Cape]] |
||
| + | |[[Wyrm Belt]] |
||
| + | |[[Melee Cape]] |
||
| + | |[[Koga Sarashi]] |
||
| + | |- BGCOLOR="#DDEEFF" align="center" |
||
| + | |BGCOLOR="#EEEEFF" align="left"| |
||
| + | [[Dynamis - Qufim|Qufim]] |
||
| + | | |
||
| + | |[[Abyss Cape]] |
||
| + | |[[Wyrm Belt]] |
||
| + | |[[Melee Cape]] |
||
| |
| |
||
|- |
|- |
||
|- bgcolor="#66CCFF" |
|- bgcolor="#66CCFF" |
||
| − | !width=" |
+ | !width="10%" BGCOLOR="#CCAAFF" |Zone !! Paladin !! Puppetmaster !! Ranger !! Red Mage !! Samurai |
|- BGCOLOR="#DDEEFF" align="center" |
|- BGCOLOR="#DDEEFF" align="center" |
||
|BGCOLOR="#EEEEFF" align="left"| |
|BGCOLOR="#EEEEFF" align="left"| |
||
| − | + | [[Dynamis - Valkurm|Valkurm]] |
|
| − | | |
||
| − | |[[Koga Sarashi]] |
||
|[[Valor Cape]] |
|[[Valor Cape]] |
||
| |
| |
||
| |
| |
||
| + | | |
||
| + | |[[Saotome Koshi-Ate]] |
||
|- BGCOLOR="#DDEEFF" align="center" |
|- BGCOLOR="#DDEEFF" align="center" |
||
|BGCOLOR="#EEEEFF" align="left"| |
|BGCOLOR="#EEEEFF" align="left"| |
||
| − | + | [[Dynamis - Buburimu|Buburimu]] |
|
| − | |[[Melee Cape]] |
||
| − | |[[Koga Sarashi]] |
||
|[[Valor Cape]] |
|[[Valor Cape]] |
||
| + | |[[Pantin Cape]] |
||
|[[Scout's Belt]] |
|[[Scout's Belt]] |
||
|[[Duelist's Belt]] |
|[[Duelist's Belt]] |
||
| + | | |
||
|- BGCOLOR="#DDEEFF" align="center" |
|- BGCOLOR="#DDEEFF" align="center" |
||
|BGCOLOR="#EEEEFF" align="left"| |
|BGCOLOR="#EEEEFF" align="left"| |
||
| − | + | [[Dynamis - Qufim|Qufim]] |
|
| − | |[[Melee Cape]] |
||
| − | | |
||
| |
| |
||
| + | |[[Pantin Cape]] |
||
|[[Scout's Belt]] |
|[[Scout's Belt]] |
||
|[[Duelist's Belt]] |
|[[Duelist's Belt]] |
||
| + | |[[Saotome Koshi-Ate]] |
||
| − | |- BGCOLOR="#DDEEFF" align="center" |
||
| − | |BGCOLOR="#EEEEFF" align="left"| |
||
| − | :[[Dynamis - Tavnazia]] |
||
| − | | |
||
| − | | |
||
| − | | |
||
| − | | |
||
| − | | |
||
|- |
|- |
||
|- bgcolor="#66CCFF" |
|- bgcolor="#66CCFF" |
||
| − | !width=" |
+ | !width="10%" BGCOLOR="#CCAAFF" |Zone !! Scholar !! Summoner !! Thief !! Warrior !! White Mage |
|- BGCOLOR="#DDEEFF" align="center" |
|- BGCOLOR="#DDEEFF" align="center" |
||
|BGCOLOR="#EEEEFF" align="left"| |
|BGCOLOR="#EEEEFF" align="left"| |
||
| − | + | [[Dynamis - Valkurm|Valkurm]] |
|
| + | | |
||
| − | |[[Saotome Koshi-Ate]] |
||
|[[Summoner's Cape]] |
|[[Summoner's Cape]] |
||
|[[Assassin's Cape]] |
|[[Assassin's Cape]] |
||
| Line 1,327: | Line 1,564: | ||
|- BGCOLOR="#DDEEFF" align="center" |
|- BGCOLOR="#DDEEFF" align="center" |
||
|BGCOLOR="#EEEEFF" align="left"| |
|BGCOLOR="#EEEEFF" align="left"| |
||
| − | + | [[Dynamis - Buburimu|Buburimu]] |
|
| |
| |
||
| |
| |
||
| Line 1,335: | Line 1,572: | ||
|- BGCOLOR="#DDEEFF" align="center" |
|- BGCOLOR="#DDEEFF" align="center" |
||
|BGCOLOR="#EEEEFF" align="left"| |
|BGCOLOR="#EEEEFF" align="left"| |
||
| − | + | [[Dynamis - Qufim|Qufim]] |
|
| − | |[[ |
+ | |[[Argute Belt]] |
|[[Summoner's Cape]] |
|[[Summoner's Cape]] |
||
|[[Assassin's Cape]] |
|[[Assassin's Cape]] |
||
| |
| |
||
|[[Cleric's Belt]] |
|[[Cleric's Belt]] |
||
| − | |- BGCOLOR="#DDEEFF" align="center" |
||
| − | |BGCOLOR="#EEEEFF" align="left"| |
||
| − | :[[Dynamis - Tavnazia]] |
||
| − | | |
||
| − | | |
||
| − | | |
||
| − | | |
||
| − | | |
||
| − | |- |
||
|} |
|} |
||
Revision as of 19:11, 30 December 2015
|
Relic Armor is the second set of Artifact Armor. Relic Armor and Relic Weapons may only be found in Dynamis areas. The first piece of armor for each job is available at level 71, and each piece is both Rare and Exclusive.
|
Relic Armor by Job
Bard
|
|
| ||||||||||||||||||||||||||||||||||||||||
Beastmaster
|
|
| ||||||||||||||||||||||||||||||||||||||||
Black Mage
|
|
| ||||||||||||||||||||||||||||||||||||||||

Blue Mage
|
|
| ||||||||||||||||||||||||||||||||||||||||
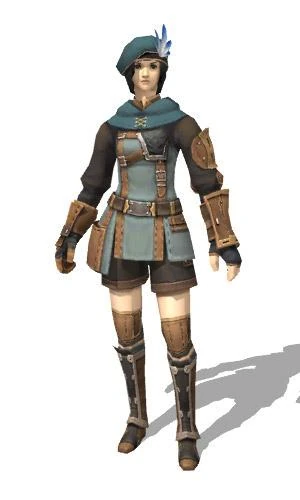
Corsair
|
|
| |||||||||||||||||||||||||||||||||||||||||||
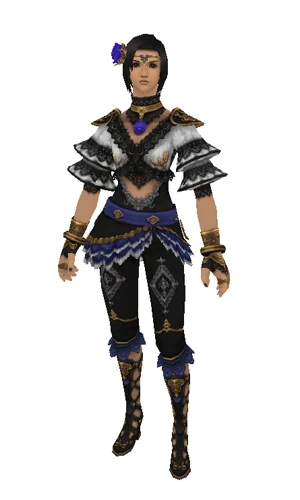
Dancer
|
|
| ||||||||||||||||||||||||||||||||||||||||
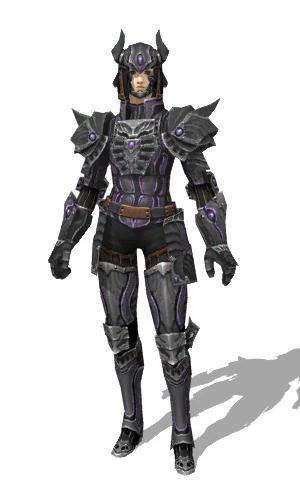
Dark Knight
|
|
| ||||||||||||||||||||||||||||||||||||||||
Dragoon
|
|
| ||||||||||||||||||||||||||||||||||||||||
Monk
|
|
| ||||||||||||||||||||||||||||||||||||||||
Ninja
|
|
| ||||||||||||||||||||||||||||||||||||||||
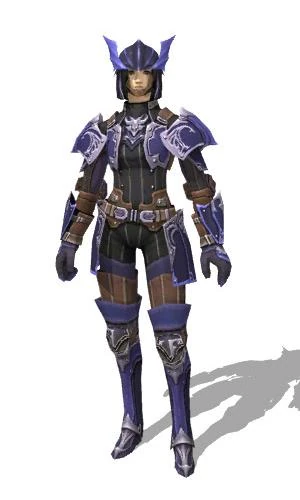
Paladin
|
|
| ||||||||||||||||||||||||||||||||||||||||
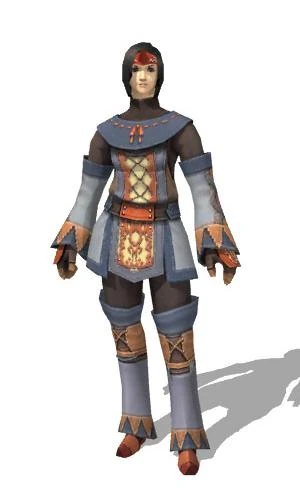
Puppetmaster
|
|
| ||||||||||||||||||||||||||||||||||||||||
Ranger
|
|
| ||||||||||||||||||||||||||||||||||||||||
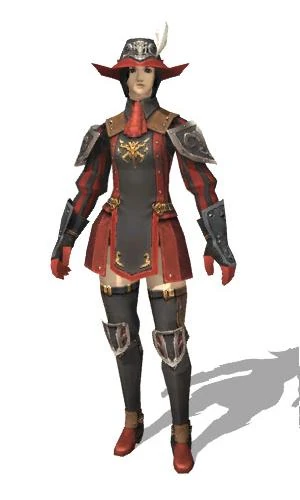
Red Mage
|
|
| ||||||||||||||||||||||||||||||||||||||||
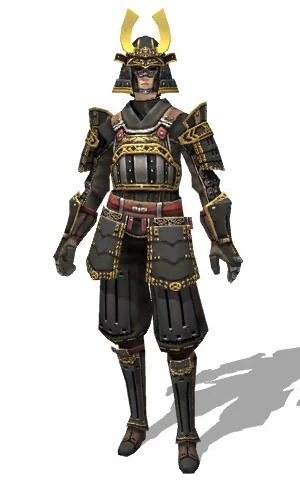
Samurai
|
|
| ||||||||||||||||||||||||||||||||||||||||
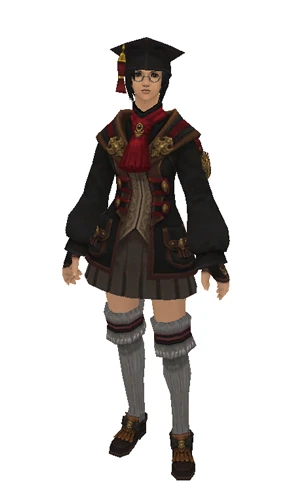
Scholar
|
|
| |||||||||||||||||||||||||||||||||||||||||||||
Summoner
|
|
| ||||||||||||||||||||||||||||||||||||||||
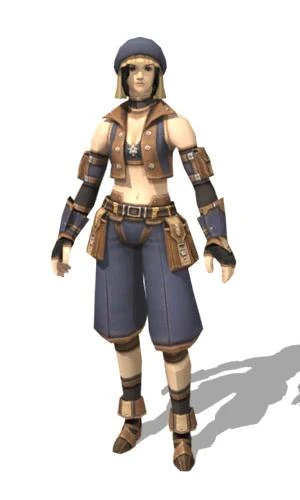
Thief
|
|
| ||||||||||||||||||||||||||||||||||||||||
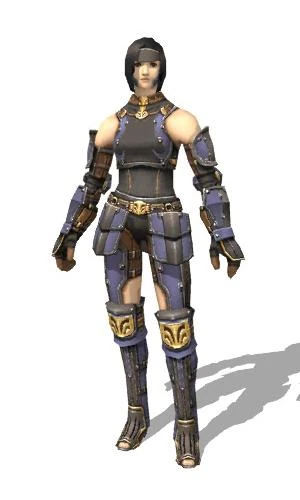
Warrior
|
|
| ||||||||||||||||||||||||||||||||||||||||
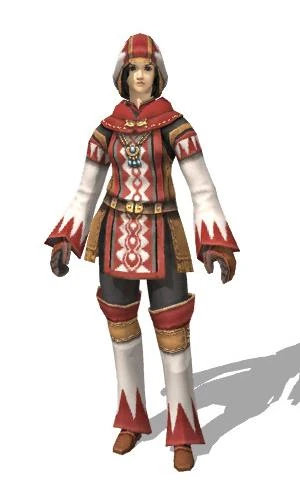
White Mage
|
|
| ||||||||||||||||||||||||||||||||||||||||
Relic Armor by Zone
Relic Armor +1
- To upgrade your Relic Armor to Relic Armor +1, talk to Sagheera in Port Jeuno (J-8) near the Windurst Dock. She will offer to repair your worn Relic Armor and make it all shiny and new. To do so, you will need to bring her your relic armor, a ragged version of your armor and a crafting item. In addition, she will charge you a fee for her services in ancient currency.
- For more information regarding the Relic Armor +1 set, including how to upgrade the Relic Armor, please see Category:Relic Armor +1
Relic Armor +2 and Augments
- To upgrade your Relic Armor to Relic Armor +2, trade the normal quality armor to the Magian Moogle (blue) in Ru'Lude Gardens. You will need to gather the requested items, found only in Dynamis zones.
- For more information regarding the set, including details on all upgrade quests, please see
Relic Accessories
In addition to sets of armor which can be found in all areas of Dynamis, each job has a Level 70 Relic Accessory (either a Waist item or Back item) which can be found in the Dreamworld Dynamis areas which were added in the December 13th, 2005 Version Update. Each of these items can be found in two of the three starting Dreamworld Dynamis areas (Dynamis - Qufim, Dynamis - Valkurm, and Dynamis - Buburimu). For more details on these items see also the Relic Accessories page.
No accessories drop in Dynamis - Tavnazia.
Unlike Relic Armor pieces named above, all Relic Accessories can be sent to other characters on the same account as the character who acquired the piece in one of the three Dreamworld Dynamis areas (Dynamis - Qufim, Dynamis - Valkurm, and Dynamis - Buburimu). They are all marked as Rare/Exclusive, and cannot be traded, bazaared or placed on the Auction House.
| Zone | Bard | Beastmaster | Black Mage | Blue Mage | Corsair |
|---|---|---|---|---|---|
| Bard's Cape | Monster Belt | Sorcerer's Belt | Mirage Mantle | Commodore Belt | |
| Bard's Cape | Sorcerer's Belt | Mirage Mantle | |||
| Monster Belt | Commodore Belt | ||||
| Zone | Dancer | Dark Knight | Dragoon | Monk | Ninja |
| Etoile Cape | Koga Sarashi | ||||
| Abyss Cape | Wyrm Belt | Melee Cape | Koga Sarashi | ||
| Abyss Cape | Wyrm Belt | Melee Cape | |||
| Zone | Paladin | Puppetmaster | Ranger | Red Mage | Samurai |
| Valor Cape | Saotome Koshi-Ate | ||||
| Valor Cape | Pantin Cape | Scout's Belt | Duelist's Belt | ||
| Pantin Cape | Scout's Belt | Duelist's Belt | Saotome Koshi-Ate | ||
| Zone | Scholar | Summoner | Thief | Warrior | White Mage |
| Summoner's Cape | Assassin's Cape | Warrior's Stone | Cleric's Belt | ||
| Warrior's Stone | |||||
| Argute Belt | Summoner's Cape | Assassin's Cape | Cleric's Belt |
| Dynamis | |
|---|---|
| Original Areas | |
| Dreamworld Areas | |
| Bosses | |
| Time Extension Monsters | |
| Rewards | |
| Other | |
All items (124)
-
Abyss Burgeonet
-
Abyss Cape
-
Abyss Cuirass
-
Abyss Flanchard
-
Abyss Gauntlets
-
Abyss Sollerets
-
Argute Belt
-
Argute Bracers
-
Argute Gown

-
Argute Gown +2
-
Argute Loafers
-
Argute Mortarboard
-
Argute Pants
-
Armor Sets/Relic Armor
-
Assassin's Armlets
-
Assassin's Bonnet
-
Assassin's Cape
-
Assassin's Culottes
-
Assassin's Poulaines
-
Assassin's Vest


-
Saotome Domaru
-
Saotome Haidate
-
Saotome Kabuto
-
Saotome Koshi-Ate
-
Saotome Kote
-
Saotome Sune-Ate
-
Scout's Belt
-
Scout's Beret
-
Scout's Braccae
-
Scout's Bracers
-
Scout's Jerkin
-
Scout's Socks
-
Sorcerer's Belt
-
Sorcerer's Coat
-
Sorcerer's Gloves
-
Sorcerer's Petasos

-
Sorcerer's Sabots
-
Sorcerer's Tonban
-
Summoner's Bracers

-
Summoner's Cape
-
Summoner's Doublet

-
Summoner's Horn
-
Summoner's Pigaches
-
Summoner's Spats


