(→Colonization Reive: Added obstacle respawn time.) Tag: Visual edit |
|||
| (35 intermediate revisions by 16 users not shown) | |||
| Line 11: | Line 11: | ||
To participate in a reive, simply approach the area where a battle is taking place (denoted by enemies and players with sword icons by their names). |
To participate in a reive, simply approach the area where a battle is taking place (denoted by enemies and players with sword icons by their names). |
||
| − | When a player strays too far from the reive, a warning is displayed in the chat log and the player is given five seconds to return to the reive. If the player does not return within five seconds, he or she is locked out of participation in any reives in the zone for 5 minutes. This restriction can be removed by changing zones. |
+ | When a player strays too far from the reive, a warning is displayed in the chat log and the player is given five seconds to return to the reive. If the player does not return within five seconds, he or she is locked out of participation in any reives in the zone for 5 minutes. The maximum allowed distance is [[Distance|20 yalms]] from the [[Lairs|lair]] structure. This restriction can be removed by changing zones. |
==Evaluations== |
==Evaluations== |
||
| Line 23: | Line 23: | ||
==="Logging"=== |
==="Logging"=== |
||
The {{KeyItem}}[["Logging"]] key item allows players to damage [[Knotted Root]]s and [[Broadleaf Palm]]s during Colonization Reives. It is obtained from the quest [[Grind to Sawdust]]. |
The {{KeyItem}}[["Logging"]] key item allows players to damage [[Knotted Root]]s and [[Broadleaf Palm]]s during Colonization Reives. It is obtained from the quest [[Grind to Sawdust]]. |
||
| + | * After this, it helps to get {{KeyItem}}[["Watercrafting"]] from the quest [[I'm on a Boat]]. |
||
==="Demolishing=== |
==="Demolishing=== |
||
The {{KeyItem}}[["Demolishing"]] key item allows players to damage [[Bedrock Crag]]s in [[Morimar Basalt Fields]] during Colonization Reives. It is obtained from the quest [[A Stone's Throw Away]]. |
The {{KeyItem}}[["Demolishing"]] key item allows players to damage [[Bedrock Crag]]s in [[Morimar Basalt Fields]] during Colonization Reives. It is obtained from the quest [[A Stone's Throw Away]]. |
||
| + | * After this, it helps to get {{KeyItem}}[["Climbing"]] from the quest [[Hide and Go Peak]]. |
||
==="Fragmenting"=== |
==="Fragmenting"=== |
||
The {{KeyItem}}[["Fragmenting"]] key item allows players to damage [[Icy Palisade]]s during Colonization Reives. It is obtained from the quest [[Breaking the Ice]]. |
The {{KeyItem}}[["Fragmenting"]] key item allows players to damage [[Icy Palisade]]s during Colonization Reives. It is obtained from the quest [[Breaking the Ice]]. |
||
| + | === "Pulverizing" === |
||
| + | The {{KeyItem}}[["Pulverizing"]] key item allows players to damage [[Amaranth Barrier]]s during Colonization Reives. It is obtained from the quest [[Lerene's Lament]]. |
||
==Types of Reives== |
==Types of Reives== |
||
===Colonization Reive=== |
===Colonization Reive=== |
||
| Line 35: | Line 39: | ||
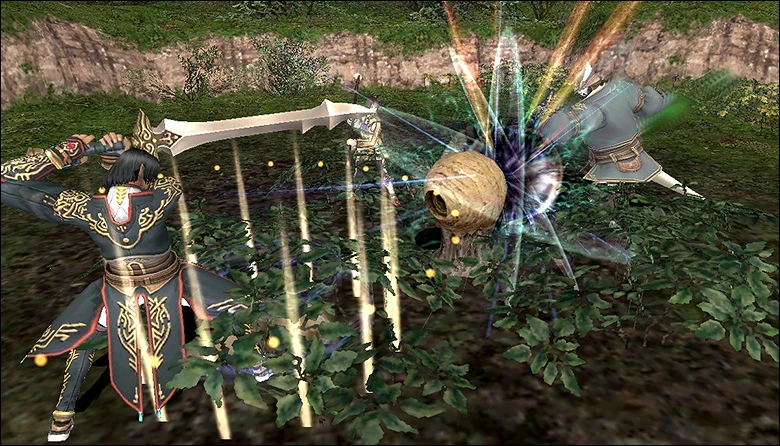
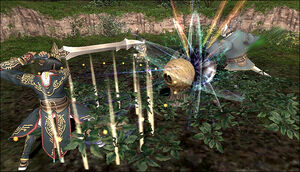
''Bushwhacking through a verdant jungle or over treacherous landscape can be a grueling experience in and of itself, so what happens when the landscape fights back? In this type of reive, you'll not only need to overcome hordes of bloodthirsty beasts, but also the terrain they're protecting!'' |
''Bushwhacking through a verdant jungle or over treacherous landscape can be a grueling experience in and of itself, so what happens when the landscape fights back? In this type of reive, you'll not only need to overcome hordes of bloodthirsty beasts, but also the terrain they're protecting!'' |
||
| − | Colonization reives involve clearing [[obstacles]] from the path. Victories in these reives allow players to access deeper areas in Adoulin. |
+ | Colonization reives involve clearing [[obstacles]] from the path. Victories in these reives allow players to access deeper areas in Adoulin. Obstacles respawn in one hour. |
The following colonization reives are known: |
The following colonization reives are known: |
||
| Line 41: | Line 45: | ||
====[[Ceizak Battlegrounds]]==== |
====[[Ceizak Battlegrounds]]==== |
||
| − | {| |
+ | {| style="background-color:#DAA520" border="0" cellpadding="1" cellspacing="1" width="100%" |
| − | |- |
+ | |- |
| − | ! |
+ | ! bgcolor="#DAA520" width="5%" |Obstacle |
| − | ! |
+ | ! bgcolor="#DAA520" width="5%" |Location |
| − | ! |
+ | ! bgcolor="#DAA520" width="10%" |Mobs |
| − | ! |
+ | ! bgcolor="#DAA520" width="15%" |Drops |
| − | |- |
+ | |- |
| − | |rowspan=4 |
+ | | rowspan="4" bgcolor="FFF8DC" |[[Knotted Root]] |
| − | |align="Center" |
+ | | align="Center" bgcolor="FFF8DC" |F/G-7 |
| − | | |
+ | | bgcolor="FFF8DC" |[[Floodplain Spider]] |
<!----------Drops-----------> |
<!----------Drops-----------> |
||
| − | |rowspan=4 |
+ | | rowspan="4" bgcolor="FFF8DC" | |
[[Arrowwood Log]]<br> |
[[Arrowwood Log]]<br> |
||
[[Ash Log]]<br> |
[[Ash Log]]<br> |
||
| Line 72: | Line 76: | ||
[[Simulacrum Segments]] |
[[Simulacrum Segments]] |
||
|- |
|- |
||
| − | |align="Center" |
+ | | align="Center" bgcolor="FFF8DC" |G/H-8 |
| − | | |
+ | | bgcolor="FFF8DC" |[[Lightfoot Lapinion]] |
|- |
|- |
||
| − | |align="Center" |
+ | | align="Center" bgcolor="FFF8DC" |I-8 |
| − | | |
+ | | bgcolor="FFF8DC" |[[Bounding Chapuli]] |
|- |
|- |
||
| − | |align="Center" |
+ | | align="Center" bgcolor="FFF8DC" |G-9 |
| − | | |
+ | | bgcolor="FFF8DC" |[[Lavender Twitherym]] |
|- |
|- |
||
|} |
|} |
||
| Line 85: | Line 89: | ||
====[[Yahse Hunting Grounds]]==== |
====[[Yahse Hunting Grounds]]==== |
||
| − | {| |
+ | {| style="background-color:#DAA520" border="0" cellpadding="1" cellspacing="1" width="100%" |
| − | |- |
+ | |- |
| − | ! |
+ | ! bgcolor="#DAA520" width="5%" |Obstacle |
| − | ! |
+ | ! bgcolor="#DAA520" width="5%" |Location |
| − | ! |
+ | ! bgcolor="#DAA520" width="10%" |Mobs |
| − | ! |
+ | ! bgcolor="#DAA520" width="15%" |Drops |
| − | |- |
+ | |- |
| − | |rowspan=5 |
+ | | rowspan="5" bgcolor="FFF8DC" |[[Knotted Root]] |
| − | |align="Center" |
+ | | align="Center" bgcolor="FFF8DC" |H-7 |
| − | | |
+ | | bgcolor="FFF8DC" |[[Temblor Beetle]] |
<!----------Drops-----------> |
<!----------Drops-----------> |
||
| − | |rowspan=5 |
+ | | rowspan="5" bgcolor="FFF8DC" |[[Arrowwood Log]]<br> |
[[Ash Log]]<br> |
[[Ash Log]]<br> |
||
[[Fruit Seeds]]<br> |
[[Fruit Seeds]]<br> |
||
| Line 108: | Line 112: | ||
[[Simulacrum Segments]] |
[[Simulacrum Segments]] |
||
|- |
|- |
||
| − | |align="Center" |
+ | | align="Center" bgcolor="FFF8DC" |H-8 |
| − | | |
+ | | bgcolor="FFF8DC" |[[Lancing Wasp]] |
|- |
|- |
||
| − | |align="Center" |
+ | | align="Center" bgcolor="FFF8DC" |J-8 |
| − | | |
+ | | bgcolor="FFF8DC" |[[Lancing Wasp]] |
|- |
|- |
||
| − | |align="Center" |
+ | | align="Center" bgcolor="FFF8DC" |G-9 |
| − | | |
+ | | bgcolor="FFF8DC" |[[Quivering Twitherym]] |
|- |
|- |
||
| − | |align="Center" |
+ | | align="Center" bgcolor="FFF8DC" |I-9 |
| − | | |
+ | | bgcolor="FFF8DC" |[[Shrubshredder Chapuli]] |
|- |
|- |
||
|} |
|} |
||
| Line 124: | Line 128: | ||
====[[Sih Gates]]==== |
====[[Sih Gates]]==== |
||
| − | {| |
+ | {| style="background-color:#DAA520" border="0" cellpadding="1" cellspacing="1" width="100%" |
| − | |- |
+ | |- |
| − | ! |
+ | ! bgcolor="#DAA520" width="5%" |Obstacle |
| − | ! |
+ | ! bgcolor="#DAA520" width="5%" |Location |
| − | ! |
+ | ! bgcolor="#DAA520" width="10%" |Mobs |
| − | ! |
+ | ! bgcolor="#DAA520" width="15%" |Drops |
| − | |- |
+ | |- |
| − | |rowspan=2 |
+ | | rowspan="2" bgcolor="FFF8DC" |[[Knotted Root]] |
| − | |align="Center" |
+ | | align="Center" bgcolor="FFF8DC" |H-6/7 |
| − | | |
+ | | bgcolor="FFF8DC" |[[Cthonic Chapuli]]<br> |
[[Fetid Twitherym]] |
[[Fetid Twitherym]] |
||
<!----------Drops-----------> |
<!----------Drops-----------> |
||
| − | |rowspan=2 |
+ | | rowspan="2" bgcolor="FFF8DC" | |
[[Chapuli Wing]]<br> |
[[Chapuli Wing]]<br> |
||
[[Cyclone Cotton]]<br> |
[[Cyclone Cotton]]<br> |
||
| + | [[Little Worm]]<br> |
||
[[Mythril Ore]]<br> |
[[Mythril Ore]]<br> |
||
[[Mushroom Locust]]<br> |
[[Mushroom Locust]]<br> |
||
[[Orpiment]]<br> |
[[Orpiment]]<br> |
||
[[Pebble]]<br> |
[[Pebble]]<br> |
||
| + | [[Purple Polypore]]<br> |
||
[[Silver Ore]]<br> |
[[Silver Ore]]<br> |
||
[[Sobbing Fungus]]<br> |
[[Sobbing Fungus]]<br> |
||
| Line 150: | Line 156: | ||
[[Simulacrum Segments]] |
[[Simulacrum Segments]] |
||
|- |
|- |
||
| − | |align="Center" |
+ | | align="Center" bgcolor="FFF8DC" |I-8/9 |
| − | | |
+ | | bgcolor="FFF8DC" |[[Mighty Craklaw]]<br> |
[[Somber Obdella]] |
[[Somber Obdella]] |
||
|- |
|- |
||
| Line 157: | Line 163: | ||
====[[Foret de Hennetiel]]==== |
====[[Foret de Hennetiel]]==== |
||
| − | {| |
+ | {| style="background-color:#DAA520" border="0" cellpadding="1" cellspacing="1" width="100%" |
| − | |- |
+ | |- |
| − | ! |
+ | ! bgcolor="#DAA520" width="5%" |Obstacle |
| − | ! |
+ | ! bgcolor="#DAA520" width="5%" |Location |
| − | ! |
+ | ! bgcolor="#DAA520" width="10%" |Mobs |
| − | ! |
+ | ! bgcolor="#DAA520" width="15%" |Drops |
| − | |- |
+ | |- |
| − | |rowspan=5 |
+ | | rowspan="5" bgcolor="FFF8DC" |[[Broadleaf Palm]] |
| − | |align="Center" |
+ | | align="Center" bgcolor="FFF8DC" |G-6 |
| − | | |
+ | | bgcolor="FFF8DC" |[[Blood Toad]]<br> |
[[Cinder Crab]] |
[[Cinder Crab]] |
||
<!----------Drops-----------> |
<!----------Drops-----------> |
||
| − | |rowspan=5 |
+ | | rowspan="5" bgcolor="FFF8DC" | |
[[Gnatbane]]<br> |
[[Gnatbane]]<br> |
||
[[Hemlock]]<br> |
[[Hemlock]]<br> |
||
| Line 182: | Line 188: | ||
[[Simulacrum Segments]] |
[[Simulacrum Segments]] |
||
|- |
|- |
||
| − | |align="Center" |
+ | | align="Center" bgcolor="FFF8DC" |H-7 |
| − | | |
+ | | bgcolor="FFF8DC" |[[Blood Toad]]<br> |
[[Cinder Crab]] |
[[Cinder Crab]] |
||
|- |
|- |
||
| − | |align="Center" |
+ | | align="Center" bgcolor="FFF8DC" |E-8 |
| − | | |
+ | | bgcolor="FFF8DC" |[[Craklaw]]<br> |
[[Primrose Jagil]] |
[[Primrose Jagil]] |
||
|- |
|- |
||
| − | |align="Center" |
+ | | align="Center" bgcolor="FFF8DC" |G-9/10 |
| − | | |
+ | | bgcolor="FFF8DC" |[[Primrose Jagil]]<br> |
[[Wetlands Orobon]] |
[[Wetlands Orobon]] |
||
|- |
|- |
||
| − | |align="Center" |
+ | | align="Center" bgcolor="FFF8DC" |I-10 |
| − | | |
+ | | bgcolor="FFF8DC" |[[Primrose Jagil]]<br> |
[[Wetlands Orobon]] |
[[Wetlands Orobon]] |
||
|- |
|- |
||
| Line 202: | Line 208: | ||
====[[Moh Gates]]==== |
====[[Moh Gates]]==== |
||
| − | {| |
+ | {| style="background-color:#DAA520" border="0" cellpadding="1" cellspacing="1" width="100%" |
| − | |- |
+ | |- |
| − | ! |
+ | ! bgcolor="#DAA520" width="5%" |Obstacle |
| − | ! |
+ | ! bgcolor="#DAA520" width="5%" |Location |
| − | ! |
+ | ! bgcolor="#DAA520" width="10%" |Mobs |
| − | ! |
+ | ! bgcolor="#DAA520" width="15%" |Drops |
| − | |- |
+ | |- |
| − | |rowspan=2 |
+ | | rowspan="2" bgcolor="FFF8DC" |[[Knotted Root]] |
| − | |align="Center" |
+ | | align="Center" bgcolor="FFF8DC" |I-7 |
| − | | |
+ | | bgcolor="FFF8DC" |[[Ruby Raptor]]<br> |
[[Skittish Matamata]] |
[[Skittish Matamata]] |
||
<!----------Drops-----------> |
<!----------Drops-----------> |
||
| − | |rowspan=2 |
+ | | rowspan="2" bgcolor="FFF8DC" | |
[[Bomb Ash]]<br> |
[[Bomb Ash]]<br> |
||
[[Durium Ore]]<br> |
[[Durium Ore]]<br> |
||
| Line 224: | Line 230: | ||
[[Simulacrum Segments]] |
[[Simulacrum Segments]] |
||
|- |
|- |
||
| − | |align="Center" |
+ | | align="Center" bgcolor="FFF8DC" |G-8 |
| − | | |
+ | | bgcolor="FFF8DC" |[[Scoriaceous Clot]]<br> |
[[Skittish Matamata]] |
[[Skittish Matamata]] |
||
|- |
|- |
||
| Line 232: | Line 238: | ||
====[[Morimar Basalt Fields]]==== |
====[[Morimar Basalt Fields]]==== |
||
| − | {| |
+ | {| style="background-color:#DAA520" border="0" cellpadding="1" cellspacing="1" width="100%" |
| − | |- |
+ | |- |
| − | ! |
+ | ! bgcolor="#DAA520" width="5%" |Obstacle |
| − | ! |
+ | ! bgcolor="#DAA520" width="5%" |Location |
| − | ! |
+ | ! bgcolor="#DAA520" width="10%" |Mobs |
| − | ! |
+ | ! bgcolor="#DAA520" width="15%" |Drops |
| − | |- |
+ | |- |
| − | |rowspan=7 |
+ | | rowspan="7" bgcolor="FFF8DC" |[[Bedrock Crag]] |
| − | |align="Center" |
+ | | align="Center" bgcolor="FFF8DC" |F/G-6 |
| − | | |
+ | | bgcolor="FFF8DC" |[[Matamata]]<br> |
[[Snaggletooth Raptor]] |
[[Snaggletooth Raptor]] |
||
<!----------Drops-----------> |
<!----------Drops-----------> |
||
| − | |rowspan=7 |
+ | | rowspan="7" bgcolor="FFF8DC" | |
[[Alizarin Yggrete Shard]] [[Alizarin Yggrete ShardI|I]], |
[[Alizarin Yggrete Shard]] [[Alizarin Yggrete ShardI|I]], |
||
[[Alizarin Yggrete Shard II|II]], |
[[Alizarin Yggrete Shard II|II]], |
||
| Line 254: | Line 260: | ||
[[Simulacrum Segments]] |
[[Simulacrum Segments]] |
||
|- |
|- |
||
| − | |align="Center" |
+ | | align="Center" bgcolor="FFF8DC" |H-8 |
| − | | |
+ | | bgcolor="FFF8DC" |MOB<br> |
MOB |
MOB |
||
|- |
|- |
||
| − | |align="Center" |
+ | | align="Center" bgcolor="FFF8DC" |I-8 |
| − | | |
+ | | bgcolor="FFF8DC" |[[Matamata]]<br> |
[[Snaggletooth Raptor]] |
[[Snaggletooth Raptor]] |
||
|- |
|- |
||
| − | |align="Center" |
+ | | align="Center" bgcolor="FFF8DC" |F-9 |
| − | | |
+ | | bgcolor="FFF8DC" |[[Basalt Lizard]]<br> |
[[Matamata]] |
[[Matamata]] |
||
|- |
|- |
||
| − | |align="Center" |
+ | | align="Center" bgcolor="FFF8DC" |F/G-9 |
| − | | |
+ | | bgcolor="FFF8DC" |[[Basalt Lizard]]<br> |
[[Matamata]] |
[[Matamata]] |
||
|- |
|- |
||
| − | |align="Center" |
+ | | align="Center" bgcolor="FFF8DC" |H-10 |
| − | | |
+ | | bgcolor="FFF8DC" |[[Basalt Lizard]]<br> |
[[Matamata]] |
[[Matamata]] |
||
|- |
|- |
||
| − | |align="Center" |
+ | | align="Center" bgcolor="FFF8DC" |G-11 |
| − | | |
+ | | bgcolor="FFF8DC" |[[Basalt Lizard]]<br> |
[[Matamata]] |
[[Matamata]] |
||
|- |
|- |
||
| Line 283: | Line 289: | ||
====[[Cirdas Caverns]]==== |
====[[Cirdas Caverns]]==== |
||
| − | {| |
+ | {| style="background-color:#DAA520" border="0" cellpadding="1" cellspacing="1" width="100%" |
| − | |- |
+ | |- |
| − | ! |
+ | ! bgcolor="#DAA520" width="5%" |Obstacle |
| − | ! |
+ | ! bgcolor="#DAA520" width="5%" |Location |
| − | ! |
+ | ! bgcolor="#DAA520" width="10%" |Mobs |
| − | ! |
+ | ! bgcolor="#DAA520" width="15%" |Drops |
| − | |- |
+ | |- |
| − | |rowspan=6 |
+ | | rowspan="6" bgcolor="FFF8DC" |[[Knotted Root]] |
| − | |align="Center" |
+ | | align="Center" bgcolor="FFF8DC" |I-6 |
| − | | |
+ | | bgcolor="FFF8DC" |[[Acuex]]<br> |
[[Tooth Cave Tarantula]](East)<br> |
[[Tooth Cave Tarantula]](East)<br> |
||
[[Tormented Obdella]](West) |
[[Tormented Obdella]](West) |
||
<!----------Drops-----------> |
<!----------Drops-----------> |
||
| − | |rowspan=6 |
+ | | rowspan="6" bgcolor="FFF8DC" | |
[[Gold Ore]]<br> |
[[Gold Ore]]<br> |
||
[[Mythril Ore]]<br> |
[[Mythril Ore]]<br> |
||
| Line 305: | Line 311: | ||
[[Simulacrum Segments]] |
[[Simulacrum Segments]] |
||
|- |
|- |
||
| − | |align="Center" |
+ | | align="Center" bgcolor="FFF8DC" |F-8 |
| − | | |
+ | | bgcolor="FFF8DC" |[[Acuex]]<br> |
[[Oregorger Worm]] |
[[Oregorger Worm]] |
||
|- |
|- |
||
| − | |align="Center" |
+ | | align="Center" bgcolor="FFF8DC" |L-8 |
| − | | |
+ | | bgcolor="FFF8DC" |[[Acuex]](West)<br> |
[[Molten Clot]](West)<br> |
[[Molten Clot]](West)<br> |
||
[[Umbril Shadewarrior]](East) |
[[Umbril Shadewarrior]](East) |
||
|- |
|- |
||
| − | |align="Center" |
+ | | align="Center" bgcolor="FFF8DC" |E-9 |
| − | | |
+ | | bgcolor="FFF8DC" |[[Acuex]]<br> |
[[Sordid Lizard]] |
[[Sordid Lizard]] |
||
|- |
|- |
||
| − | |align="Center" |
+ | | align="Center" bgcolor="FFF8DC" |J-9 |
| − | | |
+ | | bgcolor="FFF8DC" |[[Acuex]](North)<br> |
[[Frightful Funguar]](South)<br> |
[[Frightful Funguar]](South)<br> |
||
[[Slag Mandragora]](North) |
[[Slag Mandragora]](North) |
||
|- |
|- |
||
| − | |align="Center" |
+ | | align="Center" bgcolor="FFF8DC" |H-10 |
| − | | |
+ | | bgcolor="FFF8DC" |[[Putrid Funguar]](North)<br> |
[[Pyre Bat]](South) |
[[Pyre Bat]](South) |
||
|- |
|- |
||
| Line 331: | Line 337: | ||
====[[Marjami Ravine]]==== |
====[[Marjami Ravine]]==== |
||
| − | {| |
+ | {| style="background-color:#DAA520" border="0" cellpadding="1" cellspacing="1" width="100%" |
| − | |- |
+ | |- |
| − | ! |
+ | ! bgcolor="#DAA520" width="5%" |Obstacle |
| − | ! |
+ | ! bgcolor="#DAA520" width="5%" |Location |
| − | ! |
+ | ! bgcolor="#DAA520" width="10%" |Mobs |
| − | ! |
+ | ! bgcolor="#DAA520" width="15%" |Drops |
| − | |- |
+ | |- |
| − | |rowspan=7 |
+ | | rowspan="7" bgcolor="FFF8DC" |[[Monolithic Boulder]] |
| − | |align="Center" |
+ | | align="Center" bgcolor="FFF8DC" |D-7 |
| − | | |
+ | | bgcolor="FFF8DC" |[[Gerent Apkallu]]<br> |
[[Preening Tulfaire]] |
[[Preening Tulfaire]] |
||
<!----------Drops-----------> |
<!----------Drops-----------> |
||
| − | |rowspan=7 |
+ | | rowspan="7" bgcolor="FFF8DC" | |
[[Darksteel Ore]]<br> |
[[Darksteel Ore]]<br> |
||
[[Iron Sand]]<br> |
[[Iron Sand]]<br> |
||
| Line 355: | Line 361: | ||
[[Level 99 J.S.E. Capes]] |
[[Level 99 J.S.E. Capes]] |
||
|- |
|- |
||
| − | |align="Center" |
+ | | align="Center" bgcolor="FFF8DC" |K-8 |
| − | | |
+ | | bgcolor="FFF8DC" |[[Embattled Roc]]<br> |
[[Resilient Colibri]] |
[[Resilient Colibri]] |
||
|- |
|- |
||
| − | |align="Center" |
+ | | align="Center" bgcolor="FFF8DC" |F-9 |
| − | | |
+ | | bgcolor="FFF8DC" |[[Preening Tulfaire]]<br> |
[[Resilient Colibri]] |
[[Resilient Colibri]] |
||
|- |
|- |
||
| − | |align="Center" |
+ | | align="Center" bgcolor="FFF8DC" |L-9 |
| − | | |
+ | | bgcolor="FFF8DC" |[[Precipice Vulture]](North)<br> |
[[Preening Tulfaire]]<br> |
[[Preening Tulfaire]]<br> |
||
[[Resilient Colibri]](South) |
[[Resilient Colibri]](South) |
||
|- |
|- |
||
| − | |align="Center" |
+ | | align="Center" bgcolor="FFF8DC" |G-11 |
| − | | |
+ | | bgcolor="FFF8DC" |[[Precipice Vulture]]<br> |
[[Resilient Colibri]] |
[[Resilient Colibri]] |
||
|- |
|- |
||
| − | |align="Center" |
+ | | align="Center" bgcolor="FFF8DC" |I-11 |
| − | | |
+ | | bgcolor="FFF8DC" |[[Gerent Apkallu]]<br> |
[[Embattled Roc]] |
[[Embattled Roc]] |
||
|- |
|- |
||
| − | |align="Center" |
+ | | align="Center" bgcolor="FFF8DC" |K-11 |
| − | | |
+ | | bgcolor="FFF8DC" |[[Precipice Vulture]]<br> |
[[Preening Tulfaire]] |
[[Preening Tulfaire]] |
||
|- |
|- |
||
| Line 384: | Line 390: | ||
====[[Yorcia Weald]]==== |
====[[Yorcia Weald]]==== |
||
| − | {| |
+ | {| style="background-color:#DAA520" border="0" cellpadding="1" cellspacing="1" width="100%" |
| − | |- |
+ | |- |
| − | ! |
+ | ! bgcolor="#DAA520" width="5%" |Obstacle |
| − | ! |
+ | ! bgcolor="#DAA520" width="5%" |Location |
| − | ! |
+ | ! bgcolor="#DAA520" width="10%" |Mobs |
| − | ! |
+ | ! bgcolor="#DAA520" width="15%" |Drops |
| − | |- |
+ | |- |
| − | |rowspan=4 |
+ | | rowspan="4" bgcolor="FFF8DC" |[[Gnarled Rampart]] |
| − | |align="Center" |
+ | | align="Center" bgcolor="FFF8DC" |I-6 |
| − | | |
+ | | bgcolor="FFF8DC" |[[Rustled Panopt]]<br> |
[[Sloshmouth Snapweed]] |
[[Sloshmouth Snapweed]] |
||
<!----------Drops-----------> |
<!----------Drops-----------> |
||
| − | |rowspan=4 |
+ | | rowspan="4" bgcolor="FFF8DC" | |
[[Akaso]]<br> |
[[Akaso]]<br> |
||
[[Arborfruit Seed]]<br> |
[[Arborfruit Seed]]<br> |
||
| Line 413: | Line 419: | ||
[[Level 99 J.S.E. Capes]] |
[[Level 99 J.S.E. Capes]] |
||
|- |
|- |
||
| − | |align="Center" |
+ | | align="Center" bgcolor="FFF8DC" |G-7 |
| − | | |
+ | | bgcolor="FFF8DC" |[[Crabapple Treant]]<br> |
[[Soiled Funguar]] |
[[Soiled Funguar]] |
||
|- |
|- |
||
| − | |align="Center" |
+ | | align="Center" bgcolor="FFF8DC" |H-10 |
| − | | |
+ | | bgcolor="FFF8DC" |[[Twitherym Windstorm]]<br> |
[[Uprooted Sapling]] |
[[Uprooted Sapling]] |
||
|- |
|- |
||
| − | |align="Center" |
+ | | align="Center" bgcolor="FFF8DC" |J-9 |
| − | | |
+ | | bgcolor="FFF8DC" |[[Furfluff Lapinion]]<br> |
[[Larkish Opo-opo]] |
[[Larkish Opo-opo]] |
||
|- |
|- |
||
| Line 429: | Line 435: | ||
====[[Dho Gates]]==== |
====[[Dho Gates]]==== |
||
| − | {| |
+ | {| style="background-color:#DAA520" border="0" cellpadding="1" cellspacing="1" width="100%" |
| − | |- |
+ | |- |
| − | ! |
+ | ! bgcolor="#DAA520" width="5%" |Obstacle |
| − | ! |
+ | ! bgcolor="#DAA520" width="5%" |Location |
| − | ! |
+ | ! bgcolor="#DAA520" width="10%" |Mobs |
| − | ! |
+ | ! bgcolor="#DAA520" width="15%" |Drops |
| − | |- |
+ | |- |
| − | |rowspan=2 |
+ | | rowspan="2" bgcolor="FFF8DC" |[[Knotted Root]] |
| − | |align="Center" |
+ | | align="Center" bgcolor="FFF8DC" |H/I-7 |
| − | | |
+ | | bgcolor="FFF8DC" |[[Crevice Tarichuk]]<br> |
[[Velkk Manipulator]](East)<br> |
[[Velkk Manipulator]](East)<br> |
||
[[Velkk Ravager]](West) |
[[Velkk Ravager]](West) |
||
<!----------Drops-----------> |
<!----------Drops-----------> |
||
| − | |rowspan=2 |
+ | | rowspan="2" bgcolor="FFF8DC" | |
[[Crab Shell]]<br> |
[[Crab Shell]]<br> |
||
[[Gold Ore]]<br> |
[[Gold Ore]]<br> |
||
| Line 451: | Line 457: | ||
[[Velkk Necklace]]<br> |
[[Velkk Necklace]]<br> |
||
[[Simulacrum Segments]] |
[[Simulacrum Segments]] |
||
| + | |||
| + | [[Level 99 J.S.E. Capes]] |
||
|- |
|- |
||
| − | |align="Center" |
+ | | align="Center" bgcolor="FFF8DC" |J-9/10 |
| − | | |
+ | | bgcolor="FFF8DC" |[[Trogloptera]]<br> |
[[Velkk Punisher]](North)<br> |
[[Velkk Punisher]](North)<br> |
||
[[Velkk Vaticinator]](South) |
[[Velkk Vaticinator]](South) |
||
| Line 461: | Line 469: | ||
====[[Woh Gates]]==== |
====[[Woh Gates]]==== |
||
| − | {| |
+ | {| style="background-color:#DAA520" border="0" cellpadding="1" cellspacing="1" width="100%" |
| − | |- |
+ | |- |
| − | ! |
+ | ! bgcolor="#DAA520" width="5%" |Obstacle |
| − | ! |
+ | ! bgcolor="#DAA520" width="5%" |Location |
| − | ! |
+ | ! bgcolor="#DAA520" width="10%" |Mobs |
| − | ! |
+ | ! bgcolor="#DAA520" width="15%" |Drops |
| − | |- |
+ | |- |
| − | |rowspan=2 |
+ | | rowspan="2" bgcolor="FFF8DC" |[[Knotted Root]] |
| − | |align="Center" |
+ | | align="Center" bgcolor="FFF8DC" |H-7 |
| − | | |
+ | | bgcolor="FFF8DC" |[[Draftrider Bat]] |
| − | |rowspan=2 |
+ | | rowspan="2" bgcolor="FFF8DC" | |
| + | [[Darksteel Ore]]<br> |
||
[[H-P Bayld]]<br> |
[[H-P Bayld]]<br> |
||
[[Iron Ore]]<br> |
[[Iron Ore]]<br> |
||
| Line 480: | Line 489: | ||
[[Level 99 J.S.E. Capes]] |
[[Level 99 J.S.E. Capes]] |
||
|- |
|- |
||
| − | |align="Center" |
+ | | align="Center" bgcolor="FFF8DC" |H-9 |
| − | | |
+ | | bgcolor="FFF8DC" |[[Stonesoftener Acuex]] |
|- |
|- |
||
|} |
|} |
||
| Line 487: | Line 496: | ||
====[[Kamihr Drifts]]==== |
====[[Kamihr Drifts]]==== |
||
| − | {| |
+ | {| style="background-color:#DAA520" border="0" cellpadding="1" cellspacing="1" width="100%" |
| − | |- |
+ | |- |
| − | ! |
+ | ! bgcolor="#DAA520" width="5%" |Obstacle |
| − | ! |
+ | ! bgcolor="#DAA520" width="5%" |Location |
| − | ! |
+ | ! bgcolor="#DAA520" width="10%" |Mobs |
| − | ! |
+ | ! bgcolor="#DAA520" width="15%" |Drops |
| − | |- |
+ | |- |
| − | |rowspan=4 |
+ | | rowspan="4" bgcolor="FFF8DC" |[[Icy Palisade]] |
| − | |align="Center" |
+ | | align="Center" bgcolor="FFF8DC" |F-7 |
| − | | |
+ | | bgcolor="FFF8DC" |[[Alpine Rabbit]](East)<br> |
[[Pungent Ovim]](West)<br> |
[[Pungent Ovim]](West)<br> |
||
[[Territorial Lucerewe]] |
[[Territorial Lucerewe]] |
||
<!----------Drops-----------> |
<!----------Drops-----------> |
||
| − | |rowspan=4 |
+ | | rowspan="4" bgcolor="FFF8DC" | |
[[Aht Urhgan Brass]]<br> |
[[Aht Urhgan Brass]]<br> |
||
[[Flint Stone]]<br> |
[[Flint Stone]]<br> |
||
| Line 509: | Line 518: | ||
[[Meteorite]]<br> |
[[Meteorite]]<br> |
||
[[Silver Ore]]<br> |
[[Silver Ore]]<br> |
||
| + | [[Oversized Fang]]<br> |
||
[[Simulacrum Segments]]<br> |
[[Simulacrum Segments]]<br> |
||
[[Level 99 J.S.E. Capes]] |
[[Level 99 J.S.E. Capes]] |
||
|- |
|- |
||
| − | |align="Center" |
+ | | align="Center" bgcolor="FFF8DC" |H-8 |
| − | | |
+ | | bgcolor="FFF8DC" |[[Chilblain Snoll]]<br> |
[[Umberwood Tiger]] |
[[Umberwood Tiger]] |
||
|- |
|- |
||
| − | |align="Center" |
+ | | align="Center" bgcolor="FFF8DC" |I/J-9 |
| − | | |
+ | | bgcolor="FFF8DC" |[[Raptor Nightstalker]]<br> |
[[Sharptusk Raaz]] |
[[Sharptusk Raaz]] |
||
|- |
|- |
||
| − | |align="Center" |
+ | | align="Center" bgcolor="FFF8DC" |H/I-10 |
| − | | |
+ | | bgcolor="FFF8DC" |[[Alpine Rabbit]]<br> |
[[Territorial Lucerewe]] |
[[Territorial Lucerewe]] |
||
|- |
|- |
||
| Line 528: | Line 538: | ||
====[[Outer Ra'Kaznar]]==== |
====[[Outer Ra'Kaznar]]==== |
||
| − | {| |
+ | {| style="background-color:#DAA520" border="0" cellpadding="1" cellspacing="1" width="100%" |
| − | |- |
+ | |- |
| − | ! |
+ | ! bgcolor="#DAA520" width="5%" |Obstacle |
| − | ! |
+ | ! bgcolor="#DAA520" width="5%" |Location |
| − | ! |
+ | ! bgcolor="#DAA520" width="10%" |Mobs |
| − | ! |
+ | ! bgcolor="#DAA520" width="15%" |Drops |
| − | |- |
+ | |- |
| − | |rowspan=4 |
+ | | rowspan="4" bgcolor="FFF8DC" |[[Amaranth Barrier]] |
| − | |align="Center" |
+ | | align="Center" bgcolor="FFF8DC" |F/G-6 |
| − | | |
+ | | bgcolor="FFF8DC" | |
[[Vengeful Shunned]] |
[[Vengeful Shunned]] |
||
<!----------Drops-----------> |
<!----------Drops-----------> |
||
| − | |rowspan=4 |
+ | | rowspan="4" bgcolor="FFF8DC" | |
[[Dullahan Armor]]<br> |
[[Dullahan Armor]]<br> |
||
[[Gold Ore]]<br> |
[[Gold Ore]]<br> |
||
| Line 546: | Line 556: | ||
[[Iron Ore]]<br> |
[[Iron Ore]]<br> |
||
[[Meteorite]]<br> |
[[Meteorite]]<br> |
||
| + | [[Orichalcum Ore]]<br> |
||
[[Pebble]]<br> |
[[Pebble]]<br> |
||
[[Ra'Kaznar Ore]]<br> |
[[Ra'Kaznar Ore]]<br> |
||
| − | [[Simulacrum Segments]] |
+ | [[Simulacrum Segments]]<br> |
| + | [[:Category:Level 99 J.S.E. Capes|Level 99 J.S.E. Capes]] |
||
|- |
|- |
||
| − | |align="Center" |
+ | | align="Center" bgcolor="FFF8DC" |J-6/7 |
| − | | |
+ | | bgcolor="FFF8DC" | |
[[Vengeful Shunned]] |
[[Vengeful Shunned]] |
||
|- |
|- |
||
| − | |align="Center" |
+ | | align="Center" bgcolor="FFF8DC" |F-10 |
| − | | |
+ | | bgcolor="FFF8DC" | |
[[Vengeful Shunned]] |
[[Vengeful Shunned]] |
||
|- |
|- |
||
| − | |align="Center" |
+ | | align="Center" bgcolor="FFF8DC" |J-10 |
| − | | |
+ | | bgcolor="FFF8DC" | |
[[Vengeful Shunned]] |
[[Vengeful Shunned]] |
||
|- |
|- |
||
| Line 566: | Line 578: | ||
====[[Ra'Kaznar Inner Court]]==== |
====[[Ra'Kaznar Inner Court]]==== |
||
| − | {| |
+ | {| style="background-color:#DAA520" border="0" cellpadding="1" cellspacing="1" width="100%" |
| − | |- |
+ | |- |
| − | ! |
+ | ! bgcolor="#DAA520" width="5%" |Obstacle |
| − | ! |
+ | ! bgcolor="#DAA520" width="5%" |Location |
| − | ! |
+ | ! bgcolor="#DAA520" width="10%" |Mobs |
| − | ! |
+ | ! bgcolor="#DAA520" width="15%" |Drops |
| − | |- |
+ | |- |
| − | |rowspan=4 |
+ | | rowspan="4" bgcolor="FFF8DC" |[[Heliotrope Barrier]] |
| − | |align="Center" |
+ | | align="Center" bgcolor="FFF8DC" |F-6 |
| − | | |
+ | | bgcolor="FFF8DC" | |
[[Indomitable Spurned]] |
[[Indomitable Spurned]] |
||
| − | |rowspan=4 |
+ | | rowspan="4" bgcolor="FFF8DC" | |
<!----------Drops-----------> |
<!----------Drops-----------> |
||
| + | [[Faithful's Torso III]]<br> |
||
| − | {{Information}} |
||
| + | [[Meteorite]]<br> |
||
| + | [[Pebble]] |
||
|- |
|- |
||
| − | |align="Center" |
+ | | align="Center" bgcolor="FFF8DC" |K-6 |
| − | | |
+ | | bgcolor="FFF8DC" | |
[[Indomitable Spurned]] |
[[Indomitable Spurned]] |
||
|- |
|- |
||
| − | |align="Center" |
+ | | align="Center" bgcolor="FFF8DC" |F-11 |
| − | | |
+ | | bgcolor="FFF8DC" | |
[[Indomitable Spurned]] |
[[Indomitable Spurned]] |
||
|- |
|- |
||
| − | |align="Center" |
+ | | align="Center" bgcolor="FFF8DC" |K-11 |
| − | | |
+ | | bgcolor="FFF8DC" | |
[[Indomitable Spurned]] |
[[Indomitable Spurned]] |
||
|- |
|- |
||
| Line 605: | Line 619: | ||
====[[Ceizak Battlegrounds]]==== |
====[[Ceizak Battlegrounds]]==== |
||
| − | {| |
+ | {| style="background-color:#DAA520" border="0" cellpadding="1" cellspacing="1" width="100%" |
| − | |- |
+ | |- |
| − | ! |
+ | ! bgcolor="#DAA520" width="5%" |Lair |
| − | ! |
+ | ! bgcolor="#DAA520" width="5%" |Location |
| − | ! |
+ | ! bgcolor="#DAA520" width="10%" |Mobs |
| − | ! |
+ | ! bgcolor="#DAA520" width="15%" |Drops |
| − | |- |
+ | |- |
| − | |rowspan=5 |
+ | | rowspan="5" bgcolor="FFF8DC" |[[Wasp Nest]] |
| − | |align="Center" |
+ | | align="Center" bgcolor="FFF8DC" |H-6/7 |
| − | | |
+ | | bgcolor="FFF8DC" |[[Bounding Chapuli]]<br> |
[[Waggling Wasp]] |
[[Waggling Wasp]] |
||
<!----------Drops-----------> |
<!----------Drops-----------> |
||
| − | |rowspan=5 |
+ | | rowspan="5" bgcolor="FFF8DC" | |
[[Arrowwood Log]]<br> |
[[Arrowwood Log]]<br> |
||
[[Ash Log]]<br> |
[[Ash Log]]<br> |
||
| Line 638: | Line 652: | ||
[[Simulacrum Segments]] |
[[Simulacrum Segments]] |
||
|- |
|- |
||
| − | |align="Center" |
+ | | align="Center" bgcolor="FFF8DC" |J-6/7 |
| − | | |
+ | | bgcolor="FFF8DC" |[[Lightfoot Lapinion]]<br> |
[[Waggling Wasp]] |
[[Waggling Wasp]] |
||
|- |
|- |
||
| − | |align="Center" |
+ | | align="Center" bgcolor="FFF8DC" |F-7 |
| − | | |
+ | | bgcolor="FFF8DC" |[[Floodplain Spider]]<br> |
[[Waggling Wasp]] |
[[Waggling Wasp]] |
||
|- |
|- |
||
| − | |align="Center" |
+ | | align="Center" bgcolor="FFF8DC" |F-8/9 |
| − | | |
+ | | bgcolor="FFF8DC" |[[Prosperous Luckybug]]<br> |
[[Waggling Wasp]] |
[[Waggling Wasp]] |
||
|- |
|- |
||
| − | |align="Center" |
+ | | align="Center" bgcolor="FFF8DC" |H-10/11 |
| − | | |
+ | | bgcolor="FFF8DC" |[[Molted Mantis]]<br> |
[[Waggling Wasp]] |
[[Waggling Wasp]] |
||
|- |
|- |
||
| Line 658: | Line 672: | ||
====[[Yahse Hunting Grounds]]==== |
====[[Yahse Hunting Grounds]]==== |
||
| − | {| |
+ | {| style="background-color:#DAA520" border="0" cellpadding="1" cellspacing="1" width="100%" |
| − | |- |
+ | |- |
| − | ! |
+ | ! bgcolor="#DAA520" width="5%" |Lair |
| − | ! |
+ | ! bgcolor="#DAA520" width="5%" |Location |
| − | ! |
+ | ! bgcolor="#DAA520" width="10%" |Mobs |
| − | ! |
+ | ! bgcolor="#DAA520" width="15%" |Drops |
| − | |- |
+ | |- |
| − | |rowspan=5 |
+ | | rowspan="5" bgcolor="FFF8DC" |[[Wasp Nest]] |
| − | |align="Center" |
+ | | align="Center" bgcolor="FFF8DC" |H/I-6 |
| − | | |
+ | | bgcolor="FFF8DC" |[[Cerise Wasp]]<br> |
[[Thrashing Mantis]] |
[[Thrashing Mantis]] |
||
<!----------Drops-----------> |
<!----------Drops-----------> |
||
| − | |rowspan=5 |
+ | | rowspan="5" bgcolor="FFF8DC" | |
[[Arrowwood Log]]<br> |
[[Arrowwood Log]]<br> |
||
[[Celadon Yggrete Shard]] [[Celadon Yggrete Shard III|III]], |
[[Celadon Yggrete Shard]] [[Celadon Yggrete Shard III|III]], |
||
| Line 683: | Line 697: | ||
[[Wildgrass Seeds]] |
[[Wildgrass Seeds]] |
||
|- |
|- |
||
| − | |align="Center" |
+ | | align="Center" bgcolor="FFF8DC" |J-6 |
| − | | |
+ | | bgcolor="FFF8DC" |[[Cerise Wasp]]<br> |
[[Temblor Beetle]] |
[[Temblor Beetle]] |
||
|- |
|- |
||
| − | |align="Center" |
+ | | align="Center" bgcolor="FFF8DC" |F-7 |
| − | | |
+ | | bgcolor="FFF8DC" |[[Cerise Wasp]]<br> |
[[Shrubshredder Chapuli]] |
[[Shrubshredder Chapuli]] |
||
|- |
|- |
||
| − | |align="Center" |
+ | | align="Center" bgcolor="FFF8DC" |F-8 |
| − | | |
+ | | bgcolor="FFF8DC" |[[Cerise Wasp]]<br> |
[[Quivering Twitherym]] |
[[Quivering Twitherym]] |
||
|- |
|- |
||
| − | |align="Center" |
+ | | align="Center" bgcolor="FFF8DC" |H/I-9 |
| − | | |
+ | | bgcolor="FFF8DC" |[[Cerise Wasp]]<br> |
[[Red Dropwing]] |
[[Red Dropwing]] |
||
|- |
|- |
||
| Line 703: | Line 717: | ||
====[[Foret de Hennetiel]]==== |
====[[Foret de Hennetiel]]==== |
||
| − | {| |
+ | {| style="background-color:#DAA520" border="0" cellpadding="1" cellspacing="1" width="100%" |
| − | |- |
+ | |- |
| − | ! |
+ | ! bgcolor="#DAA520" width="5%" |Lair |
| − | ! |
+ | ! bgcolor="#DAA520" width="5%" |Location |
| − | ! |
+ | ! bgcolor="#DAA520" width="10%" |Mobs |
| − | ! |
+ | ! bgcolor="#DAA520" width="15%" |Drops |
| − | |- |
+ | |- |
| − | |rowspan=4 |
+ | | rowspan="4" bgcolor="FFF8DC" |[[Sere Stump]] |
| − | |align="Center" |
+ | | align="Center" bgcolor="FFF8DC" |I/J-7 |
| − | | |
+ | | bgcolor="FFF8DC" |[[Cinder Crab]]<br> |
[[Craklaw]] |
[[Craklaw]] |
||
<!----------Drops-----------> |
<!----------Drops-----------> |
||
| − | |rowspan=4 |
+ | | rowspan="4" bgcolor="FFF8DC" | |
[[Fresh Marjoram]]<br> |
[[Fresh Marjoram]]<br> |
||
[[Gnatbane]]<br> |
[[Gnatbane]]<br> |
||
| Line 728: | Line 742: | ||
[[Zaffre Yggrete Shard IV|IV]], [[Zaffre Yggrete Shard V|V]] |
[[Zaffre Yggrete Shard IV|IV]], [[Zaffre Yggrete Shard V|V]] |
||
|- |
|- |
||
| − | |align="Center" |
+ | | align="Center" bgcolor="FFF8DC" |G-7/8 |
| − | | |
+ | | bgcolor="FFF8DC" |[[Blood Toad]]<br> |
[[Craklaw]] |
[[Craklaw]] |
||
|- |
|- |
||
| − | |align="Center" |
+ | | align="Center" bgcolor="FFF8DC" |F-8/9 |
| − | | |
+ | | bgcolor="FFF8DC" |[[Craklaw]]<br> |
[[Primrose Jagil]] |
[[Primrose Jagil]] |
||
|- |
|- |
||
| − | |align="Center" |
+ | | align="Center" bgcolor="FFF8DC" |H-10 |
| − | | |
+ | | bgcolor="FFF8DC" |[[Craklaw]]<br> |
[[Wetlands Orobon]] |
[[Wetlands Orobon]] |
||
|- |
|- |
||
| Line 744: | Line 758: | ||
====[[Morimar Basalt Fields]]==== |
====[[Morimar Basalt Fields]]==== |
||
| − | {| |
+ | {| style="background-color:#DAA520" border="0" cellpadding="1" cellspacing="1" width="100%" |
| − | |- |
+ | |- |
| − | ! |
+ | ! bgcolor="#DAA520" width="5%" |Lair |
| − | ! |
+ | ! bgcolor="#DAA520" width="5%" |Location |
| − | ! |
+ | ! bgcolor="#DAA520" width="10%" |Mobs |
| − | ! |
+ | ! bgcolor="#DAA520" width="15%" |Drops |
| − | |- |
+ | |- |
| − | |rowspan=5 |
+ | | rowspan="5" bgcolor="FFF8DC" |[[Grimy Boulders]] |
| − | |align="Center" |
+ | | align="Center" bgcolor="FFF8DC" |F-6 |
| − | | |
+ | | bgcolor="FFF8DC" |[[Matamata]]<br> |
[[Snaggletooth Raptor]] |
[[Snaggletooth Raptor]] |
||
<!----------Drops-----------> |
<!----------Drops-----------> |
||
| − | |rowspan=5 |
+ | | rowspan="5" bgcolor="FFF8DC" | |
[[Alizarin Yggrete Shard]] |
[[Alizarin Yggrete Shard]] |
||
[[Alizarin Yggrete Shard II|II]], [[Alizarin Yggrete Shard III|III]], |
[[Alizarin Yggrete Shard II|II]], [[Alizarin Yggrete Shard III|III]], |
||
| Line 768: | Line 782: | ||
[[Simulacrum Segments]] |
[[Simulacrum Segments]] |
||
|- |
|- |
||
| − | |align="Center" |
+ | | align="Center" bgcolor="FFF8DC" |G-7 |
| − | | |
+ | | bgcolor="FFF8DC" |[[Alpine Eft]]<br> |
[[Matamata]] |
[[Matamata]] |
||
|- |
|- |
||
| − | |align="Center" |
+ | | align="Center" bgcolor="FFF8DC" |I-7 |
| − | | |
+ | | bgcolor="FFF8DC" |[[Basalt Lizard]]<br> |
[[Matamata]] |
[[Matamata]] |
||
|- |
|- |
||
| − | |align="Center" |
+ | | align="Center" bgcolor="FFF8DC" |E-9 |
| − | | |
+ | | bgcolor="FFF8DC" |[[Matamata]]<br> |
[[Outlands Peiste]] |
[[Outlands Peiste]] |
||
|- |
|- |
||
| − | |align="Center" |
+ | | align="Center" bgcolor="FFF8DC" |H-9 |
| − | | |
+ | | bgcolor="FFF8DC" |[[Matamata]]<br> |
[[Wivre Cragdweller]] |
[[Wivre Cragdweller]] |
||
|- |
|- |
||
| Line 788: | Line 802: | ||
====[[Cirdas Caverns]]==== |
====[[Cirdas Caverns]]==== |
||
| − | {| |
+ | {| style="background-color:#DAA520" border="0" cellpadding="1" cellspacing="1" width="100%" |
| − | |- |
+ | |- |
| − | ! |
+ | ! bgcolor="#DAA520" width="5%" |Lair |
| − | ! |
+ | ! bgcolor="#DAA520" width="5%" |Location |
| − | ! |
+ | ! bgcolor="#DAA520" width="10%" |Mobs |
| − | ! |
+ | ! bgcolor="#DAA520" width="15%" |Drops |
| − | |- |
+ | |- |
| − | |rowspan=5 |
+ | | rowspan="5" bgcolor="FFF8DC" |[[Banespore]] |
| − | |align="Center" |
+ | | align="Center" bgcolor="FFF8DC" |I/J-5 |
| − | | |
+ | | bgcolor="FFF8DC" |[[Acuex]] |
<!----------Drops-----------> |
<!----------Drops-----------> |
||
| − | |rowspan=5 |
+ | | rowspan="5" bgcolor="FFF8DC" | |
[[Gold Ore]]<br> |
[[Gold Ore]]<br> |
||
[[Luminium Ore]]<br> |
[[Luminium Ore]]<br> |
||
| Line 809: | Line 823: | ||
[[Simulacrum Segments]] |
[[Simulacrum Segments]] |
||
|- |
|- |
||
| − | |align="Center" |
+ | | align="Center" bgcolor="FFF8DC" |G-7 |
| − | | |
+ | | bgcolor="FFF8DC" |[[Acuex]] |
|- |
|- |
||
| − | |align="Center" |
+ | | align="Center" bgcolor="FFF8DC" |I/J-10 |
| − | | |
+ | | bgcolor="FFF8DC" |[[Acuex]] |
|- |
|- |
||
| − | |align="Center" |
+ | | align="Center" bgcolor="FFF8DC" |H-11 |
| − | | |
+ | | bgcolor="FFF8DC" |[[Acuex]] |
|- |
|- |
||
|} |
|} |
||
| Line 822: | Line 836: | ||
====[[Marjami Ravine]]==== |
====[[Marjami Ravine]]==== |
||
| − | {| |
+ | {| style="background-color:#DAA520" border="0" cellpadding="1" cellspacing="1" width="100%" |
| − | |- |
+ | |- |
| − | ! |
+ | ! bgcolor="#DAA520" width="5%" |Lair |
| − | ! |
+ | ! bgcolor="#DAA520" width="5%" |Location |
| − | ! |
+ | ! bgcolor="#DAA520" width="10%" |Mobs |
| − | ! |
+ | ! bgcolor="#DAA520" width="15%" |Drops |
| − | |- |
+ | |- |
| − | |rowspan=5 |
+ | | rowspan="5" bgcolor="FFF8DC" |[[Avian Roost]] |
| − | |align="Center" |
+ | | align="Center" bgcolor="FFF8DC" |C-7 |
| − | | |
+ | | bgcolor="FFF8DC" |[[Gorge Vulture]]<br> |
[[Undaunted Colibri]] |
[[Undaunted Colibri]] |
||
<!----------Drops-----------> |
<!----------Drops-----------> |
||
| − | |rowspan=5 |
+ | | rowspan="5" bgcolor="FFF8DC" | |
[[Darksteel Ore]]<br> |
[[Darksteel Ore]]<br> |
||
[[Iron Sand]]<br> |
[[Iron Sand]]<br> |
||
| Line 846: | Line 860: | ||
[[Level 99 J.S.E. Capes]] |
[[Level 99 J.S.E. Capes]] |
||
|- |
|- |
||
| − | |align="Center" |
+ | | align="Center" bgcolor="FFF8DC" |E-7 |
| − | | |
+ | | bgcolor="FFF8DC" |[[Foraging Apkallu]]<br> |
[[Trembling Tulfaire]] |
[[Trembling Tulfaire]] |
||
|- |
|- |
||
| − | |align="Center" |
+ | | align="Center" bgcolor="FFF8DC" |I-8 |
| − | | |
+ | | bgcolor="FFF8DC" |[[Trembling Tulfaire]]<br> |
[[Undaunted Colibri]] |
[[Undaunted Colibri]] |
||
|- |
|- |
||
| − | |align="Center" |
+ | | align="Center" bgcolor="FFF8DC" |E-10 |
| − | | |
+ | | bgcolor="FFF8DC" |[[Trembling Tulfaire]] |
|- |
|- |
||
| − | |align="Center" |
+ | | align="Center" bgcolor="FFF8DC" |J/K-12 |
| − | | |
+ | | bgcolor="FFF8DC" |[[Gorge Vulture]]<br> |
[[Trembling Tulfaire]] |
[[Trembling Tulfaire]] |
||
|- |
|- |
||
| Line 865: | Line 879: | ||
====[[Yorcia Weald]]==== |
====[[Yorcia Weald]]==== |
||
| − | {| |
+ | {| style="background-color:#DAA520" border="0" cellpadding="1" cellspacing="1" width="100%" |
| − | |- |
+ | |- |
| − | ! |
+ | ! bgcolor="#DAA520" width="5%" |Lair |
| − | ! |
+ | ! bgcolor="#DAA520" width="5%" |Location |
| − | ! |
+ | ! bgcolor="#DAA520" width="10%" |Mobs |
| − | ! |
+ | ! bgcolor="#DAA520" width="15%" |Drops |
| − | |- |
+ | |- |
| − | |rowspan=5 |
+ | | rowspan="5" bgcolor="FFF8DC" |[[Arboreal Bastion]] |
| − | |align="Center" |
+ | | align="Center" bgcolor="FFF8DC" |I-6 |
| − | | |
+ | | bgcolor="FFF8DC" |[[Tenacious Panopt]]<br> |
[[Tight-lipped Flytrap]] |
[[Tight-lipped Flytrap]] |
||
<!----------Drops-----------> |
<!----------Drops-----------> |
||
| − | |rowspan=5 |
+ | | rowspan="5" bgcolor="FFF8DC" | |
[[Akaso]]<br> |
[[Akaso]]<br> |
||
[[Arborfruit Seed]]<br> |
[[Arborfruit Seed]]<br> |
||
| Line 893: | Line 907: | ||
[[Simulacrum Segments]] |
[[Simulacrum Segments]] |
||
|- |
|- |
||
| − | |align="Center" |
+ | | align="Center" bgcolor="FFF8DC" |K-6 |
| − | | |
+ | | bgcolor="FFF8DC" |[[Loyal Snapweed]]<br> |
[[Tenacious Panopt]] |
[[Tenacious Panopt]] |
||
|- |
|- |
||
| − | |align="Center" |
+ | | align="Center" bgcolor="FFF8DC" |G-7 |
| − | | |
+ | | bgcolor="FFF8DC" |[[Furibund Rafflesia]]<br> |
[[Loyal Snapweed]] |
[[Loyal Snapweed]] |
||
|- |
|- |
||
| − | |align="Center" |
+ | | align="Center" bgcolor="FFF8DC" |K-9 |
| − | | |
+ | | bgcolor="FFF8DC" |[[Fervid Funguar]]<br> |
[[Tight-lipped Flytrap]] |
[[Tight-lipped Flytrap]] |
||
|- |
|- |
||
| − | |align="Center" |
+ | | align="Center" bgcolor="FFF8DC" |J-11 |
| − | | |
+ | | bgcolor="FFF8DC" |[[Fervid Funguar]]<br> |
[[Furibund Rafflesia]] |
[[Furibund Rafflesia]] |
||
|- |
|- |
||
| Line 913: | Line 927: | ||
====[[Kamihr Drifts]]==== |
====[[Kamihr Drifts]]==== |
||
| − | {| |
+ | {| style="background-color:#DAA520" border="0" cellpadding="1" cellspacing="1" width="100%" |
| − | |- |
+ | |- |
| − | ! |
+ | ! bgcolor="#DAA520" width="5%" |Lair |
| − | ! |
+ | ! bgcolor="#DAA520" width="5%" |Location |
| − | ! |
+ | ! bgcolor="#DAA520" width="10%" |Mobs |
| − | ! |
+ | ! bgcolor="#DAA520" width="15%" |Drops |
| − | |- |
+ | |- |
| − | |rowspan=5 |
+ | | rowspan="5" bgcolor="FFF8DC" |[[Wintry Cave]] |
| − | |align="Center" |
+ | | align="Center" bgcolor="FFF8DC" |H-6 |
| − | | |
+ | | bgcolor="FFF8DC" |[[Contumacious Ovim]]<br> |
[[Frostfang Tiger]] |
[[Frostfang Tiger]] |
||
<!----------Drops-----------> |
<!----------Drops-----------> |
||
| − | |rowspan=5 |
+ | | rowspan="5" bgcolor="FFF8DC" | |
[[Aht Urhgan Brass]]<br> |
[[Aht Urhgan Brass]]<br> |
||
[[Flint Stone]]<br> |
[[Flint Stone]]<br> |
||
| Line 935: | Line 949: | ||
[[Level 99 J.S.E. Capes]] |
[[Level 99 J.S.E. Capes]] |
||
|- |
|- |
||
| − | |align="Center" |
+ | | align="Center" bgcolor="FFF8DC" |H-7 |
| − | | |
+ | | bgcolor="FFF8DC" |[[Contumacious Ovim]]<br> |
[[Incensed Lucerewe]] |
[[Incensed Lucerewe]] |
||
|- |
|- |
||
| − | |align="Center" |
+ | | align="Center" bgcolor="FFF8DC" |I-8 |
| − | | |
+ | | bgcolor="FFF8DC" |[[Famished Raaz]]<br> |
[[Frostfang Tiger]] |
[[Frostfang Tiger]] |
||
|- |
|- |
||
| − | |align="Center" |
+ | | align="Center" bgcolor="FFF8DC" |H-9/10 |
| − | | |
+ | | bgcolor="FFF8DC" |[[Incensed Lucerewe]]<br> |
[[Snowpaw Rabbit]] |
[[Snowpaw Rabbit]] |
||
|- |
|- |
||
| − | |align="Center" |
+ | | align="Center" bgcolor="FFF8DC" |I-11 |
| − | | |
+ | | bgcolor="FFF8DC" |[[Famished Raaz]]<br> |
[[Snowpaw Rabbit]] |
[[Snowpaw Rabbit]] |
||
|- |
|- |
||
| Line 955: | Line 969: | ||
====[[Outer Ra'Kaznar]] ==== |
====[[Outer Ra'Kaznar]] ==== |
||
| − | {| |
+ | {| style="background-color:#DAA520" border="0" cellpadding="1" cellspacing="1" width="100%" |
| − | |- |
+ | |- |
| − | ! |
+ | ! bgcolor="#DAA520" width="5%" |Lair |
| − | ! |
+ | ! bgcolor="#DAA520" width="5%" |Location |
| − | ! |
+ | ! bgcolor="#DAA520" width="10%" |Mobs |
| − | ! |
+ | ! bgcolor="#DAA520" width="15%" |Drops |
| − | |- |
+ | |- |
| − | |rowspan=4 |
+ | | rowspan="4" bgcolor="FFF8DC" |[[Dimensional Tether]] |
| − | |align="Center" |
+ | | align="Center" bgcolor="FFF8DC" |H-6 |
| − | | |
+ | | bgcolor="FFF8DC" | |
[[Festering Umbril]]<br> |
[[Festering Umbril]]<br> |
||
[[Procrustean Draugar]] |
[[Procrustean Draugar]] |
||
<!----------Drops-----------> |
<!----------Drops-----------> |
||
| − | |rowspan=5 |
+ | | rowspan="5" bgcolor="FFF8DC" | |
| + | [[Dullahan Armor]]<br> |
||
[[Gold Ore]]<br> |
[[Gold Ore]]<br> |
||
[[Iron Ore]]<br> |
[[Iron Ore]]<br> |
||
[[Meteorite]]<br> |
[[Meteorite]]<br> |
||
[[Pebble]]<br> |
[[Pebble]]<br> |
||
| + | [[Ra'Kaznar Ore]]<br> |
||
[[Vanadium Ore]]<br> |
[[Vanadium Ore]]<br> |
||
[[Simulacrum Segments]]<br> |
[[Simulacrum Segments]]<br> |
||
[[Level 99 J.S.E. Capes]] |
[[Level 99 J.S.E. Capes]] |
||
|- |
|- |
||
| − | |align="Center" |
+ | | align="Center" bgcolor="FFF8DC" |J-6 |
| − | | |
+ | | bgcolor="FFF8DC" | |
[[Festering Umbril]]<br> |
[[Festering Umbril]]<br> |
||
[[Procrustean Draugar]] |
[[Procrustean Draugar]] |
||
|- |
|- |
||
| − | |align="Center" |
+ | | align="Center" bgcolor="FFF8DC" |H-8 |
| − | | |
+ | | bgcolor="FFF8DC" | |
[[Festering Umbril]]<br> |
[[Festering Umbril]]<br> |
||
[[Procrustean Draugar]] |
[[Procrustean Draugar]] |
||
|- |
|- |
||
| − | |align="Center" |
+ | | align="Center" bgcolor="FFF8DC" |J-8 |
| − | | |
+ | | bgcolor="FFF8DC" | |
[[Festering Umbril]]<br> |
[[Festering Umbril]]<br> |
||
[[Procrustean Draugar]] |
[[Procrustean Draugar]] |
||
| Line 996: | Line 1,012: | ||
====[[Ra'Kaznar Inner Court]]==== |
====[[Ra'Kaznar Inner Court]]==== |
||
| − | {| |
+ | {| style="background-color:#DAA520" border="0" cellpadding="1" cellspacing="1" width="100%" |
| − | |- |
+ | |- |
| − | ! |
+ | ! bgcolor="#DAA520" width="5%" |Obstacle |
| − | ! |
+ | ! bgcolor="#DAA520" width="5%" |Location |
| − | ! |
+ | ! bgcolor="#DAA520" width="10%" |Mobs |
| − | ! |
+ | ! bgcolor="#DAA520" width="15%" |Drops |
| − | |- |
+ | |- |
| − | |rowspan=4 |
+ | | rowspan="4" bgcolor="FFF8DC" |[[Dimensional Tether]] |
| − | |align="Center" |
+ | | align="Center" bgcolor="FFF8DC" |E-5/6 |
| − | | |
+ | | bgcolor="FFF8DC" | |
[[Distraught Draugar]]<br> |
[[Distraught Draugar]]<br> |
||
[[Wretched Umbril]] |
[[Wretched Umbril]] |
||
| − | |rowspan=4 |
+ | | rowspan="4" bgcolor="FFF8DC" | |
<!----------Drops-----------> |
<!----------Drops-----------> |
||
| + | [[Dullahan Armor]]<br> |
||
| − | {{Information}} |
||
| ⚫ | |||
| + | [[Meteorite]]<br> |
||
| + | [[Pebble]]<br> |
||
| + | [[Ra'Kaznar Ore]]<br> |
||
| + | [[Simulacrum Segments]]<br> |
||
| + | [[Level 99 J.S.E. Capes]] |
||
|- |
|- |
||
| − | |align="Center" |
+ | | align="Center" bgcolor="FFF8DC" |H-5/6 |
| − | | |
+ | | bgcolor="FFF8DC" | |
[[Distraught Draugar]]<br> |
[[Distraught Draugar]]<br> |
||
[[Wretched Umbril]] |
[[Wretched Umbril]] |
||
|- |
|- |
||
| − | |align="Center" |
+ | | align="Center" bgcolor="FFF8DC" |D-8 |
| − | | |
+ | | bgcolor="FFF8DC" | |
[[Distraught Draugar]]<br> |
[[Distraught Draugar]]<br> |
||
[[Wretched Umbril]] |
[[Wretched Umbril]] |
||
|- |
|- |
||
| − | |align="Center" |
+ | | align="Center" bgcolor="FFF8DC" |H-11 |
| − | | |
+ | | bgcolor="FFF8DC" | |
[[Distraught Draugar]]<br> |
[[Distraught Draugar]]<br> |
||
[[Wretched Umbril]] |
[[Wretched Umbril]] |
||
| Line 1,033: | Line 1,055: | ||
''Not much is known about [[Naakual]] behavior, but as is oft said, experience is the best teacher. Pioneers will be asked to search out these ferocious fiends and combat them in their natural habitats, which--though a huge disadvantage--makes the thrill of the hunt that much more intense.'' |
''Not much is known about [[Naakual]] behavior, but as is oft said, experience is the best teacher. Pioneers will be asked to search out these ferocious fiends and combat them in their natural habitats, which--though a huge disadvantage--makes the thrill of the hunt that much more intense.'' |
||
| − | Wildskeeper Reives involve challenging a [[Naakual]], one of the seven area mega bosses in the [[East Ulbuka Territory]]. Anyone participating in a Wildskeeper Reive must have purchased the appropriate key item from [[Dimmian]] at (E-6) in [[Eastern Adoulin]]. Without the key item, it is impossible for players to access a Wildskeeper Reive even if it is already in progress |
+ | Wildskeeper Reives involve challenging a [[Naakual]], one of the seven area mega bosses in the [[East Ulbuka Territory]]. Anyone participating in a Wildskeeper Reive must have purchased the appropriate key item from [[Dimmian]] at (E-6) in [[Eastern Adoulin]]. Without the key item, it is impossible for players to access a Wildskeeper Reive even if it is already in progress. |
| + | |||
| + | Please note that, upon zoning to participate in a Wildskeeper Reive, the pertinent Key Item is consumed and you are granted eligible status for participation in that particular Wildskeeper Reive. |
||
As in other types of Reives, participants in Wildskeeper Reives do not need to be in the same alliance to participate. |
As in other types of Reives, participants in Wildskeeper Reives do not need to be in the same alliance to participate. |
||
| Line 1,046: | Line 1,070: | ||
====Naakuals==== |
====Naakuals==== |
||
| − | {| border="0" |
+ | {| border="0" cellpadding="1" cellspacing="1" width="100%" |
| − | |- style="background:#ffdead;" |
+ | |- style="background:#ffdead;" |
| − | ! width="10%"|Name |
+ | ! width="10%" |Name |
| − | ! width="10%"|Family |
+ | ! width="10%" |Family |
| − | ! width="12%"|Companions |
+ | ! width="12%" |Companions |
| − | ! width="25%"|Spawn Information |
+ | ! width="25%" |Spawn Information |
| − | ! width="13%"|Zone |
+ | ! width="13%" |Zone |
| − | ! width="30%"|Notable Drops |
+ | ! width="30%" |Notable Drops |
| − | |||
|- style="background:#ffd9d9;" valign="top" |
|- style="background:#ffd9d9;" valign="top" |
||
|[[Achuka]] |
|[[Achuka]] |
||
|[[Gabbraths]] |
|[[Gabbraths]] |
||
|[[Snaggletooth Raptor]]<br><br>[[Matamata]]<br><br>[[Outlands Peiste]] |
|[[Snaggletooth Raptor]]<br><br>[[Matamata]]<br><br>[[Outlands Peiste]] |
||
| − | |Accessed using {{KeyItem}}[[Magma mitigation set]] purchased from [[Dimmian]] in [[Eastern Adoulin]] ( |
+ | |Accessed using {{KeyItem}}[[Magma mitigation set]] purchased from [[Dimmian]] in [[Eastern Adoulin]] (F-6) for 3,000 [[bayld]]. Respawns 3 hours after last death. |
|[[Morimar Basalt Fields]] |
|[[Morimar Basalt Fields]] |
||
| |
| |
||
| − | [[Aqreqaq Bomblet]]<br> |
+ | [[Aqreaqa Bomblet|Aqreqaq Bomblet]]<br> |
[[Camatlatia]] <br> |
[[Camatlatia]] <br> |
||
| − | [[ |
+ | [[Cuamiz Collar]]<br> |
| ⚫ | |||
[[Maochinoli]]<br> |
[[Maochinoli]]<br> |
||
| + | [[Otomi Gloves]] <br> |
||
[[Otomi Helm]] <br> |
[[Otomi Helm]] <br> |
||
| ⚫ | |||
| + | [[Quauhpilli Helm]] <br> |
||
[[Tlalpoloani]]<br> |
[[Tlalpoloani]]<br> |
||
[[Level 99 J.S.E. Capes]]<br> |
[[Level 99 J.S.E. Capes]]<br> |
||
| Line 1,076: | Line 1,101: | ||
|[[Bztavians]] |
|[[Bztavians]] |
||
|[[Bounding Chapuli]]<br><br>[[Rapier Hornet]]<br><br>[[Waggling Wasp]] |
|[[Bounding Chapuli]]<br><br>[[Rapier Hornet]]<br><br>[[Waggling Wasp]] |
||
| − | |Accessed using {{KeyItem}}[[Brier-proof net]] purchased from [[Dimmian]] in [[Eastern Adoulin]] ( |
+ | |Accessed using {{KeyItem}}[[Brier-proof net]] purchased from [[Dimmian]] in [[Eastern Adoulin]] (F-6) for 3,000 [[bayld]]. Respawns 3 hours after last death. |
|[[Ceizak Battlegrounds]] |
|[[Ceizak Battlegrounds]] |
||
| |
| |
||
| + | [[Huani Collar]]<br> |
||
[[Icoyoca]] <br> |
[[Icoyoca]] <br> |
||
| + | [[Kaabnax Hat]]<br> |
||
| + | [[Kaabnax Trousers]]<br> |
||
[[Tlamini]] <br> |
[[Tlamini]] <br> |
||
| ⚫ | |||
[[Xux Hat]] <br> |
[[Xux Hat]] <br> |
||
| + | [[Xux Trousers]]<br> |
||
[[Level 99 J.S.E. Capes]]<br> |
[[Level 99 J.S.E. Capes]]<br> |
||
{{KeyItem}}[[Aged Matriarch Naakual crest]] |
{{KeyItem}}[[Aged Matriarch Naakual crest]] |
||
| Line 1,091: | Line 1,119: | ||
|[[Waktza]] |
|[[Waktza]] |
||
|[[Breezewing Vulture]]<br><br>[[Stonefaced Roc]]<br><br>[[Ironclaw Tulfaire]] |
|[[Breezewing Vulture]]<br><br>[[Stonefaced Roc]]<br><br>[[Ironclaw Tulfaire]] |
||
| − | |Accessed using {{KeyItem}}[[Insulator tablet]] purchased from [[Dimmian]] in [[Eastern Adoulin]] ( |
+ | |Accessed using {{KeyItem}}[[Insulator tablet]] purchased from [[Dimmian]] in [[Eastern Adoulin]] (F-6) for 3,000 [[bayld]]. Respawns 3 hours after last death. |
|[[Marjami Ravine]] |
|[[Marjami Ravine]] |
||
| |
| |
||
| Line 1,108: | Line 1,136: | ||
|[[Rockfins]] |
|[[Rockfins]] |
||
|[[Craklaw]]<br><br>[[Primrose Jagil]]<br><br>[[Wetlands Orobon]] |
|[[Craklaw]]<br><br>[[Primrose Jagil]]<br><br>[[Wetlands Orobon]] |
||
| − | |Accessed using {{KeyItem}}[[Compass of transference]] purchased from [[Dimmian]] in [[Eastern Adoulin]] ( |
+ | |Accessed using {{KeyItem}}[[Compass of transference]] purchased from [[Dimmian]] in [[Eastern Adoulin]] (F-6) for 3,000 [[bayld]]. Respawns 3 hours after last death. |
|[[Foret de Hennetiel]] |
|[[Foret de Hennetiel]] |
||
| |
| |
||
[[Aqreaqa Bomblet]]<br> |
[[Aqreaqa Bomblet]]<br> |
||
| + | [[Atoyac]]<br> |
||
[[Azukinagamitsu]]<br> |
[[Azukinagamitsu]]<br> |
||
[[Cho'j Band]] <br> |
[[Cho'j Band]] <br> |
||
| Line 1,127: | Line 1,156: | ||
|[[Yggdreants]] |
|[[Yggdreants]] |
||
|[[Yumcax's Maw]]<br><br>[[Yumcax's Watchman]] |
|[[Yumcax's Maw]]<br><br>[[Yumcax's Watchman]] |
||
| − | |Accessed using {{KeyItem}}[[Resurrection retardant axe]] purchased from [[Dimmian]] in [[Eastern Adoulin]] ( |
+ | |Accessed using {{KeyItem}}[[Resurrection retardant axe]] purchased from [[Dimmian]] in [[Eastern Adoulin]] (F-6) for 3,000 [[bayld]]. Respawns 3 hours after last death. |
|[[Yorcia Weald]] |
|[[Yorcia Weald]] |
||
| |
| |
||
| − | [[ |
+ | [[Buremte Gloves]] <br> |
| − | [[ |
+ | [[Buremte Hat]] <br> |
| − | [[ |
+ | [[Chuq'aba Belt]]<br> |
[[Iximulew Cape]] <br> |
[[Iximulew Cape]] <br> |
||
| + | [[Ixtab (Weapon)|Ixtab]] <br> |
||
[[Ocachi Gorget]] <br> |
[[Ocachi Gorget]] <br> |
||
| − | [[ |
+ | [[Pahtli Cape]] <br> |
| − | [[ |
+ | [[Tamaxchi]] <br> |
[[Level 99 J.S.E. Capes]]<br> |
[[Level 99 J.S.E. Capes]]<br> |
||
{{KeyItem}}[[Aged Ligneous Naakual crest]] |
{{KeyItem}}[[Aged Ligneous Naakual crest]] |
||
| Line 1,144: | Line 1,174: | ||
|[[Cehuetzi]] |
|[[Cehuetzi]] |
||
|[[Kumhau's Claw]]<br><br>[[Kumhau's Fleshrender]]<br><br>[[Kumhau's Hoof]] |
|[[Kumhau's Claw]]<br><br>[[Kumhau's Fleshrender]]<br><br>[[Kumhau's Hoof]] |
||
| − | |Accessed using {{KeyItem}}[[Anti-glaciation gear]], Purchased from [[Dimmian]] in [[Eastern Adoulin]] ( |
+ | |Accessed using {{KeyItem}}[[Anti-glaciation gear]], Purchased from [[Dimmian]] in [[Eastern Adoulin]] (F-6) for 3,000 [[bayld]]. Respawns 3 hours{{Verification}} after last death. |
|[[Kamihr Drifts]] |
|[[Kamihr Drifts]] |
||
| |
| |
||
Revision as of 08:12, 10 October 2019
Colonizing a primordial continent such as Ulbuka poses challenges that test even the most experienced adventurers. For this reason, many who brave the wilderness have begun banding together and have developed a new style of battle. Any badge-carrying pioneer can join in the quest to clear the harrowing wilds of danger.
Even those without a party can jump into the fray and assist those already dueling the forces of nature! One for all, and all for the continent!
Reives are similar to Campaign Battles. They take place in the East Ulbuka Territory.
Participation
To participate in a reive, simply approach the area where a battle is taking place (denoted by enemies and players with sword icons by their names).
When a player strays too far from the reive, a warning is displayed in the chat log and the player is given five seconds to return to the reive. If the player does not return within five seconds, he or she is locked out of participation in any reives in the zone for 5 minutes. The maximum allowed distance is 20 yalms from the lair structure. This restriction can be removed by changing zones.
Evaluations
Players' contributions to the reive are periodically assessed, and players are awarded experience points and bayld based on participation. The frequency of the evaluations is based on damage dealt by any participants to the Lairs and Obstacles, so neglecting the main targets reduces evaluations; if all participants completely avoid the Lairs and Obstacles, no evaluations will occur and experience points and bayld will not be awarded to anyone. Players do not personally have to attack the main targets, but the primary targets must be damaged by someone in the Reive.
When a player fights in a reive to its conclusion, additional experience points and bayld are awarded, as well as a chance to receive one or more items. The calculation method for Reive evaluations is not yet known. Dealing physical damage factors most heavily into the evaluation, but taking damage, healing, and enhancing are also rewarded. Actions taken by pets do not factor into the evaluation at all.
Important Items
Reive unity
Before participating heavily in reives, players should obtain the ![]() Reive unity key item from the quest Scaredy-Cats. This item grants healing, enhancing, and offensive bonuses to players during reives, similar to Abyssea's Abyssite. These bonuses are known as Reive Momentum.
Reive unity key item from the quest Scaredy-Cats. This item grants healing, enhancing, and offensive bonuses to players during reives, similar to Abyssea's Abyssite. These bonuses are known as Reive Momentum.
"Logging"
The ![]() "Logging" key item allows players to damage Knotted Roots and Broadleaf Palms during Colonization Reives. It is obtained from the quest Grind to Sawdust.
"Logging" key item allows players to damage Knotted Roots and Broadleaf Palms during Colonization Reives. It is obtained from the quest Grind to Sawdust.
- After this, it helps to get
 "Watercrafting" from the quest I'm on a Boat.
"Demolishing
The ![]() "Demolishing" key item allows players to damage Bedrock Crags in Morimar Basalt Fields during Colonization Reives. It is obtained from the quest A Stone's Throw Away.
"Demolishing" key item allows players to damage Bedrock Crags in Morimar Basalt Fields during Colonization Reives. It is obtained from the quest A Stone's Throw Away.
- After this, it helps to get "Climbing" from the quest Hide and Go Peak.
"Fragmenting"
The ![]() "Fragmenting" key item allows players to damage Icy Palisades during Colonization Reives. It is obtained from the quest Breaking the Ice.
"Fragmenting" key item allows players to damage Icy Palisades during Colonization Reives. It is obtained from the quest Breaking the Ice.
"Pulverizing"
The ![]() "Pulverizing" key item allows players to damage Amaranth Barriers during Colonization Reives. It is obtained from the quest Lerene's Lament.
"Pulverizing" key item allows players to damage Amaranth Barriers during Colonization Reives. It is obtained from the quest Lerene's Lament.
Types of Reives
Colonization Reive

Colonization Reive
Bushwhacking through a verdant jungle or over treacherous landscape can be a grueling experience in and of itself, so what happens when the landscape fights back? In this type of reive, you'll not only need to overcome hordes of bloodthirsty beasts, but also the terrain they're protecting!
Colonization reives involve clearing obstacles from the path. Victories in these reives allow players to access deeper areas in Adoulin. Obstacles respawn in one hour.
The following colonization reives are known:
Ceizak Battlegrounds
| Obstacle | Location | Mobs | Drops |
|---|---|---|---|
| Knotted Root | F/G-7 | Floodplain Spider |
Arrowwood Log |
| G/H-8 | Lightfoot Lapinion | ||
| I-8 | Bounding Chapuli | ||
| G-9 | Lavender Twitherym |
Yahse Hunting Grounds
| Obstacle | Location | Mobs | Drops |
|---|---|---|---|
| Knotted Root | H-7 | Temblor Beetle | Arrowwood Log Ash Log |
| H-8 | Lancing Wasp | ||
| J-8 | Lancing Wasp | ||
| G-9 | Quivering Twitherym | ||
| I-9 | Shrubshredder Chapuli |
Sih Gates
| Obstacle | Location | Mobs | Drops |
|---|---|---|---|
| Knotted Root | H-6/7 | Cthonic Chapuli |
Chapuli Wing |
| I-8/9 | Mighty Craklaw |
Foret de Hennetiel
| Obstacle | Location | Mobs | Drops |
|---|---|---|---|
| Broadleaf Palm | G-6 | Blood Toad |
Gnatbane |
| H-7 | Blood Toad | ||
| E-8 | Craklaw | ||
| G-9/10 | Primrose Jagil | ||
| I-10 | Primrose Jagil |
Moh Gates
| Obstacle | Location | Mobs | Drops |
|---|---|---|---|
| Knotted Root | I-7 | Ruby Raptor |
Bomb Ash |
| G-8 | Scoriaceous Clot |
Morimar Basalt Fields
| Obstacle | Location | Mobs | Drops |
|---|---|---|---|
| Bedrock Crag | F/G-6 | Matamata |
Alizarin Yggrete Shard I,
II,
IV |
| H-8 | MOB MOB | ||
| I-8 | Matamata | ||
| F-9 | Basalt Lizard | ||
| F/G-9 | Basalt Lizard | ||
| H-10 | Basalt Lizard | ||
| G-11 | Basalt Lizard |
Cirdas Caverns
| Obstacle | Location | Mobs | Drops |
|---|---|---|---|
| Knotted Root | I-6 | Acuex Tooth Cave Tarantula(East) |
Gold Ore |
| F-8 | Acuex | ||
| L-8 | Acuex(West) Molten Clot(West) | ||
| E-9 | Acuex | ||
| J-9 | Acuex(North) Frightful Funguar(South) | ||
| H-10 | Putrid Funguar(North) Pyre Bat(South) |
Marjami Ravine
| Obstacle | Location | Mobs | Drops |
|---|---|---|---|
| Monolithic Boulder | D-7 | Gerent Apkallu |
Darksteel Ore |
| K-8 | Embattled Roc | ||
| F-9 | Preening Tulfaire | ||
| L-9 | Precipice Vulture(North) | ||
| G-11 | Precipice Vulture | ||
| I-11 | Gerent Apkallu | ||
| K-11 | Precipice Vulture |
Yorcia Weald
| Obstacle | Location | Mobs | Drops |
|---|---|---|---|
| Gnarled Rampart | I-6 | Rustled Panopt Sloshmouth Snapweed |
Akaso |
| G-7 | Crabapple Treant Soiled Funguar | ||
| H-10 | Twitherym Windstorm Uprooted Sapling | ||
| J-9 | Furfluff Lapinion Larkish Opo-opo |
Dho Gates
| Obstacle | Location | Mobs | Drops |
|---|---|---|---|
| Knotted Root | H/I-7 | Crevice Tarichuk Velkk Manipulator(East) |
Crab Shell |
| J-9/10 | Trogloptera Velkk Punisher(North) |
Woh Gates
| Obstacle | Location | Mobs | Drops |
|---|---|---|---|
| Knotted Root | H-7 | Draftrider Bat |
Darksteel Ore |
| H-9 | Stonesoftener Acuex |
Kamihr Drifts
| Obstacle | Location | Mobs | Drops |
|---|---|---|---|
| Icy Palisade | F-7 | Alpine Rabbit(East) |
Aht Urhgan Brass |
| H-8 | Chilblain Snoll | ||
| I/J-9 | Raptor Nightstalker | ||
| H/I-10 | Alpine Rabbit |
Outer Ra'Kaznar
| Obstacle | Location | Mobs | Drops |
|---|---|---|---|
| Amaranth Barrier | F/G-6 |
Dullahan Armor | |
| J-6/7 | |||
| F-10 | |||
| J-10 |
Ra'Kaznar Inner Court
| Obstacle | Location | Mobs | Drops |
|---|---|---|---|
| Heliotrope Barrier | F-6 | ||
| K-6 | |||
| F-11 | |||
| K-11 |
Lair Reive
Lair Reive
Adoulin's best defense is a strong offensive push in this type of battle, as pioneers work together to raze the broods that spawn Ulbuka's multifarious menaces.
In lair reives, players destroy the homes of hostile wildlife. The lairs are protected by at least two types of enemies, which defend their homes. Defeated enemies respawn periodically. The reive ends in success when the target lair is destroyed.
The following lair reives are known:
Ceizak Battlegrounds
| Lair | Location | Mobs | Drops |
|---|---|---|---|
| Wasp Nest | H-6/7 | Bounding Chapuli |
Arrowwood Log |
| J-6/7 | Lightfoot Lapinion | ||
| F-7 | Floodplain Spider | ||
| F-8/9 | Prosperous Luckybug | ||
| H-10/11 | Molted Mantis |
Yahse Hunting Grounds
| Lair | Location | Mobs | Drops |
|---|---|---|---|
| Wasp Nest | H/I-6 | Cerise Wasp |
Arrowwood Log |
| J-6 | Cerise Wasp | ||
| F-7 | Cerise Wasp | ||
| F-8 | Cerise Wasp | ||
| H/I-9 | Cerise Wasp |
Foret de Hennetiel
| Lair | Location | Mobs | Drops |
|---|---|---|---|
| Sere Stump | I/J-7 | Cinder Crab |
Fresh Marjoram |
| G-7/8 | Blood Toad | ||
| F-8/9 | Craklaw | ||
| H-10 | Craklaw |
Morimar Basalt Fields
| Lair | Location | Mobs | Drops |
|---|---|---|---|
| Grimy Boulders | F-6 | Matamata |
Alizarin Yggrete Shard
II, III,
IV, V |
| G-7 | Alpine Eft | ||
| I-7 | Basalt Lizard | ||
| E-9 | Matamata | ||
| H-9 | Matamata |
Cirdas Caverns
| Lair | Location | Mobs | Drops |
|---|---|---|---|
| Banespore | I/J-5 | Acuex |
Gold Ore |
| G-7 | Acuex | ||
| I/J-10 | Acuex | ||
| H-11 | Acuex |
Marjami Ravine
| Lair | Location | Mobs | Drops |
|---|---|---|---|
| Avian Roost | C-7 | Gorge Vulture |
Darksteel Ore |
| E-7 | Foraging Apkallu | ||
| I-8 | Trembling Tulfaire | ||
| E-10 | Trembling Tulfaire | ||
| J/K-12 | Gorge Vulture |
Yorcia Weald
| Lair | Location | Mobs | Drops |
|---|---|---|---|
| Arboreal Bastion | I-6 | Tenacious Panopt |
Akaso |
| K-6 | Loyal Snapweed | ||
| G-7 | Furibund Rafflesia | ||
| K-9 | Fervid Funguar | ||
| J-11 | Fervid Funguar |
Kamihr Drifts
| Lair | Location | Mobs | Drops |
|---|---|---|---|
| Wintry Cave | H-6 | Contumacious Ovim Frostfang Tiger |
Aht Urhgan Brass |
| H-7 | Contumacious Ovim | ||
| I-8 | Famished Raaz Frostfang Tiger | ||
| H-9/10 | Incensed Lucerewe Snowpaw Rabbit | ||
| I-11 | Famished Raaz Snowpaw Rabbit |
Outer Ra'Kaznar
| Lair | Location | Mobs | Drops |
|---|---|---|---|
| Dimensional Tether | H-6 |
Dullahan Armor | |
| J-6 | |||
| H-8 | |||
| J-8 |
Ra'Kaznar Inner Court
| Obstacle | Location | Mobs | Drops |
|---|---|---|---|
| Dimensional Tether | E-5/6 |
Dullahan Armor | |
| H-5/6 | |||
| D-8 | |||
| H-11 |
Wildskeeper Reive

Wildskeeper Reive
Not much is known about Naakual behavior, but as is oft said, experience is the best teacher. Pioneers will be asked to search out these ferocious fiends and combat them in their natural habitats, which--though a huge disadvantage--makes the thrill of the hunt that much more intense.
Wildskeeper Reives involve challenging a Naakual, one of the seven area mega bosses in the East Ulbuka Territory. Anyone participating in a Wildskeeper Reive must have purchased the appropriate key item from Dimmian at (E-6) in Eastern Adoulin. Without the key item, it is impossible for players to access a Wildskeeper Reive even if it is already in progress.
Please note that, upon zoning to participate in a Wildskeeper Reive, the pertinent Key Item is consumed and you are granted eligible status for participation in that particular Wildskeeper Reive.
As in other types of Reives, participants in Wildskeeper Reives do not need to be in the same alliance to participate.
Wildskeeper Reives respawn 3 hours after their last defeat.
Wildskeeper Reive Evaluations
- Special rewards such as weapons, armor, accessories, job mantles/job accessories, and magic scrolls/materials are all separated into different drop slots.
- Depending on your performance, you can earn points and increase your drop percentages for each respective slot. (The way drop percentages increase is different for each slot.)
- You will still have a chance to receive drops even if you earned a low amount of points for a slot, but the drop percentage will be quite low as well. If you have no points earned in a slot, the drop percentage will be zero.
- Because Naakual equipment is rare, if you receive the same piece of equipment that you already have, you will not receive a reward for that specific slot. Due to this, the drop rate might feel lower as you earn more equipment.
Naakuals
Source
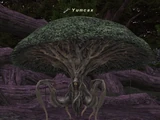


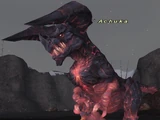


All items (129)


