No edit summary |
mNo edit summary |
||
| (43 intermediate revisions by 20 users not shown) | |||
| Line 1: | Line 1: | ||
{{Infobox Mob Family |
{{Infobox Mob Family |
||
| image = Rabbit_Family.jpg |
| image = Rabbit_Family.jpg |
||
| − | | imagesize = |
+ | | imagesize = 80px |
| System = Beasts |
| System = Beasts |
||
| − | | Subspecies = |
+ | | Subspecies = Onyx Rabbit, Alabaster Rabbit, Lapinion |
| − | | Behavior = |
+ | | Behavior = L, S, Sc |
| + | | Uncommon Behavior = A |
||
| Weak = {{Resist Water}} {{Resist Dark}} {{Resist Lightning}} |
| Weak = {{Resist Water}} {{Resist Dark}} {{Resist Lightning}} |
||
| Strong = |
| Strong = |
||
| Immunities = |
| Immunities = |
||
| Healed = |
| Healed = |
||
| − | | Common Job = [[ |
+ | | Common Job = [[Warrior]] |
| − | | Uncommon Job = [[ |
+ | | Uncommon Job = [[Thief]] |
| Traits = |
| Traits = |
||
| Charmable = {{Mob Icon|charm}} |
| Charmable = {{Mob Icon|charm}} |
||
| Line 18: | Line 19: | ||
| XP Bonus = 10% ([[Polar Hare]]) |
| XP Bonus = 10% ([[Polar Hare]]) |
||
| Notes = |
| Notes = |
||
| − | | Description = [[ |
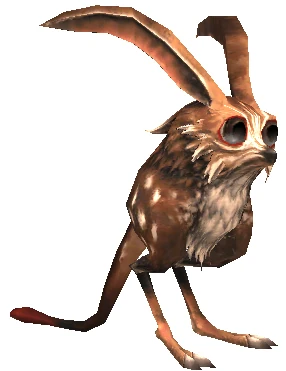
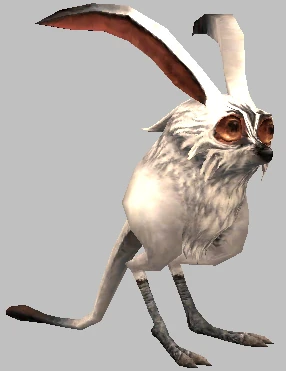
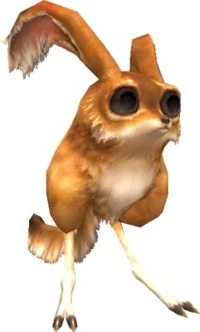
+ | | Description = [[File:Rabbit Family (Arctic).jpg|left|80px|Alabaster Rabbit]][[File:Rabbit Family (Sepia).jpg|left|80px|Onyx Rabbit]][[File:Rabbit Family (Adoulin).jpg|left|80px|Lapinion Rabbit]]Rabbits are herbivorous creatures that propel themselves by hopping with their powerful hind legs and tails. They are known for their distinctively long ears and charming eyes. These small, bipedal creatures of Vana'diel can be found in various environments throughout the [[Quon]] continent, and can usually be distinguished by their relative strength and, occasionally, their color. The rabbits of the Quon continent, hares, have brown fur with the snowflake-like spots. Lapinion rabbits are found in the [[East Ulbuka Territory]], and can usually be distinguished from other rabbits by their fluffy fur and orange color. <br clear=all /><br clear=all /> |
| − | Rabbits are known for their relatively inexpensive drops, and are therefore often used by inexperienced leathercrafters and cooks alike to hone their skills. Newer leathercrafters stack up on [[Rabbit Hide|hides]] to make a number of simple items such as [[Rabbit Mantle]]s. Similarly, younger cooks have pantries full of [[Hare Meat|meat]], although tougher and cheaper than other meat, in order to prepare simple foods such as [[Grilled Hare]] and practice their technique. Even beginning alchemists get into the mix by using [[Rabbit Hide|hides]] to make [[Animal Glue]]. There are, however, some advanced uses for these items. In leathercraft, for example, the [[Nomad's Mantle]] is a staple for any adventurer's wardrobe. In cooking, [[Rarab Meatball]] packs a powerful punch, as does the [[Windurst Taco]]. Every once in a while you may even find a [[Frost Turnip|turnip]] or [[San d'Orian Carrot|carrot]] that the rabbit was saving for a snack. |
||
}} |
}} |
||
==Special Attacks== |
==Special Attacks== |
||
| − | {| border="0" cellpadding="2" cellspacing="1" |
+ | {| border="0" cellpadding="2" cellspacing="1" bgcolor="#e3e6ff" width="100%" |
|- |
|- |
||
| − | | |
+ | | colspan="1" bgcolor="#FFE4E1" width="40%" align="center" |<big>'''Special Abilities'''</big> |
| − | | |
+ | | bgcolor="#E3E6FF" width="15%" align="center" |[[Original and Zilart Areas]] |
| − | | |
+ | | bgcolor="#e3e6ff" width="15%" align="center" |[[Promathia Areas]] |
| − | | |
+ | | bgcolor="#E3E6FF" width="15%" align="center" |[[Wings of the Goddess Areas]] |
| + | | bgcolor="#e3e6ff" width="15%" align="center" |[[Abyssea]] |
||
| + | | bgcolor="#E3E6FF" width="15%" align="center" |[[Pankration]] |
||
|- |
|- |
||
| − | | |
+ | | bgcolor="#66CCFF" |'''[[Foot Kick]]''' - Single target physical damage. |
| − | | |
+ | | bgcolor="#E3E6FF" align="center" |{{Check}} |
| − | | |
+ | | bgcolor="#e3e6ff" align="center" |{{Check}} |
| − | | |
+ | | bgcolor="#E3E6FF" align="center" |{{Check}} |
| + | | bgcolor="#e3e6ff" align="center" |{{Check}} |
||
| + | | bgcolor="#E3E6FF" align="center" |{{Check}} |
||
|- |
|- |
||
| − | | |
+ | | bgcolor="#FFE4E1" |'''[[Whirl Claws]]''' - [[AoE]] physical damage. |
| − | | |
+ | | bgcolor="#E3E6FF" align="center" |{{Check}} |
| − | | |
+ | | bgcolor="#e3e6ff" align="center" |{{Check}} |
| − | | |
+ | | bgcolor="#E3E6FF" align="center" |{{Check}} |
| + | | bgcolor="#e3e6ff" align="center" |{{Check}} |
||
| + | | bgcolor="#E3E6FF" align="center" |{{Check}} |
||
|- |
|- |
||
| − | | |
+ | | bgcolor="#FFE4E1" |'''[[Dust Cloud]]''' - Cone [[AoE]] damage and [[Blind (Status Effect)|Blind]]. |
| − | | |
+ | | bgcolor="#E3E6FF" align="center" |{{Check}} |
| − | | |
+ | | bgcolor="#e3e6ff" align="center" |{{Check}} |
| − | | |
+ | | bgcolor="#E3E6FF" align="center" |{{Check}} |
| + | | bgcolor="#e3e6ff" align="center" |{{Question}} |
||
| + | | bgcolor="#E3E6FF" align="center" |{{Question}} |
||
|- |
|- |
||
| − | | |
+ | | bgcolor="#FFE4E1" |'''[[Snow Cloud]]''' - Cone [[AoE]] damage and [[Paralyze (Status Effect)|Paralyze]]. |
:Used instead of Dust Cloud in snowy areas. |
:Used instead of Dust Cloud in snowy areas. |
||
| − | | |
+ | | bgcolor="#E3E6FF" align="center" |{{X}} |
| − | | |
+ | | bgcolor="#e3e6ff" align="center" |{{Check}} |
| − | | |
+ | | bgcolor="#E3E6FF" align="center" |{{X}} |
| + | | bgcolor="#e3e6ff" align="center" |{{Question}} |
||
| + | | bgcolor="#E3E6FF" align="center" |{{Question}} |
||
|- |
|- |
||
| − | | |
+ | | bgcolor="#66CCFF" |'''[[Wild Carrot]]''' - Heals Target Party Member for an approximate equivalent to [[Cure III]]. |
| − | | |
+ | | bgcolor="#E3E6FF" align="center" |{{X}} |
| − | | |
+ | | bgcolor="#e3e6ff" align="center" |{{Check}} |
| − | | |
+ | | bgcolor="#E3E6FF" align="center" |{{X}} |
| + | | bgcolor="#e3e6ff" align="center" |{{Question}} |
||
| + | | bgcolor="#E3E6FF" align="center" |{{Question}} |
||
|- |
|- |
||
| − | | |
+ | | colspan="6" bgcolor="#FFE8C6" align="center" |<small>'''Note: [[:category:Notorious Monsters|Notorious Monsters]] in this family may use all of the above and/or additional unique special abilities.'''</small> |
|} |
|} |
||
==Notorious Monsters in Family== |
==Notorious Monsters in Family== |
||
{| border="0" width="100%" cellpadding="2" cellspacing="2" |
{| border="0" width="100%" cellpadding="2" cellspacing="2" |
||
| − | |- style="background:#BDB76B;" |
+ | |- style="background:#BDB76B;" |
| − | ! width="20%"|Name |
+ | ! width="20%" |Name |
| − | ! width="30%"|Spawn Information |
+ | ! width="30%" |Spawn Information |
| − | ! width="10%"|Level |
+ | ! width="10%" |Level |
| − | ! width="15%"|Zone |
+ | ! width="15%" |Zone |
| − | ! width="25%"|Notable Drop(s) |
+ | ! width="25%" |Notable Drop(s) |
|- style="background:#EEE8AA;" valign="top" |
|- style="background:#EEE8AA;" valign="top" |
||
| Line 82: | Line 94: | ||
|[[West Ronfaure]] |
|[[West Ronfaure]] |
||
|[[Rabbit Charm]] |
|[[Rabbit Charm]] |
||
| + | |||
| + | |- style="background:#EEE8AA;" valign="top" |
||
| + | |[[Ratatoskr]] |
||
| + | |[[Lottery Spawn]] from [[Vorpal Bunny|Vorpal Bunnies]] around (H-10) - (H-11) |
||
| + | | align="center" |~58 |
||
| + | |[[Fort Karugo-Narugo (S)]] |
||
| + | |[[Ratatoskr Pelt]] |
||
|- style="background:#EEE8AA;" valign="top" |
|- style="background:#EEE8AA;" valign="top" |
||
| Line 89: | Line 108: | ||
|[[East Sarutabaruta]] |
|[[East Sarutabaruta]] |
||
|[[Entrancing Ribbon]] |
|[[Entrancing Ribbon]] |
||
| + | |||
| + | |- style="background:#EEE8AA;" valign="top" |
||
| + | |[[Skvader]] |
||
| + | |Spawns at (I-10) |
||
| + | | align="center" |77-78 |
||
| + | |[[Uleguerand Range]] |
||
| + | |[[Aptant: Haelan]] |
||
| + | |||
| + | |- style="background:#EEE8AA;" valign="top" |
||
| + | |[[Teporingo]] |
||
| + | |[[Lottery Spawn]] from the [[Hoarder Hare]]s around (H-9) - (H-10) |
||
| + | | align="center" |20 |
||
| + | |[[Dangruf Wadi]] |
||
| + | |[[Succubus Grip]] |
||
|- style="background:#EEE8AA;" valign="top" |
|- style="background:#EEE8AA;" valign="top" |
||
| Line 94: | Line 127: | ||
|[[Lottery Spawn]] from the [[Moss Eater]]s around (E-5) - (F-6) on the first map |
|[[Lottery Spawn]] from the [[Moss Eater]]s around (E-5) - (F-6) on the first map |
||
| align="center" |72 |
| align="center" |72 |
||
| − | |[[Boyahda Tree]] |
+ | |[[The Boyahda Tree]] |
|[[Luna Subligar]] |
|[[Luna Subligar]] |
||
| Line 104: | Line 137: | ||
|[[Selene's Bow]] |
|[[Selene's Bow]] |
||
|- |
|- |
||
| + | |||
| ⚫ | |||
| + | |- style="background:#EEE8AA;" valign="top" |
||
| + | |[[Mangy-tailed Marvin]] |
||
| + | | [[Timed Spawn]] every 10-15 minutes around (E-7) |
||
| + | | align="center" | {{Question}} |
||
| + | |[[Abyssea - La Theine]] |
||
| + | | [[Adler Ring]]<br>[[Orison Cape]]<br>[[Marvin's Pelage]]<br>{{KeyItem}}[[Scarlet Abyssite of Lenity]] |
||
| + | |- |
||
| ⚫ | |||
'''Quest NMs:''' [[Maat's Pet]] ([[Shattering Stars]] - [[Beastmaster]]) |
'''Quest NMs:''' [[Maat's Pet]] ([[Shattering Stars]] - [[Beastmaster]]) |
||
| Line 111: | Line 152: | ||
'''Battlefield NMs:''' [[Bearclaw Leveret]] ([[:category:ENM|ENM]] - [[Follow the White Rabbit]]), [[Bearclaw Rabbit]] ([[:category:ENM|ENM]] - [[Follow the White Rabbit]]), [[Cottontail]] ([[:category:BCNM|BCNM]] - [[Tails of Woe]]), [[Helltail Harry]] ([[:category:BCNM|BCNM]] - [[Tails of Woe]]) |
'''Battlefield NMs:''' [[Bearclaw Leveret]] ([[:category:ENM|ENM]] - [[Follow the White Rabbit]]), [[Bearclaw Rabbit]] ([[:category:ENM|ENM]] - [[Follow the White Rabbit]]), [[Cottontail]] ([[:category:BCNM|BCNM]] - [[Tails of Woe]]), [[Helltail Harry]] ([[:category:BCNM|BCNM]] - [[Tails of Woe]]) |
||
| − | '''Other NMs:''' [[Nightmare Bunny]] (Dynamis), [[Nimble Nelson]] (Moblin Maze Mongers) |
+ | '''Other NMs:''' [[Nightmare Bunny]] (Dynamis), [[Nimble Nelson]] (Moblin Maze Mongers), [[Gougetooth Ganzaga]] ([[Fields of Valor]]) |
</small> |
</small> |
||
|} |
|} |
||
==Monsters in Family== |
==Monsters in Family== |
||
| − | {| |
+ | :{| width="50%" cellspacing="2" cellpadding="2" border="0" |
| − | |- style="background:#ffdead;" |
+ | |- style="background:#ffdead;" |
| − | ! width=" |
+ | ! width="30%" |Name |
| − | ! width=" |
+ | ! width="20%" |Level |
| − | ! width="50%"|Zone |
+ | ! width="50%" |Zone |
|- style="background:#e3e6ff" valign="top" |
|- style="background:#e3e6ff" valign="top" |
||
| − | |rowspan="2"|[[Wild Rabbit]] |
+ | | rowspan="2" |[[Wild Rabbit]] |
| align="center" | 1 |
| align="center" | 1 |
||
| [[East Ronfaure]] |
| [[East Ronfaure]] |
||
|- style="background:#e3e6ff" |
|- style="background:#e3e6ff" |
||
| − | |align="center"| 1 |
+ | | align="center" | 1 |
| [[West Ronfaure]] |
| [[West Ronfaure]] |
||
|- style="background:#e3e6ff" valign="top" |
|- style="background:#e3e6ff" valign="top" |
||
| − | |rowspan="3"|[[Forest Hare]] |
+ | | rowspan="3" |[[Forest Hare]] |
| − | | align="center" | 1-5 |
+ | | align="center" | 1 - 5 |
|[[East Ronfaure]] |
|[[East Ronfaure]] |
||
|- style="background:#e3e6ff" |
|- style="background:#e3e6ff" |
||
| − | |align="center"| 1-5 |
+ | | align="center" | 1 - 5 |
| [[West Ronfaure]] |
| [[West Ronfaure]] |
||
|- style="background:#e3e6ff" |
|- style="background:#e3e6ff" |
||
| − | |align="center"| 11-15 |
+ | | align="center" | 11 - 15 |
| [[East Ronfaure (S)]] |
| [[East Ronfaure (S)]] |
||
|- style="background:#e3e6ff" valign="top" |
|- style="background:#e3e6ff" valign="top" |
||
| − | |rowspan="3"|[[Savanna Rarab]] |
+ | | rowspan="3" |[[Savanna Rarab]] |
| − | | align="center" | 1-5 |
+ | | align="center" | 1 - 5 |
|[[West Sarutabaruta]] |
|[[West Sarutabaruta]] |
||
|- style="background:#e3e6ff" |
|- style="background:#e3e6ff" |
||
| − | |align="center"| 1-6 |
+ | | align="center" | 1 - 6 |
| [[East Sarutabaruta]] |
| [[East Sarutabaruta]] |
||
|- style="background:#e3e6ff" |
|- style="background:#e3e6ff" |
||
| − | |align="center"| 12-15 |
+ | | align="center" | 12 - 15 |
| [[West Sarutabaruta (S)]] |
| [[West Sarutabaruta (S)]] |
||
|- style="background:#e3e6ff" valign="top" |
|- style="background:#e3e6ff" valign="top" |
||
|[[Pit Hare]] |
|[[Pit Hare]] |
||
| − | | align="center" | 2-6 |
+ | | align="center" | 2 - 6 |
|[[Palborough Mines]] |
|[[Palborough Mines]] |
||
|- style="background:#e3e6ff" valign="top" |
|- style="background:#e3e6ff" valign="top" |
||
|[[Hoarder Hare]] |
|[[Hoarder Hare]] |
||
| − | | align="center" | 6-8 |
+ | | align="center" | 6 - 8 |
|[[Dangruf Wadi]] |
|[[Dangruf Wadi]] |
||
|- style="background:#e3e6ff" valign="top" |
|- style="background:#e3e6ff" valign="top" |
||
|[[Canyon Rarab]] |
|[[Canyon Rarab]] |
||
| − | | align="center" | 7-10 |
+ | | align="center" | 7 - 10 |
|[[Tahrongi Canyon]] |
|[[Tahrongi Canyon]] |
||
|- style="background:#e3e6ff" valign="top" |
|- style="background:#e3e6ff" valign="top" |
||
|[[Steppe Hare]] |
|[[Steppe Hare]] |
||
| − | | align="center" | 7-10 |
+ | | align="center" | 7 - 10 |
|[[La Theine Plateau]] |
|[[La Theine Plateau]] |
||
|- style="background:#e3e6ff" valign="top" |
|- style="background:#e3e6ff" valign="top" |
||
|[[Rabid Rat]] |
|[[Rabid Rat]] |
||
| − | | align="center" | 11-13 |
+ | | align="center" | 11 - 13 |
|[[Palborough Mines]] |
|[[Palborough Mines]] |
||
|- style="background:#e3e6ff" valign="top" |
|- style="background:#e3e6ff" valign="top" |
||
|[[Wadi Hare]] |
|[[Wadi Hare]] |
||
| − | | align="center" | 11-14 |
+ | | align="center" | 11 - 14 |
|[[Dangruf Wadi]] |
|[[Dangruf Wadi]] |
||
|- style="background:#e3e6ff" valign="top" |
|- style="background:#e3e6ff" valign="top" |
||
| − | |rowspan="2"|[[Bog Bunny]] |
+ | | rowspan="2" |[[Bog Bunny]] |
| − | | align="center" | 13-16 |
+ | | align="center" | 13 - 16 |
|[[Pashhow Marshlands]] |
|[[Pashhow Marshlands]] |
||
|- style="background:#e3e6ff" |
|- style="background:#e3e6ff" |
||
| − | |align="center"| 62-64 |
+ | | align="center" | 62 - 64 |
| [[Pashhow Marshlands (S)]] |
| [[Pashhow Marshlands (S)]] |
||
|- style="background:#e3e6ff" valign="top" |
|- style="background:#e3e6ff" valign="top" |
||
|[[Mighty Rarab]] |
|[[Mighty Rarab]] |
||
| − | | align="center" | 15-18 |
+ | | align="center" | 15 - 18 |
|[[Buburimu Peninsula]] |
|[[Buburimu Peninsula]] |
||
|- style="background:#e3e6ff" valign="top" |
|- style="background:#e3e6ff" valign="top" |
||
|[[Sand Hare]] |
|[[Sand Hare]] |
||
| − | | align="center" | 15-18 |
+ | | align="center" | 15 - 18 |
|[[Valkurm Dunes]] |
|[[Valkurm Dunes]] |
||
|- style="background:#e3e6ff" valign="top" |
|- style="background:#e3e6ff" valign="top" |
||
|[[Blood Bunny]] |
|[[Blood Bunny]] |
||
| − | | align="center" | 17-19 |
+ | | align="center" | 17 - 19 |
|[[Ordelle's Caves]] |
|[[Ordelle's Caves]] |
||
|- style="background:#e3e6ff" valign="top" |
|- style="background:#e3e6ff" valign="top" |
||
| − | |rowspan="2"|[[Vorpal Bunny]] |
+ | | rowspan="2" |[[Vorpal Bunny]] |
| − | | align="center" | 23-26 |
+ | | align="center" | 23 - 26 |
|[[Ordelle's Caves]] |
|[[Ordelle's Caves]] |
||
|- style="background:#e3e6ff" |
|- style="background:#e3e6ff" |
||
| − | |align="center"| 26-29 |
+ | | align="center" | 26 - 29 |
| [[Fort Karugo-Narugo (S)]] |
| [[Fort Karugo-Narugo (S)]] |
||
|- style="background:#e3e6ff" valign="top" |
|- style="background:#e3e6ff" valign="top" |
||
| − | |rowspan="3"|[[Goblin's Rarab]] |
+ | | rowspan="3" |[[Goblin's Rarab]] |
| − | | align="center" | 29-31 |
+ | | align="center" | 29 - 31 |
|[[Bibiki Bay]] |
|[[Bibiki Bay]] |
||
|- style="background:#e3e6ff" |
|- style="background:#e3e6ff" |
||
| − | |align="center"| 52-54 |
+ | | align="center" | 52 - 54 |
| [[West Sarutabaruta (S)]] |
| [[West Sarutabaruta (S)]] |
||
|- style="background:#e3e6ff" |
|- style="background:#e3e6ff" |
||
| − | |align="center"| 67-69 |
+ | | align="center" | 67 - 69 |
| [[Bibiki Bay]] |
| [[Bibiki Bay]] |
||
|- style="background:#e3e6ff" valign="top" |
|- style="background:#e3e6ff" valign="top" |
||
|[[Island Rarab]] |
|[[Island Rarab]] |
||
| − | | align="center" | 34-38 |
+ | | align="center" | 34 - 38 |
|[[Bibiki Bay]] |
|[[Bibiki Bay]] |
||
|- style="background:#e3e6ff" valign="top" |
|- style="background:#e3e6ff" valign="top" |
||
|[[Goblin's Rabbit]] |
|[[Goblin's Rabbit]] |
||
| − | | align="center" | 48-50 |
+ | | align="center" | 48 - 50 |
|[[Cape Teriggan]] |
|[[Cape Teriggan]] |
||
|- style="background:#e3e6ff" valign="top" |
|- style="background:#e3e6ff" valign="top" |
||
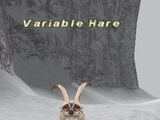
|[[Variable Hare]] |
|[[Variable Hare]] |
||
| − | | align="center" | 58-61 |
+ | | align="center" | 58 - 61 |
|[[Uleguerand Range]] |
|[[Uleguerand Range]] |
||
|- style="background:#e3e6ff" valign="top" |
|- style="background:#e3e6ff" valign="top" |
||
|[[Beach Bunny]] |
|[[Beach Bunny]] |
||
| − | | align="center" | 62-65 |
+ | | align="center" | 62 - 65 |
|[[Cape Teriggan]] |
|[[Cape Teriggan]] |
||
|- style="background:#e3e6ff" valign="top" |
|- style="background:#e3e6ff" valign="top" |
||
|[[Moss Eater]] |
|[[Moss Eater]] |
||
| − | | align="center" | 62-66 |
+ | | align="center" | 62 - 66 |
|[[Boyahda Tree]] |
|[[Boyahda Tree]] |
||
|- style="background:#e3e6ff" valign="top" |
|- style="background:#e3e6ff" valign="top" |
||
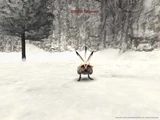
|[[Polar Hare]] |
|[[Polar Hare]] |
||
| − | | align="center" | 65-68 |
+ | | align="center" | 65 - 68 |
|[[Uleguerand Range]] |
|[[Uleguerand Range]] |
||
|- style="background:#e3e6ff" valign="top" |
|- style="background:#e3e6ff" valign="top" |
||
|[[Tropical Rarab]] |
|[[Tropical Rarab]] |
||
| − | | align="center" | 73-76 |
+ | | align="center" | 73 - 76 |
|[[Bibiki Bay]] |
|[[Bibiki Bay]] |
||
| + | |||
| + | |- style="background:#e3e6ff" valign="top" |
||
| + | |[[Bight Rarab]] |
||
| + | | align="center" | 82 - 83 |
||
| + | |[[Bibiki Bay]] |
||
| + | |||
| + | |- style="background:#e3e6ff" valign="top" |
||
| + | |[[Buds Bunny]] |
||
| + | | align="center" | 83 - 89 |
||
| + | |[[Ordelle's Caves]] |
||
| + | |||
| + | |- style="background:#e3e6ff" valign="top" |
||
| + | |[[Hispid Rarab]] |
||
| + | | align="center" | 93 - 94 |
||
| + | |[[West Sarutabaruta (S)]] |
||
| + | |||
| + | |- style="background:#e3e6ff" valign="top" |
||
| + | |[[Plateau Hare]] |
||
| + | | align="center" | {{question}} |
||
| + | |[[Abyssea - La Theine]] |
||
| + | |||
| + | |- style="background:#e3e6ff" valign="top" |
||
| + | |[[Limestone Hare]] |
||
| + | | align="center" | {{question}} |
||
| + | |[[Abyssea - Misareaux]] |
||
| + | |||
| + | |- style="background:#e3e6ff" valign="top" |
||
| + | |[[Russet Rarab]] |
||
| + | | align="center" | {{question}} |
||
| + | |[[Abyssea - Vunkerl]] |
||
| + | |||
| + | |- style="background:#e3e6ff" valign="top" |
||
| + | |[[Twigtrip Lapinion]] |
||
| + | | align="center" | 100 |
||
| + | |[[Ceizak Battlegrounds]] |
||
| + | |||
| + | |- style="background:#e3e6ff" valign="top" |
||
| + | |[[Pepper Hare]] |
||
| + | | align="center" | 101 - 102 |
||
| + | |[[Moh Gates]] |
||
| + | |||
| + | |- style="background:#e3e6ff" valign="top" |
||
| + | |[[Lapinion]] |
||
| + | | align="center" | 106 - 108 |
||
| + | |[[Marjami Ravine]] |
||
| + | |||
| + | |- style="background:#e3e6ff" valign="top" |
||
| + | |[[Leaflick Lapinion]] |
||
| + | | align="center" | 114+ |
||
| + | |[[Yorcia Weald]] |
||
| + | |||
| + | |- style="background:#e3e6ff" valign="top" |
||
| + | |[[Snowpelt Rabbit]] |
||
| + | | align="center" |111 - 112 |
||
| + | | [[Kamihr Drifts]] |
||
| + | |||
| + | |- style="background:#e3e6ff" valign="top" |
||
| + | |[[Serac Rabbit]] |
||
| + | | align="center" | 124 - 126 |
||
| + | |[[Woh Gates]] |
||
| + | |- |
||
| + | | |
||
| + | | |
||
| + | | |
||
|} |
|} |
||
Revision as of 00:53, 17 November 2018
|
Rabbits
    |
Family Information
|
Special Attacks
| Special Abilities | Original and Zilart Areas | Promathia Areas | Wings of the Goddess Areas | Abyssea | Pankration |
| Foot Kick - Single target physical damage. | |||||
| Whirl Claws - AoE physical damage. | |||||
| Dust Cloud - Cone AoE damage and Blind. | |||||
Snow Cloud - Cone AoE damage and Paralyze.
|
|||||
| Wild Carrot - Heals Target Party Member for an approximate equivalent to Cure III. | |||||
| Note: Notorious Monsters in this family may use all of the above and/or additional unique special abilities. | |||||
Notorious Monsters in Family
Monsters in Family
See Also
Trending pages
-
Jaggedy-Eared Jack -
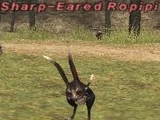
Sharp-Eared Ropipi -
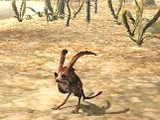
Wadi Hare -
White Coney -

Black Coney -

Goblin's Rarab -
Unut -
Variable Hare
All items (67)


B


.png)


S


U


