m (→Gestation) |
|||
| (32 intermediate revisions by 11 users not shown) | |||
| Line 1: | Line 1: | ||
| − | Monstrosity is content where adventurers can unleash their souls upon the various monsters that roam [[Vana'diel]] and take control of their mental faculties, thus becoming a monster themselves. |
+ | Monstrosity is content where adventurers can unleash their souls upon the various monsters that roam [[Vana'diel]] and take control of their mental faculties, thus becoming a monster themselves. Monsters can also engage in [[Belligerency]] against adventurers to transcend their limits and accrue greater [[infamy]]. |
==Participation== |
==Participation== |
||
| − | *Players must complete [[Monstrosity (Quest)]] to obtain {{KeyItem}}[[Ring of |
+ | *Players must complete [[Monstrosity (Quest)]] to obtain {{KeyItem}}[[Ring of supernal disjunction]]. |
**The quest is offered by the [[Suspicious Hume]] in the Pashhow Marshlands (E-12). |
**The quest is offered by the [[Suspicious Hume]] in the Pashhow Marshlands (E-12). |
||
==Visiting the Feretory== |
==Visiting the Feretory== |
||
| − | *After obtaining a {{KeyItem}}[[Ring of |
+ | *After obtaining a {{KeyItem}}[[Ring of supernal disjunction]], examine the [[Odyssean Passage]] in one of the following areas to be transported to the [[Feretory]], a liminal space where adventurers prepare themselves for their monstrous rampages. |
**[[Northern San d'Oria]] (L-8), [[Port Windurst]] (M-4), [[Port Bastok]] (K-12), or [[Pashhow Marshlands]] (E-12) |
**[[Northern San d'Oria]] (L-8), [[Port Windurst]] (M-4), [[Port Bastok]] (K-12), or [[Pashhow Marshlands]] (E-12) |
||
* All status enhancements wear off upon taking an odyssean passage to the [[Feretory]]. |
* All status enhancements wear off upon taking an odyssean passage to the [[Feretory]]. |
||
| Line 19: | Line 19: | ||
** Experience points will not reset if switching to a different monster from the same family. |
** Experience points will not reset if switching to a different monster from the same family. |
||
** Other methods of obtaining new species besides leveling up will be discussed later. |
** Other methods of obtaining new species besides leveling up will be discussed later. |
||
| − | *As of |
+ | *As of February 18, 2014, players may possess the following families of monsters: |
| + | :Aquans / Vermin / Birds / Beasts / Plantoids / Lizards / Other (currently family contains only [[Slime (MON)]] & [[Spriggan (MON)]]) |
||
| − | :Beasts / Plantoids / Vermin / Lizards |
||
==Monster Faculties== |
==Monster Faculties== |
||
| Line 29: | Line 29: | ||
===Instinct Costs=== |
===Instinct Costs=== |
||
| − | [[Instincts]] cost a certain number of [[ |
+ | [[Instincts]] cost a certain number of [[Faculty Point]]s to equip, and the amount each costs differs depending on their attributes. Furthermore, each monster has its own instinct cost limit, which cannot be exceeded. The higher the monster's level and rank, however, the higher the cost limit is. |
| + | |||
===Ranks=== |
===Ranks=== |
||
One's rank will rise as follows, in accordance with the amount of infamy he possesses. |
One's rank will rise as follows, in accordance with the amount of infamy he possesses. |
||
| Line 36: | Line 37: | ||
10,001 - 20,000: NM |
10,001 - 20,000: NM |
||
20,000+: HNM |
20,000+: HNM |
||
| + | |||
| − | * Infamy is currently capped at 10,000. |
||
===[[Infamy]]=== |
===[[Infamy]]=== |
||
| − | *Slaying monsters yields players an amount of [[ |
+ | *Slaying monsters yields players an amount of [[Infamy]] equivalent to a tenth of the experience they obtain. |
| + | *Outside of [[Belligerency]], infamy is capped at 10,000. |
||
| + | *During [[Belligerency]], infamy past 10,000 can be earned, up to a cap is 50,000. |
||
| + | *If you leave [[Belligerency]] with over 10,000 infamy, your infamy simply freezes and does not increase unless you reenter [[Belligerency]] or you spend enough infamy to be under the 10,000 cap. You do not lose any infamy by leaving Belligerency. |
||
| + | |||
===Maximum Levels=== |
===Maximum Levels=== |
||
*The maximum level for monsters is 99. |
*The maximum level for monsters is 99. |
||
| Line 46: | Line 51: | ||
==Area Selection== |
==Area Selection== |
||
===Journeying into the Field=== |
===Journeying into the Field=== |
||
| − | After finishing their preparations in the [[Feretory]], players can examine the [[Odyssean Passage]] there and select "Stalk prey as a [[monipulator]]," which displays a list of possible areas into which they can foray. |
+ | After finishing their preparations in the [[Feretory]], players can examine the [[Odyssean Passage]] there and select "Stalk prey as a [[:Category:Monipulators|monipulator]]," which displays a list of possible areas into which they can foray. |
* Areas the player has yet to visit are not displayed. |
* Areas the player has yet to visit are not displayed. |
||
**Selections also depend on the size of the monster possessed. |
**Selections also depend on the size of the monster possessed. |
||
**Monster sizes are categorized by the color of the icon border that displays during species selection. |
**Monster sizes are categorized by the color of the icon border that displays during species selection. |
||
| + | |||
===Field Areas=== |
===Field Areas=== |
||
Each field area has a recommended level that displays on the selection menu. |
Each field area has a recommended level that displays on the selection menu. |
||
| Line 55: | Line 61: | ||
* Recommended levels correspond to the lowest level of monster in the area, and there may be fiends who are much stronger than the recommended level indicates. |
* Recommended levels correspond to the lowest level of monster in the area, and there may be fiends who are much stronger than the recommended level indicates. |
||
===Field Areas to Prowl=== |
===Field Areas to Prowl=== |
||
| + | {| border="0" cellpadding="1" style="border: 1px #80A0BB solid; background-color:#80A0BB; text-align:Center;" width="100%" |
||
| − | *Recommended Level: Lv 1+ |
||
| + | |- BGCOLOR="#A3C6EA" |
||
| − | **[[West Ronfaure]] |
||
| + | |colspan="1" align="center"|'''[[Region]]''' |
||
| − | **[[East Ronfaure]] |
||
| + | |colspan="1" align="center"|'''[[Area]]''' |
||
| − | **[[North Gustaberg]] |
||
| + | |colspan="1" align="center"|'''Recommended<br>Level''' |
||
| − | **[[South Gustaberg]] |
||
| + | |colspan="1" align="center"|'''Small'''<br> (No Border) |
||
| − | **[[Zeruhn Mines]] |
||
| + | |colspan="1" align="center"|'''Medium'''<br> (White Border) |
||
| − | **[[West Sarutabaruta]] |
||
| + | |colspan="1" align="center"|'''Large'''<br> (Blue Border) |
||
| − | **[[East Sarutabaruta]] |
||
| + | |colspan="1" align="center"|'''Unreleased'''<br> (Gold Border) |
||
| − | **[[Inner Horutoto Ruins]] |
||
| + | |||
| − | *Lv 2+ |
||
| + | |- BGCOLOR="#E3E6FF" |
||
| − | **[[King Ranperre's Tomb]] |
||
| + | |rowspan="7"|[[Ronfaure]] |
||
| − | **[[Palborough Mines]] |
||
| + | |align="left"|[[West Ronfaure]] |
||
| − | **[[Giddeus]] |
||
| + | |1 |
||
| − | *Lv 3+ |
||
| + | |{{Check}} |
||
| − | **[[Ghelsba Outpost]] |
||
| + | |{{Check}} |
||
| − | **[[Dangruf Wadi]] |
||
| + | |{{Check}} |
||
| − | **[[Ranguemont Pass]] |
||
| + | |align="left"| |
||
| − | *Lv 7+ |
||
| + | |||
| − | **[[Tahrongi Canyon]] |
||
| + | |- BGCOLOR="#E3E6FF" |
||
| − | *Lv 8+ |
||
| + | |align="left"|[[East Ronfaure]] |
||
| − | **[[Fort Ghelsba]] |
||
| + | |1 |
||
| − | **[[Yughott Grotto]] |
||
| + | |{{Check}} |
||
| − | **[[Konschtat Highlands]] |
||
| + | |{{Check}} |
||
| − | **[[La Theine Plateau]] |
||
| + | |{{Check}} |
||
| − | *Lv 12+ |
||
| + | |align="left"| |
||
| − | **[[Valkurm Dunes]] |
||
| + | |||
| − | *Lv 15+ |
||
| + | |- BGCOLOR="#E3E6FF" |
||
| − | **[[Gusgen Mines]] |
||
| + | |align="left"|[[Ghelsba Outpost]] |
||
| − | **[[Ordelle's Caves]] |
||
| + | |2 |
||
| − | **[[Jugner Forest]] |
||
| + | |{{Check}} |
||
| − | **[[Pashhow Marshlands]] |
||
| + | |{{Check}} |
||
| − | **[[Buburimu Peninsula]] |
||
| + | |{{X}} |
||
| − | **[[Maze of Shakhrami]] |
||
| + | |align="left"| |
||
| − | **[[Meriphataud Mountains]] |
||
| + | |||
| − | *Lv 18+ |
||
| + | |- BGCOLOR="#E3E6FF" |
||
| − | **[[Castle Oztroja]] |
||
| + | |align="left"|[[Fort Ghelsba]] |
||
| − | *Lv 20+ |
||
| + | |3 |
||
| − | **[[Davoi]] |
||
| + | |{{Check}} |
||
| − | **[[Beadeaux]] |
||
| + | |{{Check}} |
||
| − | *Lv 23+ |
||
| + | |{{X}} |
||
| − | **[[Batallia Downs]] |
||
| + | |align="left"| |
||
| − | *Lv 24+ |
||
| + | |||
| − | **[[Rolanberry Fields]] |
||
| + | |- BGCOLOR="#E3E6FF" |
||
| − | *Lv 25+ |
||
| + | |align="left"|[[Yughott Grotto]] |
||
| − | **[[Sauromugue Champaign]] |
||
| + | |8 |
||
| − | *Lv 26+ |
||
| + | |{{Check}} |
||
| − | **[[Qufim Island]] |
||
| + | |{{Check}} |
||
| − | *Lv 34+ |
||
| + | |{{X}} |
||
| − | **[[Beaucedine Glacier]] |
||
| + | |align="left"| |
||
| − | *Lv 38+ |
||
| + | |||
| − | **{{Information Needed}} |
||
| + | |- BGCOLOR="#E3E6FF" |
||
| − | *Lv 40+ |
||
| + | |align="left"|[[King Ranperre's Tomb]] |
||
| − | **[[The Eldieme Necropolis]] |
||
| + | |8 |
||
| − | **[[Crawlers' Nest]] |
||
| + | |{{Check}} |
||
| − | **[[Garlaige Citadel]] |
||
| + | |{{Check}} |
||
| − | *Lv 41+ |
||
| + | |{{X}} |
||
| − | **[[Behemoth's Dominion]] |
||
| + | |align="left"| |
||
| − | *Lv 42+ |
||
| + | |||
| − | **[[Monastic Cavern]] |
||
| + | |- BGCOLOR="#E3E6FF" |
||
| − | **[[Xarcabard]] |
||
| + | |align="left"|[[Bostaunieux Oubliette]] |
||
| − | *Lv 45+ |
||
| + | |52 |
||
| − | **[[Toraimarai Canal]] |
||
| + | |{{Check}} |
||
| − | *Lv 46+ |
||
| + | |{{X}} |
||
| − | **[[Castle Zvahl Keep]] |
||
| + | |{{X}} |
||
| − | **[[Castle Zvahl Baileys]] |
||
| + | |align="left"| |
||
| − | *Lv 52+ |
||
| + | |||
| − | **[[Bostaunieux Oubliette]] |
||
| + | |- BGCOLOR="#E3E6FF" |
||
| − | :'''The location at which manipulators spawn after either leaving the [[Feretory]] or retrying is randomly determined.''' |
||
| + | |rowspan="5"|[[Gustaberg]] |
||
| + | |align="left"|[[North Gustaberg]] |
||
| + | |1 |
||
| + | |{{Check}} |
||
| + | |{{Check}} |
||
| + | |{{Check}} |
||
| + | |align="left"| |
||
| + | |||
| + | |- BGCOLOR="#E3E6FF" |
||
| + | |align="left"|[[South Gustaberg]] |
||
| + | |1 |
||
| + | |{{Check}} |
||
| + | |{{Check}} |
||
| + | |{{Check}} |
||
| + | |align="left"| |
||
| + | |||
| + | |- BGCOLOR="#E3E6FF" |
||
| + | |align="left"|[[Zeruhn Mines]] |
||
| + | |1 |
||
| + | |{{Check}} |
||
| + | |{{Check}} |
||
| + | |{{X}} |
||
| + | |align="left"| |
||
| + | |||
| + | |- BGCOLOR="#E3E6FF" |
||
| + | |align="left"|[[Palborough Mines]] |
||
| + | |2 |
||
| + | |{{Check}} |
||
| + | |{{Check}} |
||
| + | |{{X}} |
||
| + | |align="left"| |
||
| + | |||
| + | |- BGCOLOR="#E3E6FF" |
||
| + | |align="left"|[[Dangruf Wadi]] |
||
| + | |3 |
||
| + | |{{Check}} |
||
| + | |{{Check}} |
||
| + | |{{X}} |
||
| + | |align="left"| |
||
| + | |||
| + | |- BGCOLOR="#E3E6FF" |
||
| + | |rowspan="5"|[[Sarutabaruta]] |
||
| + | |align="left"|[[West Sarutabaruta]] |
||
| + | |1 |
||
| + | |{{Check}} |
||
| + | |{{Check}} |
||
| + | |{{Check}} |
||
| + | |align="left"| |
||
| + | |||
| + | |- BGCOLOR="#E3E6FF" |
||
| + | |align="left"|[[East Sarutabaruta]] |
||
| + | |1 |
||
| + | |{{Check}} |
||
| + | |{{Check}} |
||
| + | |{{Check}} |
||
| + | |align="left"| |
||
| + | |||
| + | |- BGCOLOR="#E3E6FF" |
||
| + | |align="left"|[[Giddeus]] |
||
| + | |1 |
||
| + | |{{Check}} |
||
| + | |{{Check}} |
||
| + | |{{X}} |
||
| + | |align="left"| |
||
| + | |||
| + | |- BGCOLOR="#E3E6FF" |
||
| + | |align="left"|[[Toraimarai Canal]] |
||
| + | |45 |
||
| + | |{{Check}} |
||
| + | |{{Check}} |
||
| + | |{{X}} |
||
| + | |align="left"| |
||
| + | |||
| + | |- BGCOLOR="#E3E6FF" |
||
| + | |align="left"|[[Inner Horutoto Ruins]] |
||
| + | |2 |
||
| + | |{{Check}} |
||
| + | |{{Check}} |
||
| + | |{{X}} |
||
| + | |align="left"| |
||
| + | |||
| + | |- BGCOLOR="#E3E6FF" |
||
| + | |rowspan="5"|[[Zulkheim]] |
||
| + | |align="left"|[[Valkurm Dunes]] |
||
| + | |12 |
||
| + | |{{Check}} |
||
| + | |{{Check}} |
||
| + | |{{X}} |
||
| + | |align="left"| |
||
| + | |||
| + | |- BGCOLOR="#E3E6FF" |
||
| + | |align="left"|[[Konschtat Highlands]] |
||
| + | |8 |
||
| + | |{{Check}} |
||
| + | |{{Check}} |
||
| + | |{{Check}} |
||
| + | |align="left"| |
||
| + | |||
| + | |- BGCOLOR="#E3E6FF" |
||
| + | |align="left"|[[Gusgen Mines]] |
||
| + | |15 |
||
| + | |{{Check}} |
||
| + | |{{Check}} |
||
| + | |{{X}} |
||
| + | |align="left"| |
||
| + | |||
| + | |- BGCOLOR="#E3E6FF" |
||
| + | |align="left"|[[La Theine Plateau]] |
||
| + | |8 |
||
| + | |{{Check}} |
||
| + | |{{Check}} |
||
| + | |{{Check}} |
||
| + | |align="left"| |
||
| + | |||
| + | |- BGCOLOR="#E3E6FF" |
||
| + | |align="left"|[[Ordelle's Caves]] |
||
| + | |15 |
||
| + | |{{Check}} |
||
| + | |{{Check}} |
||
| + | |{{X}} |
||
| + | |align="left"| |
||
| + | |||
| + | |- BGCOLOR="#E3E6FF" |
||
| + | |rowspan="3"|[[Kolshushu]] |
||
| + | |align="left"|[[Buburimu Peninsula]] |
||
| + | |15 |
||
| + | |{{Check}} |
||
| + | |{{Check}} |
||
| + | |{{Check}} |
||
| + | |align="left"| |
||
| + | |||
| + | |- BGCOLOR="#E3E6FF" |
||
| + | |align="left"|[[Tahrongi Canyon]] |
||
| + | |7 |
||
| + | |{{Check}} |
||
| + | |{{Check}} |
||
| + | |{{Check}} |
||
| + | |align="left"| |
||
| + | |||
| + | |- BGCOLOR="#E3E6FF" |
||
| + | |align="left"|[[Maze of Shakhrami]] |
||
| + | |15 |
||
| + | |{{Check}} |
||
| + | |{{Check}} |
||
| + | |{{X}} |
||
| + | |align="left"| |
||
| + | |||
| + | |- BGCOLOR="#E3E6FF" |
||
| + | |rowspan="5"|[[Norvallen]] |
||
| + | |align="left"|[[Jugner Forest]] |
||
| + | |15 |
||
| + | |{{Check}} |
||
| + | |{{Check}} |
||
| + | |{{Check}} |
||
| + | |align="left"| |
||
| + | |||
| + | |- BGCOLOR="#E3E6FF" |
||
| + | |align="left"|[[Batallia Downs]] |
||
| + | |23 |
||
| + | |{{Check}} |
||
| + | |{{Check}} |
||
| + | |{{X}} |
||
| + | |align="left"| |
||
| + | |||
| + | |- BGCOLOR="#E3E6FF" |
||
| + | |align="left"|[[The Eldieme Necropolis]] |
||
| + | |40 |
||
| + | |{{Check}} |
||
| + | |{{Check}} |
||
| + | |{{X}} |
||
| + | |align="left"| |
||
| + | |||
| + | |- BGCOLOR="#E3E6FF" |
||
| + | |align="left"|[[Davoi]] |
||
| + | |20 |
||
| + | |{{Check}} |
||
| + | |{{Check}} |
||
| + | |{{X}} |
||
| + | |align="left"| |
||
| + | |||
| + | |- BGCOLOR="#E3E6FF" |
||
| + | |align="left"|[[Monastic Cavern]] |
||
| + | |42 |
||
| + | |{{Check}} |
||
| + | |{{Check}} |
||
| + | |{{X}} |
||
| + | |align="left"| |
||
| + | |||
| + | |- BGCOLOR="#E3E6FF" |
||
| + | |rowspan="4"|[[Derfland]] |
||
| + | |align="left"|[[Pashhow Marshlands]] |
||
| + | |15 |
||
| + | |{{Check}} |
||
| + | |{{Check}} |
||
| + | |{{Check}} |
||
| + | |align="left"| |
||
| + | |||
| + | |- BGCOLOR="#E3E6FF" |
||
| + | |align="left"|[[Rolanberry Fields]] |
||
| + | |24 |
||
| + | |{{Check}} |
||
| + | |{{Check}} |
||
| + | |{{Check}} |
||
| + | |align="left"| |
||
| + | |||
| + | |- BGCOLOR="#E3E6FF" |
||
| + | |align="left"|[[Crawlers' Nest]] |
||
| + | |40 |
||
| + | |{{Check}} |
||
| + | |{{Check}} |
||
| + | |{{X}} |
||
| + | |align="left"| |
||
| + | |||
| + | |- BGCOLOR="#E3E6FF" |
||
| + | |align="left"|[[Beadeaux]] |
||
| + | |20 |
||
| + | |{{Check}} |
||
| + | |{{Check}} |
||
| + | |{{X}} |
||
| + | |align="left"| |
||
| + | |||
| + | |- BGCOLOR="#E3E6FF" |
||
| + | |rowspan="4"|[[Aragoneu]] |
||
| + | |align="left"|[[Meriphataud Mountains]] |
||
| + | |15 |
||
| + | |{{Check}} |
||
| + | |{{Check}} |
||
| + | |{{Check}} |
||
| + | |align="left"| |
||
| + | |||
| + | |- BGCOLOR="#E3E6FF" |
||
| + | |align="left"|[[Sauromugue Champaign]] |
||
| + | |25 |
||
| + | |{{Check}} |
||
| + | |{{Check}} |
||
| + | |{{Check}} |
||
| + | |align="left"| |
||
| + | |||
| + | |- BGCOLOR="#E3E6FF" |
||
| + | |align="left"|[[Garlaige Citadel]] |
||
| + | |40 |
||
| + | |{{Check}} |
||
| + | |{{Check}} |
||
| + | |{{X}} |
||
| + | |align="left"| |
||
| + | |||
| + | |- BGCOLOR="#E3E6FF" |
||
| + | |align="left"|[[Castle Oztroja]] |
||
| + | |18 |
||
| + | |{{Check}} |
||
| + | |{{Check}} |
||
| + | |{{X}} |
||
| + | |align="left"| |
||
| + | |||
| + | |- BGCOLOR="#E3E6FF" |
||
| + | |rowspan="2"|[[Qufim]] |
||
| + | |align="left"|[[Qufim Island]] |
||
| + | |26 |
||
| + | |{{Check}} |
||
| + | |{{Check}} |
||
| + | |{{X}} |
||
| + | |align="left"| |
||
| + | |||
| + | |- BGCOLOR="#E3E6FF" |
||
| + | |align="left"|[[Behemoth's Dominion]] |
||
| + | |41 |
||
| + | |{{Check}} |
||
| + | |{{Check}} |
||
| + | |{{X}} |
||
| + | |align="left"| |
||
| + | |||
| + | |- BGCOLOR="#E3E6FF" |
||
| + | |rowspan="3"|[[Fauregandi]] |
||
| + | |align="left"|[[Beaucedine Glacier]] |
||
| + | |34 |
||
| + | |{{Check}} |
||
| + | |{{Check}} |
||
| + | |{{Check}} |
||
| + | |align="left"| |
||
| + | |||
| + | |- BGCOLOR="#E3E6FF" |
||
| + | |align="left"|[[Ranguemont Pass]] |
||
| + | |3 |
||
| + | |{{Check}} |
||
| + | |{{Check}} |
||
| + | |{{X}} |
||
| + | |align="left"| |
||
| + | |||
| + | |- BGCOLOR="#E3E6FF" |
||
| + | |align="left"|[[Fei'Yin]] |
||
| + | |38 |
||
| + | |{{Check}} |
||
| + | |{{Check}} |
||
| + | |{{X}} |
||
| + | |align="left"| |
||
| + | |||
| + | |- BGCOLOR="#E3E6FF" |
||
| + | |rowspan="4"|[[Valdeaunia]] |
||
| + | |align="left"|[[Xarcabard]] |
||
| + | |42 |
||
| + | |{{Check}} |
||
| + | |{{Check}} |
||
| + | |{{Check}} |
||
| + | |align="left"| |
||
| + | |||
| + | |- BGCOLOR="#E3E6FF" |
||
| + | |align="left"|[[Castle Zvahl Baileys]] |
||
| + | |46 |
||
| + | |{{Check}} |
||
| + | |{{Check}} |
||
| + | |{{X}} |
||
| + | |align="left"| |
||
| + | |||
| + | |- BGCOLOR="#E3E6FF" |
||
| + | |align="left"|[[Castle Zvahl Keep]] |
||
| + | |46 |
||
| + | |{{Check}} |
||
| + | |{{Check}} |
||
| + | |{{X}} |
||
| + | |align="left"| |
||
| + | |||
| + | |- BGCOLOR="#E3E6FF" |
||
| + | |align="left"|[[Uleguerand Range]] |
||
| + | |58 |
||
| + | |{{Check}} |
||
| + | |{{Check}} |
||
| + | |{{Check}} |
||
| + | |align="left"| |
||
| + | |||
| + | |- BGCOLOR="#E3E6FF" |
||
| + | |rowspan="1"|[[Li'Telor]] |
||
| + | |align="left"|[[The Sanctuary of Zi'Tah]] |
||
| + | |25 |
||
| + | |{{Check}} |
||
| + | |{{Check}} |
||
| + | |{{Check}} |
||
| + | |align="left"| |
||
| + | |||
| + | |- BGCOLOR="#E3E6FF" |
||
| + | |rowspan="2"|[[Kuzotz]] |
||
| + | |align="left"|[[Eastern Altepa Desert]] |
||
| + | |30 |
||
| + | |{{Check}} |
||
| + | |{{Check}} |
||
| + | |{{Check}} |
||
| + | |align="left"| |
||
| + | |||
| + | |- BGCOLOR="#E3E6FF" |
||
| + | |align="left"|[[Western Altepa Desert]] |
||
| + | |40 |
||
| + | |{{Check}} |
||
| + | |{{Check}} |
||
| + | |{{Check}} |
||
| + | |align="left"| |
||
| + | |||
| + | |- BGCOLOR="#E3E6FF" |
||
| + | |rowspan="2"|[[Tavnazian Archipelago]] |
||
| + | |align="left"|[[Lufaise Meadows]] |
||
| + | |31 |
||
| + | |{{Check}} |
||
| + | |{{Check}} |
||
| + | |{{Check}} |
||
| + | |align="left"| |
||
| + | |||
| + | |- BGCOLOR="#E3E6FF" |
||
| + | |align="left"|[[Misareaux Coast]] |
||
| + | |31 |
||
| + | |{{Check}} |
||
| + | |{{Check}} |
||
| + | |{{Check}} |
||
| + | |align="left"| |
||
| + | |||
| + | |- BGCOLOR="#E3E6FF" |
||
| + | |rowspan="1"|[[Arrapago Islands]] |
||
| + | |align="left"|[[Caedarva Mire]] |
||
| + | |61 |
||
| + | |{{Check}} |
||
| + | |{{Check}} |
||
| + | |{{Check}} |
||
| + | |align="left"| |
||
| + | |||
| + | |- BGCOLOR="#E3E6FF" |
||
| + | |rowspan="2"|[[Vollbow]] |
||
| + | |align="left"|[[Cape Teriggan]] |
||
| + | |62 |
||
| + | |{{Check}} |
||
| + | |{{Check}} |
||
| + | |{{Check}} |
||
| + | |align="left"| |
||
| + | |||
| + | |- BGCOLOR="#E3E6FF" |
||
| + | |align="left"|[[Valley of Sorrows]] |
||
| + | |66 |
||
| + | |{{Check}} |
||
| + | |{{Check}} |
||
| + | |{{Check}} |
||
| + | |align="left"| |
||
| + | |||
| + | |- BGCOLOR="#E3E6FF" |
||
| + | |rowspan="1"|[[West Aht Urhgan]] |
||
| + | |align="left"|[[Bhaflau Thickets]] |
||
| + | |63 |
||
| + | |{{Check}} |
||
| + | |{{Check}} |
||
| + | |{{Check}} |
||
| + | |align="left"| |
||
| + | |||
| + | |- BGCOLOR="#E3E6FF" |
||
| + | |rowspan="1"|[[Lumoria]] |
||
| + | |align="left"|[[Al'Taieu]] |
||
| + | |68 |
||
| + | |{{Check}} |
||
| + | |{{Check}} |
||
| + | |{{Check}} |
||
| + | |align="left"| |
||
| + | |||
| + | |} |
||
| + | |||
| + | '''The location at which monipulators spawn after either leaving the [[Feretory]] or retrying is randomly determined.''' |
||
| + | |||
| + | See also: [[Arkitanx's Monstrosity Level Guide]] |
||
| + | |||
| + | See also: [[Tiffeny's Monstrosity Guide]] |
||
| + | |||
===Gestation=== |
===Gestation=== |
||
| − | When [[monipulators]] first enter the field or retry in the same area after being defeated in combat, they experience "[[gestation]]," which bestows the following effects. In addition, monipulators are advised to flee to a safe spot during gestation periods. |
+ | When [[monipulators]] first enter the field or retry in the same area after being defeated in combat, they experience "[[gestation]]," which bestows the following effects. In addition, monipulators are advised to flee to a safe spot during gestation periods. This effect now lasts for 18 Earth hours, and must be manually removed if you wish to start fighting before that time is up. |
*Undetectable by enemies |
*Undetectable by enemies |
||
*Invisible |
*Invisible |
||
| Line 133: | Line 563: | ||
===Unlocking Via Infamy Exchange=== |
===Unlocking Via Infamy Exchange=== |
||
Speak with [[Teyrnon]] in the Feretory to exchange infamy for new instincts and monster species. |
Speak with [[Teyrnon]] in the Feretory to exchange infamy for new instincts and monster species. |
||
| + | |||
| + | For any jobs that you have completed the [[Shattering Stars]] battle (or equivalent quest), the corresponding Instinct is discounted 50%. |
||
Certain species and instincts must be unlocked by fulfilling requirements, and will be listed only after those requirements are met. |
Certain species and instincts must be unlocked by fulfilling requirements, and will be listed only after those requirements are met. |
||
| + | |||
===Unlocking Via Trading Items=== |
===Unlocking Via Trading Items=== |
||
| − | Certain |
+ | Certain monipulators may only be unlocked by trading specific items to the NPC [[Suibhne]] in the [[Feretory]] after fulfilling the requisite conditions. |
| + | |||
| + | '''Requisite Items:''' Suibhne will tell players what items they must procure after they have fulfilled certain conditions, so make sure to speak with him periodically. |
||
| + | *'''You must be in the default form of the species which they are trying to unlock.''' |
||
| + | **For example, unlocking [[Legendary Adamantoise (MON)]] requires you to be in [[Adamantoise (MON)]] form, not [[Pygmy Adamantoise (MON)]] form. |
||
| + | **This condition does not apply to [[Dragon Quest Slime (MON)]] or [[Spriggan (MON)]]. |
||
| + | *'''You must meet or exceed the requisite level to unlock the subspecies.''' |
||
| + | **For example, to trade [[Antlion Spirit]]s and unlock [[Onyx Antlion (MON)]], you must be a level 30+ [[Antlion (MON)]]. |
||
| + | **This condition does not apply to [[Dragon Quest Slime (MON)]] or [[Spriggan (MON)]]. |
||
| + | *In the event that a player can unlock multiple subspecies, [[Suibhne]] informs him of one requisite item at random. |
||
| − | '''Requisite Items:''' Suibhne will tell players what items they must procure after they have fulfilled the following conditions, so make sure to speak with him periodically. |
||
| + | *Any of the requisite items may be traded at any time. There is no reason for it to be the one [[Suibhne]] mentioned during a player's last conversation with him. |
||
| − | *Can possess the species of the subspecies they wish to unlock. |
||
| + | *Some items, such as the [[Ake-Ome Spirit]], can only be traded after being prompted.{{Verification}} |
||
| − | *Are of the requisite level to unlock the subspecies. |
||
| − | ** In the event that a player can unlock multiple subspecies, [[Suibhne]] will inform him of one requisite item at random. |
||
| − | ** Any of the requisite items may be traded at any time. There is no reason for it to be the one [[Suibhne]] mentioned during a player's last conversation with him. |
||
==Text Commands== |
==Text Commands== |
||
| Line 151: | Line 590: | ||
/monsterskill (/ms) "[m.s. name]" "[target name]"<br> |
/monsterskill (/ms) "[m.s. name]" "[target name]"<br> |
||
Uses a monster skill on specified target.<br> |
Uses a monster skill on specified target.<br> |
||
| − | You cannot use a |
+ | You cannot use a monster skill that you have not learned. |
| − | * This command |
+ | * This command can only be used in Monstrosity. |
{{MonNavbox}} |
{{MonNavbox}} |
||
Revision as of 03:07, 26 August 2018
Monstrosity is content where adventurers can unleash their souls upon the various monsters that roam Vana'diel and take control of their mental faculties, thus becoming a monster themselves. Monsters can also engage in Belligerency against adventurers to transcend their limits and accrue greater infamy.
Participation
- Players must complete Monstrosity (Quest) to obtain
 Ring of supernal disjunction.
- The quest is offered by the Suspicious Hume in the Pashhow Marshlands (E-12).
Visiting the Feretory
- After obtaining a Ring of supernal disjunction, examine the Odyssean Passage in one of the following areas to be transported to the Feretory, a liminal space where adventurers prepare themselves for their monstrous rampages.
- Northern San d'Oria (L-8), Port Windurst (M-4), Port Bastok (K-12), or Pashhow Marshlands (E-12)
- All status enhancements wear off upon taking an odyssean passage to the Feretory.
Monstrous Preparations
Once inside the Feretory, the Equipment menu is replaced by "Customization." This new menu allows players to adjust various aspects of their bestial vessel, such as its species, abilities, and name.
Species Selection
- There are several species to choose at the start, and others may be unlocked by leveling up, exchanging infamy, and trading certain requisite items.
- The initial species are Lizard (MON), Mandragora (MON), and Rabbit (MON).
- Possessing a monster of a different family resets the number of experience points needed for your next level, but a window will appear asking you to confirm whether or not to proceed.
- Experience points will not reset if switching to a different monster from the same family.
- Other methods of obtaining new species besides leveling up will be discussed later.
- As of February 18, 2014, players may possess the following families of monsters:
- Aquans / Vermin / Birds / Beasts / Plantoids / Lizards / Other (currently family contains only Slime (MON) & Spriggan (MON))
Monster Faculties
Though monsters may not use equipment, they do possess innate knowledge termed "instincts," which function in the same manner. They can be learned by leveling up or exchanging Infamy.
- Instincts learned by leveling up differ from monster to monster.
- Once an instinct has been learned, it may be used with any monster the player possesses.
- Infamy exchange will be discussed later.
Instinct Costs
Instincts cost a certain number of Faculty Points to equip, and the amount each costs differs depending on their attributes. Furthermore, each monster has its own instinct cost limit, which cannot be exceeded. The higher the monster's level and rank, however, the higher the cost limit is.
Ranks
One's rank will rise as follows, in accordance with the amount of infamy he possesses. Infamy Rank 0 - 10,000: Mon 10,001 - 20,000: NM 20,000+: HNM
Infamy
- Slaying monsters yields players an amount of Infamy equivalent to a tenth of the experience they obtain.
- Outside of Belligerency, infamy is capped at 10,000.
- During Belligerency, infamy past 10,000 can be earned, up to a cap is 50,000.
- If you leave Belligerency with over 10,000 infamy, your infamy simply freezes and does not increase unless you reenter Belligerency or you spend enough infamy to be under the 10,000 cap. You do not lose any infamy by leaving Belligerency.
Maximum Levels
- The maximum level for monsters is 99.
- The maximum level is also dependent upon the limit break quests a player has completed.
Naming
Players may select up to two descriptors to modify the species name of the monster they possess.
Area Selection
Journeying into the Field
After finishing their preparations in the Feretory, players can examine the Odyssean Passage there and select "Stalk prey as a monipulator," which displays a list of possible areas into which they can foray.
- Areas the player has yet to visit are not displayed.
- Selections also depend on the size of the monster possessed.
- Monster sizes are categorized by the color of the icon border that displays during species selection.
Field Areas
Each field area has a recommended level that displays on the selection menu.
- It is possible to enter areas in which the recommended level is higher than the monipulator's.
- Recommended levels correspond to the lowest level of monster in the area, and there may be fiends who are much stronger than the recommended level indicates.
Field Areas to Prowl
The location at which monipulators spawn after either leaving the Feretory or retrying is randomly determined.
See also: Arkitanx's Monstrosity Level Guide
See also: Tiffeny's Monstrosity Guide
Gestation
When monipulators first enter the field or retry in the same area after being defeated in combat, they experience "gestation," which bestows the following effects. In addition, monipulators are advised to flee to a safe spot during gestation periods. This effect now lasts for 18 Earth hours, and must be manually removed if you wish to start fighting before that time is up.
- Undetectable by enemies
- Invisible
- Sprint
- Inability to attack
Other Methods for Unlocking Species
Unlocking Via Infamy Exchange
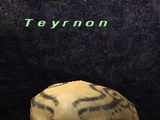
Speak with Teyrnon in the Feretory to exchange infamy for new instincts and monster species.
For any jobs that you have completed the Shattering Stars battle (or equivalent quest), the corresponding Instinct is discounted 50%.
Certain species and instincts must be unlocked by fulfilling requirements, and will be listed only after those requirements are met.
Unlocking Via Trading Items
Certain monipulators may only be unlocked by trading specific items to the NPC Suibhne in the Feretory after fulfilling the requisite conditions.
Requisite Items: Suibhne will tell players what items they must procure after they have fulfilled certain conditions, so make sure to speak with him periodically.
- You must be in the default form of the species which they are trying to unlock.
- For example, unlocking Legendary Adamantoise (MON) requires you to be in Adamantoise (MON) form, not Pygmy Adamantoise (MON) form.
- This condition does not apply to Dragon Quest Slime (MON) or Spriggan (MON).
- You must meet or exceed the requisite level to unlock the subspecies.
- For example, to trade Antlion Spirits and unlock Onyx Antlion (MON), you must be a level 30+ Antlion (MON).
- This condition does not apply to Dragon Quest Slime (MON) or Spriggan (MON).
- In the event that a player can unlock multiple subspecies, Suibhne informs him of one requisite item at random.
- Any of the requisite items may be traded at any time. There is no reason for it to be the one Suibhne mentioned during a player's last conversation with him.
- Some items, such as the Ake-Ome Spirit, can only be traded after being prompted.

Text Commands
The text command /checkname (/cn) has been introduced.
This command enables players to examine the true names of adventurers while they are possessing monsters in Monstrosity.
- This command functions in the exact same manner as /check when using it on normal adventurers.
The text command /monsterskill (/ms) has been introduced.
/monsterskill (/ms) "[m.s. name]" "[target name]"
Uses a monster skill on specified target.
You cannot use a monster skill that you have not learned.
- This command can only be used in Monstrosity.
-
Teyrnon -
Odyssean Passage -

Suspicious Elvaan -

Ring of supernal disjunction -

Sheep (MON) -

Roc (MON) -

Adenium (MON) -

Legendary Tiger (MON)
All items (203)
-
Abyssobugard (MON)

-
Adamantoise (MON)

-
Adenium (MON)

-
Aengus

-
Ake-Ome Spirit
-
Alabaster Rabbit (MON)

-
Alloy Tonic
-
Alloy Tonic +1
-
Alloy Tonic +2
-
Ameretat (MON)

-
Amorph Instincts
-
Amphiptere (MON)

-
Anniversary MMO Collaboration/Guide
-
Antlion (MON)

-
Antlion Spirit
-
Apkallu (MON)

-
Aquan Instincts
-
Arundimite (MON)

-
Ashen Lizard (MON)

-
Astoltian Slime (MON)

-
Azure Chigoe (MON)

-
Azure Leech (MON)

-
Azure Sea Monk (MON)

-
Azure Toad (MON)


-
Sabotender (MON)

-
Sabotender Florido (MON)

-
Sandworm (MON)

-
Sanguiptere (MON)

-
Scarce Morbol (MON)

-
Scolopendrid (MON)

-
Scorpion (MON)

-
Sea Monk (MON)

-
She-Slime (MON)

-
She-Slime Spirit
-
Sheep (MON)

-
Sibilus (MON)

-
Slime (MON)

-
Slime Fetish

-
Slug (MON)

-
Smilodon (MON)

-
Spider (MON)

-
Spriggan (MON)

-
Spriggan Fetish

-
Spriggan.C (MON)

-
Spriggan.G (MON)

-
Suibhne

-
Suspicious Elvaan

-
Suspicious Galka

-
Suspicious Hume

-
Suspicious Tarutaru


