|
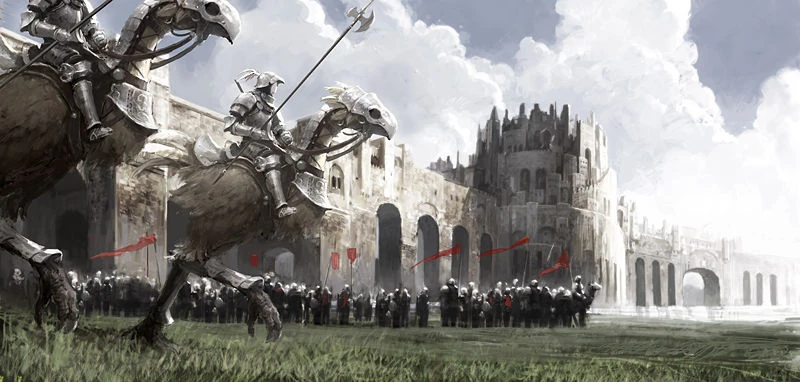
Campaign Battles
This is the collective term given to the series of battles and border skirmishes waged in the Quon and Mindartian theaters during the Crystal War.
The regions in question contain areas which are continually being plagued by sporadic outbursts of hostility along perpetually contested borders. Should the incessantly encroaching beasthordes be unequivocally repelled, the lands in dispute will be claimed as territories under Altana. There are several benefits to be reaped once claim is laid to an area, such as an increase in the number of Campaign Ops available, and the number of such benefits will grow in proportion to the amount of land secured.
Moreover, by having an "Allied Tag" issued to you by an area's Campaign Arbiter (C.A.), you may choose to have your campaign battle performance assessed. By doing so you may receive rewards for your service, such as Campaign-specific points, known as "Allied Notes," and even experience points. It is worth noting that experience points will not be lost in the event that a player should die while participating in Campaign.
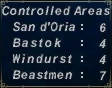
Campaign Map
The Campaign Map shows the current Campaign conflicts and how the nations are faring against the Beastmen. This can be accessed by typing /campaignmap or /cmap.
Map Information:
The Controlled Areas information appears in the upper right hand corner of the map when the arrow is not hovering over an area icon. This shows how many areas each nation currently controls. When a nation controls an area their field Campaign officer will be standing at the fortifications. When the beastmen are controlling an area the C.A. (Campaign Arbiter) will be standing some distance away from the fortifications.
|
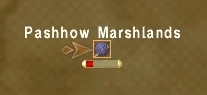
The Campaign Map shows the current Campaign battles. The sword icon over the area icon is the indicator for a current Campaign battle. Icons that are colored blue, red, or yellow are controlled by one of the nations and are currently defending. Grey icons are beastmen controlled.
It also indicates the Fortifications and Resources levels (actual vs maximum) in each area. These amounts represent how much damage the stronghold can take before it falls to the attacking force completely, and the availability of Temporary Items during a campaign battle. If Resources hits 0, no more temporary items can be purchased. Resources are replenished at the start of the week. Campaign Ops supply transport missions including Crimson Domino I / II can be completed to replenish an area's resources- by 1 point each time for Crimson Domino I; a concentrated effort by several players is needed to add a meaningful amount to the supply.
|
Enlisting in Campaign Battles
All those wishing to serve would enlist with one of the allied army's three main forces--the Kingdom of San d'Oria, the Republic of Bastok, or the Federation of Windurst--to combat the ever-advancing beastmen confederate comprising the Quon Host of the Orcish Empire, the Quadav Shieldwarriors, the Yagudo Theomilitary, and the Shadowlord's Dark Kindred. However, a volunteer's duties were not always limited to direct engagement with the enemy. Campaign endeavors also extended to tasks such as marches, supply runs, entrenchment and fortification, and cooperative maneuvers with allied forces.
How to Enlist:
- Complete Steamed Rams, The Fighting Fourth, or Snake on the Plains to join San d'Oria, Bastok, or Windurst's military forces respectively. Once you have enlisted in a military force you are able to partake in Campaign.
Traveling to a Campaign Battle
Speak to a Campaign Arbiter in your Allied nation.
- They will offer you teleportation to any of the Campaign zones, but you must have previously been in the zone at some point.
- The C.A will transport you to a Campaign area for a number of Allied Notes. The cost will depend on where you are traveling and who is controlling it.
- You will arrive at the Fortifications in the zone if it is controlled by an allied nation or by the Jeuno C.A. if it is controlled by beastmen.
- You can also teleport back from any zone to your allied nation by speaking to the field officer or C.A. in any zone.
| Town Campaign Arbiters | |||
| Windurst (S) | Windurst Waters (S) | Wenonah, C.A. (G-10) | |
| Bastok (S) | Bastok Markets (S) | Narkissa, C.A. (E-8) | |
| San d'Oria (S) | Southern San d'Oria (S) | Scarlette, C.A. (H-9) | |
Participation in a Campaign Battle
- When you have arrived in a Campaign area, you must sign up with the Campaign Arbiter in the zone to participate in the battle. The battle may sprawl out across the zone but is generally focused upon the fortifications in the zone.
- Once signed up you will obtain an Sword icon in front of your name. This allows you to attack all the Campaign monsters in the areas. These mobs show up with a sword in front of their name as well. They will not aggro you unless you have the Sword icon. All players in the area with the Sword icon can attack all Campaign monsters.
Campaign Temporary Items
The Campaign Arbiters provide the players with temporary items in exchange for Allied Notes. These items vanish after you exit the battle. The availability of items depends on the area fortification's Resources: if they are zero, players will be unable to obtain temporary items.
| Item | Cost | Effect |
| Hi-Potion +3 | 30 AN | Restores 130 HP |
| Hi-Ether +3 | 30 AN | Restores 70 MP |
| Instant Reraise | 30 AN | Adds Reraise effect |
| Lethe Water | 30 AN | Removes up to 3 enhancements on target |
| X-Potion +3 | 45 AN | Restores a moderate amount of HP. |
| Super Ether +3 | 45 AN | Restores a moderate amount of MP. |
| Catholicon | 45 AN | Cures most status ailments. |
| Elixir | 60 AN | Instantly Restores HP and MP 25% |
| Daedalus Wing | 60 AN | Instantly increases TP by 100% |
| Body Boost | 60 AN | Maximum HP +50% |
| Mana Boost | 60 AN | Maximum MP +50% |
Campaign Rewards
During the battle, all actions you do will earn you Experience Points and Allied Notes.
- Each Medal rank has a different amount of points and notes you can cap at. When you have capped you can go to the C.A. or field officer and ask for an Allied Campaign Assessment. You will then be awarded your points and notes.
- You can ask for an assessment at any point during the campaign battle and be granted new allied tags after you have reached the capped limit.
- Casting buffs on the Allied Campaign NPCs gains a small amount of Allied Notes. Approximately 17 notes are awarded for casting Protect IV on a full squad of NPCs.
- If you die while participating in a campaign battle and the enemy forces retreat you will still obtain the exp/limit points and allied notes you earned as soon as you are raised. Zoning in any way during a campaign battle will forfeit all exp/limit points and allied notes you have earned during the battle. This includes returning to your Home Point, being tractored, and casting teleportation spells.
- Experience points earned are determined mostly by how much enmity is procured by you on Campaign-active monsters. Seeing as spamming Dia hundreds of times results in barely 100 experience, but using Flash six or seven times results in well over 400 experience. However, experience is also gained through performing actions on yourself as well as others (including non-player characters participating in Campaign).
Campaign Battle Medal Limits:
- Bronze Ribbon of Service - 1250 (12/18/07) Allied Notes / 2500 (12/18/07) Experience Points
- Brass Ribbon of Service - 1410+ Allied Notes / 2825+?(12/08/07) Experience Points

- Allied Ribbon of Bravery - 1137+? (12/08/07) Allied Notes / 3375+?(12/08/07) Experience Points
- Allied Ribbon of Glory -
- Bronze Star - 1615+? (12/26/07) Allied Notes / 3230+?(12/26/07) Experience Points
Note: As of the November 28, 2007 update, the experience and Allied Notes caps have been increased.
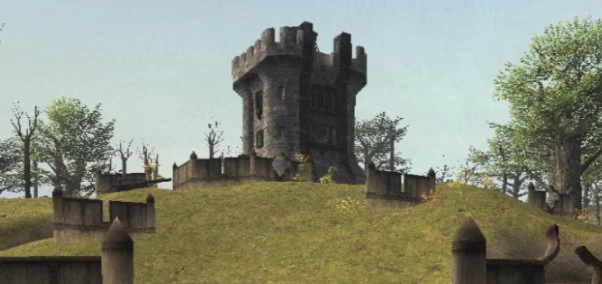
Fortifications
|
The battle will be centered on the fortifications in the outdoor zones. These are generally located at the same spot as the Outpost from the future if there is an Outpost in that zone.
Fortification Locations:
- West Sarutabaruta (S) - (H-6)
- Meriphataud Mountains (S) - (E-5)
- Sauromugue Champaign (S) - (H-7)
- Fort Karugo-Narugo (S) - (H-9)/(I-8), continue west behind the Phosphorous Ward onto the Fivespires map.
- North Gustaberg (S) - (D-10)
- Pashhow Marshlands (S) - (K-6)
- Rolanberry Fields (S) - (J-7)
- Grauberg (S) - (I-8)
- East Ronfaure (S) - (H-8)
- Jugner Forest (S) - (I-8)
- Batallia Downs (S) - (J-7)
- Vunkerl Inlet (S) - (G-10)
- Eldieme Necropolis (S) - (I-8)
Gaining Control of a Fortification
- Players can now attack the ???s once they change to targets named "Fortification". It seems that the forts' HP returns to full after it reaches 50%. However, each reduction to 50% reduces the Fortification number by 1 point. Fortifications seem to "repair" themselves over time when not under attack. If enemies spawn around a fort outside of a campaign battle, it seems to increase this rate of repair.
- These Fortifications are Lv.50 and can be skilled-up on when not participating in the Campaign battle with Allied Tags. They have incredibly low evasion, but high defense and very high hit points. Though no matter who has done the most damage to them, they do not "turn". However, when used in conjunction with Hide, Sneak Attack will activate.
- For each battle, there is a winner and a loser. The winning side will have all monsters or NPCs warp out, with the losing side fleeing out of sight. The winning army will gain influence in the region as well.
- Fortifications have no MP and cannot be Paralyzed or Slept. They can, however, be assaulted with Acid Bolts for a Defense-down effect.
Fortification Flags
Control of the fortification is indicated by a nation or beastman flag. The fortifications controlled by a nation also have their field officer present.
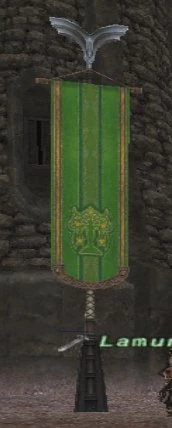
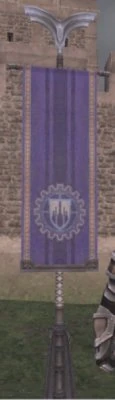
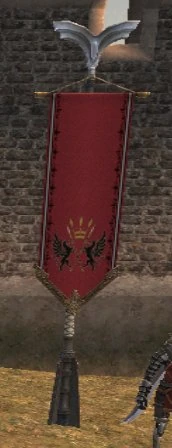
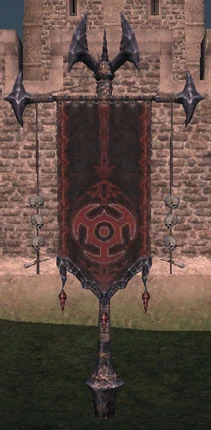
| Fortification Flags | |||
| Windurst (S) | Bastok (S) | San d'Oria (S) | Beastmen (S) |
|
|
|
|
Allied Campaign NPCs and Heroes
Allied Campaign NPCs will join in the combat. These seem to be fairly strong NPCs. They come in large squads to protect or attack fortifications. Also, Campaign Heroes will join in the fray. Note that these NPCs do not gain enmity and so any beastmen attacking an NPC will immediately turn and attack you if you generate any enmity whatsoever.
Federal Forces of Windurst
| Federation Army - Windurst | ||||||
| Commander | Regulars | Notes | ||||
| Kayeel-Payeel | Aquarian Casters | Tarutaru Black Mages - Kayeel-Payeel uses AM2, also summons "Fiend" elementals to aid him | ||||
| Lutete | Ariesian Casters | Tarutaru White Mages - Lutete summons light elementals called "Luminous Coalescence" | ||||
| Zonpa-Zippa | Capricornian Casters | Tarutaru Monks - Zonpa-Zippa calls upon Ace Cardians into battle | ||||
| Zolku-Azolku | Libran Casters | Tarutaru Scholars - Unleashes helix spells on opponents, Zolku also casts Tier 4 nukes | ||||
| Gariri | Scorpion Casters | Tarutaru Black Mages - Gariri summons a Flame Giant into battle, which can be buffed like other NPCs | ||||
| Nyumomo | Patriarch Protectors | Tarutaru Beastmasters - Nyumomo calls Patrol Worms into battle | ||||
| Mikhe Aryohcha | Cougar Volunteers | |||||
| Haja Zhwan | Wildcat Volunteers | Mithra Rangers - Haja Zhwan repeatedly uses Detonator. | ||||
| Vhino Delkahngo | Crocodile Mercenaries | Mithra Rangers | ||||
| Lhu Mhakaracca | Python Mercenaries | Mithra Beastmasters - Lhu Mhakaracca calls upon two Rocs named "Kyo" and "Pya," and wields a Guttler | ||||
| N/A | Piscean Casters | Tarutaru who brings supplies to fortifications and then warps out. | ||||
Republican Army of Bastok
| Republican Army - Bastok | ||||||
| Commander | Regulars | Notes | ||||
| Maximilian | 1st Legionnaire | Galka Rangers - | ||||
| Ludwig | 2nd Legionnaire | Hume Dark Knights - | ||||
| Invincible Shield | 3rd Legionnaire | Hume Warriors - | ||||
| Bartholomaus | 1st Iron Musketeer | Hume Red Mages - | ||||
| Kurt | 8th Iron Musketeer | Hume Ninjas - Kurt and his musketeers use ranged attacks | ||||
| Elivira | 1st Gold Musketeer | Hume Musketeers (RNG) - Elivira is armed with an Annihilator | ||||
| Else | 1st Legion Reiter | Galka Red Mages - | ||||
| Striking Bull | 2nd Legion Grenadier | Galka Warriors - Striking Bull repeatedly uses Mistral Axe at long range as his preferred style | ||||
| Adelheid | 2nd Legion Scout | Hume Scholars - Adelheid summons "status tubes" to assist in battle | ||||
| Sonia | Field Musician Guard | Hume Dancers - Sonia's attacks have Additional Effect: Stun | ||||
Royal Army of San d'Oria
| Kingdom Army - San d'Oria | ||||||
| Commander | Regulars | Notes | ||||
| Yrvaulair S Cousseraux (DRG) | Royal Knight | Elvaan Paladins - Yrvaulair throws Angons | ||||
| Febrenard C Brunnaut | Temple Knight | Elvaan White Mages - The knights will use any white magic buffs (Stoneskin, etc.) and will Cure V each other and Febrenard. | ||||
| Valaineral R Davilles | Royal Guard | Elvaan Paladins - Valaineral's Hauteclaire always procs its Additional Effect: Light Damage | ||||
| Cerane I Virgaut | Aragoneu Knight | Elvaan Paladins - Cerane has an Aegis and uses it to Shield Bash | ||||
| Feldrautte I Rouhent | Norvallen Knight | |||||
| Laisavie X Berlends | Silver Fox Archer | Elvaan Rangers - Laisavie uses a bow and ranged weapon skills, plus white magic. | ||||
| Noillurie | Red Rose Condottiere | Elvaan | ||||
| Leonoyne | Savage Hound Condottiere | Elvaan Warriors - Leonoyne uses Tier 3 -ga black magic and some white magic, including Cure IV | ||||
| Ashmea B Greinner | Scarlet Boar Esquire | Elvaan Dragoons - Ashmea dual wields swords and casts Red Mage spells. | ||||
| Mieuseloir B Enchelles | Crimson Wolf Esquire | Elvaan Dragoons - | ||||
| Crimson Boar Esquire |
||||||
| N/A | Gold Badger Esquire | Sighted as Galka and Elvaan Female; brings supplies to forts, then warps out. | ||||
Campaign Enemies and Notorious Monsters
The monsters appear in squadrons with a named leader. They all check as Impossible to Gauge. These will not aggro players without the sword icon for Campaign; only players with Allied Tags will be attacked.
- It is possible to gain skill ups on these mobs, as long you do not have an Allied Tag. Fortifications are 37, regular mobs are estimated to be around level 60, the Commander is 75+.
- Being defeated by these mobs without Allied Tags will cause you to lose experience points.
- It is possible to gain hate without Allied Tags if you assist other player characters with Allied Tags on.
Dark Kindred
These uncommon forces sometimes show up during campaign battles, and are often more difficult than the other three forces.
| Dark Kindred | ||||||
| Commander | Regulars | Notes | ||||
| Shadoweye (Ahriman) | Shadoweye Gnat (Gnat) | The gnats ferociously attack in a swarm | ||||
| Shadowfang (Kindred SMN/DRK) | Shadowfang Void (Dark Elemental) | Shadowfang uses Condemnation and Quadrastrike | ||||
| Shadowhand | Shadowhand Cuirassier | Fomor Black Mages - Shadowhand uses both Chainspell and Manafont, and Blizzaga III can one-shot anyone. | ||||
| Shadowhorn (Taurus MNK/BLM) | Shadowhorn Stormer (Gigas) | Gigas Monks - Shadowhorn uses Hundred Fists, and casts Thundaga III, Shock Spikes, and Stun. | ||||
Orcish Hosts
The Orcish Host employs "Orcish Counterstance," granting them a counterstance effect. Some NM's use "Beserker Dance" to grant a self-Haste effect.
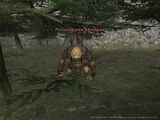
Quadav Shieldwarriors
Quadav Shieldwarriors have a TP move called "Diamond Shell" that makes any attacks from behind hit for 0 damage while the effect is active. Take note of this when used and move to the front to cause damage.
Some of the leaders will also use Wrath of Gu'Dha.
| Quadav Shieldwarriors | ||||||
| Commander | Regulars | Notes | ||||
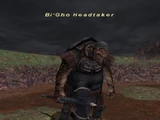
| Bi'Gho Headtaker | Qulun Heavyshell | Quadav Dark Knights - | ||||
| Bo'Dho Hundredfist | Waughroon Heavyshell | Quadav Warriors - Bo'Dho make frequent use of Wrath of Gu'Dha (AOE knockback + Weight, absorbed by two shadows), and uses both Hundred Fists and Mighty Strikes | ||||
| De'Vyu Headhunter (S) | Beadeaux Vanguard | Quadav Paladins - Past version of De'Vyu Headhunter | ||||
| Di'Dha Adamantfist | Di'Dha's Elite Guard | Quadav White Mages - Di'Dha casts Hastega, Cure V, Curaga IV, and can use Benediction. Can activate Benediction three times in the same battle, healing himself completely. Will use Ore Lob, but not as frequently as Ga'Dho. | ||||
| Do'Bho Venomtail | Dadough Vanguard | Quadav Black Mages - they're fond of casting Poisonga II, also Do'Bho has Additional Effect: Poison | ||||
| Ga'Dho Softstep | Vhuud Vanguard | Quadav Thieves - Ga'Dho summons Gu'Dho Staggershell which uses damaging Ore Lob attack that wipes shadows and does high damage. | ||||
| Gha'Bu Champion | ||||||
| Gi'Ghi Rockchopper | Gi'Ghi's Elite Guard | Quadav | ||||
| Go'Bhu Herohunter | Go'Bhu's Elite Raider | Quadav Red Mages - Go'Bhu casts many AOE Enfeebling spells | ||||
| Go'Dha Jademaiden | Go'Dha's Elite Raider | |||||
| No'Mho Crimsonarmor | No'Mho's Elite Guard | Quadav Paladins - No'Mho is able to cast several Black magic spells including Sleepga II and Ice Spikes | ||||
Yagudo Theomilitary
The Yagudo Theomilitary has an ability called "Feathered Furore" that will remove one random piece of equipment in a cone blast. Several campaign leaders also use "Dark Invocation" to inflict poison.
| Yagudo Theomilitary | ||||||
| Commander | Regulars | Notes | ||||
| Dee Xalmo the Grim (MNK) | Divine Ascetic | Yagudo Monks - Dee Xalmo spams Doom and can give himself an En-Doom effect. Extremely dangerous once Hundred Fists gets activated. | ||||
| Kazan the Peerless (NIN) | Plenilune Ronin | Yagudo Ninjas - Kazan uses Shibaraku, a very powerful AoE. | ||||
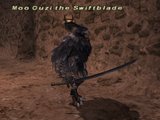
| Moo Ouzi the Swiftblade (SAM) | Divine Disseminator | Yagudo Samurai - Moo Ouzi has a seemingly permanent Regain effect. | ||||
| Muu Buxu the Elusive (NIN) | Divine Assassin | Yagudo Ninjas - Muu Buxu can use Mijin Gakure repeatedly. | ||||
| Vaa Oozu the Redolent (BST) | Divine Inciter | Yagudo Samurai - Vaa Ouzu calls up to two pet Scolopendrid. | ||||
| Vee Qiqa the Decreer (SMN) | Divine Templar | Yagudo Summoners - Vee Qiqa summons multiple elementals. | ||||
| Vuu Puqu the Beguiler (BRD/NIN) | Divine Inspirer | Yagudo Bards - Vuu Puqu uses Dragonfoe Mambo and Sheepfoe Mambo in conjunction with Utsusemi. | ||||
| Yuu Mjuu the Awakened (WHM/SMN) | Divine Sentinel | Yagudo White Mages - Yuu Mjuu calls in some light elementals. | ||||
| Yuu Seju the Consumed (SMN) | Divine Martyr | Yagudo Summoners - Yuu Seju summons multiple elementals. Uses Hundred Fists. | ||||
| Yaa Haqa the Pious (BLM/RDM) | Divine Liturgist | Yagudo Black Mages - Past version of Yaa Haqa the Profane; Yaa Haqa only uses wind elemental magic spells, but can use all of them, up to Tornado II. | ||||
| N/A | Divine Pilgrim (MNK) | Bring supplies to Yagudo forces in beastmen held zones, then warp out. | ||||
-
Poisonhand Gnadgad -
Moo Ouzi the Swiftblade -
Vuu Puqu the Beguiler -
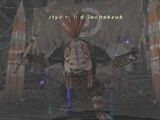
Dirtyhanded Gochakzuk -

Steelbiter Gudrud -

De'Vyu Headhunter -
Bi'Gho Headtaker -

Vee Seju the Consumed
All items (225)


-
How to level and get money fast
-
Campaign: Experience Point Calculation Guide
-
Capricornian Caster

-
Cardian Prototype
-
Cerane I Virgaut

-
Chigoe (NPC)

-
Choh Moui

-
Clan Bear Fighter

-
Clan Longtooth Pillager

-
Clan Reaper Grunt

-
Combat Salvemixer

-
Confederate Belfry

-
Confederate Mantelet

-
Conqueror Bakgodek

-
Cougar Volunteer

-
Crimson Wolf Esquire

-
Crocodile Mercenary

-
Dadough Vanguard

-
Dalzakk (S)

-
De'Vyu Headhunter

-
Deathlord Rojgnoj

-
Dee Xalmo the Grim

-
Degenhard (S)

-
Di'Dha Adamantfist

-
Di'Dha's Elite Guard

-
Dirtyhanded Gochakzuk

-
Dismemberment Grappler

-
Divine Ascetic

-
Divine Assassin

-
Divine Disseminator

-
Divine Inciter

-
Divine Inspirer

-
Divine Liturgist

-
Divine Martyr

-
Divine Pilgrim

-
Divine Sentinel

-
Divine Templar

-
Do'Bho Venomtail

-
Dusk Raider

-
Duskraven


-
Scarlet Boar Esquire

-
Scorpion Caster

-
Scylla Brigade Elite
-
Scylla Brigade Healer

-
Scylla Brigade Officer
-
Shadowbreath

-
Shadowbreath Defiler

-
Shadowclaw

-
Shadowclaw Devastator

-
Shadoweye

-
Shadoweye Gnat

-
Shadowfang

-
Shadowfang Void

-
Shadowhand

-
Shadowhand Cuirassier

-
Shadowhind Machinator

-
Shadowhorn

-
Shadowhorn Stormer

-
Shadowsoul

-
Shadowsoul Devourer

-
Shadowwing

-
Shadowwing Infuriator

-
Siege Turret
-
Silencing Tube (Mob)

-
Silver Fox Archer

-
Skeleton Escort

-
Sonia

-
Spinebeak Neckchopper

-
Steelbiter Gudrud

-
Steelhide Protector

-
Striking Bull

-
Stun Tube


