mNo edit summary |
No edit summary |
||
| Line 12: | Line 12: | ||
Moreover, by having an "[[Allied Tag]]" issued to you by an area's [[Campaign Arbiter]] ([[C.A.]]), you may choose to have your campaign battle performance assessed. By doing so you may receive rewards for your service, such as Campaign-specific points, known as "[[Allied Notes]]," or even experience points. It is worth noting that experience points will not be lost in the eventthat a player should die while participating in Campaign. |
Moreover, by having an "[[Allied Tag]]" issued to you by an area's [[Campaign Arbiter]] ([[C.A.]]), you may choose to have your campaign battle performance assessed. By doing so you may receive rewards for your service, such as Campaign-specific points, known as "[[Allied Notes]]," or even experience points. It is worth noting that experience points will not be lost in the eventthat a player should die while participating in Campaign. |
||
| + | |||
| + | ==Campaign Map== |
||
| + | |||
| + | The Campaign Map shows the current Campaign conflicts and how the nations are faring against the Beastment. This can be accessed by typing /campaignmap or /cmap. |
||
| + | |||
| + | |||
| + | '''Map Information:''' |
||
| + | |||
| + | The '''Controlled Areas''' information appears in the upper right hand corner of the map when the arrow is not hovering over an area icon. |
||
| + | |||
| + | [[category:Campaign]] |
||
| + | {|border=0 width=100%| |
||
| + | |align=left|[[Image:Controlledareas.jpg]] |
||
| + | |} |
||
| + | |||
| + | |||
| + | The '''Stronghold Details''' information will show in the upper right hand corner of the map when the icon is hovering over a stronghold. The strongholds are: [[Windurst (S)]], [[Bastok (S)]], [[San d'Oria (S)]], [[Yagudo Theomilitary]], [[Quadav Shieldwarriors]], and [[Orcish Hosts]] |
||
| + | |||
| + | [[category:Campaign]] |
||
| + | {|border=0 width=100%| |
||
| + | |align=left|[[Image:Strongholddetails.jpg]] |
||
| + | |} |
||
| + | |||
| + | (1) Shows the name and icon of the force controlling the stronghold.<br> |
||
| + | (2) Reconnaissance: Shows the current reconnaissance level of the stronghold. The higher the reconnaissance, the more information the battle conditions NPC will provide.<br> |
||
| + | (3) Morale: Graphical representation of the stronghold’s current morale. The higher the morale, the more formidable troops will become on the battlefield.<br> |
||
| + | (4) Prosperity: Graphical representation of the stronghold’s current prosperity. The higher the prosperity, the more Campaign funds a nation will generate. Also, the rate of said nation’s technological and industrial means in Campaign Ops will increase.<br> |
||
| + | |||
| + | |||
| + | The '''Area Details''' information will show in the upper right hand corner when the icon is hovering over a zone icon. |
||
| + | |||
| + | [[category:Campaign]] |
||
| + | {|border=0 width=100%| |
||
| + | |align=left|[[Image:Areadetails.jpg]] |
||
| + | |} |
||
| + | |||
| + | (1) Dominant Force: The icon of the army with the most influence over an area is displayed.<br> |
||
| + | (2) Fortifications: Numerical representation of an area’s defenses. This rating is influenced by factors such as the number of soldiers participating in that area’s battles, etc.<br> |
||
| + | (3) Resources: Numerical representation of an area’s resources. This rating is influenced by such factors as the number of temporary items available.<br> |
||
| + | (4) Influence: Graphical representations of each of the three nations’ influence over an area, as well as the Beastman Confederate’s.<br> |
||
| + | |||
| + | |||
| + | The '''Campaign Map''' will also show the current Campaign battles. The sword icon over the area icon is the indicator for a current Campaign battle. Icons that are coloured blue, red, or yellow are controlled by one of the nations and are currently defending. Grey icons are beastmen controlled. |
||
| + | |||
| + | [[category:Campaign]] |
||
| + | {|border=0 width=100%| |
||
| + | |align=left|[[Image:Campaignbattles.jpg]] |
||
| + | |} |
||
| + | |||
==Enlisting in Campaign Battles== |
==Enlisting in Campaign Battles== |
||
| Line 46: | Line 95: | ||
*When you have arrived in a Campaign area, you must sign up with the Campaign Arbiter in the zone to participate in the battle. The battle may sprawl out across the zone but is generally focused upon the fortifications in the zone. |
*When you have arrived in a Campaign area, you must sign up with the Campaign Arbiter in the zone to participate in the battle. The battle may sprawl out across the zone but is generally focused upon the fortifications in the zone. |
||
| + | **Once signed up you will obtain an Sword icon in front of your name. This allows you to attack all the Campaign monsters in the areas. These mobs show up with a sword in front of their name as well. They will not aggro you unless you have the Sword icon. All players in the area with the Sword icon can attack all Campaign monsterss. |
||
{|border=1 cellpadding=3 cellspacing=1 |
{|border=1 cellpadding=3 cellspacing=1 |
||
| Line 77: | Line 127: | ||
|align=center|unknown |
|align=center|unknown |
||
|align=center|unknown |
|align=center|unknown |
||
| − | |- |
+ | |- |
| + | |align=center|[[Garlaige Citadel(S)]] |
||
| + | |align=center|unknown |
||
| + | |align=center|unknown |
||
| + | |align=center|unknown |
||
| + | |align=center|unknown |
||
| + | |align=center|unknown |
||
| + | |- |
||
|align=center|[[North Gustaberg (S)]] |
|align=center|[[North Gustaberg (S)]] |
||
|align=center|unknown |
|align=center|unknown |
||
| Line 98: | Line 155: | ||
|align=center|unknown |
|align=center|unknown |
||
|align=center|[[Gisbert, C.A.]] |
|align=center|[[Gisbert, C.A.]] |
||
| + | |- |
||
| + | |align=center|[[Crawler's Nest(S)]] |
||
| + | |align=center|unknown |
||
| + | |align=center|unknown |
||
| + | |align=center|unknown |
||
| + | |align=center|unknown |
||
| + | |align=center|unknown |
||
|- |
|- |
||
|align=center|[[East Ronfaure (S)]] |
|align=center|[[East Ronfaure (S)]] |
||
| Line 119: | Line 183: | ||
|align=center|unknown |
|align=center|unknown |
||
|align=center|[[Telford, C.A.]] |
|align=center|[[Telford, C.A.]] |
||
| + | |- |
||
| + | |align=center|[[Eldieme Necropolois(S)]] |
||
| + | |align=center|unknown |
||
| + | |align=center|unknown |
||
| + | |align=center|unknown |
||
| + | |align=center|unknown |
||
| + | |align=center|unknown |
||
|} |
|} |
||
| Line 125: | Line 196: | ||
**When you think you have capped you can go to the [[Campaign Arbiter]] and ask for an Assesment. You will be awarded [[Experience Points]] and [[Allied Notes]]. |
**When you think you have capped you can go to the [[Campaign Arbiter]] and ask for an Assesment. You will be awarded [[Experience Points]] and [[Allied Notes]]. |
||
**The number of [[Allied Notes]] is approximately half of the [[Experience Points]] earned. |
**The number of [[Allied Notes]] is approximately half of the [[Experience Points]] earned. |
||
| + | |||
==Fortifications== |
==Fortifications== |
||
| − | The battle will be centered on the fortifications in the |
+ | The battle will be centered on the fortifications in the outdoor zones. These are generally located at the same spot as the Outpost from the future if there is an Outpost in that zone. |
'''Fortification Locations:''' |
'''Fortification Locations:''' |
||
| Line 140: | Line 212: | ||
*[[Jugner Forest (S)]] - (I-8) |
*[[Jugner Forest (S)]] - (I-8) |
||
*[[Batallia Downs (S)]] - (J-7) |
*[[Batallia Downs (S)]] - (J-7) |
||
| + | |||
==Allied Campaign NPCs and Heroes== |
==Allied Campaign NPCs and Heroes== |
||
| Line 150: | Line 223: | ||
*[[West Sarutabaruta (S)]] - [[Zonpa-Zippa (S)]]: Commands [[Capricornus Caster]] regiment |
*[[West Sarutabaruta (S)]] - [[Zonpa-Zippa (S)]]: Commands [[Capricornus Caster]] regiment |
||
| + | |||
| − | ==See Also== |
||
| + | ==Campaign Enemies and Notorious Monsters== |
||
| − | *[[Wings of the Goddess Assets]] |
||
| + | |||
| − | [[Category:Terminology]] |
||
| + | The monsters appear in squadrons with a named leader. They all check as [[Impossible to Gauge]]. These will not aggro players without the Sword icon for Campaign. They will aggro players participating in Campaign. |
||
Revision as of 16:57, 25 November 2007
|
Campaign Battles
This is the collective term given to the series of battles and border skirmishes waged in the Quon and Mindartian theaters during the Crystal War.
The regions in question contain areas which are continually being plagued by sporadic outbursts of hostility along perpetually contested borders. Should the incessantly encroaching beasthordes be unequivocally repelled, the lands in dispute will be claimed as territories under Altana. There are several benefits to be reaped once claim is laid to an area, such as an increase in the number of Campaign Ops available, and the number of such benefits will grow in proportion to the amount of land secured.
Moreover, by having an "Allied Tag" issued to you by an area's Campaign Arbiter (C.A.), you may choose to have your campaign battle performance assessed. By doing so you may receive rewards for your service, such as Campaign-specific points, known as "Allied Notes," or even experience points. It is worth noting that experience points will not be lost in the eventthat a player should die while participating in Campaign.
Campaign Map
The Campaign Map shows the current Campaign conflicts and how the nations are faring against the Beastment. This can be accessed by typing /campaignmap or /cmap.
Map Information:
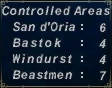
The Controlled Areas information appears in the upper right hand corner of the map when the arrow is not hovering over an area icon.
|
The Stronghold Details information will show in the upper right hand corner of the map when the icon is hovering over a stronghold. The strongholds are: Windurst (S), Bastok (S), San d'Oria (S), Yagudo Theomilitary, Quadav Shieldwarriors, and Orcish Hosts
| File:Strongholddetails.jpg |
(1) Shows the name and icon of the force controlling the stronghold.
(2) Reconnaissance: Shows the current reconnaissance level of the stronghold. The higher the reconnaissance, the more information the battle conditions NPC will provide.
(3) Morale: Graphical representation of the stronghold’s current morale. The higher the morale, the more formidable troops will become on the battlefield.
(4) Prosperity: Graphical representation of the stronghold’s current prosperity. The higher the prosperity, the more Campaign funds a nation will generate. Also, the rate of said nation’s technological and industrial means in Campaign Ops will increase.
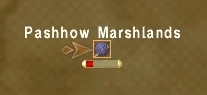
The Area Details information will show in the upper right hand corner when the icon is hovering over a zone icon.
| File:Areadetails.jpg |
(1) Dominant Force: The icon of the army with the most influence over an area is displayed.
(2) Fortifications: Numerical representation of an area’s defenses. This rating is influenced by factors such as the number of soldiers participating in that area’s battles, etc.
(3) Resources: Numerical representation of an area’s resources. This rating is influenced by such factors as the number of temporary items available.
(4) Influence: Graphical representations of each of the three nations’ influence over an area, as well as the Beastman Confederate’s.
The Campaign Map will also show the current Campaign battles. The sword icon over the area icon is the indicator for a current Campaign battle. Icons that are coloured blue, red, or yellow are controlled by one of the nations and are currently defending. Grey icons are beastmen controlled.
|
Enlisting in Campaign Battles
All those wishing to serve would enlist with one of the allied army's three main forces--the Kingdom of San d'Oria, the Republic of Bastok, or the Federation of Windurst--to combat the ever-advancing beastmen confederate comprising the Quon Host of the Orcish Empire, the Quadav Shieldwarriors, the Yagudo Theomilitary, and the Shadowlord's Dark Kindred. However, a volunteer's duties were not always limited to direct engagement with the enemy. Campaign endeavors also extended to tasks such as marches, supply runs, entrenchment and fortification, and cooperative maneuvers with allied forces.
How to Enlist:
- Complete Wings of the Goddess Mission 2: Back to the Beginning
- Optional: Speak to a Campaign Arbiter in your Allied nation.
Town Campaign Arbiters Windurst (S) Windurst Waters (S) Wenoonah, C.A. (?-?) Bastok (S) Bastok Markets (S) Narkissa, C.A. (E-8) San d'Oria (S) Southern San d'Oria (S) Scarlette, C.A. (H-9)
- The Campaign Arbiter in your own Allied Nation will transport you to a Campaign area for a number of Allied Notes. You will arrive close to the Campaign Arbiter, not the Fortifications in the area.
- Own Nation Controlled: 10 AN
- Other National Controlled: 30 AN
- Beastman Controlled: 90 AN
- Teleporting from another Allied Nation costs a different amount of Allied Notes. A Windurst Allied player teleporting from San d'Oria to Rolanberry (Beastmen controlled) costs 108 AN.
- The Campaign Arbiter in your own Allied Nation will transport you to a Campaign area for a number of Allied Notes. You will arrive close to the Campaign Arbiter, not the Fortifications in the area.
- When you have arrived in a Campaign area, you must sign up with the Campaign Arbiter in the zone to participate in the battle. The battle may sprawl out across the zone but is generally focused upon the fortifications in the zone.
- Once signed up you will obtain an Sword icon in front of your name. This allows you to attack all the Campaign monsters in the areas. These mobs show up with a sword in front of their name as well. They will not aggro you unless you have the Sword icon. All players in the area with the Sword icon can attack all Campaign monsterss.
| Zone Campaign Arbiters | |||||
| Zone | Position | Windurst (S) C.A. | Bastok (S) C.A. | San d'Oria (S) C.A. | Beastman (Jeuno (S) C.A.) |
| West Sarutabaruta (S) | (H-6) | Mhik Liusihlo, M.C. | unknown | unknown | unknown |
| Meriphataud Mountains (S) | unknown | unknown | unknown | unknown | unknown |
| Sauromugue Champaign (S) | unknown | unknown | unknown | unknown | unknown |
| Garlaige Citadel(S) | unknown | unknown | unknown | unknown | unknown |
| North Gustaberg (S) | unknown | unknown | unknown | unknown | unknown |
| Pashhow Marshlands (S) | unknown | unknown | unknown | unknown | unknown |
| Rolanberry Fields (S) | (J-6) | unknown | unknown | unknown | Gisbert, C.A. |
| Crawler's Nest(S) | unknown | unknown | unknown | unknown | unknown |
| East Ronfaure (S) | unknown | unknown | unknown | unknown | unknown |
| Jugner Forest (S) | unknown | unknown | unknown | unknown | unknown |
| Batallia Downs (S) | (J-8) | unknown | unknown | unknown | Telford, C.A. |
| Eldieme Necropolois(S) | unknown | unknown | unknown | unknown | unknown |
- During the battle, all actions you do will earn you Experience Points and Allied Notes.
- You will cap out at 600 Allied Notes for each Allied Tag you have. There is no message for reaching 600 Allied Notes.
- When you think you have capped you can go to the Campaign Arbiter and ask for an Assesment. You will be awarded Experience Points and Allied Notes.
- The number of Allied Notes is approximately half of the Experience Points earned.
Fortifications
The battle will be centered on the fortifications in the outdoor zones. These are generally located at the same spot as the Outpost from the future if there is an Outpost in that zone.
Fortification Locations:
- West Sarutabaruta (S) -
- Meriphataud Mountains (S) -
- Sauromugue Champaign (S) -
- North Gustaberg (S) -
- Pashhow Marshlands (S) -
- Rolanberry Fields (S) -
- East Ronfaure (S) -
- Jugner Forest (S) - (I-8)
- Batallia Downs (S) - (J-7)
Allied Campaign NPCs and Heroes
Allied Campaign NPCs will join in the combat. These seem to be fairly strong NPCs. They come in large squads to protect or attack fortifications. Also, Campaign Heroes will join in the fray.
Allied Campaign NPCs (by type):
Campaign Heroes:
- West Sarutabaruta (S) - Zonpa-Zippa (S): Commands Capricornus Caster regiment
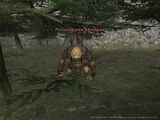
Campaign Enemies and Notorious Monsters
The monsters appear in squadrons with a named leader. They all check as Impossible to Gauge. These will not aggro players without the Sword icon for Campaign. They will aggro players participating in Campaign.
-
Poisonhand Gnadgad -
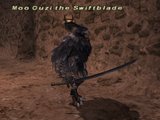
Moo Ouzi the Swiftblade -
Vuu Puqu the Beguiler -
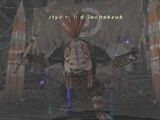
Dirtyhanded Gochakzuk -

Steelbiter Gudrud -

De'Vyu Headhunter -
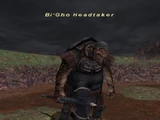
Bi'Gho Headtaker -

Vee Seju the Consumed
All items (225)


-
How to level and get money fast
-
Campaign: Experience Point Calculation Guide
-
Capricornian Caster

-
Cardian Prototype
-
Cerane I Virgaut

-
Chigoe (NPC)

-
Choh Moui

-
Clan Bear Fighter

-
Clan Longtooth Pillager

-
Clan Reaper Grunt

-
Combat Salvemixer

-
Confederate Belfry

-
Confederate Mantelet

-
Conqueror Bakgodek

-
Cougar Volunteer

-
Crimson Wolf Esquire

-
Crocodile Mercenary

-
Dadough Vanguard

-
Dalzakk (S)

-
De'Vyu Headhunter

-
Deathlord Rojgnoj

-
Dee Xalmo the Grim

-
Degenhard (S)

-
Di'Dha Adamantfist

-
Di'Dha's Elite Guard

-
Dirtyhanded Gochakzuk

-
Dismemberment Grappler

-
Divine Ascetic

-
Divine Assassin

-
Divine Disseminator

-
Divine Inciter

-
Divine Inspirer

-
Divine Liturgist

-
Divine Martyr

-
Divine Pilgrim

-
Divine Sentinel

-
Divine Templar

-
Do'Bho Venomtail

-
Dusk Raider

-
Duskraven


-
Scarlet Boar Esquire

-
Scorpion Caster

-
Scylla Brigade Elite
-
Scylla Brigade Healer

-
Scylla Brigade Officer
-
Shadowbreath

-
Shadowbreath Defiler

-
Shadowclaw

-
Shadowclaw Devastator

-
Shadoweye

-
Shadoweye Gnat

-
Shadowfang

-
Shadowfang Void

-
Shadowhand

-
Shadowhand Cuirassier

-
Shadowhind Machinator

-
Shadowhorn

-
Shadowhorn Stormer

-
Shadowsoul

-
Shadowsoul Devourer

-
Shadowwing

-
Shadowwing Infuriator

-
Siege Turret
-
Silencing Tube (Mob)

-
Silver Fox Archer

-
Skeleton Escort

-
Sonia

-
Spinebeak Neckchopper

-
Steelbiter Gudrud

-
Steelhide Protector

-
Striking Bull

-
Stun Tube


