(bird system) |
No edit summary |
||
| (One intermediate revision by one other user not shown) | |||
| Line 46: | Line 46: | ||
|BGCOLOR="#e3e6ff" align="center"|{{Check}} |
|BGCOLOR="#e3e6ff" align="center"|{{Check}} |
||
|BGCOLOR="#e3e6ff" align="center"|{{X}} |
|BGCOLOR="#e3e6ff" align="center"|{{X}} |
||
| − | |BGCOLOR="#e3e6ff" align="center"|{{ |
+ | |BGCOLOR="#e3e6ff" align="center"|{{Check}} |
|- |
|- |
||
|BGCOLOR="#FFE4E1" |'''[[Sonic Boom]]:''' AoE [[Attack Down]] effect |
|BGCOLOR="#FFE4E1" |'''[[Sonic Boom]]:''' AoE [[Attack Down]] effect |
||
| Line 54: | Line 54: | ||
|BGCOLOR="#e3e6ff" align="center"|{{Check}} |
|BGCOLOR="#e3e6ff" align="center"|{{Check}} |
||
|BGCOLOR="#e3e6ff" align="center"|{{Check}} |
|BGCOLOR="#e3e6ff" align="center"|{{Check}} |
||
| − | |BGCOLOR="#e3e6ff" align="center"|{{ |
+ | |BGCOLOR="#e3e6ff" align="center"|{{Check}} |
|- |
|- |
||
|BGCOLOR="#FFE4E1" |'''[[Turbulence]]:''' AoE Wind Damage |
|BGCOLOR="#FFE4E1" |'''[[Turbulence]]:''' AoE Wind Damage |
||
| Line 87: | Line 87: | ||
|[[Black Triple Stars]] |
|[[Black Triple Stars]] |
||
|[[Lottery Spawn]] from [[Midnight Wings]] at (I-9) - (I-10) every hour during night time. |
|[[Lottery Spawn]] from [[Midnight Wings]] at (I-9) - (I-10) every hour during night time. |
||
| − | | align="center" | 26-27 |
+ | | align="center" | 26 - 27 |
|[[Rolanberry Fields]] |
|[[Rolanberry Fields]] |
||
|N/A |
|N/A |
||
| Line 126: | Line 126: | ||
==Monsters in Family== |
==Monsters in Family== |
||
| − | {| border="0" width=" |
+ | :{| border="0" width="50%" cellpadding="2" cellspacing="2" |
|- style="background:#ffdead;" |
|- style="background:#ffdead;" |
||
| − | ! width=" |
+ | ! width="30%"|Name |
| − | ! width=" |
+ | ! width="20%"|Level |
! width="50%"|Zone |
! width="50%"|Zone |
||
|- style="background:#e3e6ff" valign="top" |
|- style="background:#e3e6ff" valign="top" |
||
| rowspan="8"|[[Ding Bats]] |
| rowspan="8"|[[Ding Bats]] |
||
| − | | align="center" | 1-3 |
+ | | align="center" | 1 - 3 |
|[[Zeruhn Mines]] |
|[[Zeruhn Mines]] |
||
|- BGCOLOR="#e3e6ff" |
|- BGCOLOR="#e3e6ff" |
||
| − | | align="center" | 1-4 |
+ | | align="center" | 1 - 4 |
|[[North Gustaberg]] |
|[[North Gustaberg]] |
||
|- BGCOLOR="#e3e6ff" |
|- BGCOLOR="#e3e6ff" |
||
| − | | align="center" | 1-4 |
+ | | align="center" | 1 - 4 |
|[[South Gustaberg]] |
|[[South Gustaberg]] |
||
|- BGCOLOR="#e3e6ff" |
|- BGCOLOR="#e3e6ff" |
||
| − | | align="center" | 1-5 |
+ | | align="center" | 1 - 5 |
|[[East Ronfaure]] |
|[[East Ronfaure]] |
||
|- BGCOLOR="#e3e6ff" |
|- BGCOLOR="#e3e6ff" |
||
| − | | align="center" | 1-5 |
+ | | align="center" | 1 - 5 |
|[[West Ronfaure]] |
|[[West Ronfaure]] |
||
|- BGCOLOR="#e3e6ff" |
|- BGCOLOR="#e3e6ff" |
||
| − | | align="center" | 2-5 |
+ | | align="center" | 2 - 5 |
|[[King Ranperre's Tomb]] |
|[[King Ranperre's Tomb]] |
||
|- BGCOLOR="#e3e6ff" |
|- BGCOLOR="#e3e6ff" |
||
| − | | align="center" | 12-14 |
+ | | align="center" | 12 - 14 |
|[[East Ronfaure (S)]] |
|[[East Ronfaure (S)]] |
||
|- BGCOLOR="#e3e6ff" |
|- BGCOLOR="#e3e6ff" |
||
| − | | align="center" | 26-28 |
+ | | align="center" | 26 - 28 |
|[[North Gustaberg (S)]] |
|[[North Gustaberg (S)]] |
||
|- style="background:#e3e6ff" valign="top" |
|- style="background:#e3e6ff" valign="top" |
||
| rowspan="2"|[[Battue Bats]] |
| rowspan="2"|[[Battue Bats]] |
||
| − | | align="center" | 1-5 |
+ | | align="center" | 1 - 5 |
|[[Inner Horutoto Ruins]] |
|[[Inner Horutoto Ruins]] |
||
|- BGCOLOR="#e3e6ff" |
|- BGCOLOR="#e3e6ff" |
||
| − | | align="center" | 1-5 |
+ | | align="center" | 1 - 5 |
|[[Outer Horutoto Ruins]] |
|[[Outer Horutoto Ruins]] |
||
|- style="background:#e3e6ff" valign="top" |
|- style="background:#e3e6ff" valign="top" |
||
| rowspan="2"|[[Spectacled Bats]] |
| rowspan="2"|[[Spectacled Bats]] |
||
| − | | align="center" | 1-5 |
+ | | align="center" | 1 - 5 |
|[[Ghelsba Outpost]] |
|[[Ghelsba Outpost]] |
||
|- BGCOLOR="#e3e6ff" |
|- BGCOLOR="#e3e6ff" |
||
| − | | align="center" | 6-8 |
+ | | align="center" | 6 - 8 |
|[[Fort Ghelsba]] |
|[[Fort Ghelsba]] |
||
|- style="background:#e3e6ff" valign="top" |
|- style="background:#e3e6ff" valign="top" |
||
| rowspan="2"|[[Wind Bats]] |
| rowspan="2"|[[Wind Bats]] |
||
| − | | align="center" | 3-5 |
+ | | align="center" | 3 - 5 |
|[[Ranguemont Pass]] |
|[[Ranguemont Pass]] |
||
|- BGCOLOR="#e3e6ff" |
|- BGCOLOR="#e3e6ff" |
||
| − | | align="center" | 9-11 |
+ | | align="center" | 9 - 11 |
|[[King Ranperre's Tomb]] |
|[[King Ranperre's Tomb]] |
||
|- style="background:#e3e6ff" valign="top" |
|- style="background:#e3e6ff" valign="top" |
||
|[[Gale Bats]] |
|[[Gale Bats]] |
||
| − | | align="center" | 6-8 |
+ | | align="center" | 6 - 8 |
|[[La Theine Plateau]] |
|[[La Theine Plateau]] |
||
|- style="background:#e3e6ff" valign="top" |
|- style="background:#e3e6ff" valign="top" |
||
|[[Grotto Bats]] |
|[[Grotto Bats]] |
||
| − | | align="center" | 8-11 |
+ | | align="center" | 8 - 11 |
|[[Yughott Grotto]] |
|[[Yughott Grotto]] |
||
|- style="background:#e3e6ff" valign="top" |
|- style="background:#e3e6ff" valign="top" |
||
| rowspan="2"|[[Plague Bats]] |
| rowspan="2"|[[Plague Bats]] |
||
| − | | align="center" | 9-11 |
+ | | align="center" | 9 - 11 |
|[[La Theine Plateau]] |
|[[La Theine Plateau]] |
||
|- BGCOLOR="#e3e6ff" |
|- BGCOLOR="#e3e6ff" |
||
| − | | align="center" | 15-17 |
+ | | align="center" | 15 - 17 |
|[[King Ranperre's Tomb]] |
|[[King Ranperre's Tomb]] |
||
|- style="background:#e3e6ff" valign="top" |
|- style="background:#e3e6ff" valign="top" |
||
|[[Sand Bats]] |
|[[Sand Bats]] |
||
| − | | align="center" | 12-15 |
+ | | align="center" | 12 - 15 |
|[[Valkurm Dunes]] |
|[[Valkurm Dunes]] |
||
|- style="background:#e3e6ff" valign="top" |
|- style="background:#e3e6ff" valign="top" |
||
|[[Bat Battalion]] |
|[[Bat Battalion]] |
||
| − | | align="center" | 12-15 |
+ | | align="center" | 12 - 15 |
|[[Inner Horutoto Ruins]] |
|[[Inner Horutoto Ruins]] |
||
|- style="background:#e3e6ff" valign="top" |
|- style="background:#e3e6ff" valign="top" |
||
| rowspan="5"|[[Night Bats]] |
| rowspan="5"|[[Night Bats]] |
||
| − | | align="center" | 12-15 |
+ | | align="center" | 12 - 15 |
|[[Valkurm Dunes]] |
|[[Valkurm Dunes]] |
||
|- BGCOLOR="#e3e6ff" |
|- BGCOLOR="#e3e6ff" |
||
| − | | align="center" | 13-16 |
+ | | align="center" | 13 - 16 |
|[[Meriphataud Mountains]] |
|[[Meriphataud Mountains]] |
||
|- BGCOLOR="#e3e6ff" |
|- BGCOLOR="#e3e6ff" |
||
| − | | align="center" | 13-16 |
+ | | align="center" | 13 - 16 |
|[[Pashhow Marshlands]] |
|[[Pashhow Marshlands]] |
||
|- BGCOLOR="#e3e6ff" |
|- BGCOLOR="#e3e6ff" |
||
| − | | align="center" | 53-56 |
+ | | align="center" | 53 - 56 |
|[[Meriphataud Mountains (S)]] |
|[[Meriphataud Mountains (S)]] |
||
|- BGCOLOR="#e3e6ff" |
|- BGCOLOR="#e3e6ff" |
||
| − | | align="center" | 65-67 |
+ | | align="center" | 65 - 67 |
|[[Pashhow Marshlands (S)]] |
|[[Pashhow Marshlands (S)]] |
||
|- style="background:#e3e6ff" valign="top" |
|- style="background:#e3e6ff" valign="top" |
||
| rowspan="3"|[[Stink Bats]] |
| rowspan="3"|[[Stink Bats]] |
||
| − | | align="center" | 15-18 |
+ | | align="center" | 15 - 18 |
|[[Maze of Shakhrami]] |
|[[Maze of Shakhrami]] |
||
|- BGCOLOR="#e3e6ff" |
|- BGCOLOR="#e3e6ff" |
||
| − | | align="center" | 15-18 |
+ | | align="center" | 15 - 18 |
|[[Ordelle's Caves]] |
|[[Ordelle's Caves]] |
||
|- BGCOLOR="#e3e6ff" |
|- BGCOLOR="#e3e6ff" |
||
| − | | align="center" | 15-18 |
+ | | align="center" | 15 - 18 |
|[[Outer Horutoto Ruins]] |
|[[Outer Horutoto Ruins]] |
||
|- style="background:#e3e6ff" valign="top" |
|- style="background:#e3e6ff" valign="top" |
||
|[[Bulldog Bats]] |
|[[Bulldog Bats]] |
||
| − | | align="center" | 15-20 |
+ | | align="center" | 15 - 20 |
|[[Carpenters' Landing]] |
|[[Carpenters' Landing]] |
||
|- style="background:#e3e6ff" valign="top" |
|- style="background:#e3e6ff" valign="top" |
||
| rowspan="2"|[[Bastion Bats]] |
| rowspan="2"|[[Bastion Bats]] |
||
| − | | align="center" | 18-21 |
+ | | align="center" | 18 - 21 |
|[[Castle Oztroja]] |
|[[Castle Oztroja]] |
||
|- BGCOLOR="#e3e6ff" |
|- BGCOLOR="#e3e6ff" |
||
| − | | align="center" | 70-72 |
+ | | align="center" | 70 - 72 |
|[[Castle Oztroja (S)]] |
|[[Castle Oztroja (S)]] |
||
|- style="background:#e3e6ff" valign="top" |
|- style="background:#e3e6ff" valign="top" |
||
| rowspan="2"|[[Wood Bats]] |
| rowspan="2"|[[Wood Bats]] |
||
| − | | align="center" | 20-23 |
+ | | align="center" | 20 - 23 |
|[[Davoi]] |
|[[Davoi]] |
||
|- BGCOLOR="#e3e6ff" |
|- BGCOLOR="#e3e6ff" |
||
| − | | align="center" | 71-73 |
+ | | align="center" | 71 - 73 |
|[[La Vaule (S)]] |
|[[La Vaule (S)]] |
||
|- style="background:#e3e6ff" valign="top" |
|- style="background:#e3e6ff" valign="top" |
||
| rowspan="4"|[[Midnight Wings]] |
| rowspan="4"|[[Midnight Wings]] |
||
| − | | align="center" | 20-23 |
+ | | align="center" | 20 - 23 |
|[[Rolanberry Fields]] |
|[[Rolanberry Fields]] |
||
|- BGCOLOR="#e3e6ff" |
|- BGCOLOR="#e3e6ff" |
||
| − | | align="center" | 20-23 |
+ | | align="center" | 20 - 23 |
|[[Sauromugue Champaign]] |
|[[Sauromugue Champaign]] |
||
|- BGCOLOR="#e3e6ff" |
|- BGCOLOR="#e3e6ff" |
||
| − | | align="center" | 38-42 |
+ | | align="center" | 38 - 42 |
|[[Rolanberry Fields (S)]] |
|[[Rolanberry Fields (S)]] |
||
|- BGCOLOR="#e3e6ff" |
|- BGCOLOR="#e3e6ff" |
||
| − | | align="center" | 50-52 |
+ | | align="center" | 50 - 52 |
|[[Sauromugue Champaign (S)]] |
|[[Sauromugue Champaign (S)]] |
||
|- style="background:#e3e6ff" valign="top" |
|- style="background:#e3e6ff" valign="top" |
||
| rowspan="6"|[[Seeker Bats]] |
| rowspan="6"|[[Seeker Bats]] |
||
| − | | align="center" | 22-26 |
+ | | align="center" | 22 - 26 |
|[[Korroloka Tunnel]] |
|[[Korroloka Tunnel]] |
||
|- BGCOLOR="#e3e6ff" |
|- BGCOLOR="#e3e6ff" |
||
| − | | align="center" | 23-26 |
+ | | align="center" | 23 - 26 |
|[[Maze of Shakhrami]] |
|[[Maze of Shakhrami]] |
||
|- BGCOLOR="#e3e6ff" |
|- BGCOLOR="#e3e6ff" |
||
| − | | align="center" | 23-26 |
+ | | align="center" | 23 - 26 |
|[[Ordelle's Caves]] |
|[[Ordelle's Caves]] |
||
|- BGCOLOR="#e3e6ff" |
|- BGCOLOR="#e3e6ff" |
||
| − | | align="center" | 25-27 |
+ | | align="center" | 25 - 27 |
|[[Lower Delkfutt's Tower]] |
|[[Lower Delkfutt's Tower]] |
||
|- BGCOLOR="#e3e6ff" |
|- BGCOLOR="#e3e6ff" |
||
| − | | align="center" | 25-27 |
+ | | align="center" | 25 - 27 |
|[[Qufim Island]] |
|[[Qufim Island]] |
||
|- BGCOLOR="#e3e6ff" |
|- BGCOLOR="#e3e6ff" |
||
| − | | align="center" | 25-28 |
+ | | align="center" | 25 - 28 |
|[[Ranguemont Pass]] |
|[[Ranguemont Pass]] |
||
|- style="background:#e3e6ff" valign="top" |
|- style="background:#e3e6ff" valign="top" |
||
| rowspan="4"|[[Goblin's Bats]] |
| rowspan="4"|[[Goblin's Bats]] |
||
| − | | align="center" | 24-26 |
+ | | align="center" | 24 - 26 |
|[[Ordelle's Caves]] |
|[[Ordelle's Caves]] |
||
|- BGCOLOR="#e3e6ff" |
|- BGCOLOR="#e3e6ff" |
||
| − | | align="center" | 25-27 |
+ | | align="center" | 25 - 27 |
|[[Ranguemont Pass]] |
|[[Ranguemont Pass]] |
||
|- BGCOLOR="#e3e6ff" |
|- BGCOLOR="#e3e6ff" |
||
| − | | align="center" | 40-42 |
+ | | align="center" | 40 - 42 |
|[[Castle Zvahl Baileys]] |
|[[Castle Zvahl Baileys]] |
||
|- BGCOLOR="#e3e6ff" |
|- BGCOLOR="#e3e6ff" |
||
| − | | align="center" | 53-55 |
+ | | align="center" | 53 - 55 |
|[[Ifrit's Cauldron]] |
|[[Ifrit's Cauldron]] |
||
|- style="background:#e3e6ff" valign="top" |
|- style="background:#e3e6ff" valign="top" |
||
|[[Mold Bats]] |
|[[Mold Bats]] |
||
| − | | align="center" | 25-27 |
+ | | align="center" | 25 - 27 |
|[[Middle Delkfutt's Tower]] |
|[[Middle Delkfutt's Tower]] |
||
|- style="background:#e3e6ff" valign="top" |
|- style="background:#e3e6ff" valign="top" |
||
| rowspan="2"|[[Dark Bats]] |
| rowspan="2"|[[Dark Bats]] |
||
| − | | align="center" | 25-27 |
+ | | align="center" | 25 - 27 |
|[[Qufim Island]] |
|[[Qufim Island]] |
||
|- BGCOLOR="#e3e6ff" |
|- BGCOLOR="#e3e6ff" |
||
| − | | align="center" | 31-35 |
+ | | align="center" | 31 - 35 |
|[[Oldton Movalpolos]] |
|[[Oldton Movalpolos]] |
||
|- style="background:#e3e6ff" valign="top" |
|- style="background:#e3e6ff" valign="top" |
||
| rowspan="3"|[[Gigas's Bats]] |
| rowspan="3"|[[Gigas's Bats]] |
||
| − | | align="center" | 25-27 |
+ | | align="center" | 25 - 27 |
|[[Middle Delkfutt's Tower]] |
|[[Middle Delkfutt's Tower]] |
||
|- BGCOLOR="#e3e6ff" |
|- BGCOLOR="#e3e6ff" |
||
| − | | align="center" | 27-29 |
+ | | align="center" | 27 - 29 |
|[[Lower Delkfutt's Tower]] |
|[[Lower Delkfutt's Tower]] |
||
|- BGCOLOR="#e3e6ff" |
|- BGCOLOR="#e3e6ff" |
||
| − | | align="center" | 27-29 |
+ | | align="center" | 27 - 29 |
|[[Upper Delkfutt's Tower]] |
|[[Upper Delkfutt's Tower]] |
||
|- style="background:#e3e6ff" valign="top" |
|- style="background:#e3e6ff" valign="top" |
||
|[[Tower Bats]] |
|[[Tower Bats]] |
||
| − | | align="center" | 27-29 |
+ | | align="center" | 27 - 29 |
|[[Middle Delkfutt's Tower]] |
|[[Middle Delkfutt's Tower]] |
||
|- style="background:#e3e6ff" valign="top" |
|- style="background:#e3e6ff" valign="top" |
||
| rowspan="2"|[[Undead Bats]] |
| rowspan="2"|[[Undead Bats]] |
||
| − | | align="center" | 36-39 |
+ | | align="center" | 36 - 39 |
|[[Sea Serpent Grotto]] |
|[[Sea Serpent Grotto]] |
||
|- BGCOLOR="#e3e6ff" |
|- BGCOLOR="#e3e6ff" |
||
| − | | align="center" | 38-40 |
+ | | align="center" | 38 - 40 |
|[[Fei'Yin]] |
|[[Fei'Yin]] |
||
|- style="background:#e3e6ff" valign="top" |
|- style="background:#e3e6ff" valign="top" |
||
| rowspan="2"|[[Lesser Gaylas]] |
| rowspan="2"|[[Lesser Gaylas]] |
||
| − | | align="center" | 39-42 |
+ | | align="center" | 39 - 42 |
|[[Sanctuary of Zi'Tah]] |
|[[Sanctuary of Zi'Tah]] |
||
|- BGCOLOR="#e3e6ff" |
|- BGCOLOR="#e3e6ff" |
||
| − | | align="center" | 40-42 |
+ | | align="center" | 40 - 42 |
|[[Behemoth's Dominion]] |
|[[Behemoth's Dominion]] |
||
|- style="background:#e3e6ff" valign="top" |
|- style="background:#e3e6ff" valign="top" |
||
| rowspan="4"|[[Wingrats]] |
| rowspan="4"|[[Wingrats]] |
||
| − | | align="center" | 40-42 |
+ | | align="center" | 40 - 42 |
|[[Garlaige Citadel]] |
|[[Garlaige Citadel]] |
||
|- BGCOLOR="#e3e6ff" |
|- BGCOLOR="#e3e6ff" |
||
| − | | align="center" | 41-44 |
+ | | align="center" | 41 - 44 |
|[[Lufaise Meadows]] |
|[[Lufaise Meadows]] |
||
|- BGCOLOR="#e3e6ff" |
|- BGCOLOR="#e3e6ff" |
||
| − | | align="center" | 41-44 |
+ | | align="center" | 41 - 44 |
|[[Misareaux Coast]] |
|[[Misareaux Coast]] |
||
|- BGCOLOR="#e3e6ff" |
|- BGCOLOR="#e3e6ff" |
||
| − | | align="center" | 43-45 |
+ | | align="center" | 43 - 45 |
|[[Grauberg (S)]] |
|[[Grauberg (S)]] |
||
|- style="background:#e3e6ff" valign="top" |
|- style="background:#e3e6ff" valign="top" |
||
| rowspan="2"|[[Canal Bats]] |
| rowspan="2"|[[Canal Bats]] |
||
| − | | align="center" | 41-46 |
+ | | align="center" | 41 - 46 |
|[[Phomiuna Aqueducts]] |
|[[Phomiuna Aqueducts]] |
||
|- BGCOLOR="#e3e6ff" |
|- BGCOLOR="#e3e6ff" |
||
| − | | align="center" | 45-47 |
+ | | align="center" | 45 - 47 |
|[[Toraimarai Canal]] |
|[[Toraimarai Canal]] |
||
|- style="background:#e3e6ff" valign="top" |
|- style="background:#e3e6ff" valign="top" |
||
|[[Citadel Bats]] |
|[[Citadel Bats]] |
||
| − | | align="center" | 46-48 |
+ | | align="center" | 46 - 48 |
|[[Garlaige Citadel]] |
|[[Garlaige Citadel]] |
||
|- style="background:#e3e6ff" valign="top" |
|- style="background:#e3e6ff" valign="top" |
||
| rowspan="2"|[[Greater Gaylas]] |
| rowspan="2"|[[Greater Gaylas]] |
||
| − | | align="center" | 46-48 |
+ | | align="center" | 46 - 48 |
|[[Sacrarium]] |
|[[Sacrarium]] |
||
|- BGCOLOR="#e3e6ff" |
|- BGCOLOR="#e3e6ff" |
||
| − | | align="center" | 46-49 |
+ | | align="center" | 46 - 49 |
|[[Gustav Tunnel]] |
|[[Gustav Tunnel]] |
||
|- style="background:#e3e6ff" valign="top" |
|- style="background:#e3e6ff" valign="top" |
||
| rowspan="3"|[[Fomor's Bats]] |
| rowspan="3"|[[Fomor's Bats]] |
||
| − | | align="center" | 49-51 |
+ | | align="center" | 49 - 51 |
|[[Sacrarium]] |
|[[Sacrarium]] |
||
|- BGCOLOR="#e3e6ff" |
|- BGCOLOR="#e3e6ff" |
||
| Line 399: | Line 399: | ||
|- style="background:#e3e6ff" valign="top" |
|- style="background:#e3e6ff" valign="top" |
||
|[[Underworld Bats]] |
|[[Underworld Bats]] |
||
| − | | align="center" | 50-52 |
+ | | align="center" | 50 - 52 |
|[[Fei'Yin]] |
|[[Fei'Yin]] |
||
|- style="background:#e3e6ff" valign="top" |
|- style="background:#e3e6ff" valign="top" |
||
| rowspan="2"|[[Funnel Bats]] |
| rowspan="2"|[[Funnel Bats]] |
||
| − | | align="center" | 51-55 |
+ | | align="center" | 51 - 55 |
|[[Garlaige Citadel]] |
|[[Garlaige Citadel]] |
||
|- BGCOLOR="#e3e6ff" |
|- BGCOLOR="#e3e6ff" |
||
| − | | align="center" | 52-55 |
+ | | align="center" | 52 - 55 |
|[[Bostaunieux Oubliette]] |
|[[Bostaunieux Oubliette]] |
||
|- style="background:#e3e6ff" valign="top" |
|- style="background:#e3e6ff" valign="top" |
||
|[[Impish Bats]] |
|[[Impish Bats]] |
||
| − | | align="center" | 58-60 |
+ | | align="center" | 58 - 60 |
|[[Toraimarai Canal]] |
|[[Toraimarai Canal]] |
||
|- style="background:#e3e6ff" valign="top" |
|- style="background:#e3e6ff" valign="top" |
||
| rowspan="3"|[[Incubus Bats]] |
| rowspan="3"|[[Incubus Bats]] |
||
| − | | align="center" | 62-64 |
+ | | align="center" | 62 - 64 |
|[[Upper Delkfutt's Tower]] |
|[[Upper Delkfutt's Tower]] |
||
|- BGCOLOR="#e3e6ff" |
|- BGCOLOR="#e3e6ff" |
||
| − | | align="center" | 63-65 |
+ | | align="center" | 63 - 65 |
|[[Garlaige Citadel (S)]] |
|[[Garlaige Citadel (S)]] |
||
|- BGCOLOR="#e3e6ff" |
|- BGCOLOR="#e3e6ff" |
||
| − | | align="center" | 64-67 |
+ | | align="center" | 64 - 67 |
|[[Bhaflau Thickets]] |
|[[Bhaflau Thickets]] |
||
|- style="background:#e3e6ff" valign="top" |
|- style="background:#e3e6ff" valign="top" |
||
| rowspan="3"|[[Succubus Bats]] |
| rowspan="3"|[[Succubus Bats]] |
||
| − | | align="center" | 63-65 |
+ | | align="center" | 63 - 65 |
|[[Newton Movalpolos]] |
|[[Newton Movalpolos]] |
||
|- BGCOLOR="#e3e6ff" |
|- BGCOLOR="#e3e6ff" |
||
| − | | align="center" | 65-68 |
+ | | align="center" | 65 - 68 |
|[[Uleguerand Range]] |
|[[Uleguerand Range]] |
||
|- BGCOLOR="#e3e6ff" |
|- BGCOLOR="#e3e6ff" |
||
| − | | align="center" | 65-69 |
+ | | align="center" | 65 - 69 |
|[[Den of Rancor]] |
|[[Den of Rancor]] |
||
|- style="background:#e3e6ff" valign="top" |
|- style="background:#e3e6ff" valign="top" |
||
| rowspan="4"|[[Nightmare Bats]] |
| rowspan="4"|[[Nightmare Bats]] |
||
| − | | align="center" | 66-69 |
+ | | align="center" | 66 - 69 |
|[[Sea Serpent Grotto]] |
|[[Sea Serpent Grotto]] |
||
|- BGCOLOR="#e3e6ff" |
|- BGCOLOR="#e3e6ff" |
||
| − | | align="center" | 68-72 |
+ | | align="center" | 68 - 72 |
|[[Ifrit's Cauldron]] |
|[[Ifrit's Cauldron]] |
||
|- BGCOLOR="#e3e6ff" |
|- BGCOLOR="#e3e6ff" |
||
| − | | align="center" | 69-72 |
+ | | align="center" | 69 - 72 |
|[[Uleguerand Range]] |
|[[Uleguerand Range]] |
||
|- BGCOLOR="#e3e6ff" |
|- BGCOLOR="#e3e6ff" |
||
| − | | align="center" | 72-74 |
+ | | align="center" | 72 - 74 |
|[[Newton Movalpolos]] |
|[[Newton Movalpolos]] |
||
|- style="background:#e3e6ff" valign="top" |
|- style="background:#e3e6ff" valign="top" |
||
|[[Volcanic Bats]] |
|[[Volcanic Bats]] |
||
| − | | align="center" | 69-71 |
+ | | align="center" | 69 - 71 |
|[[Halvung]] |
|[[Halvung]] |
||
| Line 465: | Line 465: | ||
| align="center" | {{question}} |
| align="center" | {{question}} |
||
|[[Abyssea - Vunkerl]] |
|[[Abyssea - Vunkerl]] |
||
| + | |||
| + | |- style="background:#e3e6ff" valign="top" |
||
| + | |[[New Moon Bats]] |
||
| + | | align="center" | 100 - 102 |
||
| + | |[[Rala Waterways]] |
||
|- style="background:#e3e6ff" valign="top" |
|- style="background:#e3e6ff" valign="top" |
||
Revision as of 11:42, 4 January 2015
|
Bat Trios
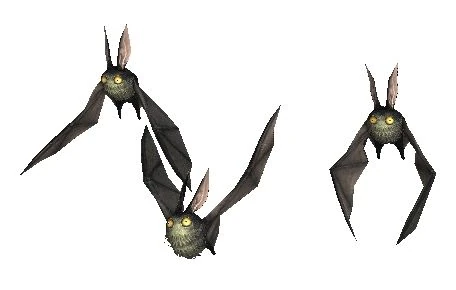 While their area attacks can damage or enfeeble whole parties, it is their direct damage three-hit attack that can send an attacker to a quick exit from a fight. These bats are also trained by a number of Beastmen in Vana'diel, and can often be seen trailing their masters, ready to assist in any fight. When defeated, these bats will typically drop wings and fangs – which can be used by crafters – although their supply is usually plentiful. Some varieties of bats can drop rarer items, such as blood (like Beast Blood, Fiend Blood, or even Dragon Blood), or keys (like a Fei'Yin Chest Key, Garlaige Chest Key, or Toraimarai Coffer Key).
|
Family Information
|
Special Attacks
| Special Abilities | Original and Zilart Areas | Promathia Areas | Aht Urhgan Areas | Wings of the Goddess Areas | Pankration | Abyssea |
| Jet Stream: Three-hit TP attack | ||||||
| Sonic Boom: AoE Attack Down effect | ||||||
| Turbulence: AoE Wind Damage | ||||||
| Slipstream: AoE Accuracy Down | ||||||
| Note: Notorious Monsters in this family may use all of the above and/or additional unique special abilities. | ||||||
Notorious Monsters in Family
| Name | Spawn Information | Level | Zone | Notable Drop(s) |
|---|---|---|---|---|
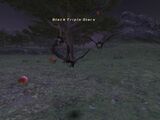
| Black Triple Stars | Lottery Spawn from Midnight Wings at (I-9) - (I-10) every hour during night time. | 26 - 27 | Rolanberry Fields | N/A |
| Citadel Pipistrelles | Spawns at (H-7) on map 2 | Garlaige Citadel (S) | Aptant: Bellum Aptant: Ishis | |
| Treble Noctules | Forced Spawn by trading an Exorcised Skull and Bloody Fang to ??? @ (I-9) | Abyssea - Tahrongi | Metanoia Ring Torn Bat Wing | |
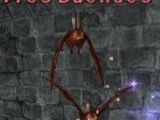
| Tres Duendes | Pops in the place of a Fomor Black Mage around (D-4) - (E-5) every 21 to 24 hours. | Phomiuna Aqueducts | Chiroptera Dagger Niokiyotsuna Vampiric Claws | |
|
Quest NMs: None Mission NMs: None Battlefield NMs: Furies (BCNM) Einherjar NMs: Hazhalm Bats (Wing I), Utgarth Bats (Wing II & III), Vampyr Bats (Wing III) Other NMs: Nightmare Gaylas (Dynamis), Nosferatu Bats (assists: Nosferatu) | ||||
Monsters in Family
-
Tres Duendes -
Black Triple Stars -

Goblin's Bats -

Ding Bats -

Sand Bats -

Underworld Bats -

Impish Bats -

Nightmare Bats
All items (62)


