Ambuscade is a instanced dungeon battlefield in which players team up against the monster-of-the-month.
Getting Started
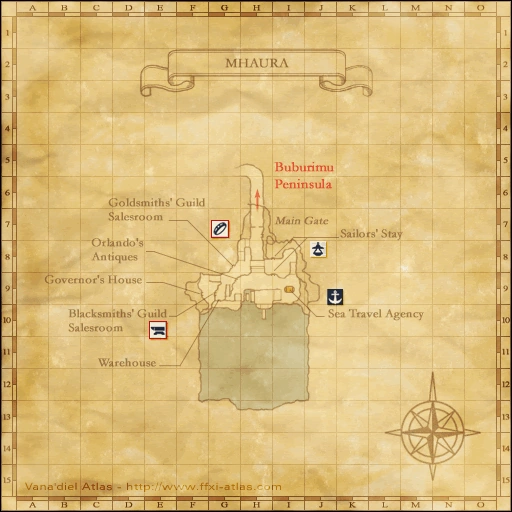
First, activate the Records of Eminence quest Stepping into an Ambuscade, then talk to Gorpa-Masorpa at Mhaura (G-9). To enter any Ambuscade battlefield all players in the party will need a Key Item. ![]() Ambuscade Primer Volume One grants entry to Intense Ambuscade, a more challenging encounter.
Ambuscade Primer Volume One grants entry to Intense Ambuscade, a more challenging encounter. ![]() Ambuscade Primer Volume Two grants entry to Normal Ambuscade, a step down in technical difficulty. "Intense" and "Normal" not only describe the relative challenge of the two battlefields, but alter the final rewards on completion.
Ambuscade Primer Volume Two grants entry to Normal Ambuscade, a step down in technical difficulty. "Intense" and "Normal" not only describe the relative challenge of the two battlefields, but alter the final rewards on completion.
Obtaining Key Items
You obtain the Key Items with Records of Eminence quests. There are two different quests per Key Item to activate: a non-repeatable daily quest, and a repeatable quest. The Daily objectives for both Volume 1 and Volume 2 require one experience-yielding monster be killed of the specified type. The repeatable objective for Volume 1 requires five kills, while Volume 2 requires 10.
The Ambuscade Tome
Once everyone in the party has the Primer key items, the party leader then registers the party at the Ambuscade Tome right next to Gorpa-Masorpa. At registration you choose the difficulty level of the selected Ambuscade type and inscribe your name into the tome, assigning you a number. Inscribing your name in the Ambuscade Tome gives you a page number. Page numbers are called in a zone-wide system message "Page ### of the tome flares up!" and the party leader can interact again with the Tome to enter the battlefield. The Tome also has an option to auto-transport your party to the battlefields as soon as your number is announced.
- Your Key Item is lost upon completion of a successful battle.
Rewards
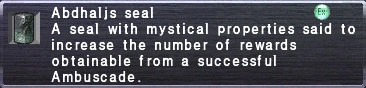
Successful completion of an Ambuscade battlefield rewards two forms of currency: Hallmarks and Gallantry. Hallmarks earned vary with the Key Item used to enter the battlefield and the selected difficulty level. Gallantry earned is based on the Key Item, Difficulty and the total number of party members, excluding Trusts. Solo players do not earn Gallantry. Using an ![]() Abdhaljs Seal
Abdhaljs Seal ![]() will triple the currency rewards for a single win.
will triple the currency rewards for a single win.
- Hallmarks, Total Hallmarks, and Gallantry are reset to zero every monthly content update.
Ambuscade Primer Volume One
Intense Ambuscade
| Difficulty | Hallmarks Earned |
Gallantry Earned 2~6 members |
|---|---|---|
| Very Difficult | 3600 | 300 ~ 1500 |
| Difficult | 2400 | 240 ~ 1200 |
| Normal | 1200 | 180 ~ 900 |
| Easy | 600 | 80 ~ 400 |
| Very Easy |
600 | 20 ~ 100 |
Ambuscade Primer Volume Two
Regular Ambuscade
| Difficulty | Hallmarks Earned |
Gallantry Earned 2~6 members |
|---|---|---|
| Very Difficult | 300 | 30 ~ 150 |
| Difficult | 200 | 20 ~ 100 |
| Normal | 100 | 10 ~ 50 |
| Easy | 75 | 5 ~ 25 |
| Very Easy |
50 | 1 ~ 5 |
Redeeming Hallmarks and Gallantry
Spend your accumulated Hallmarks and Gallantry with Gorpa-Masorpa, who offers a limited stock of rewards that is reset at every monthly content update, usually around the first or second Thursday of each month.
Ambuscade rewards are organized into materials used to reforge REMA weaponry, Skirmish Stones, JSE Capes and materials used to augment them, and Vouchers and Tokens redeemable for Ambuscade Armor and the materials required to upgrade it.
REMA Reforging Materials
The full list of REMA Materials purchasable with Hallmarks is always available.
REMA Materials purchased with Gallantry are available on a rotating schedule.
- Empyrean weapon materials are available January, April, July, and October.
- Relic weapon materials are available February, May, August, and November.
- Mythic/Ergon weapon materials are available March, June, September, and December.
Skirmish Stones
+2 Skirmish Stones are available every month, purchasable only with Hallmarks. Each stone costs 200 Hallmarks, up to a limit of 10 of each type.
JSE Capes
You can buy up to one cape per job for 500 Hallmarks each.
The materials for augmenting these capse can be bought with either Hallmarks or Gallantry, with different prices and stock limits.
Ambuscade Armor
Hallmarks can be used to purchase coupons good for 1 NQ piece of equipment, rotating between Tokens and Vouchers every month.
Gallantry can be used to purchase coupons good for 1 HQ piece of equipment, rotating between Tokens and Vouchers every month.
The special materials ![]() Abdhaljs Metal
Abdhaljs Metal ![]() and
and ![]() Abdhaljs Fiber
Abdhaljs Fiber ![]() are used to upgrade NQ armor to HQ, and HQ armor to HQ+2 armor. These materials are available either for Hallmarks or Gallantry.
are used to upgrade NQ armor to HQ, and HQ armor to HQ+2 armor. These materials are available either for Hallmarks or Gallantry.


Total Hallmarks
This special tally of total accumulated Hallmarks is used to obtain items and equipment from a special menu. Once an item is redeemed, it disappears. Total Hallmarks are not consumed, but represent an ever filling pool that grants access to more expensive rewards from this list:
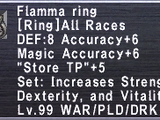
- Total Hallmarks are the only currency accepted for Ambuscade Ring coupons. The coupons also alternate between Vouchers and Tokens every content update.
- 100:
 Abdhaljs Seal
 - 130: Monthly NQ Feet Voucher/Token
- 170: Super Reraiser
- 220: Monthly NQ Hands Voucher/Token
- 280: Remedy x 12
- 370: Monthly NQ Head Voucher/Token
- 480: Caliber Ring
- 620: Monthly NQ Legs Voucher/Token
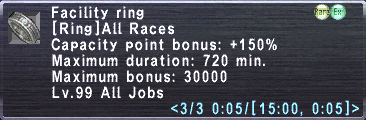
- 800: Facility Ring
- 1,050: Monthly NQ Body Voucher/Token
- 1,350: Monthly Ring Voucher/Token
- 1,800: Monthly HQ Feet Voucher/Token
- 2,300: Abdhaljs Metal
- 2,300: Abdhaljs Fiber
- 3,000: Monthly HQ Hands Voucher/Token
- 3,900: Abdhaljs Metal
- 3,900: Abdhaljs Fiber
- 5,000: Monthly HQ Head Voucher/Token
- 6,500: Abdhaljs Metal
- 6,500: Abdhaljs Fiber
- 8,500: Monthly HQ Legs Voucher/Token
- 11,000: Abdhaljs Metal
- 11,000: Abdhaljs Fiber
- 14,500: Monthly HQ Body Voucher/Token
- 20,000: Abdhaljs Metal
- 20,000: Abdhaljs Fiber
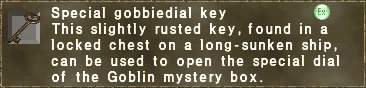
- 25,000: SP Gobbie Key


May 2019
Volume 1: Dullahan
Face off against the Dullahan Bozzetto Retributionist and its ally, the Bozzetto Charger.
Encountered Foes
- Bozzetto Retributionist - Dark Knight
- Bozzetto Charger - Monoceros (Alicorn variant)
The fight ends when all foes are defeated.
Difficulty Settings
The Difficulty Setting determines the enemies faced and ![]()
Easy~Very Difficult: Retributionist + Charger
Very Easy: Retributionist
Battle Mechanics
Passive Traits
Retributionist:
- Immune to gravity and dark elemental magic. Finale works to dispel buffs.
- All spells cast are area of effect
- Mewing Lullaby only takes 10% of its current TP[1]
- As of the September 2022 update, builds a gradual resistance to damage during Blood Weapon.
Charger:
- Permanent Enlight effect
- Double Attack at a very high rate
- 100% Critical hit rate
- Absorbs damage taken while reading a TP move.
Abilities Used
Retributionist:[2]
- Blood Weapon at set health percentages.
- Infernal Bulwark: Applies the following buffs - Haste, Stoneskin, Attack Bonus, Defense Bonus, Magic Attack Bonus, Magic Defense Bonus.
- Noahionto: Powerful AOE damage, possibly proportional to damage taken[3]. Appears to trigger a strong Intimidation effect to players in front of it.
- Villanous Rebuke: Powerful AOE physical damage + Stun + Knockback
- Charge-Up: Boss enters a unique phase that triggers one of three log messages to appear, signalling the 'mode' the boss is currently in and the next TP move it will use.
- 'Charging up' message - boss gains a spikes effect that drains TP and gains access to Atramentous Libations.
- 'Miasma' message - boss gains a spikes effect that drains TP and gains access to Eisenschneider (30' KO). Can be pushed out of this mode by dealing enough damage.
- 'Boiling over' message - Boss emits a Regain sphere that affects players. Gains access to Nether Castigation, 20' AOE damage proportional to damage received following this log message. Critical damage can be absorbed by Earthen Armor/Scherzo/Migawari effects.[4]
- This phase of the fight ends when either Nether Castigation or Eisenschneider has been used.
Charger:
- Scintillant Lance: High front AOE damage. Seems to do drastically increased damage, the mechanics of which are not well understood.
- Rampant Stance: AOE Stun + Physical damage
- Damsel Memento: Restores 5% of max HP
- Grace of Hera: Removes all debuffs, grants a potent Regen effect. While readying, absorbs damage. Favors this move over others if it has been sufficiently debuffed.[5]
- The September 2022 update further limits the number of times it will perform this move
- Very Difficult: 3 times
- Normal - Difficult: twice
- Easy: once
Spells Cast
Retributionist (All spells affect a large radius AOE):
- Endark II, Aspir II, Bio III, Stun, Absorb-spells, Dread Spikes
Other Notes
- Scintillant Lance can randomly spike for 7~8k damage, but does not appear to be tied to the Retributionist's current HP. Keep your tank's defenses up and mind your positioning at all times.[6]
- The Dullahan is not particularly resistant to any debuffs that aren't darkness based.
- Low damage elemental nukes or weak physical auto attacks should provide adequate TP gain to push the Retributionist to use Nether Castigation without drastically increasing its damage.
- Eisenschneider's KO can be avoided by reacting with /heal. Causes the move to deal damage instead.[7]
Where to get your Primer
Get ready for a walk[8]
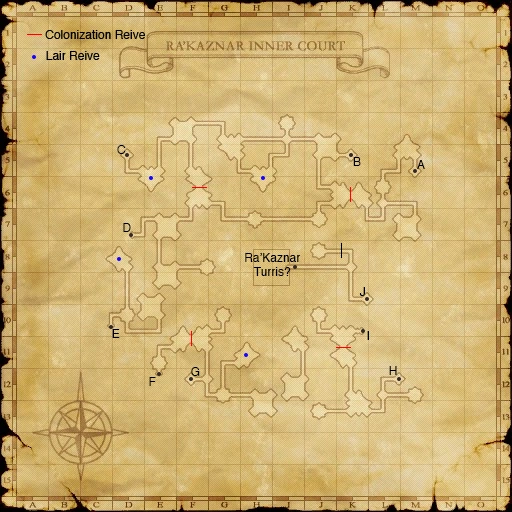
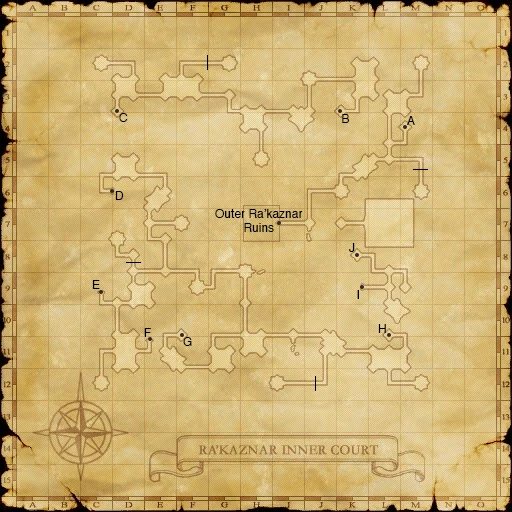
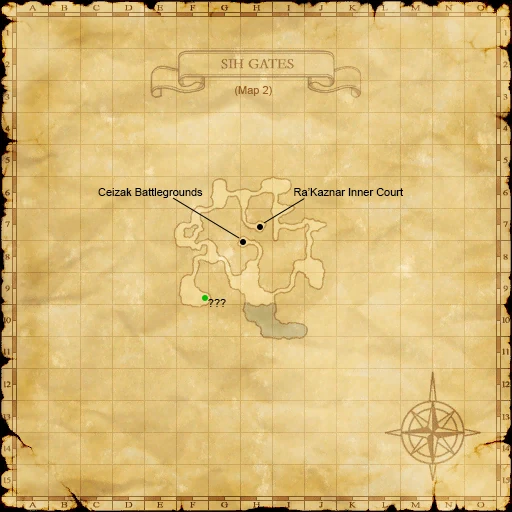
- Ra'Kaznar Inner Court. Take the Home Point Warp. Walk to the teleport at Ra'Kaznar Inner Court, Map 2 (K-9), Dullahan Axegrinders at Ra'Kaznar Inner Court, Map 1 (L-10)
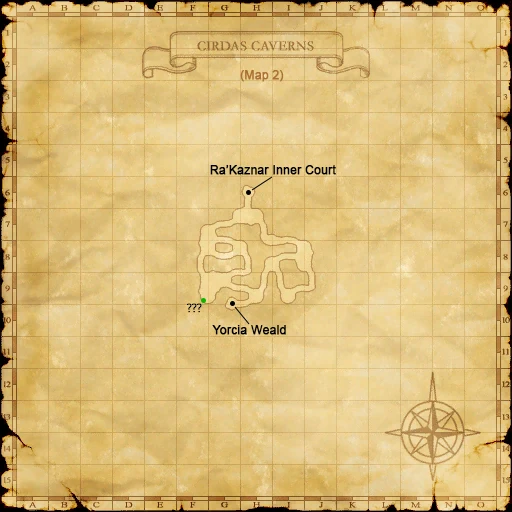
- Cirdas Caverns - Take the Home Point Warp. Walk to the teleport at Ra'Kaznar Inner Court, Map 2 (J-8), Imposing Dullahans at Cirdas Caverns, Map 2 (H-7)
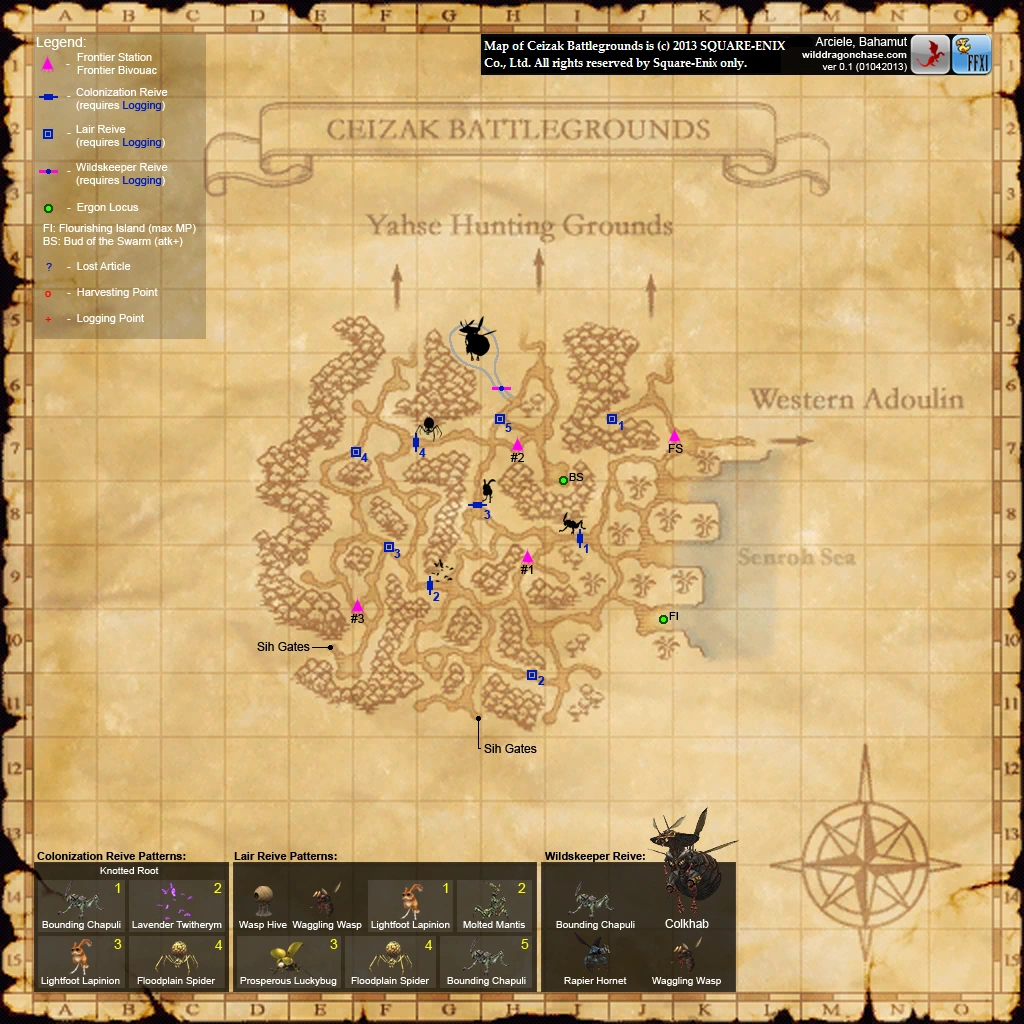
- Sih Gates - Take the Bivouac #1 warp to Ceizak Battlegrounds, then go south to Ceizak Battlegrounds (G-10). On the southern path there should be a warp to Sih Gates. Unrelenting Dullahans at Sih Gates, Map 2 (H-9)
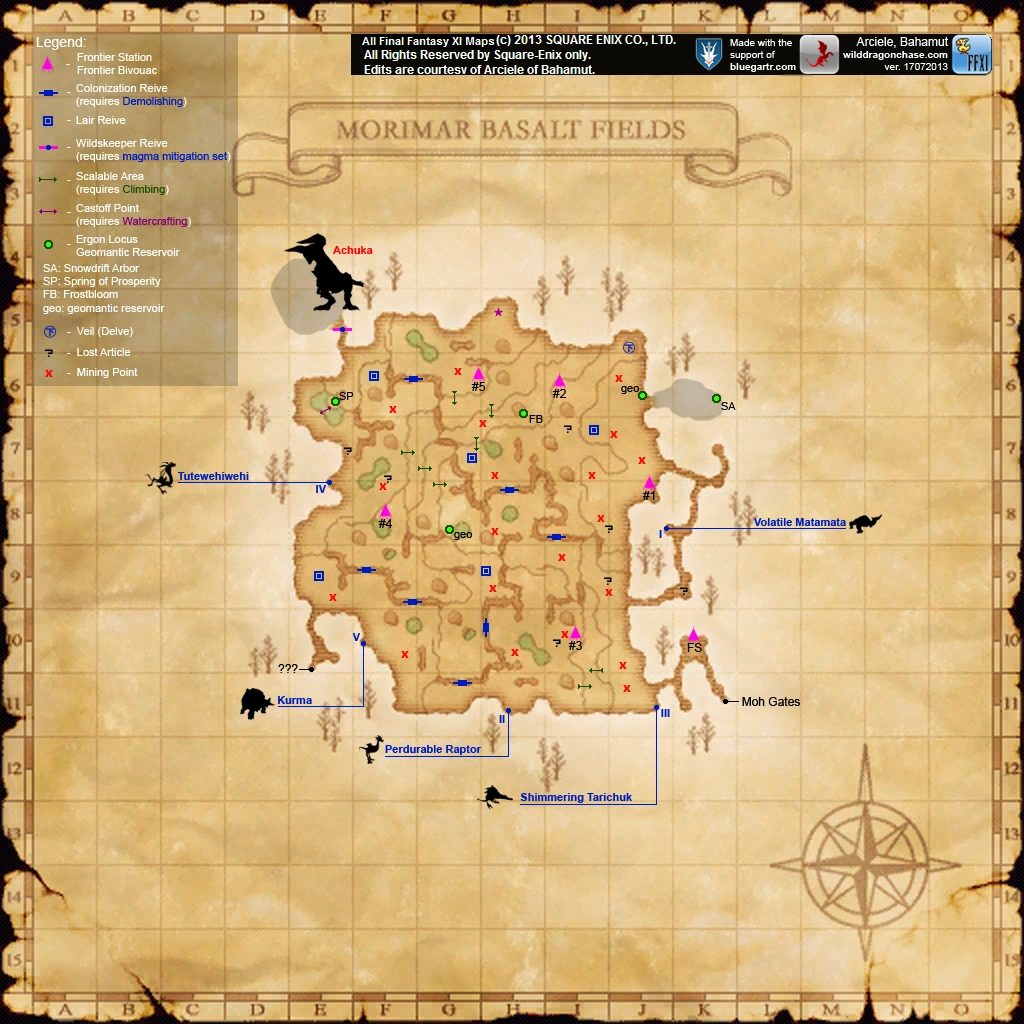
- Moh Gates - Take the Bivouac #5 warp to Morimar Basalt Fields, then head for the warp point at Morimar Basalt Fields (H-5). Somatophylax Dullahans at Moh Gates, Map 2 (I-8)

Volume 2: Demons
![]()
References
Battlefield Archives
-

Gorpa-Masorpa -

Flamma Korazin Set -
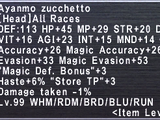
Ayanmo Corazza Set -

Hizamaru Haramaki Set -
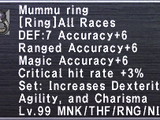
Mummu Jacket +2 Set -

Tali'ah Manteel Set -
Sulevia's Platemail Set -
Flamma Korazin +2 Set
All items (44)


