No edit summary |
No edit summary |
||
| Line 124: | Line 124: | ||
*20,000: {{IIn|Abdhaljs Fiber}} |
*20,000: {{IIn|Abdhaljs Fiber}} |
||
*25,000: {{IIn|SP Gobbie Key}} |
*25,000: {{IIn|SP Gobbie Key}} |
||
| − | = |
+ | =July 2021= |
| − | ==Volume 1: |
+ | ==Volume 1: Sahagin== |
| − | {{:Ambuscade/Battlefield Archive/Bozzetto |
+ | {{:Ambuscade/Battlefield Archive/Bozzetto Songstress}} |
| − | ==Volume 2: |
+ | ==Volume 2: Plantoids== |
| − | {{:Ambuscade/Battlefield Archive/ |
+ | {{:Ambuscade/Battlefield Archive/Yartsa Gunbu}} |
==References== |
==References== |
||
Revision as of 13:38, 12 July 2021
Ambuscade is a instanced dungeon battlefield in which players team up against the monster-of-the-month.
Getting Started
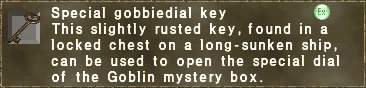
First, activate the Records of Eminence quest Stepping into an Ambuscade, then talk to Gorpa-Masorpa at Mhaura (G-9). To enter any Ambuscade battlefield all players in the party will need a Key Item. ![]() Ambuscade Primer Volume One grants entry to Intense Ambuscade, a more challenging encounter.
Ambuscade Primer Volume One grants entry to Intense Ambuscade, a more challenging encounter. ![]() Ambuscade Primer Volume Two grants entry to Normal Ambuscade, a step down in technical difficulty. "Intense" and "Normal" not only describe the relative challenge of the two battlefields, but alter the final rewards on completion.
Ambuscade Primer Volume Two grants entry to Normal Ambuscade, a step down in technical difficulty. "Intense" and "Normal" not only describe the relative challenge of the two battlefields, but alter the final rewards on completion.
Obtaining Key Items
You obtain the Key Items with Records of Eminence quests. There are two different quests per Key Item to activate: a non-repeatable daily quest, and a repeatable quest. The Daily objectives for both Volume 1 and Volume 2 require one experience-yielding monster be killed of the specified type. The repeatable objective for Volume 1 requires one kill, while Volume 2 requires ten.
The Ambuscade Tome
Once everyone in the party has the Primer key items, the party leader then registers the party at the Ambuscade Tome right next to Gorpa-Masorpa. At registration you choose the difficulty level of the selected Ambuscade type and inscribe your name into the tome, assigning you a number. Inscribing your name in the Ambuscade Tome gives you a page number. Page numbers are called in a zone-wide system message "Page ### of the tome flares up!" and the party leader can interact again with the Tome to enter the battlefield. The Tome also has an option to auto-transport your party to the battlefields as soon as your number is announced.
- Your Key Item is lost upon completion of a successful battle.
Rewards
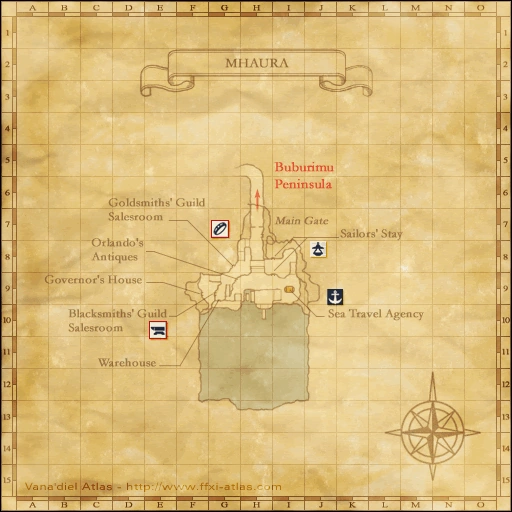
Successful completion of an Ambuscade battlefield rewards two forms of currency: Hallmarks and Gallantry. Hallmarks earned vary with the Key Item used to enter the battlefield and the selected difficulty level. Gallantry earned is based on the Key Item, Difficulty and the total number of party members, excluding Trusts. Solo players do not earn Gallantry. Using an ![]() Abdhaljs Seal
Abdhaljs Seal ![]() will triple the currency rewards for a single win.
will triple the currency rewards for a single win.
- Hallmarks, Total Hallmarks, and Gallantry are reset to zero every monthly content update.
Ambuscade Primer Volume One
Intense Ambuscade
| Difficulty | Hallmarks Earned |
Gallantry Earned 2~6 members |
|---|---|---|
| Very Difficult | 3600 | 300 ~ 1500 |
| Difficult | 2400 | 240 ~ 1200 |
| Normal | 1200 | 180 ~ 900 |
| Easy | 600 | 80 ~ 400 |
| Very Easy |
200 | 20 ~ 100 |
Ambuscade Primer Volume Two
Regular Ambuscade
| Difficulty | Hallmarks Earned |
Gallantry Earned 2~6 members |
|---|---|---|
| Very Difficult | 300 | 30 ~ 150 |
| Difficult | 250 | 25 ~ 125 |
| Normal | 200 | 20 ~ 100 |
| Easy | 150 | 15 ~ 75 |
| Very Easy |
100 | 10 ~ 50 |
Redeeming Hallmarks and Gallantry
Spend your accumulated Hallmarks and Gallantry with Gorpa-Masorpa, who offers a limited stock of rewards that is reset at every monthly content update, usually around the first or second Thursday of each month. Both Hallmarks and Gallantry are reset to 0 upon each monthly update.
Ambuscade rewards are organized into materials used to reforge REMA weaponry, Skirmish Stones, JSE Capes and materials used to augment them, and Vouchers and Tokens redeemable for Ambuscade Armor and the materials required to upgrade it.
REMA Reforging Materials
The full list of REMA Materials purchasable with Hallmarks is always available.
REMA Materials purchased with Gallantry are available on a rotating schedule.
- Empyrean weapon materials are available January, April, July, and October.
- Relic weapon materials are available February, May, August, and November.
- Mythic/Ergon weapon materials are available March, June, September, and December.
Skirmish Stones
+2 Skirmish Stones are available every month, purchasable only with Hallmarks. Each stone costs 200 Hallmarks, up to a limit of 10 of each type.
JSE Capes
You can buy up to one cape per job for 500 Hallmarks each.
The materials for augmenting these capes can be bought with either Hallmarks or Gallantry, with different prices and stock limits.
Ambuscade Armor
Hallmarks can be used to purchase coupons good for 1 NQ piece of equipment, rotating between Tokens and Vouchers every month.
Gallantry can be used to purchase coupons good for 1 HQ piece of equipment, rotating between Tokens and Vouchers every month.
The special materials ![]() Abdhaljs Metal
Abdhaljs Metal ![]() and
and ![]() Abdhaljs Fiber
Abdhaljs Fiber ![]() are used to upgrade NQ armor to HQ, and HQ armor to HQ+2 armor. These materials are available either for Hallmarks or Gallantry.
are used to upgrade NQ armor to HQ, and HQ armor to HQ+2 armor. These materials are available either for Hallmarks or Gallantry.


Total Hallmarks
This special tally of total accumulated Hallmarks is used to obtain items and equipment from a special menu. Once an item is redeemed, it disappears. Total Hallmarks are not consumed, but represent an ever filling pool that grants access to more expensive rewards from this list:
- Total Hallmarks are the only currency accepted for Ambuscade Ring coupons. The coupons also alternate between Vouchers and Tokens every content update.
- 100:
 Abdhaljs Seal
 - 130: Monthly NQ Feet Voucher/Token
- 170: Super Reraiser
- 220: Monthly NQ Hands Voucher/Token
- 280: Remedy x 12
- 370: Monthly NQ Head Voucher/Token
- 480: Caliber Ring
- 620: Monthly NQ Legs Voucher/Token
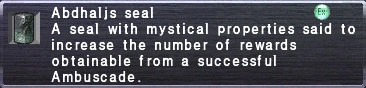
- 800: Facility Ring
- 1,050: Monthly NQ Body Voucher/Token
- 1,350: Monthly Ring Voucher/Token
- 1,800: Monthly HQ Feet Voucher/Token
- 2,300: Abdhaljs Metal
- 2,300: Abdhaljs Fiber
- 3,000: Monthly HQ Hands Voucher/Token
- 3,900: Abdhaljs Metal
- 3,900: Abdhaljs Fiber
- 5,000: Monthly HQ Head Voucher/Token
- 6,500: Abdhaljs Metal
- 6,500: Abdhaljs Fiber
- 8,500: Monthly HQ Legs Voucher/Token
- 11,000: Abdhaljs Metal
- 11,000: Abdhaljs Fiber
- 14,500: Monthly HQ Body Voucher/Token
- 20,000: Abdhaljs Metal
- 20,000: Abdhaljs Fiber
- 25,000: SP Gobbie Key


July 2021
Volume 1: Sahagin
Face off against the Bozzetto Songstress and its allies. The main gimmick of the fight is the invulnerable state of the Songstress. Direct damage is reduced to zero as long as other foes are present, and the Songstress in turn strengthens their allies depending on their distance and the songs buffing them. As foes are defeated, the Songstress's HP is depleted by a set percentage, depending on the difficulty setting. After any foe is defeated besides the Songstress, it will respawn 3 minutes later. On easier difficulties this makes it possible to defeat all of the Songstress's allies and then deal direct damage to her, but the second any respawn she becomes invulnerable again.
Encountered Foes
- Bozzetto Songstress - BRD
- Bozzetto Flowspear - DRG
- Bozzetto Wavefist - MNK
- Bozzetto Hydrophile - WHM
- Bozzetto Wyvern - Summoned by the Flowspear
- Chirurgeon - Sea Monk
The fight ends when the Songstress's HP is depleted to 0.
Difficulty Settings
The Difficulty Setting determines the total number of foes present at the start of the fight, the abilities used by Songstress, and the count of enemies that must be defeated to reduce the Songstress's HP to 0.
Very Difficult: Songstress, Flowspear x2, Wavefist x2, Hydrophile, Chirurgeon. 8 foes in total must be defeated for the Songstress to fall.[1]. Each add has approximately 600k HP[2]
Difficult: Songstress, Flowspear x2, Wavefist x2, Hydrophile. 6 foes in total must be defeated for the Songstress to fall.
Normal: Songstress, Flowspear x2, Wavefist x2. 5 foes in total must be defeated for the Songstress to fall.
Easy: Songstress, Flowspear, Wavefist x2. 4 foes in total must be defeated for the Songstress to fall.
Very Easy: Songstress, Flowspear, Wavefist. 3 foes in total must be defeated for the Songstress to fall.
Battle Mechanics
Passive Traits
Songstress:
- Does not move or auto-attack.
- Completely immune to all damage while other foes are alive.
- Loses a set percentage of health (based on difficulty) any time any non-pet mob dies.
- Immune to sleep. Susceptible to most other debuffs but extremely resistant to silence. As more debuffs are applied to the Songstress, it becomes easier to land Silence.
- The boss emits a series of emotes as their susceptibility to silence increases with the number of applied debuffs[3]
- "The boss's throat is parched"
- "The boss begins to sing off key"
- "The boss's voice begins to crack"
- "The boss can barely croak the words out" - At this point the boss can be silenced with reasonable accuracy
- "The boss can no longer sing!" - The boss is silenced.
- Emits a powerful Regen aura to all allies and Bio aura to foes when it clears its own Silence. The potency of both auras is reduced with each debuff, and removed entirely once Silenced.
All other foes:
- All of the Songstress's allies take considerably increased damage from skillchains.
- All other Sahagin have active Regain effects at all time
- When a foe is hit with a strong enough Lightning-elemental attack, it loses TP.[4]. A potent enough en-spell effect constantly hitting a foe, combined with sufficient Subtle Blow equipped on your physical damage dealers, is enough to keep that foe from ever using a special ability besides its SP.[5]
- The closer they are to the Songstress, the more damage they take overall.[6]
Flowspear:
- Permanent Aqua Spikes effect (On physical damage: Poison)
Wavefist:
- High counter rate
- Permanent Enwater effect.
Hydrophile:
- Very resistant to sleep
Chirurgeon:
- Immune to sleep
- High rate of Double Attack.
- Gains an Avoidance Down aura during Mighty Strikes[7]
Abilities Used
Songstress:
- Soul Voice Uses at will. Powers up all songs and the Bio/regen auras.
- Cleansing Bubbles Used approximately 60 seconds after being silenced.[8] Removes all debuffs from nearby allies. Begins to emit a potent Bio aura alongside the Regen aura for the Songstress's allies. Both auras are removed once the Songstress is silenced.
All Other Sahagin:
- Level Up. All Sahagin will Level Up (with a visible effect) every time a special ability (including Weapon Skills) is used on them while the Songstress's Bio and Regen auras are not active[9]. Halting all damage for a period of time will level them back down.[10]. They also level up if they receive more than 22,222 damage in a single hit.
- Hydro Shot - Physical damage + Knockback + Resets hate.
- Spinning Fin - AOE Damage + a lengthy Stun (up to 15 seconds). Resistable with Tellus Runes and enough Magic Evasion. Takes multiple shadows.
- Hydro Ball - AOE water elemental damage + Strength Down. Pierces shadows.
Wavefist:
- Hundred Fists
- Sucker Punch - Physical damage + Enmity reset.
Flowspear:
- Call Wyvern - Does this once at ~50% health. This is immediately followed by the use of Spirit Surge, removing the Wyvern from the battle and healing approximately 25% of the Flowspear's health. It is possible to preempt the heal by stunning and defeating the Flowspear before Spirit Surge can go off. In this case, the Wyvern is still summoned but remains active on the battlefield. Killing the wyvern does not reduce the Songstress's health.[11]
- Jumping Thrust - Physical damage to one target + Defense Down for 2 minutes.
Hydrophile:
- Benediction - Will use once before dying.
Chirugeon:
- Level Up - Under the same conditions as the Sahagin. Will not use during Mighty Strikes.
- Mighty Strikes - Furthermore triggers an Avoidance Down aura.
- Inky Injection - Front AOE damage + Blindness + Knockback. Pierces shadows.
Spells Cast:
Songstress:
- Has a set order in which they cast spells:
- Dragonfoe Mambo, Valor Minuet V, Victory March, Lightning Carol II, Magic Finale, Water Threnody II, Foe Requiem VII, Maiden's Virelai (VD Only)[12]
- The song effects (except Virelai) can be dispelled.
Hydrophile:
- Curaga. Will use this to wake other Sahagin.
Where to get your Primer:
- Sea Serpent Grotto - Take the Unity Concord warp, level 125. This is the only practical location.
Volume 2: Plantoids
Face off against the Funguar Yartsa Gunbu. Yartsa Gunbu takes significantly reduced damage from all sources except in the presence of a Light Elemental which appears under certain circumstances. It also pops more Funguar allies as the fight progresses.
Encountered Foes
- Yartsa Gunbu. Present at the start of the fight
- Skullcap. Up to four. Summoned by Yartsa Gunbu whenever it uses a "-shroom" attack.
- Bozzetto Elemental. Dark elemental type. Spawns whenever Yartsa Gunbu uses Dark Spore. Up to two can be present at once.
- Bozzetto Elemental. Light elemental type. Up to one spawned, after a dark elemental type is defeated.
The fight ends when Yartsa Gunbu is defeated.
Difficulty Settings
The Difficulty Setting determines the stats and HP of your foes.
Battle Mechanics
Passive Traits
Yartsa Gunbu
- Greatly reduced damage taken by all sources.
- Greatly increased damage taken when a Light Elemental is present.
Skullcap
- Immune to sleep.
- Low hp (~20k on VD)[13]
- Loses HP gradually in the presence of a light elemental.
Dark Elementals
- One will emit a wide Blindness aura while it is present. The other will emit a wide Curse aura while it is present.
Light Elemental
- Very low hp (<5k on VD).
- Emits a beneficial Refresh and Regain aura while it is present. Does not attack your party members.
- Gradually loses HP until it dies.
Abilities Used
Yartsa Gunbu
- Dark Spore: Front AOE dark elemental damage and Blindness. Pierces shadows. Spawns a Dark Elemental if two are not already present.
- Frog Kick: Single target physical damage and knockback. Absorbed by 1 shadow.
- Danceshroom: Single target dark elemental damage and Disease. Absorbed by 1 shadow.
- Queasyshroom: Single target dark elemental damage and Poison. Absorbed by 1 shadow.
- Shockshroom: Single target dark elemental damage, paralysis and stun. Absorbed by 1 shadow.
- Silence Gas: Front AOE dark elemental damage and silence. Pierces shadows.
- Spore: Single target paralysis. Pierces shadows.
Spells Cast:
Dark Elementals
- Sleepga, Absorb-spells, Bio, Drain.
Where to get your Primer:
- Boyahda Tree - Korrigans and Goobbues by HP #1.
- Yorcia Weald - Plantoids everywhere.
References
Battlefield Archives
-

Gorpa-Masorpa -

Flamma Korazin Set -
Ayanmo Corazza Set -

Hizamaru Haramaki Set -
Mummu Jacket +2 Set -

Tali'ah Manteel Set -
Sulevia's Platemail Set -
Flamma Korazin +2 Set
All items (44)


