No edit summary |
No edit summary |
||
| (47 intermediate revisions by 4 users not shown) | |||
| Line 2: | Line 2: | ||
{{tocright}} |
{{tocright}} |
||
=Getting Started= |
=Getting Started= |
||
| − | First, activate the |
+ | First, activate the Records of Eminence quest [[Tutorial#Basics|Stepping into an Ambuscade]], then talk to [[Gorpa-Masorpa]] at {{Location|Mhaura|G-9}}. To enter any Ambuscade battlefield all players in the party will need a Key Item. {{KeyItem}} [[Ambuscade Primer Volume One]] grants entry to Intense Ambuscade, a more challenging encounter. {{KeyItem}} [[Ambuscade Primer Volume Two]] grants entry to Normal Ambuscade, a step down in technical difficulty. "Intense" and "Normal" not only describe the relative challenge of the two battlefields, but alter the final rewards on completion. |
==Obtaining Key Items== |
==Obtaining Key Items== |
||
| − | You obtain the Key Items with [[:Category:Records of Eminence|Records of Eminence]] quests. There are two different quests per Key Item to activate: a non-repeatable daily quest, and a repeatable quest. The Daily objectives for both Volume 1 and Volume 2 require one experience-yielding monster be killed of the specified type. The repeatable objective for Volume 1 requires |
+ | You obtain the Key Items with [[:Category:Records of Eminence|Records of Eminence]] quests. There are two different quests per Key Item to activate: a non-repeatable daily quest, and a repeatable quest. The Daily objectives for both Volume 1 and Volume 2 require one experience-yielding monster be killed of the specified type. The repeatable objective for Volume 1 requires one kill, while Volume 2 requires ten. |
*Monsters in [[Dynamis]] and [[Abyssea]] zones are not counted for any Ambuscade objectives. |
*Monsters in [[Dynamis]] and [[Abyssea]] zones are not counted for any Ambuscade objectives. |
||
| Line 40: | Line 40: | ||
|- align = "center" |
|- align = "center" |
||
| Very<br>Easy |
| Very<br>Easy |
||
| − | | |
+ | | 200 |
| 20 ~ 100 |
| 20 ~ 100 |
||
|} |
|} |
||
| Line 57: | Line 57: | ||
|- align = "center" |
|- align = "center" |
||
| Difficult |
| Difficult |
||
| + | | 250 |
||
| ⚫ | |||
| ⚫ | |||
| ⚫ | |||
| 200 |
| 200 |
||
| 20 ~ 100 |
| 20 ~ 100 |
||
| ⚫ | |||
| ⚫ | |||
| − | | 100 |
||
| ⚫ | |||
|- align = "center" |
|- align = "center" |
||
| Easy |
| Easy |
||
| − | | |
+ | | 150 |
| − | | |
+ | | 15 ~ 75 |
|- align = "center" |
|- align = "center" |
||
| Very<br>Easy |
| Very<br>Easy |
||
| − | | |
+ | | 100 |
| − | | |
+ | | 10 ~ 50 |
|} |
|} |
||
=Redeeming Hallmarks and Gallantry= |
=Redeeming Hallmarks and Gallantry= |
||
| − | Spend your accumulated Hallmarks and Gallantry with [[Gorpa-Masorpa]], who offers a limited stock of rewards that is reset at every monthly content update, usually around the first or second Thursday of each month. |
+ | Spend your accumulated Hallmarks and Gallantry with [[Gorpa-Masorpa]], who offers a limited stock of rewards that is reset at every monthly content update, usually around the first or second Thursday of each month. Both Hallmarks and Gallantry are reset to 0 upon each monthly update. |
Ambuscade rewards are organized into materials used to reforge REMA weaponry, Skirmish Stones, JSE Capes and materials used to augment them, and Vouchers and Tokens redeemable for [[:Category:Ambuscade Armor|Ambuscade Armor]] and the materials required to upgrade it. |
Ambuscade rewards are organized into materials used to reforge REMA weaponry, Skirmish Stones, JSE Capes and materials used to augment them, and Vouchers and Tokens redeemable for [[:Category:Ambuscade Armor|Ambuscade Armor]] and the materials required to upgrade it. |
||
| Line 89: | Line 89: | ||
You can buy up to one cape per job for 500 Hallmarks each. |
You can buy up to one cape per job for 500 Hallmarks each. |
||
| − | The materials for augmenting these |
+ | The materials for augmenting these capes can be bought with either Hallmarks or Gallantry, with different prices and stock limits. |
==Ambuscade Armor== |
==Ambuscade Armor== |
||
Hallmarks can be used to purchase coupons good for 1 NQ piece of equipment, rotating between Tokens and Vouchers every month. |
Hallmarks can be used to purchase coupons good for 1 NQ piece of equipment, rotating between Tokens and Vouchers every month. |
||
| Line 124: | Line 124: | ||
*20,000: {{IIn|Abdhaljs Fiber}} |
*20,000: {{IIn|Abdhaljs Fiber}} |
||
*25,000: {{IIn|SP Gobbie Key}} |
*25,000: {{IIn|SP Gobbie Key}} |
||
| − | =April |
+ | =April 2021= |
| − | ==Volume 1: |
+ | ==Volume 1: Meebles== |
| − | {{:Ambuscade/Battlefield Archive/Bozzetto |
+ | {{:Ambuscade/Battlefield Archive/Bozzetto Breadwinner}} |
| − | ==Volume 2: |
+ | ==Volume 2: Dragons== |
| + | {{:Ambuscade/Battlefield Archive/Sombra Dragon}} |
||
| − | {{Information Needed}} |
||
==References== |
==References== |
||
Revision as of 13:21, 2 April 2021
Ambuscade is a instanced dungeon battlefield in which players team up against the monster-of-the-month.
Getting Started
First, activate the Records of Eminence quest Stepping into an Ambuscade, then talk to Gorpa-Masorpa at Mhaura (G-9). To enter any Ambuscade battlefield all players in the party will need a Key Item. ![]() Ambuscade Primer Volume One grants entry to Intense Ambuscade, a more challenging encounter.
Ambuscade Primer Volume One grants entry to Intense Ambuscade, a more challenging encounter. ![]() Ambuscade Primer Volume Two grants entry to Normal Ambuscade, a step down in technical difficulty. "Intense" and "Normal" not only describe the relative challenge of the two battlefields, but alter the final rewards on completion.
Ambuscade Primer Volume Two grants entry to Normal Ambuscade, a step down in technical difficulty. "Intense" and "Normal" not only describe the relative challenge of the two battlefields, but alter the final rewards on completion.
Obtaining Key Items
You obtain the Key Items with Records of Eminence quests. There are two different quests per Key Item to activate: a non-repeatable daily quest, and a repeatable quest. The Daily objectives for both Volume 1 and Volume 2 require one experience-yielding monster be killed of the specified type. The repeatable objective for Volume 1 requires one kill, while Volume 2 requires ten.
The Ambuscade Tome
Once everyone in the party has the Primer key items, the party leader then registers the party at the Ambuscade Tome right next to Gorpa-Masorpa. At registration you choose the difficulty level of the selected Ambuscade type and inscribe your name into the tome, assigning you a number. Inscribing your name in the Ambuscade Tome gives you a page number. Page numbers are called in a zone-wide system message "Page ### of the tome flares up!" and the party leader can interact again with the Tome to enter the battlefield. The Tome also has an option to auto-transport your party to the battlefields as soon as your number is announced.
- Your Key Item is lost upon completion of a successful battle.
Rewards
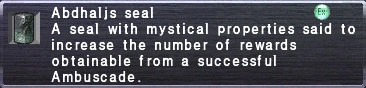
Successful completion of an Ambuscade battlefield rewards two forms of currency: Hallmarks and Gallantry. Hallmarks earned vary with the Key Item used to enter the battlefield and the selected difficulty level. Gallantry earned is based on the Key Item, Difficulty and the total number of party members, excluding Trusts. Solo players do not earn Gallantry. Using an ![]() Abdhaljs Seal
Abdhaljs Seal ![]() will triple the currency rewards for a single win.
will triple the currency rewards for a single win.
- Hallmarks, Total Hallmarks, and Gallantry are reset to zero every monthly content update.
Ambuscade Primer Volume One
Intense Ambuscade
| Difficulty | Hallmarks Earned |
Gallantry Earned 2~6 members |
|---|---|---|
| Very Difficult | 3600 | 300 ~ 1500 |
| Difficult | 2400 | 240 ~ 1200 |
| Normal | 1200 | 180 ~ 900 |
| Easy | 600 | 80 ~ 400 |
| Very Easy |
200 | 20 ~ 100 |
Ambuscade Primer Volume Two
Regular Ambuscade
| Difficulty | Hallmarks Earned |
Gallantry Earned 2~6 members |
|---|---|---|
| Very Difficult | 300 | 30 ~ 150 |
| Difficult | 250 | 25 ~ 125 |
| Normal | 200 | 20 ~ 100 |
| Easy | 150 | 15 ~ 75 |
| Very Easy |
100 | 10 ~ 50 |
Redeeming Hallmarks and Gallantry
Spend your accumulated Hallmarks and Gallantry with Gorpa-Masorpa, who offers a limited stock of rewards that is reset at every monthly content update, usually around the first or second Thursday of each month. Both Hallmarks and Gallantry are reset to 0 upon each monthly update.
Ambuscade rewards are organized into materials used to reforge REMA weaponry, Skirmish Stones, JSE Capes and materials used to augment them, and Vouchers and Tokens redeemable for Ambuscade Armor and the materials required to upgrade it.
REMA Reforging Materials
The full list of REMA Materials purchasable with Hallmarks is always available.
REMA Materials purchased with Gallantry are available on a rotating schedule.
- Empyrean weapon materials are available January, April, July, and October.
- Relic weapon materials are available February, May, August, and November.
- Mythic/Ergon weapon materials are available March, June, September, and December.
Skirmish Stones
+2 Skirmish Stones are available every month, purchasable only with Hallmarks. Each stone costs 200 Hallmarks, up to a limit of 10 of each type.
JSE Capes
You can buy up to one cape per job for 500 Hallmarks each.
The materials for augmenting these capes can be bought with either Hallmarks or Gallantry, with different prices and stock limits.
Ambuscade Armor
Hallmarks can be used to purchase coupons good for 1 NQ piece of equipment, rotating between Tokens and Vouchers every month.
Gallantry can be used to purchase coupons good for 1 HQ piece of equipment, rotating between Tokens and Vouchers every month.
The special materials ![]() Abdhaljs Metal
Abdhaljs Metal ![]() and
and ![]() Abdhaljs Fiber
Abdhaljs Fiber ![]() are used to upgrade NQ armor to HQ, and HQ armor to HQ+2 armor. These materials are available either for Hallmarks or Gallantry.
are used to upgrade NQ armor to HQ, and HQ armor to HQ+2 armor. These materials are available either for Hallmarks or Gallantry.


Total Hallmarks
This special tally of total accumulated Hallmarks is used to obtain items and equipment from a special menu. Once an item is redeemed, it disappears. Total Hallmarks are not consumed, but represent an ever filling pool that grants access to more expensive rewards from this list:
- Total Hallmarks are the only currency accepted for Ambuscade Ring coupons. The coupons also alternate between Vouchers and Tokens every content update.
- 100:
 Abdhaljs Seal
 - 130: Monthly NQ Feet Voucher/Token
- 170: Super Reraiser
- 220: Monthly NQ Hands Voucher/Token
- 280: Remedy x 12
- 370: Monthly NQ Head Voucher/Token
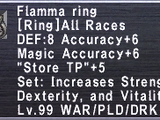
- 480: Caliber Ring
- 620: Monthly NQ Legs Voucher/Token
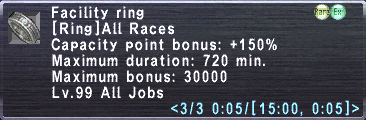
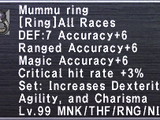
- 800: Facility Ring
- 1,050: Monthly NQ Body Voucher/Token
- 1,350: Monthly Ring Voucher/Token
- 1,800: Monthly HQ Feet Voucher/Token
- 2,300: Abdhaljs Metal
- 2,300: Abdhaljs Fiber
- 3,000: Monthly HQ Hands Voucher/Token
- 3,900: Abdhaljs Metal
- 3,900: Abdhaljs Fiber
- 5,000: Monthly HQ Head Voucher/Token
- 6,500: Abdhaljs Metal
- 6,500: Abdhaljs Fiber
- 8,500: Monthly HQ Legs Voucher/Token
- 11,000: Abdhaljs Metal
- 11,000: Abdhaljs Fiber
- 14,500: Monthly HQ Body Voucher/Token
- 20,000: Abdhaljs Metal
- 20,000: Abdhaljs Fiber
- 25,000: SP Gobbie Key


April 2021
Volume 1: Meebles
Face off against the Bozzetto Breadwinner and its allies.
Encountered Foes
- Bozzetto Breadwinner - Monk. Spawns in the middle of the battlefield.
- Bozzetto Housemaker - No apparent job or SP abilities. Spawns hiding behind the pillar furthest from the battlefield entrance.
- Bozzetto Urchin - Monk / Dark Knight hybrid. Summoned by the Breadwinner throughout the fight.
The fight ends when the Breadwinner is defeated.
Difficulty Settings
The Difficulty Setting determines the enemies encountered.
Very Difficult: Breadwinner, Housemaker, up to 4 Urchins summoned per Warble.
Normal, Difficult: Breadwinner, Housemaker, up to 3 Urchins summoned per Warble.
Easy: Breadwinner, Housemaker, up to 2 Urchins summoned per Warble.
Very Easy: Breadwinner, no Urchins summoned.
Battle Mechanics
Passive Traits
Urchins:
- Can be slept. Awaken when the Breadwinner uses a Warble ability.
Housemaker:
- Stays hidden behind their pillar until later in the fight, then rushes in for a single use of their only TP move, Earthshaker, then runs back away and sits down until the next opportunity.
- Does not obey normal rules of Enmity, and seems to attack whoever has been casting Bar-spells on the group.
Breadwinner:
- Approximately 1.6M HP on VD.[1]
- Possesses the Monk traits of Guard, Counter, and Kick Attacks. Also has Double Attack.
- Immune to sleep and stun. Resistant to Slow. Takes significantly reduced Earth damage. Susceptible to Silence and Paralyze. Fairly resistant to Slow.
- Immune to Mewing Lullaby.
- Takes 95% reduced damage from area of effect attacks.
- Unlike most Ambuscade foes, susceptible to the full effect of debuffing Geomancy.
Abilities Used
Urchins:
- Hundred Fists + Souleater: Can hit for up to 3000 on a single target. Triggered if they are awake during a special move used by the Breadwinner
Housemaker:
- Earthshaker: When activated, the Housemaker will focus on a single target and attempt to ready this move. It can hit from a considerable distance.[2] Hits a target and anybody within 10 yalms of that target for 1000 physical damage per affected player and inflicts a very potent Paralysis. 2 targets = 2000 damage, and so on. Counts pets (and luopans) in this total. Not mitigated by Physical Damage Taken -% equipment. Stoneskin helps.
Breadwinner:
- Will use an Elemental Warble approximately once every 30 seconds. Warbles have a chance to summon Urchins and activate the Housemaker, and will wake any nearby Urchins. Inflicting Silence on the Breadwinner may (but not reliably so) prevent Warbles from summoning Urchins or activating the Housemaker.[3]. Warble readying time varies with the difficulty:
- Very Easy to Normal: 5 seconds.
- Difficult and Very Difficult: 4 seconds.
- Fire Meeble Warble: AOE Fire Elemental damage, inflicts Plague (50 MP/tick, 300 TP/tick) and Burn (50 HP/tick).
- Blizzard Meeble Warble: AOE Ice Elemental damage, inflicts a potent Paralysis effect and Frost (50 HP/tick).
- Aero Meeble Warble: AOE Wind Elemental damage, inflicts Silence and Choke (50 HP/tick).
- Stone Meeble Warble: AOE Earth Elemental damage, inflicts Petrification and Rasp (50 HP/tick).
- Thunder Meeble Warble: AOE Lightning Elemental damage, inflicts Stun and Shock (50 HP/tick).
- Water Meeble Warble: AOE Water Elemental damage, inflicts Poison and Drown (50 HP/tick).
- Thrashing Assault: Physical damage + Defense Down. Absorbed by 4 shadows.
- Drill Claw: Physical damage + Max HP Down + Max TP Down.
- Hundred Fists: Used once at 50% health. Lasts 45 seconds.
- Clod Spikes: Become active during Hundred Fists. Deals earth damage and inflicts a potent Slow effect on any player who physically strikes the Breadwinner. The Slow effect is strong enough to overwite Haste II.
Spells Cast
- None observed.
Other Notes
- The mechanics of when a Warble will or will not summon Urchins are not yet fully understood. Silence seems to help somewhat but groups report that even a silenced Breadwinner can still summon Urchins.[4]
- After Silence is successfully stuck on the Breadwinner, attempts to summon Urchins will instead produce new messages in the battle log:[5]
- "The boss appears to have a difficult time projecting." if the Breadwinner is silenced.
- "The boss's cries are having trouble reaching his allies!" if the Breadwinner attempts to call adds and/or the Housemaker when he's silenced.
- "The boss's throat is no longer scratchy." if the Breadwinner is no longer silenced.
- The Housemaker's lone TP move is deadly if more than one player is hit with it, and it moves fast enough that the expected target has to be vigilant and watch for its charge to begin moving away from the group. Earthshaker has a long enough readying animation that the target should be able to move away from the group to limit the total damage done.
- Barspells are very good at mitigating the damage done by Warbles and preventing their negative status effects. Having more than one mage subbing /WHM will help to manage this part of the fight, especially once the Housemaker forces your mages to have to run.
Where to get your Primer
- Escha - Zi'Tah: Worms at the entrance.
- Den of Rancor: Right outside the Sacrificial Chamber is a Home Point. Worms scattered around the Tonberries. The Unity Concord warp will put you near the same area.
- Dynamis - Tavnazia. Nightmare Worms up the ramp, grouped up tigher than Cave Worms in Den.
- Zeruhn Mines. A Survival Guide warp puts you within walking distance of the Burrower Worms.
Volume 2: Dragons
Encountered Foes
- The dark Dragon Sombra Dragon is your sole enemy. Defeat it to win.
Enemy details
Sombra Dragon:
- ~1250 Accuracy to hit cap.[6]
- Uses Thornsong and a random Breath attack immediately when engaged. Throughout the fight it will use various other breath attacks and changes its defensive attributes.
- Poison Breath: Water elemental breath damage. Decreases resistance to lightning elemental damage. Takes somewhat more magic damage.
- Flame Breath: Fire elemental breath damage. Decreases resistance to water elemental damage.
- Wind Breath: Wind elemental breath damage. Decreases resistance to ice elemental damage. Gains an evasion boost.
After about a minute it will use Voidsong and repeat its cycle of Thornsong and breath attacks.
At 25% health it starts using Chaos Blade and Petro Eyes. Both these abilities reset hate. Chaos Blade additionally inflicts weight.
Where to get your Primer:
- Bhaflau Thickets: Puks near Home Point #1
References
Battlefield Archives
-

Gorpa-Masorpa -

Flamma Korazin Set -
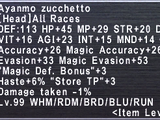
Ayanmo Corazza Set -
Flamma Korazin +2 Set -

Ayanmo Corazza +2 Set -

Hizamaru Haramaki Set -
Mummu Jacket +2 Set -

Tali'ah Manteel Set
All items (44)


