No edit summary |
No edit summary |
||
| Line 131: | Line 131: | ||
{{:Ambuscade/Battlefield Archive/Ixchel}}<br> |
{{:Ambuscade/Battlefield Archive/Ixchel}}<br> |
||
Placeholder: Fight is against 2 [[Coeurl]]. I call em Big and Little.<br> |
Placeholder: Fight is against 2 [[Coeurl]]. I call em Big and Little.<br> |
||
| − | Big is the easiest. He can Petrify (if you're walking/strafing backwards you can out-distance it), Silence (long range), Pounce (seems to be quite weak damage, medium range) and possibly something else inconsequential.<br> |
+ | Big is the easiest. He can Petrify and reset Hate (if you're walking/strafing backwards you can out-distance it), Silence (long range), Pounce (seems to be quite weak damage, medium range) and possibly something else inconsequential.<br> |
| − | Little does the most dmg. Has |
+ | Little does the most dmg. Has a Charged Whiskers which is AoE Medium-Heavy Lightning damage and give it Shock Spikes w/Stun effect, Blink of Peril - HEAVY single target DMG that MIGHT just always bring its target to 1% HP and reset Hate (MIGHT do less damage with distance or less TP fed), can also Petrify, and uses Blaster, a conal move with Def/MDef down?<br> |
BOTH Coeruls might have a timer on their TP moves. On Normal, maybe every 10 seconds or less. They don't seem to depend on TP given. The DAMAGE they do might depend on TP given.<br> |
BOTH Coeruls might have a timer on their TP moves. On Normal, maybe every 10 seconds or less. They don't seem to depend on TP given. The DAMAGE they do might depend on TP given.<br> |
||
My Strat: PUP with Tank Maton. Apururu, Ulmia, Joachim, Qultada, Koru-Moru. I take Big guy to start and put Maton on Little. Get myself and the trusts away from little ASAP. If you want to avoid Petrify, just be walking backwards while meleeing while strafing left or right occasionally, especially when you see it's TP move animation. Big guy is easy this way. PUP/WAR doesn't care about being silenced. I've only had to use Repair a couple times over 10s of runs to keep my Auto alive while he solo's Little.<br> |
My Strat: PUP with Tank Maton. Apururu, Ulmia, Joachim, Qultada, Koru-Moru. I take Big guy to start and put Maton on Little. Get myself and the trusts away from little ASAP. If you want to avoid Petrify, just be walking backwards while meleeing while strafing left or right occasionally, especially when you see it's TP move animation. Big guy is easy this way. PUP/WAR doesn't care about being silenced. I've only had to use Repair a couple times over 10s of runs to keep my Auto alive while he solo's Little.<br> |
||
Revision as of 02:21, 16 February 2020
Ambuscade is a instanced dungeon battlefield in which players team up against the monster-of-the-month.
Getting Started
First, activate the Records of Eminence quest Stepping into an Ambuscade, then talk to Gorpa-Masorpa at Mhaura (G-9). To enter any Ambuscade battlefield all players in the party will need a Key Item. ![]() Ambuscade Primer Volume One grants entry to Intense Ambuscade, a more challenging encounter.
Ambuscade Primer Volume One grants entry to Intense Ambuscade, a more challenging encounter. ![]() Ambuscade Primer Volume Two grants entry to Normal Ambuscade, a step down in technical difficulty. "Intense" and "Normal" not only describe the relative challenge of the two battlefields, but alter the final rewards on completion.
Ambuscade Primer Volume Two grants entry to Normal Ambuscade, a step down in technical difficulty. "Intense" and "Normal" not only describe the relative challenge of the two battlefields, but alter the final rewards on completion.
Obtaining Key Items
You obtain the Key Items with Records of Eminence quests. There are two different quests per Key Item to activate: a non-repeatable daily quest, and a repeatable quest. The Daily objectives for both Volume 1 and Volume 2 require one experience-yielding monster be killed of the specified type. The repeatable objective for Volume 1 requires five kills, while Volume 2 requires 10.
The Ambuscade Tome
Once everyone in the party has the Primer key items, the party leader then registers the party at the Ambuscade Tome right next to Gorpa-Masorpa. At registration you choose the difficulty level of the selected Ambuscade type and inscribe your name into the tome, assigning you a number. Inscribing your name in the Ambuscade Tome gives you a page number. Page numbers are called in a zone-wide system message "Page ### of the tome flares up!" and the party leader can interact again with the Tome to enter the battlefield. The Tome also has an option to auto-transport your party to the battlefields as soon as your number is announced.
- Your Key Item is lost upon completion of a successful battle.
Rewards
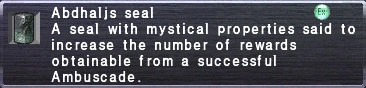
Successful completion of an Ambuscade battlefield rewards two forms of currency: Hallmarks and Gallantry. Hallmarks earned vary with the Key Item used to enter the battlefield and the selected difficulty level. Gallantry earned is based on the Key Item, Difficulty and the total number of party members, excluding Trusts. Solo players do not earn Gallantry. Using an ![]() Abdhaljs Seal
Abdhaljs Seal ![]() will triple the currency rewards for a single win.
will triple the currency rewards for a single win.
- Hallmarks, Total Hallmarks, and Gallantry are reset to zero every monthly content update.
Ambuscade Primer Volume One
Intense Ambuscade
| Difficulty | Hallmarks Earned |
Gallantry Earned 2~6 members |
|---|---|---|
| Very Difficult | 3600 | 300 ~ 1500 |
| Difficult | 2400 | 240 ~ 1200 |
| Normal | 1200 | 180 ~ 900 |
| Easy | 600 | 80 ~ 400 |
| Very Easy |
600 | 20 ~ 100 |
Ambuscade Primer Volume Two
Regular Ambuscade
| Difficulty | Hallmarks Earned |
Gallantry Earned 2~6 members |
|---|---|---|
| Very Difficult | 300 | 30 ~ 150 |
| Difficult | 200 | 20 ~ 100 |
| Normal | 100 | 10 ~ 50 |
| Easy | 75 | 5 ~ 25 |
| Very Easy |
50 | 1 ~ 5 |
Redeeming Hallmarks and Gallantry
Spend your accumulated Hallmarks and Gallantry with Gorpa-Masorpa, who offers a limited stock of rewards that is reset at every monthly content update, usually around the first or second Thursday of each month.
Ambuscade rewards are organized into materials used to reforge REMA weaponry, Skirmish Stones, JSE Capes and materials used to augment them, and Vouchers and Tokens redeemable for Ambuscade Armor and the materials required to upgrade it.
REMA Reforging Materials
The full list of REMA Materials purchasable with Hallmarks is always available.
REMA Materials purchased with Gallantry are available on a rotating schedule.
- Empyrean weapon materials are available January, April, July, and October.
- Relic weapon materials are available February, May, August, and November.
- Mythic/Ergon weapon materials are available March, June, September, and December.
Skirmish Stones
+2 Skirmish Stones are available every month, purchasable only with Hallmarks. Each stone costs 200 Hallmarks, up to a limit of 10 of each type.
JSE Capes
You can buy up to one cape per job for 500 Hallmarks each.
The materials for augmenting these capse can be bought with either Hallmarks or Gallantry, with different prices and stock limits.
Ambuscade Armor
Hallmarks can be used to purchase coupons good for 1 NQ piece of equipment, rotating between Tokens and Vouchers every month.
Gallantry can be used to purchase coupons good for 1 HQ piece of equipment, rotating between Tokens and Vouchers every month.
The special materials ![]() Abdhaljs Metal
Abdhaljs Metal ![]() and
and ![]() Abdhaljs Fiber
Abdhaljs Fiber ![]() are used to upgrade NQ armor to HQ, and HQ armor to HQ+2 armor. These materials are available either for Hallmarks or Gallantry.
are used to upgrade NQ armor to HQ, and HQ armor to HQ+2 armor. These materials are available either for Hallmarks or Gallantry.


Total Hallmarks
This special tally of total accumulated Hallmarks is used to obtain items and equipment from a special menu. Once an item is redeemed, it disappears. Total Hallmarks are not consumed, but represent an ever filling pool that grants access to more expensive rewards from this list:
- Total Hallmarks are the only currency accepted for Ambuscade Ring coupons. The coupons also alternate between Vouchers and Tokens every content update.
- 100:
 Abdhaljs Seal
 - 130: Monthly NQ Feet Voucher/Token
- 170: Super Reraiser
- 220: Monthly NQ Hands Voucher/Token
- 280: Remedy x 12
- 370: Monthly NQ Head Voucher/Token
- 480: Caliber Ring
- 620: Monthly NQ Legs Voucher/Token
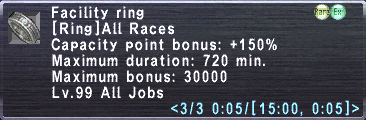
- 800: Facility Ring
- 1,050: Monthly NQ Body Voucher/Token
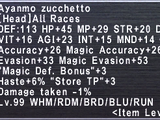
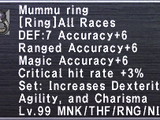
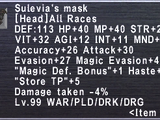
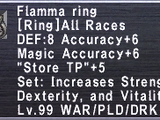
- 1,350: Monthly Ring Voucher/Token
- 1,800: Monthly HQ Feet Voucher/Token
- 2,300: Abdhaljs Metal
- 2,300: Abdhaljs Fiber
- 3,000: Monthly HQ Hands Voucher/Token
- 3,900: Abdhaljs Metal
- 3,900: Abdhaljs Fiber
- 5,000: Monthly HQ Head Voucher/Token
- 6,500: Abdhaljs Metal
- 6,500: Abdhaljs Fiber
- 8,500: Monthly HQ Legs Voucher/Token
- 11,000: Abdhaljs Metal
- 11,000: Abdhaljs Fiber
- 14,500: Monthly HQ Body Voucher/Token
- 20,000: Abdhaljs Metal
- 20,000: Abdhaljs Fiber
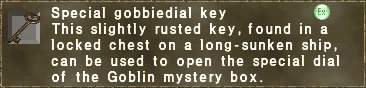
- 25,000: SP Gobbie Key


February 2020
Volume 1: Demons
Face off against the Master Manipulator and between 3 and 8 Bozzetto Imps, depending on the difficulty setting. The Manipulator is capable of greatly enhancing its offensive and defensive capabilities while crippling nearby party members. For this reason, pet/ranged strategies are recommended.
Encountered Foes
- Master Manipulator - A powerful soulflayer with access to Blue Mage spells and abilities.
- Bozzetto Imp - relatively weak but great in number depending on the difficulty.
Difficulty Settings
The main impact of the difficulty setting is the power of the Bio applied by Tribulation and the total count of Imps present at the start of the fight.
- Very Easy: Bio ticks for HP every 3 seconds, 3 Imps present.
- Easy: Bio ticks for HP every 3 seconds, 4 Imps present.
- Normal: Bio ticks for HP every 3 seconds, Imps present.
- Difficult: Bio ticks for HP every 3 seconds, Imps present.
- Very Difficult: Bio ticks for 1000 HP every 3 seconds, 8 Imps present.
Battle Mechanics
Passive Traits
Master Manipulator:
- Approximately 700k HP on VD
- 1344 evasion on VD.[1]
- Immune to damage until all Imps are defeated.
- Powerful Fast Cast trait.
- Susceptible to Bind. [2]
- Resistant to Silence and Gravity.
- Takes 25% less magic damage. Particularly resistant to light, water, and dark elemental magic.
Bozetto Imps:
- 240k HP, 1319 evasion on VD.
- Immune to Sleep
- Resistant to Light and Dark elemental magic.
- Susceptible to Bind
Abilities Used
Manipulator:
- Immortal Mind: Magic Attack Boost.
- Immortal Shield: A damage shield that can be powered up if left up too long. On first application, it becomes damage immune to non-critical physical damage. A second application will provide 100% damage immunity to a type of physical damage (slashing, piercing, blunt) and can only be broken by either dealing enough of a different type of physical damage, or by using magical Blood Pacts.[3]
- Immortal Anathema: Curse
- Tribulation: Extremely potent AOE Bio (500~1000/tick) and Blind. Have tanks carry Panaceas for this.
- Reprobation: 20' AOE Full Dispel, including food. Can be resisted with sufficient Magic Evasion.[4]
- Mind Purge: Single-target Full Dispel, including food.
Imps:
- Grating Tantara: (AOE Damage + Amnesia)
- Stifling Tantara: (AOE Damage + Silence
- Dark Recital: (AOE Damage, Full Dispel + Paralysis)
- Bugle Call:
Spells Cast
Imps:
- High level AOE elemental magic like Firaja
Manipulator:
- Mighty Guard: Increases Physical and Magical Defense. Grants haste and Regen. Master Manipulator's casts do not require Unbridled Learning are AoE without the use of Diffusion.
- Paralyzing Triad: Paralysis
- Benthic Typhoon: Physical Defense Down, Magical Defense Down.
- Subduction: AOE Gravity
- Rail Cannon: Light-based Damage
- Blistering Roar: AOE Terror
- Dream Flower: AOE Sleep
- Nectarous Deluge: AOE Poison
- Uproot: Full debuff removal from Caster. Grants Dia aura and Regen.
- Mind Blast: Paralysis
- Embalming Earth: Slow
- Crashing Thunder: Thunder damage.
- Polar Roar: Bind
- Droning Whirlwind: AOE Multi-Dispel
Where to get your Primer:
- Castle Zvahl Keep (S), Home Point #1
- Xarcabard (S), Home Point #1.
Volume 2: Beasts
Face off against the Coeurl pair Ixchel (Lynx type) and Itzamna (Coeurl type). Each is imbued with a unique ability that can disable your party temporarily. According to the updated Digest, defeating one may power up the remaining foe.[5]
Encountered Foes
- Ixchel - The red one.
- Itzamna - The gold one.
The fight ends when all enemies are defeated.
Difficulty Settings
The Difficulty Settings determines only the stats of the coeurls in the battlefield.
Battle Mechanics
Passive Traits
Both coeurls have enhanced movement speed.
Ixchel is susceptible to stun.
Abilities Used
Ixchel:
- Petrifactive Breath: Breath attack that petrifies and resets enmity. Tends to open the fight with this ability.
- Pounce: Single target damage.
- Frenzied Rage: Attack Boost. Only used after Itzamna is defeated. Dispellable.
- Chaotic Eye: Single target silence.
Itzamna:
- Preternatural Gleam: Front AOE Damage + Defense Down + Magic Defense Down.
- Blink of Peril: Deals 90% of target's maximum HP (RELIABLY does less damage when target is able to distance themselves from Itzamna, also seems to be a gaze attack as turning one's back to the cat eliminates all damage and hate reset; Also, if it did 90% of MAX HP, one would die while solo quite often unless always topped off; I believe it simply drops the target to low HP (possibly based on distance from Itzamna), and resets Enmity. Only used after Ixchel is defeated.
- Blaster: Single target Paralysis.
- Charged Whisker: AOE damage + applies Shock Spikes to Itzamna. The spikes are dispellable.
Spells Cast
- None.
Where to get your Primer:
- Cape Teriggan: Quick ride to Manticores from Home Point #1, or rabbits near the Survival Guide warp.
- Ceizak Battlegrounds: Some sheep near bivouac #2 and Home Point #1.
Placeholder: Fight is against 2 Coeurl. I call em Big and Little.
Big is the easiest. He can Petrify and reset Hate (if you're walking/strafing backwards you can out-distance it), Silence (long range), Pounce (seems to be quite weak damage, medium range) and possibly something else inconsequential.
Little does the most dmg. Has a Charged Whiskers which is AoE Medium-Heavy Lightning damage and give it Shock Spikes w/Stun effect, Blink of Peril - HEAVY single target DMG that MIGHT just always bring its target to 1% HP and reset Hate (MIGHT do less damage with distance or less TP fed), can also Petrify, and uses Blaster, a conal move with Def/MDef down?
BOTH Coeruls might have a timer on their TP moves. On Normal, maybe every 10 seconds or less. They don't seem to depend on TP given. The DAMAGE they do might depend on TP given.
My Strat: PUP with Tank Maton. Apururu, Ulmia, Joachim, Qultada, Koru-Moru. I take Big guy to start and put Maton on Little. Get myself and the trusts away from little ASAP. If you want to avoid Petrify, just be walking backwards while meleeing while strafing left or right occasionally, especially when you see it's TP move animation. Big guy is easy this way. PUP/WAR doesn't care about being silenced. I've only had to use Repair a couple times over 10s of runs to keep my Auto alive while he solo's Little.
When Big dies and you switch to Little, just be aware of who has threat and what HP levels are. If you get the single target heavy dmg followed by the AoE heavy damage without heals in-between you die.
References
Battlefield Archives
-

Gorpa-Masorpa -

Flamma Korazin Set -
Ayanmo Corazza Set -

Hizamaru Haramaki Set -
Mummu Jacket +2 Set -

Tali'ah Manteel Set -
Sulevia's Platemail Set -
Flamma Korazin +2 Set
All items (44)


