(→Notes) |
(→Notes) |
||
| (20 intermediate revisions by 14 users not shown) | |||
| Line 22: | Line 22: | ||
50 - 52 |
50 - 52 |
||
|<!--Add Items Dropped Here--> |
|<!--Add Items Dropped Here--> |
||
| − | *[[Aikido Koshita]] {{Drop Rate| |
+ | *[[Aikido Koshita]] {{Drop Rate|75|242}} |
| − | *[[Bugbear Mask]] {{Drop Rate|24| |
+ | *[[Bugbear Mask]] {{Drop Rate|24|242}} |
| − | *[[Shinimusha Haidate]]{{Drop Rate|41| |
+ | *[[Shinimusha Haidate]]{{Drop Rate|41|242}} |
| − | *{{Gil Dropped|29 |
+ | *{{Gil Dropped|29|58}}<!-- Please Note, Gil is divided among party members. --> |
| |
| |
||
*{{Gil Mugged|2-40}} |
*{{Gil Mugged|2-40}} |
||
| Line 40: | Line 40: | ||
== Notes == |
== Notes == |
||
| − | :*[[Lottery Spawn]] from the [[Bugbear Bondman]] at I-11 (mob ID 95) |
+ | :*[[Lottery Spawn]] from the [[Bugbear Bondman]] at I-11 (mob ID 95) and J-11 (mob ID 9A). |
| − | :* |
+ | ::*There is <b>no minimum</b> respawn time for Strongman after last kill. |
| ⚫ | |||
| − | ::*Has been observed spawning again immediately after being killed. |
||
| + | ::*Two placeholders cannot be up at the same time. The placeholder will form a duo with another [[Bugbear Bondman]] while the other side will stay solo. For ease, you can kill both of a duo within a second of each other and watch respawn at that spot. If it's not a duo, go to the other side. |
||
| − | ::*Has taken over 10 hours to spawn before. 7/13/11 - 12 hours now and counting. |
||
| − | ::*There are two instances of the NM, just like [[Black Triple Stars]], and likewise two placeholders. However, only one placeholder can spawn at a time. The placeholders are a pair of [[Bugbear Bondman]]s spawn at I-11 and J-11. Only one can spawn at a time so there will only be one pair at one location and a solo bugbear at the other. |
||
::*On the East side, the PH is the Left Bugbear if you are facing South. |
::*On the East side, the PH is the Left Bugbear if you are facing South. |
||
::*On the West side, the PH is the Right Bugbear if you are facing West. |
::*On the West side, the PH is the Right Bugbear if you are facing West. |
||
| − | ::*The PH is either at the west spawn or the east spawn. Never both at the same time. |
||
| ⚫ | |||
| − | ::*PH Mob IDs are 95 and 9A |
||
:*Significantly larger than other Bugbears in the area. |
:*Significantly larger than other Bugbears in the area. |
||
| − | :*Aggressive towards level |
+ | :*Aggressive towards level 99 characters, but no [[Experience Points]] will be granted upon defeat. |
| − | :*Possible to spawn right after it's killed. |
+ | :*Possible to spawn right after it's killed. |
:*Both items, haidate and koshita may drop at the same time. |
:*Both items, haidate and koshita may drop at the same time. |
||
:*Killable by: Solo at level 65. {{Testimonials}} |
:*Killable by: Solo at level 65. {{Testimonials}} |
||
| Line 62: | Line 58: | ||
| width="85%" align="center" |'''Details''' |
| width="85%" align="center" |'''Details''' |
||
|- align="center" BGCOLOR="dfdfff" |
|- align="center" BGCOLOR="dfdfff" |
||
| − | |[[trial_5 | Trial 5]]|| Defeat 4 times with [[Renegade]] equipped. |
+ | |[[trial_5 | Trial 5]]|| Defeat 4 times with [[Renegade]] equipped. (THF/BRD/DNC) |
|- align="center" BGCOLOR="dfdfff" |
|- align="center" BGCOLOR="dfdfff" |
||
| − | |[[trial_515 | Trial 515]]|| Defeat 4 times with [[Stigma]] equipped. |
+ | |[[trial_515 | Trial 515]]|| Defeat 4 times with [[Stigma]] equipped. (DRK) |
|- align="center" BGCOLOR="dfdfff" |
|- align="center" BGCOLOR="dfdfff" |
||
| − | |[[trial_894 | Trial 894]]|| Defeat 4 times with [[Blue Steel]] equipped. |
+ | |[[trial_894 | Trial 894]]|| Defeat 4 times with [[Blue Steel]] equipped. (RNG/COR) |
|} |
|} |
||
Revision as of 16:33, 15 January 2020
|
Job: Monk Notorious Monster |
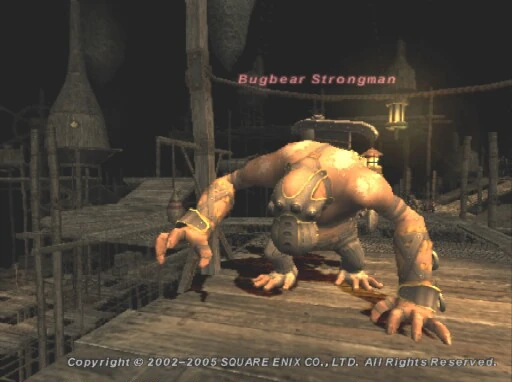 Bugbear Strongman |
| Zone | Level | Drops | Steal | Spawns |
Notes |
|---|---|---|---|---|---|
|
50 - 52 |
|
|
1 |
A, L, S | |
|
HP = Detects Low HP; M = Detects Magic; Sc = Follows by Scent; T(S) = True-sight; T(H) = True-hearing JA = Detects job abilities; WS = Detects weaponskills; Z(D) = Asleep in Daytime; Z(N) = Asleep at Nighttime; A(R) = Aggressive to Reive participants | |||||
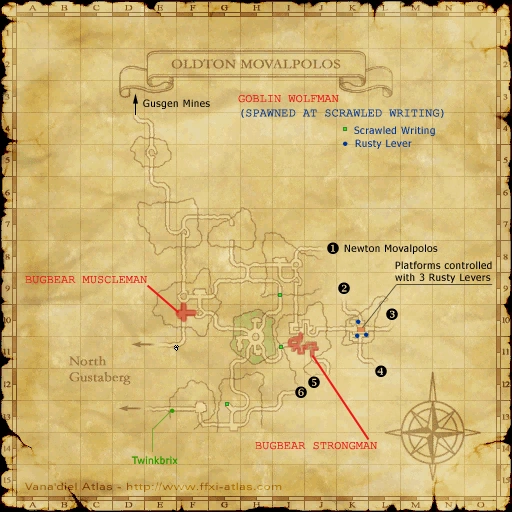
Oldton Movalpolos NMs
Notes
- Lottery Spawn from the Bugbear Bondman at I-11 (mob ID 95) and J-11 (mob ID 9A).
- There is no minimum respawn time for Strongman after last kill.
- Placeholders respawn every 14 minutes.
- Two placeholders cannot be up at the same time. The placeholder will form a duo with another Bugbear Bondman while the other side will stay solo. For ease, you can kill both of a duo within a second of each other and watch respawn at that spot. If it's not a duo, go to the other side.
- On the East side, the PH is the Left Bugbear if you are facing South.
- On the West side, the PH is the Right Bugbear if you are facing West.
- Significantly larger than other Bugbears in the area.
- Aggressive towards level 99 characters, but no Experience Points will be granted upon defeat.
- Possible to spawn right after it's killed.
- Both items, haidate and koshita may drop at the same time.
- Killable by: Solo at level 65. (see testimonials)
Trial of the Magians
| Trial of the Magians | Details |
| Trial 5 | Defeat 4 times with Renegade equipped. (THF/BRD/DNC) |
| Trial 515 | Defeat 4 times with Stigma equipped. (DRK) |
| Trial 894 | Defeat 4 times with Blue Steel equipped. (RNG/COR) |
| Hunt Registry | Elusiveness | Ferocity | Required Scylds | Rewarded Scylds | Evolith | Evolith |
|
4 | 5 | 45 | 15 | Mighty Strikes: Ability delay |
Historical Background
A strongman is a person who performs feats of strength, usually at exhibitions. It also refers to a political leader who rules by force, always with an authoritarian regime. The Bugbear Strongman is apparently the strongest monster in Oldton Movalpolos.