No edit summary |
|||
| (5 intermediate revisions by 3 users not shown) | |||
| Line 7: | Line 7: | ||
[[Giddeus]] |
[[Giddeus]] |
||
<br>[[West Sarutabaruta]] ('''only''' by using [[Escape]] or completing the BCNM) |
<br>[[West Sarutabaruta]] ('''only''' by using [[Escape]] or completing the BCNM) |
||
| + | <br> From [[Lower Jeuno]] via [[Domenic]] |
||
| + | |||
| Maps = No Map |
| Maps = No Map |
||
| Stats = {{Tractor}} {{Escape}} |
| Stats = {{Tractor}} {{Escape}} |
||
| Line 25: | Line 27: | ||
{{TableQuestLine |Name=Beat Around the Bushin| Type= General| Starter= [[Vola]]| Zone= [[Lower Jeuno]]| Coordinates= J-8}} |
{{TableQuestLine |Name=Beat Around the Bushin| Type= General| Starter= [[Vola]]| Zone= [[Lower Jeuno]]| Coordinates= J-8}} |
||
| + | |||
| ⚫ | |||
{{TableQuestLine |Name=Fistful of Fury| Type= General| Starter= [[Vola]]| Zone= [[Lower Jeuno]]| Coordinates= J-8}} |
{{TableQuestLine |Name=Fistful of Fury| Type= General| Starter= [[Vola]]| Zone= [[Lower Jeuno]]| Coordinates= J-8}} |
||
{{TableQuestLine |Name= Shattering Stars| Type= [[Genkai]] (MNK, WHM, SMN)| Starter= [[Maat]]| Zone= [[Ru'Lude Gardens]]| Coordinates= H-5}} |
{{TableQuestLine |Name= Shattering Stars| Type= [[Genkai]] (MNK, WHM, SMN)| Starter= [[Maat]]| Zone= [[Ru'Lude Gardens]]| Coordinates= H-5}} |
||
| − | |||
| ⚫ | |||
{{TableMissionHeader}} |
{{TableMissionHeader}} |
||
| Line 143: | Line 145: | ||
|align="center"|Mission |
|align="center"|Mission |
||
|align="center"|-- |
|align="center"|-- |
||
| − | |align="center"| |
+ | |align="center"|99 |
|align="center"|6 people |
|align="center"|6 people |
||
|align="center"|30 minutes |
|align="center"|30 minutes |
||
| Line 150: | Line 152: | ||
|align="center"|Mission |
|align="center"|Mission |
||
|align="center"|-- |
|align="center"|-- |
||
| − | |align="center"| |
+ | |align="center"|99 |
|align="center"|6 people |
|align="center"|6 people |
||
|align="center"|30 minutes |
|align="center"|30 minutes |
||
| Line 157: | Line 159: | ||
|align="center"|Mission |
|align="center"|Mission |
||
|align="center"|-- |
|align="center"|-- |
||
| − | |align="center"| |
+ | |align="center"|99 |
|align="center"|6 people |
|align="center"|6 people |
||
|align="center"|30 minutes |
|align="center"|30 minutes |
||
| Line 164: | Line 166: | ||
|align="center"|Limit |
|align="center"|Limit |
||
|align="center"|[[Monk's Testimony]] |
|align="center"|[[Monk's Testimony]] |
||
| − | |align="center"|70/ |
+ | |align="center"|70/99* |
|align="center"|1 person |
|align="center"|1 person |
||
|align="center"|10 minutes |
|align="center"|10 minutes |
||
| Line 171: | Line 173: | ||
|align="center"|Limit |
|align="center"|Limit |
||
|align="center"|[[Summoner's Testimony]] |
|align="center"|[[Summoner's Testimony]] |
||
| − | |align="center"|70/ |
+ | |align="center"|70/99* |
|align="center"|1 person |
|align="center"|1 person |
||
|align="center"|10 minutes |
|align="center"|10 minutes |
||
| Line 178: | Line 180: | ||
|align="center"|Limit |
|align="center"|Limit |
||
|align="center"|[[White Mage's Testimony]] |
|align="center"|[[White Mage's Testimony]] |
||
| − | |align="center"|70/ |
+ | |align="center"|70/99* |
|align="center"|1 person |
|align="center"|1 person |
||
|align="center"|10 minutes |
|align="center"|10 minutes |
||
| Line 185: | Line 187: | ||
|align="center"|Limit |
|align="center"|Limit |
||
|align="center"|{{KeyItem}}[[Soul gem clasp]] |
|align="center"|{{KeyItem}}[[Soul gem clasp]] |
||
| − | |align="center"| |
+ | |align="center"|--- |
| − | |align="center"| |
+ | |align="center"|6 people |
|align="center"|10 minutes |
|align="center"|10 minutes |
||
| + | |- BGCOLOR="#F9D5B0" |
||
| + | |style="padding-left:1ex;"|[[Divine Punishers II]] |
||
| + | |align="center"|[[Reforged Armor]] |
||
| + | |align="center"|[[Macrocosmic Orb]] |
||
| + | |align="center"|None |
||
| + | |align="center"|6 people |
||
| + | |align="center"|30 minutes |
||
|} |
|} |
||
| − | *'' |
+ | *''[[Shattering Stars]] battles must be defeated at least once to raise personal level cap beyond 70.'' |
Latest revision as of 22:23, 10 January 2014
|
Table of Contents
|
Zone Information
| ||||||||||||||||||||||||||||||
|
Description
The innermost crevice within the Yagudo realm of Giddeus containing a Burning Circle. This area is the entrance to a number of different BCNM battles, as well as being used in some missions and quests. You must use the Burning Circle to do battle. 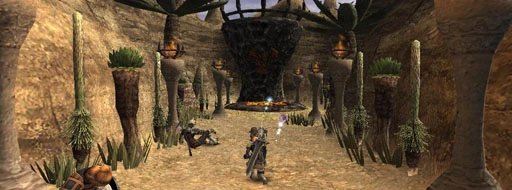 | |||||||||||||||||||||||||||||||
|
Connections
Giddeus
|
Involved in Quests/Missions
| Quest | Type | Starter | Location |
|---|---|---|---|
| Beat Around the Bushin | General | Vola | Lower Jeuno J-8 |
| Beyond Infinity | Genkai | Nomad Moogle | Ru'Lude Gardens H-5 |
| Fistful of Fury | General | Vola | Lower Jeuno J-8 |
| Shattering Stars | Genkai (MNK, WHM, SMN) | Maat | Ru'Lude Gardens H-5 |
| Mission | Nation | Starter | Location |
| The Emissary | Bastok | Bastok Gate Guard | Bastok |
| Journey Abroad | San d'Oria | San d'Orian Gate Guard | San d'Oria |
| Saintly Invitation | Windurst | Windurst Gate Guard | Windurst |
Battlefield Events
| Entrance: Burning Circle | |||||
| Name | Type | Item | Level | Members | Time |
|---|---|---|---|---|---|
| Charming Trio | BCNM | Cloudy Orb | 20 | 3 people | 15 minutes |
| Creeping Doom | BCNM | Sky Orb | 30 | 3 people | 15 minutes |
| Harem Scarem | BCNM | Sky Orb | 30 | 6 people | 30 minutes |
| Royal Succession | BCNM | Star Orb | 40 | 3 people | 15 minutes |
| Steamed Sprouts | BCNM | Star Orb | 40 | 6 people | 30 minutes |
| Rapid Raptors | BCNM | Comet Orb | 50 | 3 people | 15 minutes |
| Treasure and Tribulations | BCNM | Comet Orb | 50 | 6 people | 30 minutes |
| Wild Wild Whiskers | BCNM | Moon Orb | 60 | 3 people | 15 minutes |
| Divine Punishers | BCNM | Moon Orb | 60 | 6 people | 30 minutes |
| Moa Constrictors | KSNM | Atropos Orb | -- | 6 people | 30 minutes |
| Royale Ramble | KSNM | Lachesis Orb | -- | 6 people | 30 minutes |
| Seasons Greetings | KSNM | Clotho Orb | -- | 6 people | 30 minutes |
| Early Bird Catches the Wyrm | KSNM | Themis Orb | -- | 18 people | 30 minutes |
| Journey Abroad | Mission | -- | 99 | 6 people | 30 minutes |
| The Emissary | Mission | -- | 99 | 6 people | 30 minutes |
| Saintly Invitation | Mission | -- | 99 | 6 people | 30 minutes |
| Shattering Stars (Monk) | Limit | Monk's Testimony | 70/99* | 1 person | 10 minutes |
| Shattering Stars (Summoner) | Limit | Summoner's Testimony | 70/99* | 1 person | 10 minutes |
| Shattering Stars (White Mage) | Limit | White Mage's Testimony | 70/99* | 1 person | 10 minutes |
| Beyond Infinity | Limit | --- | 6 people | 10 minutes | |
| Divine Punishers II | Reforged Armor | Macrocosmic Orb | None | 6 people | 30 minutes |
- Shattering Stars battles must be defeated at least once to raise personal level cap beyond 70.