No edit summary Tag: sourceedit |
|||
| (13 intermediate revisions by 13 users not shown) | |||
| Line 19: | Line 19: | ||
|- |
|- |
||
|valign="top" style="padding-left:1ex; background:#ceffc7"|'''Recruitment:''' |
|valign="top" style="padding-left:1ex; background:#ceffc7"|'''Recruitment:''' |
||
| − | |valign="top" style="padding-left:1ex; background:#deffd9"|Lv.70, |
+ | |valign="top" style="padding-left:1ex; background:#deffd9"|Lv.70, 1-6 mercenaries |
|- |
|- |
||
|valign="top" style="padding-left:1ex; background:#ceffc7"|'''Mission Orders:''' |
|valign="top" style="padding-left:1ex; background:#ceffc7"|'''Mission Orders:''' |
||
| Line 29: | Line 29: | ||
|valign="top" style="padding-left:1ex; background:#ceffc7"|'''Reward:''' |
|valign="top" style="padding-left:1ex; background:#ceffc7"|'''Reward:''' |
||
|valign="top" style="padding-left:1ex; background:#deffd9"|[[Mamool Ja Training Grounds]] [[Assault Points]] |
|valign="top" style="padding-left:1ex; background:#deffd9"|[[Mamool Ja Training Grounds]] [[Assault Points]] |
||
| + | *''2 Members:'' 1500 (First win)<br> |
||
*''3 Members:'' 1000<br> |
*''3 Members:'' 1000<br> |
||
*''4 Members:'' 900<br> |
*''4 Members:'' 900<br> |
||
| Line 186: | Line 187: | ||
! Ancient Lockbox |
! Ancient Lockbox |
||
|- BGCOLOR=#e3e6ff align=center |
|- BGCOLOR=#e3e6ff align=center |
||
| − | |[[Hi-Ether Tank]] {{Drop Rate| |
+ | |[[Hi-Ether Tank]] {{Drop Rate|2|6}} |
|- BGCOLOR=#e3e6ff align=center |
|- BGCOLOR=#e3e6ff align=center |
||
| − | |[[Hi-Potion +3]] {{Drop Rate| |
+ | |[[Hi-Potion +3]] {{Drop Rate|6|6}} |
|- BGCOLOR=#e3e6ff align=center |
|- BGCOLOR=#e3e6ff align=center |
||
| − | |[[Hi-Reraiser]] {{Drop Rate|2| |
+ | |[[Hi-Reraiser]] {{Drop Rate|2|6}} |
| + | |- BGCOLOR=#e3e6ff align=center |
||
| + | |[[Hi-Potion Tank]] {{Drop Rate|1|6}} |
||
|} |
|} |
||
| Line 196: | Line 199: | ||
{| width=100% |
{| width=100% |
||
|- BGCOLOR=#ffdead |
|- BGCOLOR=#ffdead |
||
| − | ! [[??? Sash]] {{Drop Rate| |
+ | ! [[??? Sash]] {{Drop Rate|3|6}} |
|- BGCOLOR=#e3e6ff align=center |
|- BGCOLOR=#e3e6ff align=center |
||
| − | |[[Ksi Sash]] {{Drop Rate| |
+ | |[[Ksi Sash]] {{Drop Rate|3|15}} |
|- BGCOLOR=#e3e6ff align=center |
|- BGCOLOR=#e3e6ff align=center |
||
|[[Talisman Obi]] {{Drop Rate|1|2}} |
|[[Talisman Obi]] {{Drop Rate|1|2}} |
||
| Line 206: | Line 209: | ||
|[[Little Worm Belt]] {{Drop Rate|0|2}} |
|[[Little Worm Belt]] {{Drop Rate|0|2}} |
||
|- BGCOLOR=#e3e6ff align=center |
|- BGCOLOR=#e3e6ff align=center |
||
| − | |[[Silver Obi +1]] {{Drop Rate| |
+ | |[[Silver Obi +1]] {{Drop Rate|1|3}} |
|} |
|} |
||
| Line 216: | Line 219: | ||
|[[Wild Onion]] {{Drop Rate|0|1}} |
|[[Wild Onion]] {{Drop Rate|0|1}} |
||
|- BGCOLOR=#e3e6ff align=center |
|- BGCOLOR=#e3e6ff align=center |
||
| − | |[[Kaolin]] {{Drop Rate |
+ | |[[Kaolin]] {{Drop Rate|1|2}} |
|- BGCOLOR=#e3e6ff align=center |
|- BGCOLOR=#e3e6ff align=center |
||
|[[Mamool Ja Collar]] {{Drop Rate|0|1}} |
|[[Mamool Ja Collar]] {{Drop Rate|0|1}} |
||
|- BGCOLOR=#e3e6ff align=center |
|- BGCOLOR=#e3e6ff align=center |
||
|[[Toolbag (Kodo)]] {{Drop Rate|0|1}} |
|[[Toolbag (Kodo)]] {{Drop Rate|0|1}} |
||
| + | |- BGCOLOR=#e3e6ff align=center |
||
| + | |[[Toolbag (Jusa)]] {{Drop Rate|0|1}} |
||
| + | |- BGCOLOR=#e3e6ff align=center |
||
| + | |[[Toolbag (Maki)]] {{Drop Rate|0|1}} |
||
|- BGCOLOR=#e3e6ff align=center |
|- BGCOLOR=#e3e6ff align=center |
||
|[[Remedy]] {{Drop Rate|0|1}} |
|[[Remedy]] {{Drop Rate|0|1}} |
||
| Line 242: | Line 249: | ||
|[[Silver Earring]] {{Drop Rate|2|2}} |
|[[Silver Earring]] {{Drop Rate|2|2}} |
||
|- BGCOLOR=#e3e6ff align=center |
|- BGCOLOR=#e3e6ff align=center |
||
| − | |[[Eta Earring]] {{Drop Rate |
+ | |[[Eta Earring]] {{Drop Rate|2|16}} |
|} |
|} |
||
| Line 248: | Line 255: | ||
== Walkthrough == |
== Walkthrough == |
||
| − | Become afflicted by at least |
+ | Become afflicted by at least 3 status ailments from the enemies in the area. |
| − | *To win this Assault you need to talk to the starting NPC, [[Garjham]] (H-8), while under the effects of |
+ | *To win this Assault you need to talk to the starting NPC, [[Garjham]] (H-8), while under the effects of three of seven negative status effects. |
*You can "turn in" each effect one at a time. There is no need to do them all at once. |
*You can "turn in" each effect one at a time. There is no need to do them all at once. |
||
*You turn in ailments by talking to the NPC. |
*You turn in ailments by talking to the NPC. |
||
*Any party member can turn in an ailment at any time to increase the count of status effects turned in. EX RDM turns in BIO + BLM turns in Slow = 2 Status Ailments turned in. Note: 2 people turning in the same ailment doesn't work, each ailment must be unique and not previously turned in. |
*Any party member can turn in an ailment at any time to increase the count of status effects turned in. EX RDM turns in BIO + BLM turns in Slow = 2 Status Ailments turned in. Note: 2 people turning in the same ailment doesn't work, each ailment must be unique and not previously turned in. |
||
| − | ** [[Amnesia]] ([[Qiqirn Huckster]]) |
+ | ** [[Amnesia]] ([[Qiqirn Huckster]]: [[Kibosh]]) |
** [[Bio (Status Effect)|Bio]] ([[Poroggo]]) |
** [[Bio (Status Effect)|Bio]] ([[Poroggo]]) |
||
** [[Disease]] ([[Pit Lindwurm]]: [[Foul Breath]])) |
** [[Disease]] ([[Pit Lindwurm]]: [[Foul Breath]])) |
||
| Line 269: | Line 276: | ||
*Note that the map doesn't show the tunnels to the west, south, and east, but they are in fact there. |
*Note that the map doesn't show the tunnels to the west, south, and east, but they are in fact there. |
||
*After turning in a status Ailment you will get the message "You have currently been exposed to X of the ailments on which we require data", where X equals the number of ailments turned in. |
*After turning in a status Ailment you will get the message "You have currently been exposed to X of the ailments on which we require data", where X equals the number of ailments turned in. |
||
| − | *After "turning in" |
+ | *After "turning in" 3 status ailments speak with [[Garjham]] again to end the assault. |
| Line 276: | Line 283: | ||
After some very bad luck at this (lizards spamed Block Head, spiders spamed Sickle Slash, etc), we decided to something new. It just so happens players are capable of inflicting 5 of the 7 ailments on the list, and there is a mob in the area that uses charm. |
After some very bad luck at this (lizards spamed Block Head, spiders spamed Sickle Slash, etc), we decided to something new. It just so happens players are capable of inflicting 5 of the 7 ailments on the list, and there is a mob in the area that uses charm. |
||
| − | The idea is, pull some poroggos to the NPC, fight it until the tank gets chamed, then we put ailments onto him ourselves, |
+ | The idea is, pull some poroggos to the NPC, fight it until the tank gets chamed, then we put ailments onto him ourselves, and turn the ailments in. |
| Line 286: | Line 293: | ||
| + | It worked, sort of. Turned out SE made it so the NPC will take up to 2 ailments at one time. Anything on top of that is removed. So each charm from the poroggo will only let you turn in 2 ailments. So this was not as fool proof as I imagined would be. There are advantages though, since you can always put 2 ailments that you don't already have when a person gets charmed. So you get 2 ailments for the price of one. The downside is the difficulty in pulling poroggo and the time involved. |
||
| − | We were able to prove the concept and got the ailments in this way, however, the idea came up too late in the run, we were 2 seconds too late to touch the rune for release, and we were unfortunately out of tags. Will try again and update this info after. --[[User:Yuanlung]] |
||
| + | |||
| + | |||
| + | We ended up winning with a hybrid strategy. The main force pulled a raptor at the start and start working on 2 effects while a SMN goes off to the north side to pull a poroggo. Once the poroggo gets to the centre area the party can then start to get someone charmed. Whenever someone gets charmed, you get 2 new ailments. When the poroggo dies, SMN goes back for a fresh one while the party then resume working on normal mobs. |
||
| + | |||
| + | |||
| + | A few things to watch out: |
||
| + | |||
| + | * Poroggo may lose aggro on the way to camp. Puller need to make sure to maintain claim when it stops to cast. |
||
| + | * It maybe beneficial to keep the poroggo silenced, so it will be using abilities instead of casting. |
||
| + | * The charm lasts for only a minute or two. Instead of killing the poroggo to uncharm the person, you could just sleep the poroggo and kite the charmed person to wait for uncharm. This way you preserve the poroggo for more charming. |
||
==Notes== |
==Notes== |
||
| + | * After inflicting infrasonics (eva down) x2 times with blue mage charm strategy, the NPC would not except it. awful eye, sprout smack, corrosive ooze, and sch's bio worked like a charm. Last 5 min we pull a Qiqirn for amnesia, he used on first move. |
||
*'''Charmed monsters will not despawn when released.''' |
*'''Charmed monsters will not despawn when released.''' |
||
*A simple strategy for this is to have a healer, someone who can serve as a DD/tank, and someone with [[Summoner]] sub to pull using [[Carbuncle]]. This eliminates the need for [[Sleepga]]. |
*A simple strategy for this is to have a healer, someone who can serve as a DD/tank, and someone with [[Summoner]] sub to pull using [[Carbuncle]]. This eliminates the need for [[Sleepga]]. |
||
| Line 298: | Line 316: | ||
**Possible to trio as all BST, I'd suggest building TP on Bugards with different types of pets and have someone stand in front of the Bugard with all pets on same side. Then after Bugard dies take turns using TP on pets while being in AOE range, Then recharm and pull another bugard. After getting awful eye start building TP on other pets. |
**Possible to trio as all BST, I'd suggest building TP on Bugards with different types of pets and have someone stand in front of the Bugard with all pets on same side. Then after Bugard dies take turns using TP on pets while being in AOE range, Then recharm and pull another bugard. After getting awful eye start building TP on other pets. |
||
*Casting Bio II on a charmed person worked for the Bio, so it might work to bring a BLU and try to get charmed for other effects. |
*Casting Bio II on a charmed person worked for the Bio, so it might work to bring a BLU and try to get charmed for other effects. |
||
| − | *The Mamool Ja seems have a much farther aggro range |
+ | *The Mamool Ja seems have a much farther aggro range than normal. |
*Won as RDM, DRK/WHM, SAM, NIN. I told the SAM to stand behind me (NIN) for foul breath. Then we ran to the ramp, pulled spiders, linked mamools and spiders. Sleepga is useful here, so is cure IV. Pulled qiqrins to the NPC, got amnesia, killed them off. Went north to leeches, then got bugards. Finished with three minutes left. It's probably trioable, just need to give the monsters TP quickly, have sleepga, and a healer. Guessing a NIN, DD and RDM could trio it. |
*Won as RDM, DRK/WHM, SAM, NIN. I told the SAM to stand behind me (NIN) for foul breath. Then we ran to the ramp, pulled spiders, linked mamools and spiders. Sleepga is useful here, so is cure IV. Pulled qiqrins to the NPC, got amnesia, killed them off. Went north to leeches, then got bugards. Finished with three minutes left. It's probably trioable, just need to give the monsters TP quickly, have sleepga, and a healer. Guessing a NIN, DD and RDM could trio it. |
||
*Won with NIN/DNC, SCH/RDM and THF/WAR. Some element of luck is involved, the mobs have an annoying habit of doing every TP move ''except'' the one you want it to. Be very careful with pulls if you use this set-up. |
*Won with NIN/DNC, SCH/RDM and THF/WAR. Some element of luck is involved, the mobs have an annoying habit of doing every TP move ''except'' the one you want it to. Be very careful with pulls if you use this set-up. |
||
| + | *Won after 3 tries with PLD/DNC, BST/DNC, and MNK/DNC all level 90. We split up, each being self sufficient and going for our own separate afflictions. MNK dual wielded Warp Cudgel and Caduceus, PLD used weak sword and BST used weak axes to feed TP. Got ailments from leeches, bugards, lizards, qiqirn, and raptors. Nearly lost because one of them (I think it was slow) didn't count, but we caught Amnesia and Disease in time. Note that Amnesia will not last long enough for you to make it back to the NPC from the qiqirn camp. Close call, wouldn't recommend using this one to farm Mamool Ja points (I liked Blitzkrieg or Marids in the Mist better myself). |
||
==Map== |
==Map== |
||
Revision as of 18:19, 23 May 2015
|
Enemies
| Monster | Level | Strengths | Weaknesses | Spawns |
Notes |
|---|---|---|---|---|---|
|
75 |
|
|
8 |
A | |
|
75 |
|
|
8 |
A, L | |
|
75 |
|
|
8 |
A | |
|
|
6 |
A | ||
|
75 |
|
|
8 |
A, L | |
|
75 |
|
|
8 |
A | |
|
75 |
|
|
8 |
A, H, L | |
|
75 |
|
|
8 |
A, L | |
|
HP = Detects Low HP; M = Detects Magic; Sc = Follows by Scent; T(S) = True-sight; T(H) = True-hearing JA = Detects job abilities; WS = Detects weaponskills; Z(D) = Asleep in Daytime; Z(N) = Asleep at Nighttime; A(R) = Aggressive to Reive participants | |||||
Drops
|
|
|
|
Walkthrough
Become afflicted by at least 3 status ailments from the enemies in the area.
- To win this Assault you need to talk to the starting NPC, Garjham (H-8), while under the effects of three of seven negative status effects.
- You can "turn in" each effect one at a time. There is no need to do them all at once.
- You turn in ailments by talking to the NPC.
- Any party member can turn in an ailment at any time to increase the count of status effects turned in. EX RDM turns in BIO + BLM turns in Slow = 2 Status Ailments turned in. Note: 2 people turning in the same ailment doesn't work, each ailment must be unique and not previously turned in.
- Amnesia (Qiqirn Huckster: Kibosh)
- Bio (Poroggo)
- Disease (Pit Lindwurm: Foul Breath))
- Verified that Plague from Bone Crunch does not qualify as Disease in this case.
- Slow (Huge Spider: Spider Web), (Pit Lindwurm: Chomp Rush, Ripper Fang)
- STR Down (Bugard: Awful Eye)
- Attack Down (Leech: Acid Mist)
- Evasion Down (Slavering Lizard: Infrasonics)
- Mamool Ja Warders do not give any of the ailments needed.
- The kinds of monsters can be found in these general areas:
- Raptors, Spiders, Qiqirn - East
- Leeches - North
- Bugards - West
- Lizards - South
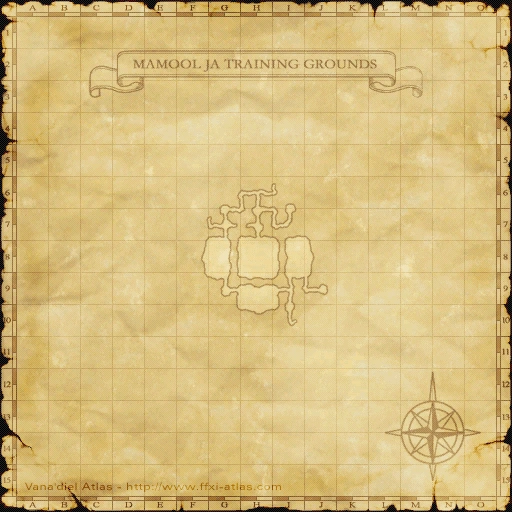
- Note that the map doesn't show the tunnels to the west, south, and east, but they are in fact there.
- After turning in a status Ailment you will get the message "You have currently been exposed to X of the ailments on which we require data", where X equals the number of ailments turned in.
- After "turning in" 3 status ailments speak with Garjham again to end the assault.
Alternative Strategy
After some very bad luck at this (lizards spamed Block Head, spiders spamed Sickle Slash, etc), we decided to something new. It just so happens players are capable of inflicting 5 of the 7 ailments on the list, and there is a mob in the area that uses charm.
The idea is, pull some poroggos to the NPC, fight it until the tank gets chamed, then we put ailments onto him ourselves, and turn the ailments in.
- Skills/Spells Needed for Ailments
- Bio/Slow: no brainer, use the spells
- STR Down: Maelstorm/Awful Eye
- EVA Down: Infrasonics/Full Break
- ATK Down: Terror Touch/Corrosive Ooze/Full Break
It worked, sort of. Turned out SE made it so the NPC will take up to 2 ailments at one time. Anything on top of that is removed. So each charm from the poroggo will only let you turn in 2 ailments. So this was not as fool proof as I imagined would be. There are advantages though, since you can always put 2 ailments that you don't already have when a person gets charmed. So you get 2 ailments for the price of one. The downside is the difficulty in pulling poroggo and the time involved.
We ended up winning with a hybrid strategy. The main force pulled a raptor at the start and start working on 2 effects while a SMN goes off to the north side to pull a poroggo. Once the poroggo gets to the centre area the party can then start to get someone charmed. Whenever someone gets charmed, you get 2 new ailments. When the poroggo dies, SMN goes back for a fresh one while the party then resume working on normal mobs.
A few things to watch out:
- Poroggo may lose aggro on the way to camp. Puller need to make sure to maintain claim when it stops to cast.
- It maybe beneficial to keep the poroggo silenced, so it will be using abilities instead of casting.
- The charm lasts for only a minute or two. Instead of killing the poroggo to uncharm the person, you could just sleep the poroggo and kite the charmed person to wait for uncharm. This way you preserve the poroggo for more charming.
Notes
- After inflicting infrasonics (eva down) x2 times with blue mage charm strategy, the NPC would not except it. awful eye, sprout smack, corrosive ooze, and sch's bio worked like a charm. Last 5 min we pull a Qiqirn for amnesia, he used on first move.
- Charmed monsters will not despawn when released.
- A simple strategy for this is to have a healer, someone who can serve as a DD/tank, and someone with Summoner sub to pull using Carbuncle. This eliminates the need for Sleepga.
- Easily trioed as WAR/SMN, WAR/NIN, and RDM/WHM using this strategy.
- All mobs were fought next to the NPC to avoid having the status effect wear too soon.
- Kraken Club is great for feeding mobs TP in this Assault.
- Beastmaster is also a good puller job for this. I'd suggest pulling the non-charmable mobs with a charmable pet first. Let your pet build TP then release your pet and let it use it's TP on you. You can charm the mob right after it uses it's TP. This way you can get a few chances of the move out of your pet without killing it.
- Easily trioed as NIN/WAR, BST/WHM, BST/WHM. Just have the NIN stand by the NPC and have the BST/WHM's use different pets and pull the non-charmable mobs and when you pet has tp release it and let it use tp on NIN then recharm.
- Possible to trio as all BST, I'd suggest building TP on Bugards with different types of pets and have someone stand in front of the Bugard with all pets on same side. Then after Bugard dies take turns using TP on pets while being in AOE range, Then recharm and pull another bugard. After getting awful eye start building TP on other pets.
- Casting Bio II on a charmed person worked for the Bio, so it might work to bring a BLU and try to get charmed for other effects.
- The Mamool Ja seems have a much farther aggro range than normal.
- Won as RDM, DRK/WHM, SAM, NIN. I told the SAM to stand behind me (NIN) for foul breath. Then we ran to the ramp, pulled spiders, linked mamools and spiders. Sleepga is useful here, so is cure IV. Pulled qiqrins to the NPC, got amnesia, killed them off. Went north to leeches, then got bugards. Finished with three minutes left. It's probably trioable, just need to give the monsters TP quickly, have sleepga, and a healer. Guessing a NIN, DD and RDM could trio it.
- Won with NIN/DNC, SCH/RDM and THF/WAR. Some element of luck is involved, the mobs have an annoying habit of doing every TP move except the one you want it to. Be very careful with pulls if you use this set-up.
- Won after 3 tries with PLD/DNC, BST/DNC, and MNK/DNC all level 90. We split up, each being self sufficient and going for our own separate afflictions. MNK dual wielded Warp Cudgel and Caduceus, PLD used weak sword and BST used weak axes to feed TP. Got ailments from leeches, bugards, lizards, qiqirn, and raptors. Nearly lost because one of them (I think it was slow) didn't count, but we caught Amnesia and Disease in time. Note that Amnesia will not last long enough for you to make it back to the NPC from the qiqirn camp. Close call, wouldn't recommend using this one to farm Mamool Ja points (I liked Blitzkrieg or Marids in the Mist better myself).
Map
| Assault | |
|---|---|
| Leujaoam Missions | |
| Mamool Ja Missions | |
| Lebros Missions | |
| Periqia Missions | |
| Ilrusi Missions | |
| Nyzul Isle Missions | |
| Assault Point Rewards | |
| Nyzul Isle Rewards | |