| Cette page n'est pas complètement traduite. Veuillez compléter les informations manquantes si vous le pouvez. |
|
Règles[]
Contrairement aux autres zones d'Assaut, l'Exploration de Nyzul incorpore une progression aléatoire des étages. Les règles sont les suivantes:
- Comme les autres Assault missions, Nyzul Isle Investigation requiert un Imperial Army I.D. Tag.
- Aucun Assault Points ne seras gagné lors de la reussite de ces missions.
- Une mission "Nyzul Isle Investigation" consiste à progresser au travers de divers étages ayant chacun un objectif aléatoire.
- Le hall est une pièce contenant une Rune of Transfer.
- Chaque membre du groupe peut utiliser la Rune of Transfer pour sélectionner l'étage de départ en utilisant la progression enregistrée.
- Si vous avez déjà complété la mission jusqu'à un étage multiple de 5, vous pouvez commencer à l'étage suivant. Donc si vous avez enregistré votre progression au 5ème étage, vous pouvez commencer par le 6ème étage. Si votre progression est enregistrée jusqu'au 40ème étage, vous pouvez commencer au 41ème.
- Le nombre de tokens requis pour commencer à un étage précis augmente plus l'étage est élevé.
- Le coût en Token augmente de 50 tous les 5 étages du 6ème au 46 ème étage. Le sixième étage coûte 500 tokens, le onzième 550, et ainsi de suite.
- Le coût en Token augmente de 100 tous les 5 étages à partir du 51ème. L'étage 51 coûte 1000, et le 56 coûte 1100, et ainsi de suite.
- Au début de chaque nouvel étage se trouve une Rune of Transfer. La Rune of Transfer a les propriétés suivantes :
- Cliquer sur la Rune of Transfer avant que l'objectif ne soit complété affichera l'objectif à remplir.
- Cliquer sur la Rune of Transfer après avoir complété l'objectif vous donnera le choix de quitter l'assaut ou de passer à l'étage suivant. Si vous choisissez de quitter l'assaut, il sera jugé réussi, et vous serez récompensé par un certain nombre de Tokens dépendant du nombre d'étages que vous aurez complété.
- Le joueur avec le brassard (armband) reçoit 10% de Tokens en bonus.
- Le joueur qui a sélectionné l'étage de départ verra sa progression enregistrée par le jeu, mais pas les autres membres.
- Vous devez enregistrer aux étages multiples de 5 (ex.5, 10, 15 etc) - la sauvegarde ne se fera pas automatiquement sur votre Runic Disc simplement en passant à l'étage suivant (6, 11, 16 etc). Vous devez soit sauvegarder à l'étage multiple de 5 ou quitter l'assaut (la sauvegarde se fera automatiquement).
- Si vous choisissez de passer à l'étage suivant, vous devez completer son nouvel objectif avant d'avoir une autre opportunité de quitter l'assaut. Si le temps vous manque, vous ne devriez pas choisir cette option car si vous ne parvenez pas à remplir l'objectif donné dans le temps restant, vous perdrez l'assaut et vous ne gagnerez aucun token.
- Il peut arriver au début d'un étage que les joueurs se voient attribué un effet positif ou négatif. Dans les deux cas, l'effet est très puissant. Ces Pathos semblent être aléatoires et peuvent avoir soit un énorme impact (ex impossible d'utiliser de ninjutsu) soit un impact moindre (ex baisse de CHR). Quel que soit l'effet, il durera seulement un étage et semble être relativement peu fréquent.
- A la fin d'un étage, vous sera parfois donné le choix d'aller à gauche ou à droite. Nous ne savons pas pour l'instant quel effet cela a sur le prochain étage.
- Since June patch, if you win the mission on Floor 100, the Runic Disc user's data is erased.
- Since June patch, Inside the first room (before entering any floor) there is a chest where players can spend tokens to get temporary items to be used inside Nyzul Isle.
- 100 Tokens: Barbarian's Drink, Fighter's Drink, Oracle's Drink, Assassin's Drink, Spy's Drink, Gnostic's Drink, Shepherd's Drink, Dusty Scroll of Reraise, Strange Milk, Strange Juice, Vicar's Drink, Sprinter's Drink
- 200 Tokens: Braver's Drink, Soldier's Drink, Champion's Drink, Monarch's Drink, Dusty Potion, Dusty Ether, Fanatic's Drink, Fool's Drink, Dusty Wing, Body Boost, Mana Boost
- 300 Tokens: Dusty Elixir
Ennemis Possible[]
Just as Nyzul Isle has randomly generated maps, the enemies encountered are chosen out of 17 possible "enemy layouts". These enemies are spawned from the archaic rampart found on each floor with enemies on them.![]() Each layout contains 12 enemies, except for the dahak layout.
Each layout contains 12 enemies, except for the dahak layout.![]()
- Possible enemies:
- Layout 1 (Aquans): Greatclaw x6, Stygian Pugil x4, Kulshedra x2
- Layout 2 (Amorphs): Bouncing Ball x3, Thousand Eyes x3, Mousse x4, Black Pudding x2
- Layout 3 (Arcana): Killing Weapon x2, Ominous Weapon x2, Magic Flagon x2, Friar's Lantern x2 (Previously Cannonball x2), Sweeping Cluster x2, Friar's Lantern x2 (Previously Bifrons x2)
- Layout 4 (Undead): Garm x3, Tainted Flesh x3, Draugar x4 (Black Mage x2 / Thief x2
 ), Bhoot x2
 - Layout 5 (Vermin): Carmine Eruca x3, Spinner x3, Wamouracampa x4, Wamoura x2
- Layout 6 (Demons): Imp x10, Psycheflayer x2
- Layout 7 (Dragons): Puk x10, Wyvern x2
- Layout 8 (Birds): Marsh Murre x3, Lesser Colibri x3, Ziz x4, Peryton x2
- Layout 9 (Beasts): Wild Karakul x3, Wajaom Tiger x3, Manticore x4, Marid x2
- Layout 10 (Plantoids): Death Cap x3, Puktrap x3, Leshy x4, Ameretat x2
- Layout 11 (Lizards): Sand Lizard x3, Deinonychus x3, Bull Bugard x4, Wivre x2
- Layout 12 (Amorphs #2): Bouncing Ball x5, Thousand Eyes x5, Mousse x2
- Layout 13 (Other): Peryton x10, Mousse x2
- Layout 14 (Other #2): Draugar x10 (Black Mage x5 / Thief x5
 ), Mousse x2
 - Layout 15 (Amorphs #3): Mousse x6, Black Pudding x6
- Layout 16 (Arcana #2): Killing Weapon x3, Ominous Weapon x3, Magic Flagon x6
- Layout 17 (Dahak): Dahak x1

- Possible enemies:
Monstres Célèbres[]
There are also various non-beastman Notorious Monsters (NMs) found throughout Vana'diel that are summoned by the archaic ramparts of Nyzul Isle. Every 20 floors, there are 18 different NMs that may spawn. They are as follows:
Floor 1-Floor 20: Bat Eye, Shadow Eye, Bomb King, Juggler Hecatomb, Smothered Schmidt, Hellion, Leaping Lizzy, Tom Tit Tat, Jaggedy-Eared Jack, Cactuar Cantautor, Gargantua, Gyre-Carlin, Asphyxiated Amsel, Frostmane, Peallaidh, Carnero, Falcatus Aranei, Emergent Elm
Floor 21-Floor 40: Old Two-Wings, Aiatar, Intulo, Orctrap, Valkurm Emperor, Crushed Krause, Stinging Sophie, Serpopard Ishtar, Western Shadow, Bloodtear Baldurf, Zizzy Zillah, Ellyllon, Mischievous Micholas, Leech King, Eastern Shadow, Nunyenunc, Helldiver, Taisaijin
Floor 41-Floor 60: Fungus Beetle![]() , Friar Rush, Pulverized Pfeffer, Argus, Bloodpool Vorax
, Friar Rush, Pulverized Pfeffer, Argus, Bloodpool Vorax![]() , Nightmare Vase, Daggerclaw Dracos, Northern Shadow
, Nightmare Vase, Daggerclaw Dracos, Northern Shadow![]() , Fraelissa
, Fraelissa![]() , Roc
, Roc![]() , Sabotender Bailarin, Aquarius, Energetic Eruca, Spiny Spipi, Trickster Kinetix
, Sabotender Bailarin, Aquarius, Energetic Eruca, Spiny Spipi, Trickster Kinetix![]() , Drooling Daisy, Bonnacon
, Drooling Daisy, Bonnacon![]() , Taisaijin
, Taisaijin
Floor 61-Floor 80: Golden Bat, Steelfleece Baldarich, Sabotender Mariachi![]() , Ungur, Swamfisk
, Ungur, Swamfisk![]() ,
Buburimboo, Keeper of Halidom, Serket, Dune Widow, Odqan, Burned Bergmann, Tom Tit Tat
,
Buburimboo, Keeper of Halidom, Serket, Dune Widow, Odqan, Burned Bergmann, Tom Tit Tat![]() , Tyrannic Tunnok
, Tyrannic Tunnok![]() , Bloodsucker, Tottering Toby, Southern Shadow, Sharp-Eared Ropipi, Taisaijin
, Bloodsucker, Tottering Toby, Southern Shadow, Sharp-Eared Ropipi, Taisaijin![]()
Floor 81-Floor 100: Panzer Percival, Vouivre, Jolly Green, Tumbling Truffle![]() , Capricious Cassie
, Capricious Cassie![]() , Amikiri, Stray Mary, Sewer Syrup
, Amikiri, Stray Mary, Sewer Syrup![]() , Unut
, Unut![]() , Simurgh, Pelican
, Simurgh, Pelican![]() , Cargo Crab Colin
, Cargo Crab Colin![]() , Wounded Wurfel
, Wounded Wurfel![]() , Peg Powler, Tom Tit Tat
, Peg Powler, Tom Tit Tat![]() , Jaded Jody, Maighdean Uaine
, Jaded Jody, Maighdean Uaine![]() , Taisaijin
, Taisaijin![]()
Objectifs[]
Eliminate enemy leader.
- There is exactly one enemy on the floor that will unlock the Rune of Transfer.
- The leader always checks Impossible to Gauge, and is usually "out of place" with respect to the other monsters in the room.
- Possible leaders
- Mokke, Mokka, Mokku (Imps)
- Vile Wahdaha, Vile Ineef, Vile Yabeewa (Soulflayers)
- Uriri Samariri, Eriri Samariri, Oriri Samariri (Poroggos)
- Ginger Custard, Anise Custard, Cumin Custard, Nutmeg Custard, Mint Custard, Cinnamon Custard, Caraway Custard, Vanilla Custard (Flan)
- Gem Heister Roorooroon (THF), Stealth Bomber Gagaroon (THF), Quick Draw Sasaroon (RNG) (Qiqirn)
- Shielded Chariot, Battledressed Chariot, Long-Gunned Chariot, Long-Horned Chariot, Long-Armed Chariot (Chariots)
- The leader will never be a Notorious Monster that appears in other parts of Vana'diel. Instead, the leader will always be an imp, soulflayer, Poroggo, flan, Qiqirn, or chariot NM without their respective family's usual design. However, every twenty floors, you will encounter a HNM that appears in other parts of Vana'diel that can drop pieces of the Goliard/Denali/Askar sets, with the pieces varying for each floor. Whichever HNM is present, it can drop a piece from any of the sets. The enemies, which floors they appear on, and which armor pieces they drop are as follows:
- Floor 20
- Slot: Feet (Askar Gambieras / Goliard Clogs / Denali Gamashes)
- Possible enemy leaders: Adamantoise, Behemoth, Fafnir
- Floor 40
- Slot: Legs (Askar Dirs / Goliard Trews / Denali Kecks)
- Possible enemy leaders: Adamantoise, Behemoth, Fafnir
- Floor 60
- Slot: Hands (Askar Manopolas / Goliard Cuffs / Denali Wristbands)
- Possible enemy leaders: Khimaira, Hydra, Cerberus
- Floor 80
- Slot: Body (Askar Korazin / Goliard Saio / Denali Jacket)
- Possible enemy leaders: Khimaira, Hydra, Cerberus
- Floor 100
- Slot: Head (Askar Zucchetto / Goliard Chapeau / Denali Bonnet)
- Possible enemy leaders: Khimaira, Hydra, Cerberus
- These versions of the HNMs have some substantially lower stats than their standard Vana'diel counterparts (HP, defense), whereas others (attack, magic resist) may be similar. Additionally, some special abilities used by the normal versions might not be used here.
- The floor 100 bosses can use their previously restricted TP moves.
- Floor 20
- The leader will never be a Notorious Monster that appears in other parts of Vana'diel. Instead, the leader will always be an imp, soulflayer, Poroggo, flan, Qiqirn, or chariot NM without their respective family's usual design. However, every twenty floors, you will encounter a HNM that appears in other parts of Vana'diel that can drop pieces of the Goliard/Denali/Askar sets, with the pieces varying for each floor. Whichever HNM is present, it can drop a piece from any of the sets. The enemies, which floors they appear on, and which armor pieces they drop are as follows:
Eliminate all enemies.
- You must defeat every enemy on the floor to unlock the Rune of Transfer.
- If you receive a secondary objective "Avoid discovery by archaic gears!" or "Do not destroy archaic gears!", the gears do not need to be defeated.
Eliminate specified enemy.
- There is exactly one enemy on the floor that will unlock the Rune of Transfer.
- The correct enemy to end the floor will not have the name of a notorious monster. It will be a regular enemy that checks as Impossible to Gauge.
- The correct enemy will not always be the only one of its family on the entire floor. If multiple members of a specific family are present, the correct enemy will be the only member of it's family that checks as "Impossible to Gauge".
Eliminate specified enemies.
- There is a particular family of enemies, all of which must be defeated to unlock the Rune of Transfer.
- These enemies will always be imps, soulflayers, Poroggos, flan, Qiqirn, or chariots.
- There will either be 2 (Qiqirn THF x1? + Qiqirn RNG x1?), 3 (Qiqirn THF x1? + Qiqirn RNG x2?), 4 (Qiqirn THF x2? + Qiqirn RNG x2?), 5 (Qiqirn THF x2? + Qiqirn RNG x3?), or 6 (Qiqirn THF x3? + Qiqirn RNG x3?) enemies of the same family that need to be eliminated, with the amount varying on the map generated.

- These enemies will all check Impossible to Gauge. This is one way to determine "rampart-spawned" flan, soulflayers, and imps apart from those involved in this objective. Rampart flan/imps these flan/imps, however, also have different names.
- Enemies that are not of the same family of the specified enemies do not need to be eliminated, and, in the case of flan and soulflayers, not all enemies of that family need to be eliminated. (See above.)
- Possible enemy families
- Imps (Heraldic Imps)
- Soulflayers (Psycheflayers)
- Poroggos (Poroggo Gents)
- Flan (Ebony Puddings)
- Qiqirn (Qiqirn Treasure Hunters & Qiqirn Archaeologists)
- Chariots (Racing Chariots)
Activate all lamps.
- This can mean one of three things:
- There is one lamp, everyone needs to activate it.
- When you use the lamp, it says "The certification code for all party members is required to activate this lamp."
- There are multiple (3-5) lamps which must be activated at the same time.
- When you use the lamp, it says "This lamp cannot be activated unless all other lamps are activated at the same time." and gives you the option to activate it. Do not activate it yet; wait until there is someone at all lamps, then everyone select "Yes" at the same time.
- If you activate your lamp but the others aren't all activated at the same time it says "All lamps on this floor are activated, but some other action appears to be necessary in order to activate the rune of transfer." This means you need to wait for them all to turn off (after ~30 sec), then try again. Despite the wording of this message, it will also be displayed if several lamps are lit at the same time, but 1 or more remain unlit.
- After a lamp turns off there is a cool down period of ~30 seconds before you can activate it again; it says "It appears you cannot activate this lamp for some time..."
- There are multiple (3-5) lamps which must be activated in an unknown order.
- Activating a lamp doesn't turn it on. Activate all of them, and remember the order you used.
- When all lamps have been activated, they all turn on. Lamps which were at the right place in the order remain on, while those at the wrong place in the order turn off again.
- Adjust the order of the lamps that turned off and try again until all the lamps stay on and the level is complete.
- There is one lamp, everyone needs to activate it.
- This can mean one of three things:
Avoid discovery by archaic gears!
- This is a secondary objective, given along with one of the first five objectives.
- You must accomplish the primary objective without aggroing a single Archaic Gear/Archaic Gears.
- If you do aggro an Archaic Gear, you can still win by clearing the rest of the enemies on the floor, however you will experience either a token reward penalty, a time limit penalty (-1 minute), or a random Pathos inflicted upon you (such as a Ninjutsu Restriction).
- Pulling an Archaic Gear/Archaic Gears with Ranged Attack/Foe Lullaby does not count as "discovery", and avoids the penalty.
- When this secondary objective is given on an "Elminate all enemies" floor, the gears do not need to be defeated to complete the primary objective.
- The number of possible single gears is 4, 8, 12, 16, and 20, and the number of possible triple gears is 2, 4, 6, 8, and 10, with the amount depending on the map generated.

Do not destroy archaic gears!
- This is a secondary objective, given along with one of the first five objectives.
- You must accomplish the primary objective without killing a single Archaic Gear/Archaic Gears.
- When this secondary objective is given on an "Elminate all enemies" floor, the gears do not need to be defeated to complete the primary objective.
- If you do kill an Archaic Gear/Archaic Gears, you can still win by clearing the rest of the enemies on the floor, however your token reward or time limit (-1 minute) will be reduced, and you will also have a random Pathos inflicted upon you.
- The number of possible single gears is 4, 8, 12, 16, and 20, and the number of possible triple gears is 2, 4, 6, 8, and 10, with the amount depending on the map generated.

Free Floor!
- No objective, move to the next floor. There are also random Armoury crates on these floors you can open for some interesting items.
Récompenses[]
The rewards seen so far from this Assault mission are similar to that of the other 5 areas, but with a different twist. Throughout the mission, you (most likely) will encounter a few familiar Notorious Monsters while completing your objectives. Upon defeating them, an "Armoury Crate" will drop, and whoever opens it will receive an ??? Item. (For example, the Cactuar Cantautor, which usually drops Kung Fu Shoes, drops ??? Footwear from its Armoury crate.) Be warned that these NMs are not as weak as they are outside of the Assault mission and should be treated with caution.
All ??? Items must be appraised like normal in order to obtain the true (or different) reward. (Based on current speculation, higher floors could mean better chances at items and/or better item holding NM's appearing.)![]()
In addition to these potential rewards, every 20 floors there will be a HNM boss that has a chance to drop a new piece of armor from one of these sets:
Askar Korazin Set - Goliard Saio Set - Denali Jacket Set
The footwear are dropped on Floor 20, leg pieces on 40, handgears on 60, body piece on 80, and headgears on 100. The bosses follow a similar pattern, with Fafnir, Behemoth or Adamantoise on Floors 20 & 40, and Cerberus, Hydra, or Khimaira on Floors 60, 80 & 100.
Completing 1 or more levels of Nyzul Isle Investigation for the first time, as long as you exit via the rune of transfer will reward you with 5 points toward your Mercenary Rank promotion. Subsequent completions, as long as you exit via the rune of transfer, will reward you with 1 point.
Also, the HNM fought on Floor 100 of Nyzul Isle has a chance of dropping 1 of 18 level 75 weapons (1 for each job) that are currently being called "Nyzul weapons." Most of them have names taken from (usually significant) weapons from old Final Fantasy games. Many theories surround what their true purpose is, although the most common ones state that they either will have a relic weapon-esque purpose later on or that they have some sort of hidden effect (some think the hidden effect is activated via weapon skill points, much like trial weapons). Currently confirmed to drop are Burning Fists (MNK), Double Axe (BST), Werebuster (WHM) , Killer Bow (RNG), and Vorpal Sword (RDM) which have dropped from Floor 100 Khimaira. Wightslayer (BLU) dropped from Floor 100 Cerberus. Mage's Staff BLM dropped from Floor 100 Hydra.
A "Runic Key" key item is also rewarded to the player with the recorded data upon completing Floor 100. As of the June update, more light has been shed on the purpose of the item: "The reward for re-completing the 100th floor (by returning to the 100th floor via the key item received upon the first completion) has been adjusted." Completing floor 100 a second time results in an additional reward. The reward itself is not yet confirmed.
Description du jeu[]
- Mission Orders
- You are to scout out the remnants before the A.A.R.I. sends an official research team. No rewards are offered for these unofficial missions.
Carte[]
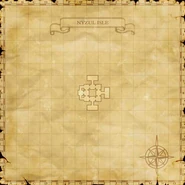
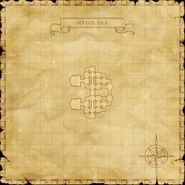
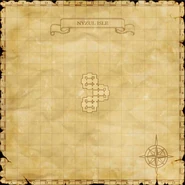
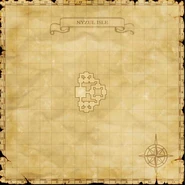
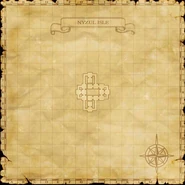
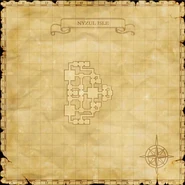
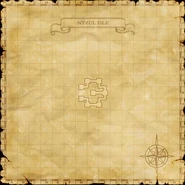
The in-game map function cannot be used within Nyzul Isle. However, the level layouts may be based on these maps:
| Assaut | |
|---|---|
| Missions de Leujaoam: SDC | SPC | SSup. | SC | C | S | SCh. | SMaj. | SL | L Missions de mamool ja: SDC | SPC | SSup. | SC | C | S | SCh. | SMaj. | SL | L Missions de Lebros: SDC | SPC | SSup. | SC | C | S | SCh. | SMaj. | SL | L |
Missions de Periqia: SDC | SPC | SSup. | SC | C | S | SCh. | SMaj. | SL | L Missions d'Ilrusi: SDC | SPC | SSup. | SC | C | S | SCh. | SMaj. | SL | L Missions de l'Ile de Nyzul: Exploration de Nyzul |
|
Récompenses des points d'Assaut: Armure émir | Armure pahluwan | Armure yigit | Autre | |
